


Here’s a video tutorial for the French Knot. This knot is used often in hand-embroidery, but a lot of people avoid it, because it intimidates them. Once you work one correctly, you’ll find that it’s really easy!!!
There are different methods to making French knots. Some people wrap their thread around the needle three times, some only two. I generally use two wraps, but if I want a larger knot, I’ll go with three, depending on the thread I’m using. Going with more than three wraps around the needle doesn’t always work, though – the wraps can become unruly!
You can also achieve larger knots by changing the weight of the thread you are using. Instead of, say, two strands of DMC, you can use three or four.
Here are a couple useful tricks to working good French knots easily:
1. Use a milliner (aka straw) needle. The shaft of this needle is the same circumference as the eye, so it passes very easily through the knot. However, if you don’t have a milliner needle, regular embroidery needles do work. They just might be a bit cantankerous at times. Don’t tension up your thread so tightly that the eye doesn’t fit through the knot!
2. Keep tension on your working thread while you’re pulling your needle through so that your coils stay in their proper place on your needle.
In the video, I’m using a #3 milliner needle and #5 pearl cotton. The pearl cotton is a heavier thread that is easier to see in the video production.
I’m also wrapping the thread forward and around the needle (with the needle placed in front of the working thread at the beginning of the stitch). If you watch the video, you’ll see what I mean. This is not the only way to do the French knot. You can bring the needle up behind the working thread, and wrap the thread around the needle in the other direction (away from you). I’ve seen it done and diagrammed both ways. Erica Wilson’s book, for example, illustrates it the way I’ve done it in the video, except with only one wrap (well, it works out to one and a half wraps, the way she illustrates it). So either way is fine. The direction of the wrap actually does make a difference, if you’re working a stitch with lots of wraps on it, like the bullion knot, but the French knot is so small, that the difference in the direction of the wrap when taking into consideration the twist of the thread is not really noticeable.
Here’s the video:
If you’d like to see how French knots can be used for lettering, feel free to check out this tutorial on embroidered lettering, where I used French knots for one of the letters.
For more video tutorials, please visit the my list of How-To Videos here on Needle ‘n Thread.
Enjoy!
Looking for inspiration & information on hand embroidery?
There are all kinds of reasons to sign up for the Needle ‘n Thread daily newsletter! Check them out and sign up today!
If you like what you see on Needle ’n Thread, if you want to be a part of keeping the website thriving (and free of annoying network advertising), why not become a patron on Patreon? Check out my Patreon page here, where I’ll occasionally add special needlework bonuses for patrons.
If you shop on Amazon, you can support Needle ’n Thread without any extra expense to you by visiting my Amazon Recommendations page here, where you’ll find books and sundries for the needleworker available on Amazon.
Oh my goodness thank you!! I am not a proud and accomplished french knotter!! I’ve tried to follow about 6 other tutorials with no luck. But now I am a pro.
Thank you!
Glenn
I’m glad to hear it, Glenn! Keep stitching!
Thank you so much. I just needed a little reminder (it’s about 35 years since I embroidered a French Knot) to finsih making a Christmas stocking! Your site was a quick easy life saver.
This is ditto for me. Many thanks.
really nice to watch and a nice easily understanderbel voice
Catrin in denmark
E X C E L L E N T E !!!
E X C E L L E N T E !!!
Hey im only 13 and im gettin pretty interested in embroidery i was searching on da web and then found ur syte fank you soooo much i just recieved an A* on my textile exam ur my embroidery role model
Hi,I am very much glad on seeing your video on Embroidery.It is so well explained.I hope you’ll also teach us the Bullion Knots.Thanks
Amudha
Wow!!! Can’t belive it! I could finally manage to do a french knot! (been trying to ever since I started cross stitching) Thanks! It’s a very easy to follow tutorial, and it works!!!
Hi Glenn I have asked for Bullion Knots and you have done for me.I am so happy to see that.Many many thanks.I tried it atonce it came so well.
Amudha
amukish2002@yahoo.com
THANK YOU!
I have been searching everywhere for someone to Show me how to do these stitches!!!
I own many books but I learn very little that way I need to SEE someone doing the stiches. I have been crazy quilting for 4 years and now I can make them much more then plain patches.
Vanessa
Thank you , thank you, thank you! I could do these when I was a little girl (my mother showed me), but just couldn’t seem to make it work as an adult trying to follow written instructions. Excellent tutorial.
thank you so much for this fantastic tutorial! so much easier to follow than paper instructions. i can now finally finish my embroidery.
reta site-what a wonderful resource!
Thank you so much for your instructional videos. My 87 year old mother has a pattern she is doing which needs the pistol stitch. I think it looks something like the french knot but long. Is that right?
Hi, Hazel – that’s right. For pistol stitch, instead of going down into the fabric right next to where you came up and placing the knot right there, you take your needle a distance away from where you came up, to make the line of the pistol stitch. The rest of the stitch is the same – wrap your needle, hold the working thread to keep tension while you pull through, and there’s your pistol stitch.
Hope that’s helpful!
Hi
I just got my computer and came to your site and now I cannot see any of your videos. There is just a blank spot where they used to be. Can you or any of your readers help me access the videos.
Nora
Hi, Nora!
You may need to install Flash on your new computer. If you visit the Google video help page, you should be able to find information to help you as well.
Here’s a link:
Google Video Help
Thank you — I was trying to do a French knot based on what I read in a book. Your video was indispensible. Thank you so much!
-Sarah
Thanks so much! I tried to make french knots from written insructions but they always turned out flat because I wasn’t holding the thread with my left hand correctly. Now they are perfect!
Karen Oregon
Thanks for posting this. In a panic last night I forgot how to make french knots since it’s been years since I’ve picked up an embroidery needle.
This was so easy to understand!
WOW! This helped me get rid of those annoying loops on my knots! Thank you so much!
consider this comment posted on all of your tutorials. thank you so much for posting these. i had difficulty with several stitches and your tutorials straightened me out. bravo to your high quality vids and fantastic instruction!
Thank you!
Being a visual learner, this helped the written instructions I keep reading through “click.”
Thank you, such an easy explination on these stiches! This is such a wonderful link for those of us who have only just begun!
thanks heaps for your site. your visual/vocal instructions are excellent. i have saved this site in my favourites so i can refer back to this site for another lesson . you are a very thoughtfull person to add this free editorial. thanks for you patience , time and knowledge.regards cheryl
YAY!! I LOVE your wonderful videos :o) I am a quilter and have getting hooked on using hand embroidery on by blocks to add extra charm. Thankyou so much for investing your time to make these for us. I’ve bookmarked it. Amie-Tennessee :oD
Thank You’
Such an easy explination on
these stiches! thankyou so much for investing your time to make these for us.
I like wonderful videos.
Thank you so much! I was taking a sewing class and did not know how to make a french knot and this really helped! This is a great resource for sewing!!
Thanks a million! We couldn’t quite understand the written directions in our embroidery kit, but now my daughter and I can both do the french knot with ease! 🙂
Your videos are fantastic. Not only are the instructions clear and really easy to follow, your voice is calm and soothing. Great to calm down the frustrated stitcher!! Eternal gratitude. Sandy
Thank you SO much for this excellent tutorial — I’ve been trying to figure these out forever and you made it so easy!
Thank you, thank you, thank you! I struggled for for two days trying to make french knots. I couldn’t figure out what I was doing wrong. After viewing your tutorial twice, I made one on the first try! I’m now on my fifth consecutive knot. Stichin’ days are here again!
Thank you so much for the easy to follow tutorial on french knots.
brilliant 🙂
Absolutely fabulous! You make it look so easy… and it IS once it is being done correctly. Thank you very much for showing me how 🙂
Thankyou! I’ve been struggling so muhc with frnch knots and this has helped immensly
SOOO Helpful!! Explained and shown exactly how to do it, better than any books. Thank you so much!!
Thank you soooo much!!! I haven’t made a french knot since I was a girlscout and you brought it right back. I thought it would be like riding a bike and it wasn’t and I was lucky to find your site!
You are so wonderful!!! Since I’ve never embroidered/stitched in my life, I wondered whether I would be able to carry it through. I just recently got the ‘bug’ to create something for my son, who’s only one years old. After browsing the web and buying books/magazines on sewing/embroidery, I got overwhelmed with the information. Once I read some of your posts and watched the videos, I realized that I could actually do these stitches. Thank you so very much for having the videos and the illustrated tutorials; they’re a life saver and I cannot wait to try the basics and make something for my son. Please don’t ever stop what you’re doing and don’t ever think that you’re doing too much. I’m just so inspired right now, I’m elated!
xxx
Annie
Thank you so much! I can now do french knots like a pro. This tutorial is amazing!
Emma
Thank you so much for such a great video. I now can finish the project I have been working on. This is a real help. I will be checking out more videos in the future.
WoW!— thank you very much.
I’m doing the french knot on a baby blanket I just finished.
I’m amazed it’s so easy.
Great tutorial
Wow, I’m glad that everyone had good luck. My biggest problem is that I’m left-handed and I have to do it backwards…still can’t get it. Very sad. Great video, though.
Hey I am from India,
Its an excelllent site,we can easily learn embroidery through this demonstration.
I have personally paid fees to learn hand embroidery, but by the time i come home i tend to forget the method.
I am very thank full for creating such informative sites
I had no idea how to do this, and I found your video! I’m so thankful. After watching you make the very first knot I was able to make a french knot. You’re a life saver!
Thanks!
-Scarlett
Denton, TX
Thank you so much for this easy video! Up until this point I had yet to figure it out and was freaking since I am doing a Thomas Kinkade kit that is practically ONLY french knots!
Thank you. Great video!!
Bless you. I’ve done French knots before, but not for awhile and I could not remember. Written instructions went way over my head, but this was perfect.
i am a pro in french knots now!
you’ve helped alot, thank you!!
hey mary…
i was looking at the french knots video…. and i noticed ur floss was not doubled… is it like that for all stitch technique or was that just for the french knot???
Hi, Jules –
I’m using perle cotton in the video, so no, it wouldn’t be doubled. Even with stranded cotton, you don’t have to double your floss. If you want teeny tiny French knots, you can just use one strand of cotton. If you want bigger knots, add the number of strands you need to get the size you want.
With perle cotton, you don’t usually double it, as it’s already pretty darned thick! 🙂
Hope that helps!
MC
Thanks for posting this video. I’m curious about about how you anchor the beginning and end of a single french knot.
When you first place your needle through the fabric, do you first knot the thread to anchor it on the reverse side? I’m assuming this is so, because you need to have tension on the thread.
Then to end the stitch, do you stitch through the anchoring knot on the reverse?
Thanks for your wonderful site. I visit at least once a week. I’ve learn a LOT! 🙂
Susan
Hi, Susan –
That’s a good question! I’ll address that if I ever re-make this video!
But, in the meantime, if you look under “tips and tricks for hand embroidery” in the top right column on the website, you’ll find there a list of articles that are instructive, and under there, and index on different ways to start and end threads. These aren’t the only ways, but the only ones I’ve written whole posts about!
Anyway, normally for French knots, if I’m using a fine thread, it’s easy enough to work a couple tiny anchor stitches over one thread, and then to work the French knots on top of that. Otherwise, if there are other embroidered areas right close by, I’ll work anchoring stitches in the areas close by that will be embroidered, then carry the thread over. Even with heavy thread, you can usually manage anchor stitches and stitch into them or over them somehow. It’s better than a knot, anyway, I think…
Hope that helps!
MC
I am working on my first ever cross stitch, (of a Geisha) that uses several French Knots and I must admit, I have been alittle intimidated by this step. But watching your video and doing it at the same time, was an incredible help!
Thank you so much. So much easier to see how it’s done than to read how it’s done!
Thankyou so much for your explanation on sewing the french knot I have try,ed all way,s but i could not do it. Thank you for your video it was a great help
thank you SO MUCH I cross stitch occasionally but I have never (and I can’t figure out how because its such a common stitch) come across a french knot and the instructions in the kid make absolutely no sense unless you can actually see it…..its got all this point A point B stuff…..again thanks BUNCHES!!!!! 😀
~Pandahh
Great video, thank you!
This is a very good video! I’m almost finished with a cross-stitch project and saved the french-knots for last. I got it now!
Thanks for the video!!
Thanks! My Grandma taught my embroidery and I wanted to do this stitch but couldn't remember! Thanks for all the help!
Thanks! My grandma taught my embroidery 3 summers ago and I took it up quickly. I recently had some projects to embroider and had forgotten how to do this stitch! Thanks for the reminder! 😀
Thank you so much! This is the clearest video I have found anywhere! I was getting very frustrated that after spending I don't even want to think how long on this huge dolphin picture, I couldn't do the detailing on the bubbles. Thanks again 🙂
FINALLY!!!! I finally made a French knot thanks to this video. Thank you!!
Wonderful. After starting out in the dark, I only watched the first french knot that you do and I was able to finish my work..! Many thanks.
Thanks sooo much for a clear explanation-now i can finish a project long neglected…
Thank you so much, havent done French knots for years, and am doing a quilt for my great grandchild of 3 months…this tutorial has been absolutely great.
Phyllis (78)
awesome
Thank you for your help. I now can make a french knot
very helpful!!
the best how to on the french knot.
it was helpful including the minor mistake on the sixth knot — since it showed me how to make the knot step by step at a Slower pace!
great site 🙂
thank you
very helpful!!
the best how to on the french knot.
it was helpful including the minor mistake on the sixth knot — since it showed me how to make the knot step by step at a Slower pace!
great site 🙂
thank you
Thank you for your site. I am looking for an example of how to do an elongated french knot. I saw it in a book around the edge of a felt seahorse. Perhaps it has a different name? Thank you.
Hi, Camille –
Well, you're right – it is called something else: pistol stitch. It's exactly what you said, though – an elongated French knot. So, instead of putting your needle back into the fabric right next to where you came up, you take it down as far away as the length of the stitch, so that you end up with a long straight stitch with the knot ending up on the very tip of the long stitch.
Hope that helps!
MC
Great site, I am going back to my embroidery days and one thing I never learnt was the french knot, well I don't really know many stiches. Anyway, I found your site really really helpful.
K
Bardzo dobrze i przystępnie pokazane. 🙂
This is a wonderful site!! Thanks a lot for the same.
I'm interested in a particulay embroidery pattern from India, known as 'Shisha' stitch ('Mirror' stitch). I could find few websites explaining it, but would be great to hear it from you, as your narrative style is simply awesome.
Hoping to hear from you on this one.
(Shisha stitch:- http://www.joyfulabode.com/2008/02/12/tutorial-indian-shisha-mirror-embroidery/)
I am so thrilled and excited to find this site. All I wanted to know was how to do a "French Knot" after searching the internet for hours! I found you and it's free!!! I just can not believe how lucky I am to find you. A million thank you's!!!!!!
Keep up the good work
This tutorial rocks!!!!! Have tried and failed to do these for ages but with this tutorial I can now do perfect french knots. Amazed hoe simple you have made it – Thank you very much! Happy Holidays.x
I just spent the better part of an hour trying to learn a French knot from a diagram and after watching this, I got it in one try! Thank you so much!
This is fantastic, I've been trying to learn this for so long, but your video did the trick!! I'm sewing on paper cards! http://www.tiffanysgarden.com
extremely helpful. thanks so much!
A.P. 🙂
Thanks! This is so helpful. I’ve wanted to learn some simple embroidery stitches for a long time, but just reading instructions was NOT working. This was so clear, easy to see, easy to understand. Wonderful.
Thank you, this was very helpful!
So delighted to find this wonderful explanation and see where I was going wrong-have never been able to master French Knots before, but now I can finish that picture! Great site-thank-you.
thank you so much you videos help me a lot in making my embroidery project i hope that your lectures can enrich the wisdom of others about stitching… god bless…
GREEAAAATT AWESOME IM 11 AND IVE BEEN TRYING THIS SO HARD AND I FINALLY GOT IT!!!!THANK YOU SOOOOOOOOOOOOOOOOOOOOOOOOOOOOOOOOOOOOOOOOOOOOOOO MUCH!!!
Thank you, this was very helpful!thank you veeeeeeeeeeeeeeeeeeeeeeeeeeeeeeeeryyyyyyyyyyyyyyyyyyyyyyy mucHHHHHHHHHHHHHHHHHHHHHHHHHHHHHHHHHHHHHHH!1!!!!
Thank you for doing this video and all the others. I was having problems with this one until I found your video…made it easy for me!
Merci Mary, ce sera mon travail d’aujourd’hui.
A très vite
Amicalement
Violette
Hi Mary,
I was just wondering what is the difference between a french knot and a colonial knot?
Hi, Mary Ann – it’s all in the way the thread is twisted. The French knot wraps in the same direction around the needle, and the colonial knot wraps in a figure 8 around the needle…. They look slightly different when finished, because of the twist, but if you were just glancing, it wouldn’t be so obvious that it was one and not the other, without looking closely at the knot. Hope that helps!
~MC
I look forward to watching your videos. I enjoy making French knots but your video was interesting to me. You wrap the needle the opposite direction that I do. You bring the thread over and towards you. I wrap over and away from me. I do wrap twice. I’ve seen some directions say to wrap once. I’ve never trusted that style, always worried it wouldn’t stay in a knot. Thank you for the video and I’ll have to try it your way.
Hi Mary,
all I can say is “excellent” once again a job well done.
Joan
Thanks for this video! I found it on the Craft Gossip website & has been a great help. I love the look of French knots & this video makes it much easier to do the stitch.
thank you from Italy!
your video tutorial is helpful!!!
ciao
Thank you so much for your wonderful video tutorial! Very easy to follow and my french knots were a success! Thank you!
Thank you so much for this video. I have looked through several written explanations as well as pictures that are supposed to explain the “knot”. None of them helped. But yours was fantastic. I am headed upstairs to grab my needle and thread right now. I really appreciate the time you took to teach us.
I have been doing these #@*&% french knots wrong for years! You have put me on the right path. I also watched your turkey work video. I have a kit that I have been putting off for the longest time because the turkey work looked so complicated. You really made it look less….theatening. Thank you SO much for your wonderful website!
Hi thanks for the tutorial u made it look really easy, the pattern I have uses one strand of thread and says to wrap round the needle 4 times, I’m assuming that’s because it’s thin cotton, will it be as easy to do it with 4? Thanks Georgina
hi, solid web log, just I don’t see how to add your site in my rss reader. Could are Assist me please?
Hi, Rosanne – It’s in the top right corner of the site, with the orange square that says “Subscribe to our web feed”. Hope that helps! ~MC
hi Mary i was having trouble doing the french knot for my homework and once i had watched your video i was able to do it! thanks alot!!
Mary, Thanks for the great video after watching you just once I was able to make a french knot in a wedding sampler for my daughter and son-in-laws upcoming wedding. I was getting so frustrated trying to figure it out and actually was thinking about paying someone to do it, but now am finishing it myself. Thanks so much again for you help.
Hi, Mary! I am so glad the video helped you out! I think it’s great that you’ll be able to finish the sampler yourself! ~MC
Thank you Mary for your help, My french knots were not coming out the right way, now they look great!
Super super helpful. Thanks!!
Hi Mary,
I love your website; it’s been so helpful! My 92 year old grandmother just taught me how to embroider during last winter break. I’m an English teacher too, and I for so long I thought sewing and embroidery were boring even though all the women in my family do one or the other.
I’m hooked now!
Hi, Michelle – Thanks for your note. It’s good to hear you’re hooked! I find needlework to be a most relaxing thing to do after a day in the classroom. It’s a great stress reliever (not that I’d ever admit that teaching can be stressful!). ~MC
Thanks you so much! I have never been able to get this stitch to work for me! I always end up with a huge mess either in front or back, but your video helped me to figure out what I’ve been doing wrong! Thanks so much!!!!
Hi Mary,
The french knots sound like so much fun! I was just wondering if you could use them for anything else- i.e. a sea urchin
Also- have you ever considered trying embriodery with beads? I’m not sure if you have already- but it turns out wonderful!
This was a great, simple video. I’ve been cross-stitching since I was eight, and I’ve found that so many of the online videos are overly complicated. This was so well-done. Now I can finish my thank-you gift for my Nonna!
Best video ever thank you so much!!!!
Thanks – love this!
Thank you so much, Mary! Your explanations are great.
I was wondering, is there an efficient way to start and finish the thread if I just need one knot and I don’t have other stitches to anchor to? Thank you for your wonderful site!
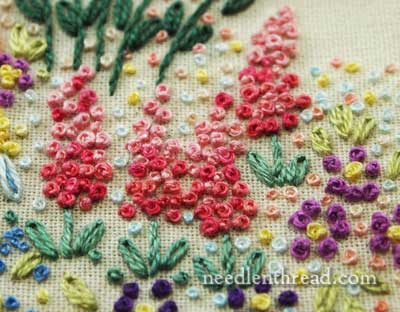
Thank you for great work. Picture with flowers is inspiration for my projects.
P.S. I hope you don’t mind that I add your tutorial to my blog.
Thank you! Thank you! Thank you! You succeeded in teaching me how to do a french knot where others have tried and failed. I was making a Christmas gift and really wanted to be able to say I had made it ALL myself. Thanks to you, I didn’t have to ask my Mom to put on the french knots.
Hi, Mary Corbet! I am so grateful for your lovely website especially the tutorials. I was wondering what method you recommend for starting and tying off French knots, particularly in a cluster removed from another area of work?
Hi, Mary – Here’s a link to a tutorial on doing single dot-like stitches. The same method would apply: https://needlenthread.wpengine.com/2009/10/hand-embroidery-lettering-and-text-3.html Hope that helps! ~MC
Dear Mary,while showing my friend some quilting squares I came across some candle wicking blocks I had done 33 years,,,she loved them and has inspired m to get back to wicking!!! I came across your site while trying to learn again,,,your videos are just the best!!!Thanks for being here I’m so xcited!! Kathy
Hi, Kathy! That’s great! I’m glad the videos come in handy, and I hope you have fun with your new adventures! ~MC
I noticed that you always put the needle back into the fabric to the right of the point it emerged. Is that important to the stitch or just habit? I once heard that a French Knot should only have one wrap and any more wraps were just a type of boullion know. Do you have an opinion on that?
LOVELY SITE.VERY INFORMATIVE.
Just wanted to say thank you!! I’ve been trying forever to do a french knot and for the life of me just couldn’t understand the instructions!! I am so excited that the animals on my daughters birth record will now have eyes!!! Thanks so much 🙂
I’ve just tried it and it worked perfectly! Thank you so much for this, it’s an awesome tutorial and the whole site is a fabulous place. Thank you again!
S x
Thank you for letting us learn your valuable knowledge.It is very kind of you! A Spanish fan.
Thank you for this tutorial video! I have tried following diagrams in books to learn this stitch, but have never quite figured it out. After watching and sewing along with your video, I got my knot on the first try.
Thank you for the french knot video. I needed a refresher and this video made it so easy.
Hi
I am a textiles student, I think your website is really good. I could never do a french knot until I looked at your websites.
Can I also use one of your video’s in my presention ?
Hi, Abigail – as long as you reference Needle ‘n Thread, you’re welcome to use it! Thanks! -MC
Hi, Mary! I thought I knew how to sew a French Knot, but all of mine seem to be able to pull right through when I sew them, in fact, they even come undone from the front if I’m ironing a piece I’d like to put on display! Is the secret just using two wraps?
Hi,
Thanks for posting this! It helped me a lot. Can you kindly also post the design/pattern for the beautiful picture you have posted? I would love to make it!
Thanks again,
N
This is a fantastic tutorial! I got the french knot on the first try after watching this; it’s very clear. This makes a confusing stitching technique simple and easy.
THANK YOU for the well done video demonstrating how to make the French knot. The lighting was great, the technique was clearly shown (you never once got your hand in the way of my seeing what you were doing), and you have a pleasant voice. This all makes for great video making.
It’s my first time on your site so I’m going to go now and look some more! And, perhaps, view more videos. I hope they all are as good as this one is!
BTW, I got to your site by doing a Bing search “how to make french knots”. If I recall, it was not the 1st one to pop up but I’m so glad to have found you.
Thank you so much! I had tried so hard to learn French knots and just could not do it. Your video helped me actually do it!
Thank you, thank you, thank you! Now I can make a French knot. I’m so proud!
Thank you… fantastic explanation for french knots and colonial knots. I am now able to proceed with my embroidery!Will be visiting this site again so glad I found you
Thanks so much!! Great tutorial – I’ll be putting french knots on everything. 🙂
just what i needed! thank you. very easy instructions!
Dear Miss Mary,
I love to sew and I watched your video and I love most of all NOW to french knot
Thanks Again!
Natalie M.
This is the first tutorial to successfully teach me to stitch a french knot. Thank you so much!
superb;always loving this website
Well, this was not really hard but I learn slowly so yeah. I love embroidering so that my push to learn this stitch. Once I got the hang of the stitch it was VERY easy.
This was perfect! Thank you so so much!
Thank you so much for this tutorial, you have made this technique so easy and understandable!
hi,
I love your website I am 10 years old and I am making a blanket with French knots all around the corners and it is quite big thank you for your tutorials and vids they are the best
OMG! Thx so much! I was like hopeless at French Knots, but now, I can do them with no help. I’m only 12 and I took an interest in sewing and embroidery seven months ago. Thanks so much anyway
GREAT tutorial and site — thank you for sharing! Could you tell us if the photo featured at the top of this article (pink foxgloves?) is from a specific pattern, or is it just a little embroidery “doodle”? It’s really pretty!
Hi, Laura – that was from a piece I worked years and years ago, and I’m not exactly sure who the design was by now. It has slipped my memory – but it was definitely a design by someone else. Sorry I can’t help further on that one! ~MC
Thank you! I can’t believe how many people post such helpful videos! The best!
GREAT tutorial! Well done :DD
:):):):):):):):):):)
I tried to learn French knots from someone & I couldn’t get it. Your tutorial worked! So glad I was referred to it! It’s very easy to understand. Thank you!
Pensei que sabia,,,mas aprendi perfeitamente agora,obrigada
THANK YOU SO VERY MUCH FOR ALL THIS VIDEOS, THEY ARE VERY USEFULL.
Hi can u plz let me know which thread & size to use for french knot? Is it pearl cotton?
Hi, You can use any thread for French knots. It depends on the size of knot you want. Anything from one strand of cotton floss (which will give you a tiny knot) to heavy perle cotton, to anything in between, will work!
Hi thanks 4 the help 🙂 I have a suggestion when u put ur new stitch, can u plz let the viewers know which thread u are using +the needle size, so it would be easy. Thanks for teaching us the new stitches every time and ther are very very helpful for all. :-).
Hi Mary,
I have to thank you so very much for your clear and concise videos. I feel so much less intimidated than I did with my how to book. You’re great!!
Thanks
So glad you like them, Stephanie!
I’m relatively new to hand embroidery & haveI watched numerous videos/tutorials on how to do these stitches. Your tutorialss are the best & easiest to understand & follow. I’ve bookmarked this site so I can readily find it. Thank you for making these available.
Thanks, Patricia! I’m so glad you find the tutorials here on Needle ‘n Thread helpful! I’m hoping to add quite a few more video tutorials to the site in 2015.
Success! I received a needle craft for Christmas. The diagrams in directions just didn’work for me. After viewing the video, I successfully made a perfect French knot. Thanks!
Glad it helped, Laurel!
Hi Mary!
I’m in Fresno California working on a crewel kit from the 70s. The french knot instructions did not get me the desired effect. Your youtube video was invaluable!
Thanks so much 🙂
Megan
So glad to hear that, Megan!
Thanks Mary, I’m new to french knots and I really want to try this technique for my next project. Thanks for sharing 😉
thank you for your videos. So clear, great close-ups, and detailed.
Hi, your french knot vídeo isn’t working. I have a proyect to finish and the only stitch left are french knots. I don’t stitch them very often I looked in the internet and I think your site is great and sólo be checking it often.
I hope you can fix the vídeo.
Retarda
Cornelia
Hi, Cornelia – thanks for your comment! The video is working on this end, so maybe if you give it another try….?
Hi Mary,
Thank you for this lovely tutorial! I couldn’t do it before I watched this but you explain and demonstrate it so clearly that after a few tries I can now do it easily! 🙂
Amy
Oh. My. Gosh.
I have never, not EVER, been able to do a French knot, and here you come along with your tutorial and now I can do it.
I mean, I’ve had god knows how many people show me how to do it and it’s never made sense. Now I’ve made like 30. Thank you.
Thank you so much for this much needed and very clear tutorial. I’m about to embroider a man with a beard and wanted to make his beard with French knots… now I can! 🙂
Sincerely,
TEMA
Its a beautiful video! Earlier, I was always afraid to do french knot….thank you very much!
Hi Mary, I’m so glad I stumbled across your blog! Thanks for the easy to follow instructions, I can now stitch a french knot without any problems. Just one question…how can I tie off after each knot? The back of my work is looking like a tangle of weeds…
Thank you,
Ursula
Hi, Ursula – You’ll find two articles here on Needle ‘n Thread that show you how to work isolated French knots, ending the thread after each knot:
https://needlenthread.wpengine.com/2012/06/isolated-french-knots-part-1.html
https://needlenthread.wpengine.com/2012/06/isolated-french-knots-part-2.html
If you’re working the knots close together, though, I probably wouldn’t end the thread. It’s good to keep the back of your embroidery as neat as possible, but some thread build up on the back is generally inevitable. It’s not something you should stress out about, as long as it’s not affecting the front of the embroidery.
Today an amazing thing happened – I finally, with your video help, can successfully make a French knot. Thank you so much!
What type of thread are you using? And how long should a piece be? Or do you use on thread continually for all knots? Sorry hopefully you understand what I’m asking 🙂
You can use any kind of embroidery thread for French knots. In the video I’m using a perle cotton because it’s heavy and easier to see for video purposes.
This is such a helpful tutorial! However, I’m wondering how one can end the stitch for a French knot without tying a knot at the back?
Thank you so much.
I’ve tried doing this stitch for ages. I’ve just completed it !
I’m doing redwork embroidery and want to change from stranded cotton to either Foche or Perle. Which is best ? Also could you let me know what number for both that is equal to two strands of stranded cotton
Many thanks
Hi, Doreen – it really depends on the look you’re after. They are completely different threads, with a different twist. Floche is very softly twisted, perle is tightly twisted. This will make a big difference in the outcome of your finished embroidery. Floche is equal in weight, when stitched, to about 1.5 strands of floss. Perle depends on the weight of perle you use.
THANK YOU SO MUCH.!!!!
Your explanations are crystal clear. I have been trying g to do the enlarged chai stitch for a long time. I was taught to start with a chain stitch but your idea of using the needle to stop the thread is just fantastic. The only difficulty might be to bring the needle down and up again when the fabric is really tight on the embroidery hoop. Any tip for that?
Hats off to you.
Sylvie from France
Stab the stitch instead of “sewing it” – that is, take the needle and thread all the way to the back of the fabric and then turn it around and bring it to the front, instead of “scooping” the fabric.
Hello Mary,
Thanks for all you do.
The video link for the French Knot tutorial appears (or rather it doesn’t!) to be missing. Perhaps I’m doing something wrong, but tried others and they were fine. Looks like an updated one is available but couldn’t get that one either.
Love your site and all you teach us.
Thanks! Susan
Hi, Susan – Thanks for letting me know! i’ve just fixed that. I’m not sure what changed, but… the YouTube gremlins are at it again!
Being retired, I can afford to take a day to learn French knits. I’m using embroidery on my knitted garments. Taking time out to get my allergy shots, go to Costco and cook a 15 minute dinner, I worked on those blasted knots until 7:30 PM. Then I found your website. Your explanation was clear, your video was A+++++, and I have some spectacular looking French knots! Thank you so much.
So glad to hear this, Verna! I’m glad your French knots are working out! 🙂
Thanks for the great video! I will have it handy when I practice my French knots. Can you please share the thread you are using in the video tutorial? It is so pretty!
Nanci
It’s just a perle cotton – probably #5 or #8. 🙂