


Somewhere in the not-so-distant past, at some point, I made some statement about a hand made Christmas, didn’t I? Embroidery projects for gifts? Something like that? Are you sure I actually said that? What I’m wondering is whether or not I actually meant it. Perhaps I was joking when I said it… or perhaps I was just a little naive. (Maybe just plain stupid?!) It sure seemed like a possibility at the time, but as the days tick onwards and I keep making cards and embroidering on that riffemrackemfrickemfrackem Christmas greenery towel, I must admit that I’m beginning to wonder….!
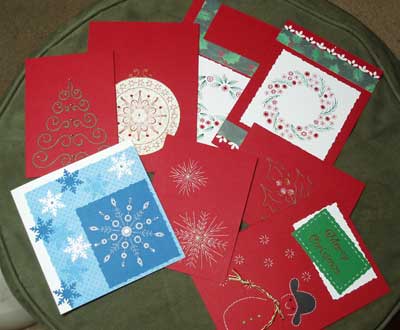
Still, the challenge is fun, and I have actually managed to complete a few more embroidered Christmas cards. Tonight, I assembled them and put the finishing touches on them.
You might wonder what you’d have to assemble on a hand embroidered paper card. Isn’t, after all, the embroidery enough by itself? I suppose it would be, but I have a tendancy to go overboard on some things. More is not always better. I need to learn that.
There are a few elements of the embroidered card that require assembly, though, depending on how you make the card.
First of all, if you embroider on a separate little decorative piece of card stock, you have to situate that piece onto the folded card. Then, if you want, you can continue to decorate the card… and decorate it…. and decorate it some more. Take, for example, the snowflake card and the wreath card.
First, the snowflake card. I like this embroidery pattern, and it’s really very easy to stitch – it goes pretty quickly. The pattern can be found in Erica Fortgens “Merry Christmas” book, I think, though I’ve been using several different books for patterns lately. I used regular textured card stock, and Sulky rayon machine embroidery thread in white.
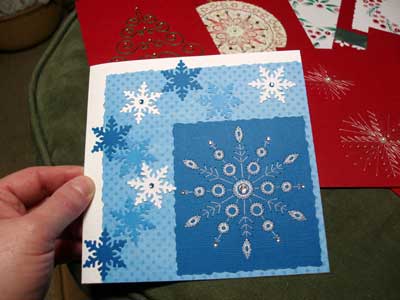
It took me about an hour and fifteen minutes to prick the card and stitch it.

Then I started decorating it further, just on a whim. And then I decorated a little more. And a little more.

I added little rhinestone accents and punched out snowflakes. And I went, as I am often want to do, a bit overboard. Still, it was fun.
Then there’s the wreath card.
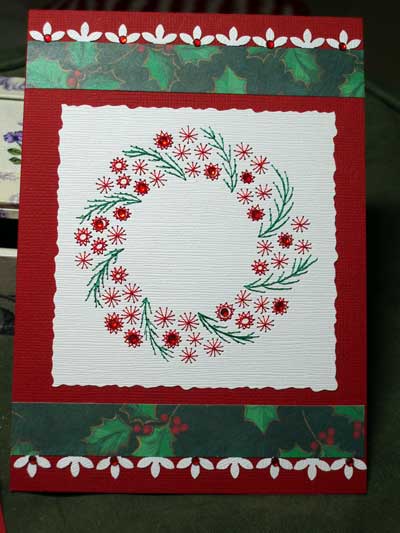
The embroidery on this one took a bit more time – all told, about an hour and forty five minutes. I should have left well enough alone, and mounted the little white square with the pretty wreath onto the red card and just left it. But there were these strange cutout little flowers floating around in my stuff. Scraps, really. And I found I could cut them in half. And in cutting them in half, I realized I could line them across the top of the card. But then I realized they looked lonely, so added a paper strip.
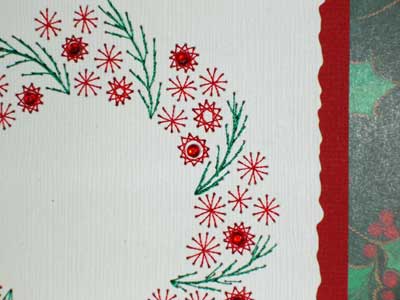
And of course, the wreath needed some “bling,” too, so I added a few red rhinestones. And…. sheesh. I did it again.
So that’s one kind of assembly when you’re embroidering paper cards.
Sometimes, instead of stitching on a cut-out piece of card stock, you might want to stitch directly onto the card itself. I had a plethora of red cards that I bought for practically nothing ages ago (before Christmas preparations were even thought of), so I decided to use those up. I pricked designs on a bunch of them and set about embroidering them.
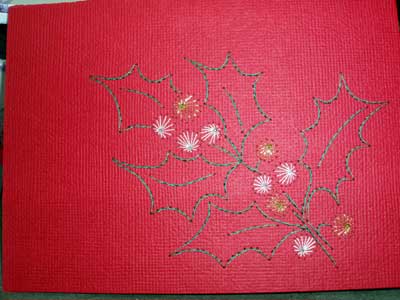
These cards are simpler. This holly card, for example, is stitched straight onto the card, with no extras to adorn it:
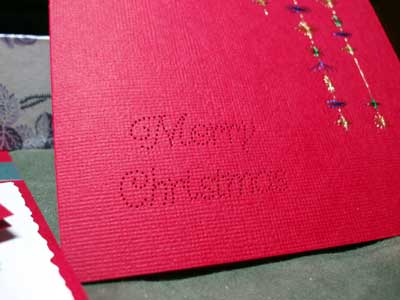
The snowman is also stitched directly onto the card, though the “Merry Christmas” sign at the top is separate.
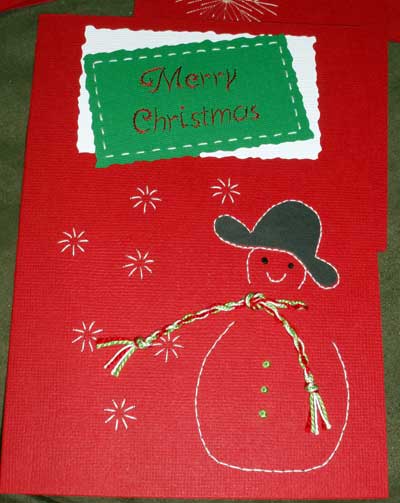
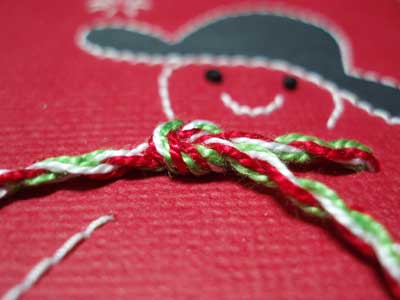
His little scarf is made out of perle cotton #5 twisted together.
(I hate to admit this, but the whole time I was working on him, he reminded me – and still does – of the Stay Puft Marshmallow Man from Ghostbusters!)
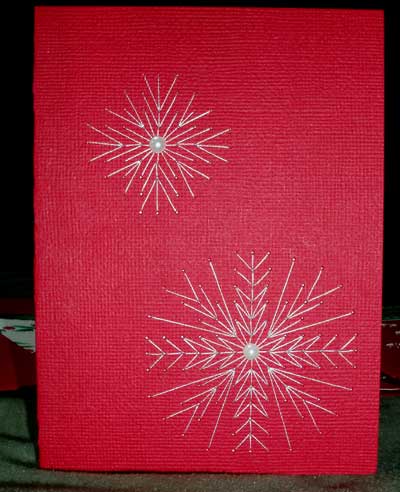
This is a very simple white-on-red snowflake card that took around 40 minutes total to make:
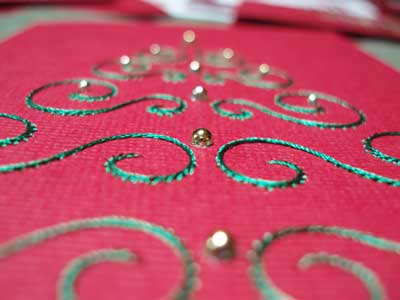
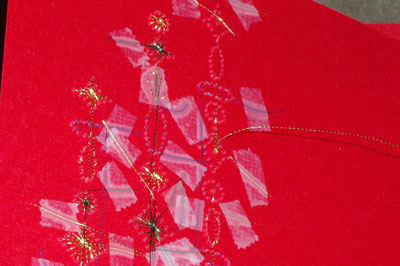
This little swirly Christmas tree is also stitched directly onto the card, too:
After stitching directly onto the card, you still have to do a little bit of assemblage, because the inside of the card, covered with bits of tape securing the threads, is most distressingly messy, and that needs to be covered up!
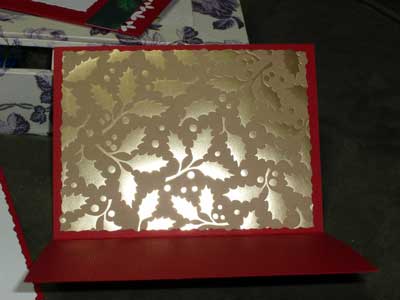
To cover the inside, I choose a matching decorative paper, cut it to fit (sometimes with a straight edge, sometimes with a decorative, depending on my mood – or whether or not I want to mess with changing blades on my cutter), and glue it into the inside of the card.
For the holly card above, I chose a gold holly card stock.
It doesn’t always have to be card stock, though. For the inside of the swirly tree card, I used a decorative paper, in a green holly pattern.
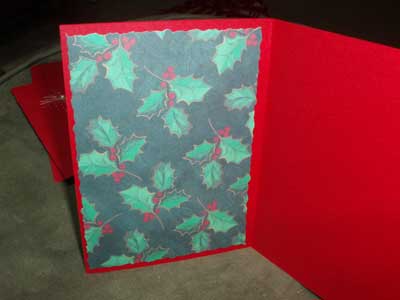
If you don’t have decorative scrapbooking paper, I’ve found that wrapping paper works great, too!
If you’re going to add any extra touches (like the gold beads on the swirly Christmas tree), do that AFTER you’ve covered up t
he inside of the card with decorative paper, because it’s much easier to glue the inside paper down smoothly when you don’t have bumps on the front of the card.
I use strip adhesive, by the way. It’s so easy, it’s worth the cost of the adhesive. When you can get the stuff on sale, it’s worth picking up refils!
I still have a few more cards in the works, like this sparkly bauble card that still needs a few more baubles and a message.
At the rate I’m going, though, I don’t think I’ll be sending hand made cards to my whole list! Still….
It’s not a bad collection. Maybe I could do the whole list. A few late nights… early mornings… enough spiked egg nog…
If you’re looking for some great patterns for Christmas-themed embroidery on paper, you may wish to check out Merry Christmas Embroidery on Paper by Erica Fortgens. It’s got a great selection of patterns in it, and they can be mixed up and matched up and made into a whole variety of unique Christmas cards, ornaments, ornamental tags, and so forth.
Those are all wonderful, Mary. I think the idea of spiked egg nog is just the ticket to get you to the finish line!
Cissie
Hey now, you would not want to be caught stitching under the influence now would you. 🙂
BJ
Very pretty cards! I hope the recipients enjoy them. I am sure they will unless you spill some of that egg nog on them. Oh, scratch and sniff!
WOW!!!!!!
How cool are those!!!!
Annie in now really cold Michigan
They are gorgeous Mary, just gorgeous!
Photograph your favorite one (or two or three) and have them printed (or print them yourself if you’ve a good printer) onto glossy cardstock. There you have a handmade card with beautiful stitching that is a print.
I would love to see some pictures on the blog of your embroidery christmas cards I am sure they look fab 🙂
Wow, those are beautiful. A lot of time, but anyone who gets one will definitely save it forever.
very beautiful work
Very beautiful work indeed. I wonder when will i have time to try all this what you are showing here on the blog 😀
I just found your website and I like it very much! 🙂
I like especially the snowman card…
How did you fill the snowman hat? Did you color it or is it a colored paper?
Congrats!! I’m from Bolivia. Just started with stitching cards. You have a WONDERFUL work!!
I have never seen such beautiful work. I can’t wait to learn and then teach some of my students.
Mrs. R.
Were these made using a machine? Is it possible to do these (simpler patterns, of course!) by hand? Do you poke the pattern out first, and what type of stitch do you use? It seems the back stitch would be sort of bulky and tear at the tiny holes. Thanks!
Hi, Denise – no, these are all done by hand. I print or draw a pattern, lay it on top of the card stock, and then pierce through the pattern and the paper, then stitch in the holes. Back stitch works fine – you just have to be careful of tension! Hope that helps! ~MC
What a great set of cards. You have got brilliant ideas.
Cool….. 🙂
Very beautiful crds…. like to learn how to make those + luv those <3
Hi Mary, where can I find the pattern of the xmas tree? Is a pdf available? Did you used simply back stitch? Ciao, Manuela
Hi, Manuela – the pattern for the tree came out of a book, if I recall, probably by Erica Fortgens. The stitch is more of a stem stitch than a back stitch, because the stitches overlap each other. Erica Fortgens has many books on paper embroidery and the techniques are explained in there. Hope that helps! – MC
If you google “prick and stitch” you can find some nice patterns, even free ones!
I just love your sewing cards, especially the wreath and xmas tree where could I get the patterns please.
Hi! I am creating embroidered greeting cards for my Senior Thesis Project (I am a graphic design major) and I was just wondering what type of paper did you use to embroider on these cards, or do you have any suggestions of the best paper to use to hand embroider on? Thanks it would be a great great great!
Hi…love your work. could you tell me what weight card stock you use to embroider on? i guess i could get white note cards and then embroider the front and glue another card to cover up the ends…but i’m not sure what weight i would need to to the pricking. thanks…IM