


Well, I’ve not gotten very far on the Redwork Runner hem – but I’ve started withdrawing some threads.
Withdrawing threads for a little drawn thread hem stitch around the whole hem of the runner takes a lot of time! It’s fiddly work, and admittedly, it’s not the most exciting part of any embroidery project. Besides, it always makes me a little nervous, to start cutting and pulling out threads.
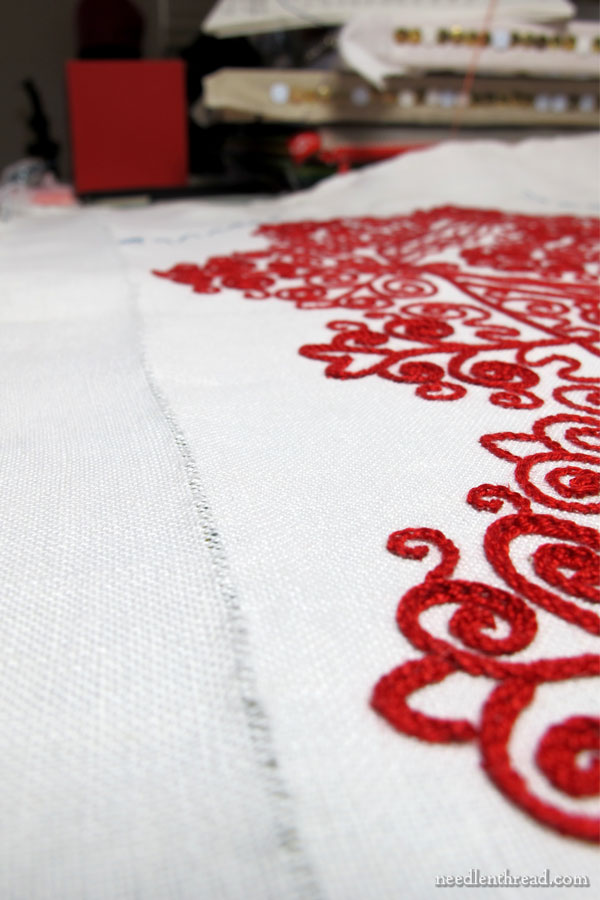
If you haven’t seen it yet, you can take a look at the finished embroidery on my Hungarian Redwork Runner here. It’s a lot of embroidery! Wouldn’t it be just a crying shame to cut the wrong threads in the hem work?
I’ll show you how I go about preparing for this type of simple hem – it’s really a fool-proof method, so there’s not too much to be worried about. The key is taking your time and looking two, three, four, or ten times before you snip the first threads.
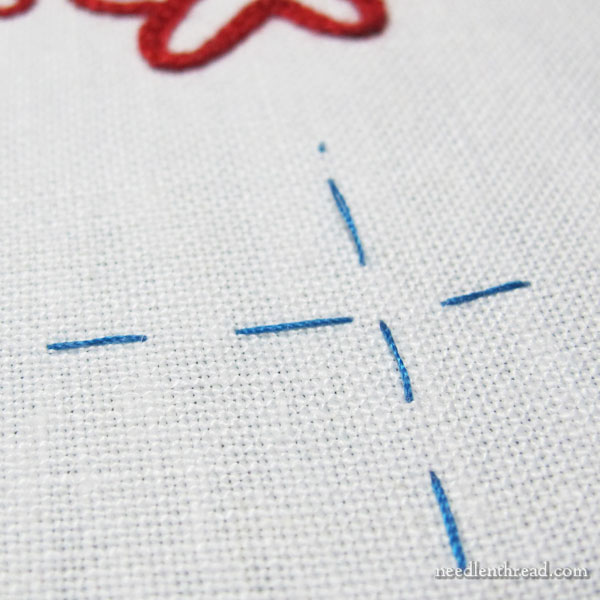
When I first set up the Redwork Runner, I basted the fabric with a blue sewing thread, splitting the design area in half both directions, and outlining the whole design area at the point where I wanted the hem to fall.
This particular linen – Legacy’s Alba Maxima linen – is possibly The Best All-Around Linen in the World for general surface embroidery, as well as for other techniques, like Schwalm whitework. It’s about a 40-ish count linen, with a full weave, a gloriously beautiful “hand” (that is, it’s got a great surface feel), and it’s a nice weight. It’s not super heavy, but it’s not super light, either. It’s just….ahhhhhhhh. It’s the Linen I Love. If I never had any other ground fabric to work on but Alba Maxima, I’d be perfectly content.
One thing that I really love about it when working a project like the Redwork Runner is the fact that it’s easy to set up a perfectly squared-up project. The fabric threads are easy enough to see, to work a basting stitch around the perimeter of your project area and to stitch basted center lines, so that you can make sure the design is perfectly centered. The fabric threads are also so nice and even – there are not many slubs, and there are no skinny threads with space all around them.
It’s just …. *sigh* …. such Nice Linen.
Ok, ok. Sorry. I’m running away with Linen Love here…
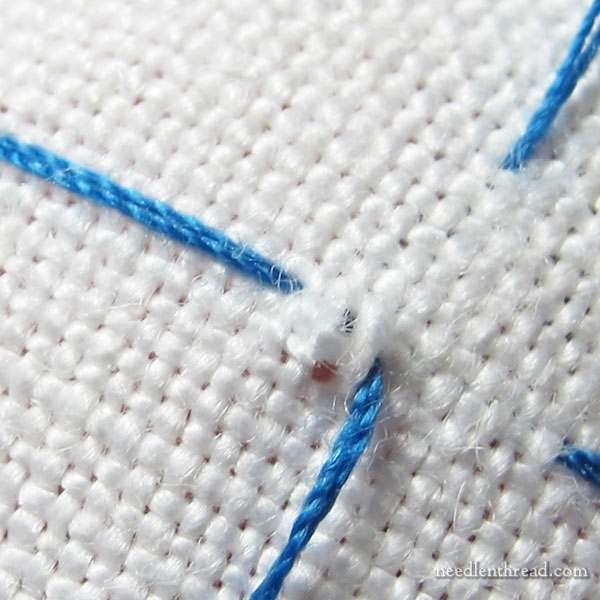
In the photo above, you can see the cross-point, where the basted line to mark the hem area runs horizontally (more or less) across the photo. The intersecting line is the half-way point that cuts across the width of the runner.
Why Block before Finishing?
When I showed the finished embroidery and the whole runner damp stretched and blocked, a couple of you asked why I blocked it before hemming. That was a good question!
I find it’s always best to block a piece before you do any finish work on it. Even though I will most certainly wrinkle the thing up while doing the hemming, as I set up the hem and baste it in place, the piece will be perfectly squared up, flat, and easy to work with.
If you don’t block a piece before you finish it, you might end up with a skewed finished piece, and it certainly won’t be as easy to set up a nice hem. It’s always easier to measure your hem, fold the fabric, cut along the right lines, and so forth, when your fabric is straight, square, and flat.
Withdrawing the Threads for a Simple Drawn-Thread Hem
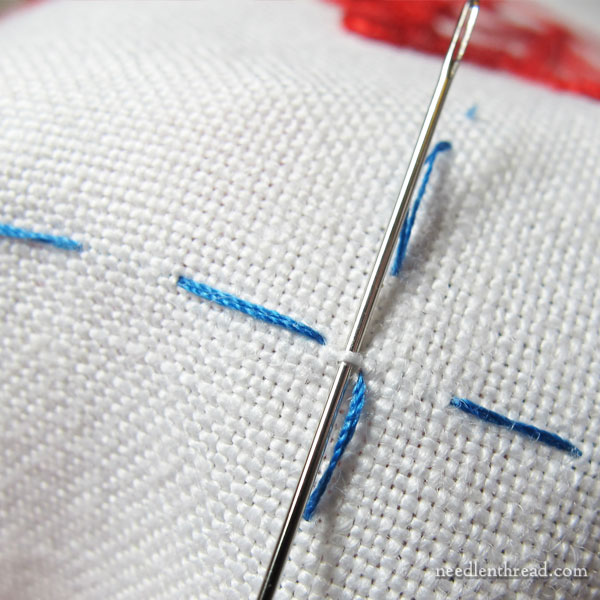
I’m going to withdraw two threads all the way around the perimeter of the design, just outside that basted hem line.
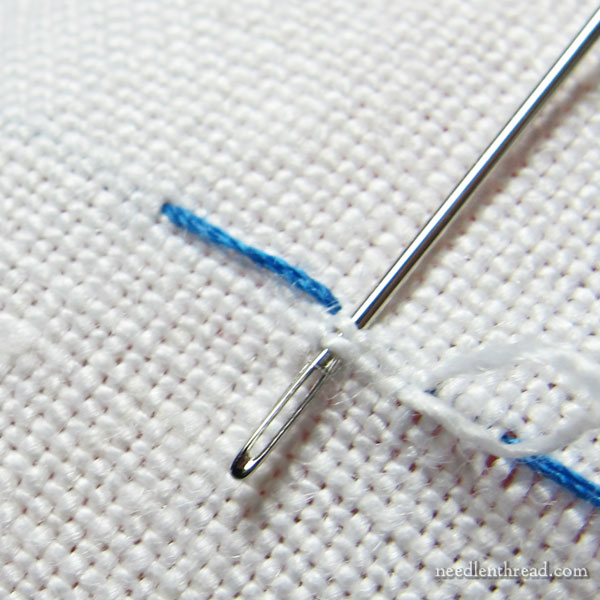
Using the eye of a needle, I lifted the first thread I want to cut, to pull it out a little way from the fabric so it is easier to snip.
With the thread pried out with the needle, it’s easier to slip your scissor blade under the thread to snip it. Much better to pull that thread up and away from the fabric, than to stick the tip of your scissors down into the thread and snip – just in case you miss!
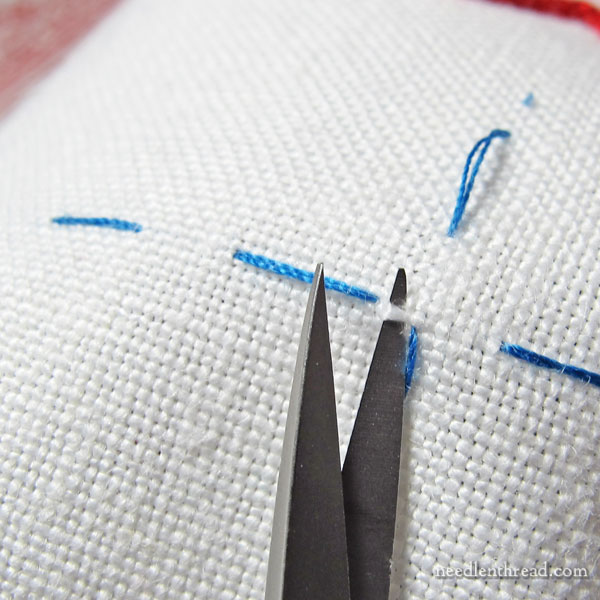
With the first thread cut, it’s much easier to get in there to cut the second thread, too.
I withdraw two threads at a time, generally, so with both threads cut at the center of a long side of the runner, I can now withdraw those two threads all the way down towards the corner.
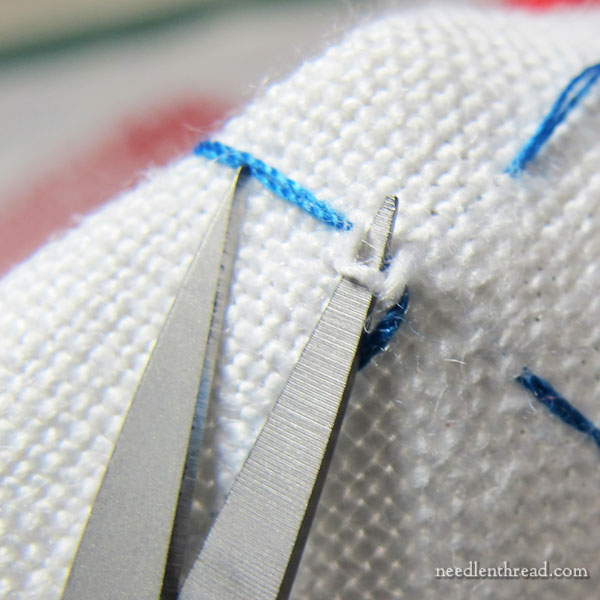
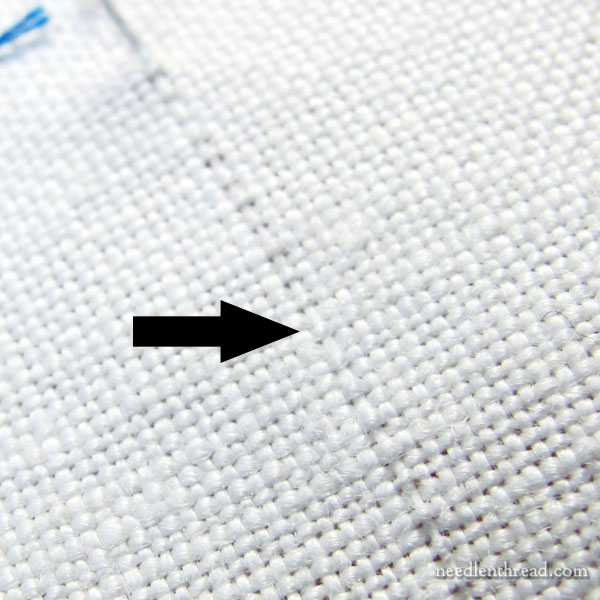
There it is.
The cut.
The hole.
The Point of No Return.
Now, using the eye of a needle again, I pry out the threads two at a time, about every half inch down the line.
Occasionally, the threads I’m pulling out will get a little fuzzy. Once they get to the point of long and fuzzy, I’ll snip them shorter and just keeeeeeeep going.
To help see exactly what thread I’m getting ready to pry out down the line, I find it helps to give one of the withdrawn thread tails a good tug. This off-sets the weave a bit and makes that thread easy to see.
With a clear path to go by, I just keep prying out the two threads every half an inch or so.
Now, “prying” sounds like such a harsh term. I work in half-inch or so increments, to keep from really distorting the perpendicular fabric threads. I try not to be too brutal with the fabric. But, that’s another great thing about Good Linen: it’s so resilient!
As I withdraw the two threads down the length of the runner, I end up with a little open path in the fabric.
At the corners, I leave an inch or so of the withdrawn threads hanging at the point where I want the path to stop. Then, I start in the middle of the next side, and withdraw again to the corners.
There is a little side of me that wants to do a decorative hem here, which would required withdrawing quite a few more threads, but the Other Side of Me is winning out. I think a simple, understated hem will let the embroidery shine.
So that’s the withdrawing part! Next time, I’ll show you the hemming part!
Alba Maxima Linen and Where to Find It
Just in case you’re looking for Alba Maxima linen, you can find it at some needlework shops online. It’s often listed as “Schwalm” linen. It’s a Legacy Linen imported by Access Commodities.
They also have a not-quite-so-white version of Alba Maxima – kind of an “old white” – that’s the same fabric, but just not as bright white. It’s equally as good.
Some other places that carry Alba Maxima linen include Needle in a Haystack, where it’s listed as Schwalm / Embroidery Ground under Access Commodities as the vendor (I think the old white version is listed under 40 count), and Threadneedle Street (Alba Maxima is listed there under “Schwalm linen”).
Thistle Threads also carries the Old White version of Alba Maxima on their website, under ground fabrics.
The Hungarian Redwork Runner Index
You can find this whole project from start to finish chronicled in the Hungarian Redwork Runner Index. You’ll find everything, from the pattern, to the threads used, testing the threads and stitches, stitching and tips, plus progress reports and … eventually … the finished runner will be there, too!
Thank you for showing the hemstitch progress. I really think it adds a nice finish. I look forward tot he next edition.
Question —- Would you ever consider a tutorial on various hems? I have a few Italian books but while good, your photos of the steps is pretty superior. I am a visual learner.
Oh, I would love this too! Hems and various ways to finish a piece would be very welcome.
Beautiful work Mary and I admire your courage in making that first snip and boldly go where no scissor has gone before!
It’s Soooooooooooo close! Keep on Mrs. Corbet! I hope the hemming process goes quickly and easily 🙂
Sarah
Dear Mary
I’m so glad you are continuing with the Red Runner can’t wait to see it finished. I so agree with you, like you I love Alba Maxima which I’m using in my current project it is such a lovely versatile fabric and so resilient. Just a question from the above post. I see that you have removed the blue thread but have you cut the fabric as well to make line across the fabric. As a novice I’ve never seen this done before on fabric so I was wondering why you are cutting the thread from underneath the fabric, just a thought. Thanks so much for showing us the hemming process I learning new techniques from the project, so thanks.
Regards Anita Simmance
I’m so excited to see this progress! The white on red looks so wonderful, and I think a simple hem will set it off beautifully.
Hems and bindings–I wish I could do them first and have them finished. Sigh. But I love to pull threads; might be a throwback to primate grooming instincts.
Thank you for sharing you technique on finishing hems. On cutting threads, one of my embroidery teachers (I can’t remember who) showed us a fool-proof way to cut fabric threads. You pass your needle under the thread you want to cut until the eye of the needle is under it and then cut the thread through the eye of the needle. Most embroidery scissors have a small enough tip that you can do that and you’ll never cut the wrong thread by accident.
Marie,
I admire you, you will always take the time to finish a pretty flawlessly daunting project for my taste in the work, you have the courage and energy to finish it and so the result is stunning regularity and it’s really a beautiful piece classic we would like to have all, myself and thank you to inform us of how to finish such an embroidery in the art.
Sincerly
Thank you, Mary! I’ll be saving all your posts on the hemming. I need constant reminding that finishing needs to be done with as much care and precision as the embroidery itself.
thanks! I’ll be starting my first ever drawn work hem this weekend. It ison a much smaller project, but it is good to get tips before I start!
thanks for the great instructions. i am so happy you posted on how to handle the corners – i have always had problems figuring out what to do with them. and cant wait to try t can’t wait to try ‘possibly The Best All Around Linen in the world for surface embroidery…” many thanks for ALL your posts!
The drawn thread finishing is always one of my favourite parts of a project. Partly because it is a finishing stage (nearly there folks!) but also because it just looks so crisp and lovely. I actually quite like the careful tacking and withdrawing threads stage – even though it is a deliberate process. The embroidery is starting to look like the original vision and it’s so exciting! Looking forward to seeing the hemstitching beginning soon. 🙂