


You remember cramming for tests, right? Well, I’m cramming an embroidery project! I started this project this past Saturday, around noon. I have one week to have it finished – doable? You bet!
The project is an embroidered book cover for my niece’s prayer book. She makes her First Communion this Sunday. (I’ll show you her hand-embroidered dress once it’s pressed and ready…) I thought I’d whip up a little book cover for her prayer book before this coming Saturday evening – after all, it’s just a little book, with a little cover.
The only possible obstacle that I may have overlooked was … the work week!?!
I started by finding a design. I could draw one – takes time – or I could flip through the designs I have. I flipped. I quickly realized I would need something long and narrow as opposed to short and wide, so I limited my looking to the overall shape of the design, and then eliminated choices from there. I needed something relatively simple that I could stitch relatively quickly, and that would appeal to my niece.
The fabric of choice – should it be white Italian silk (thick silk – satin), or linen? I settled on linen for washability. I’m using a piece of Alabaster Angel by Legacy – NICE stuff!
Then I pre-shrunk the fabric. While it was going through the stages of pre-shrinking linen, I took out graph paper and the prayer book and drew up the pattern for the cover.
I sought a piece of white cotton for a lining behind the linen, as the prayer book has a black cover, and I didn’t want that to show through. I pre-shrunk the cotton as well.
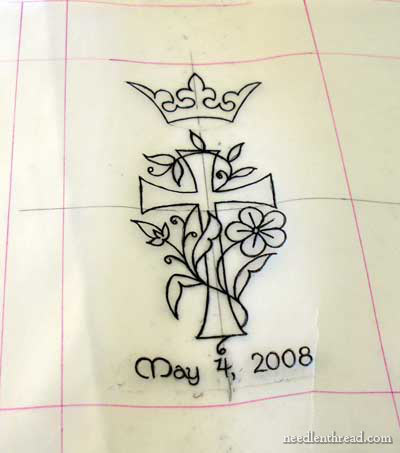
Then while the fabric was drying, I transferred my embroidery design to tracing paper. I drew the design with a fine micron pen, then turned it over and traced the back of it with a pencil.
When my fabrics were almost dry, I ironed them to crisp (as in, stiff and wrinkle-free, not burnt!!). I added a couple layers of starch on the linen to make removing any pencil marks easier.
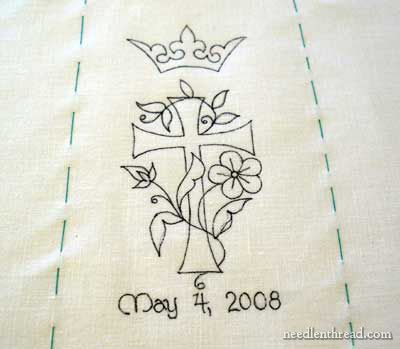
I removed a thread on each side of the linen to mark the size of the pattern (makes cutting easier and square when finished) and basted in the width of the cover of the prayer book.
I took the embroidery design (on the tracing paper), centered it up, and used a ball-point pen on the right side of the design, pressing hard enough to transfer the pencil lines on the back of the design onto the fabric. It worked perfectly. Then I took an extra-fine (.005) micron art pen, and drew in the lines on the linen with the pen.
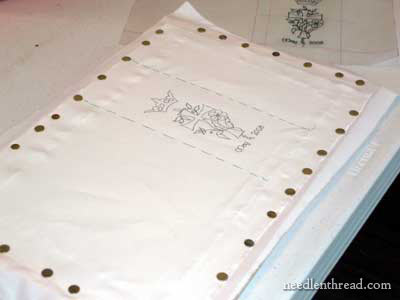
I framed up both the lining and the linen – but I didn’t frame it super-tight. Just enough to give a little tension without pulling on the linen.
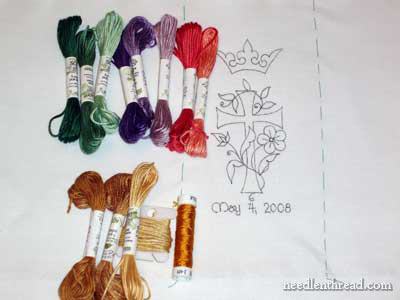
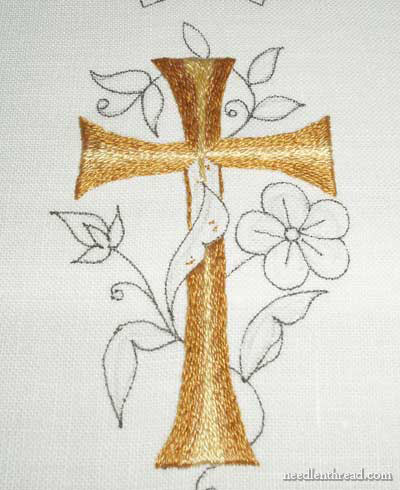
I picked out my colors – the cross and crown will be gold, the vines green, the flower will be a range of purple, and the bud will be a light and medium shade of salmon-pink.
And then I started stitching. I had a good chunk of time on Saturday evening to stitch (it took me a couple hours to get the project set up), a little bit of time on Sunday afternoon, and a few hours late Sunday night. I managed a little stitching on Monday evening, and a couple hours on Tuesday. The picture below shows progress through Sunday afternoon (a few hours of stitching).
Will I finish before Saturday? I do believe I will! Now I wish I had chosen a more complicated pattern! It’s going pretty fast, actually.
I was glad to find a use for the gilt sylke twist on the project – but then I remembered I chose linen for washability. Ut oh. The GST will most likely get wet. I outlined the cross in the gold GST, which helped even up some of the lines (cheating, I know!) and I’m contemplating using it on the crown as well.
I’ll keep you posted with finished pictures. I’m going to make a matching corded trim, so I’ll show you how I do that. It’ll either be kumihimo, or I’ll just make a twisted cord by hand. And I’ll try to take sensible and instructive photos on assembling the piece over the book!
Have you ever crammed a project? Do you perform better or worse when you’re embroidering under pressure?
Wish me luck!
What a beautiful and treasured labor of love the book cover will be for your niece, Mary. Just lovely! – Jeannine
Wow, I could never cram something like that in a week! It’s going to be gorgeous! I stitched a needlepoint ornament in 2 days last Dec for an exchange when I misplaced the first one. Like you, it went very quickly and I could have done something with more detail.
This is such a thoughtful gift. I’m sure your niece is going to love it. I can’t wait to see the finished book cover. Your choice of colors and stitches are always great…love it. I normally cannot work very well under pressure…quality of my work deteriorates.
Thankyou for so many great little tips you’ve mentioned (like removing the thread).
I’d like to hear more about putting on the stretcher frame tight ‘but not too tight” if possible. (I’m about to put my Poppies on my frame)
And it’s gorgeous. I wish you waz my auntie!
Mary — you never cease to amaze me with you fine needlework. I LOVE the design and the colors you chose. I always look forward to opening your e-mail and see what new jewels you have! Well Done!
Mary
What a wonderful gift and it will last a lifetime.
Your work is superb and I look forward to reading your posts.
Hugs
FredaB
Right now I’m cramming a simple version of the corner pattern that you posted on April 21st. It’s just two corners of a table runner in split stitch on cotton but our time frame is the same. Good luck! Yours looks beautiful!
Mary, where did you find the Gylt Silke Twist? I know I read it in one of your posts, but now I can’t find it. Thanks.
Hi, JoWynn –
I got my original colors (not the whole range) from Plimoth Plantation, but now you can get them from Hedgehog Handworks, which is the least expensive place I’ve seen them so far. They have all the colors right now except green, I believe!
Hi! I wandered onto your site when I was trying to teach myself to embroider so that I could embroider a scapular for my nephew’s first communion, and I’ve got to say, I’m hooked! I’ve been looking for a second project to keep practicing and I really liked this book cover! But do you think it’s too hard for an extreme newbie beginner like myself? Also, I don’t have a frame or any fancy equipment to work with… What do you think? Thanks!
Hi, Sarah – I’m pretty much of the opinion that an enthusiastic beginner can conquer anything. As far as “fancy” equipment goes, you’ll need a hoop at least – it doesn’t have to be a fancy one. You can find them at JoAnn’s, Hobby Lobby, Michael’s, etc. I’d get a plastic Susan Bates brand before buying a cheap wooden one, as the latter usually don’t hold the fabric well and are splintery. Best of luck with it! ~MC
Thanks so much for the tips! Just one more question… The Bible I want to cover has a dark green cover so I also want to add a lining and I was wondering what you did to attach the two pieces of fabric together? Did you machine sew them or is it just the embroidery holding everything together? Thanks so much!
Hi, Sarah – Here’s the description of the finish for this project: https://needlenthread.wpengine.com/2008/05/complete-embroidered-book-cover-cross.html I didn’t exactly sew them together – I just framed up the linen with the cotton behind it, and then embroidered through both. Then I folded the whole thing into a book cover, whip stitched it on with white thread so that it couldn’t be seen, and then added a decorative edge. Hope that helps!
MC
That is going to be beautiful, I am sure she will love it.