


Continuing on with the hand embroidered lettering tutorials, today we’ll be looking at combining stitches and colors in a word. We’ve already combined stitches in previous tutorials, but for this tutorial, we’ll be working each letter in a different stitch, and we’ll be exploring how some stitches that seem unconventional for writing with thread can be used to good effect to form letters.
If you’re just joining in on these embroidered lettering tutorials, you can find the whole list of them under this Index of Tutorials for hand embroidered lettering. The previous tutorials in this series cover the basics of writing with needle and thread – from starting and ending threads, to stitching small letters, to traveling your threads on the back so that they are not visible on the front, to dotting your i’s in different ways. So you might want to check those out for some background information.
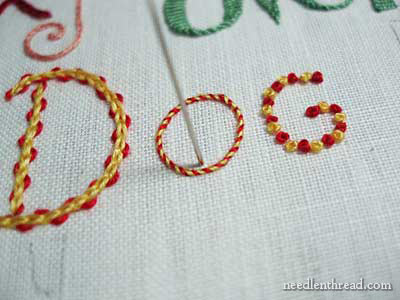
In this tutorial, I’m stitching the word “Dog.” I’m starting with a laced chain stitch for the D, then revisiting the whipped running stitch for the O, then working the G in French knots. For all the stitching, I’m using DMC floche in yellow and red.
Starting at the top of the D, I anchored the thread with tiny backstitches.
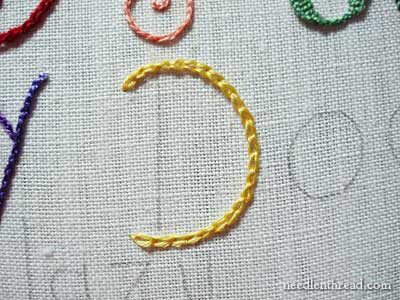
Then I worked the letter in chain stitch – the rounded part of the D first, then the spine.
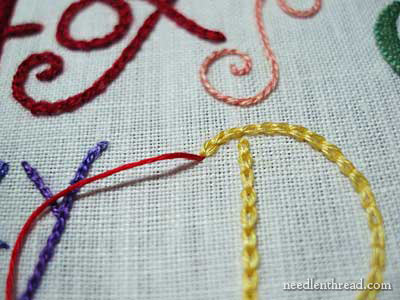
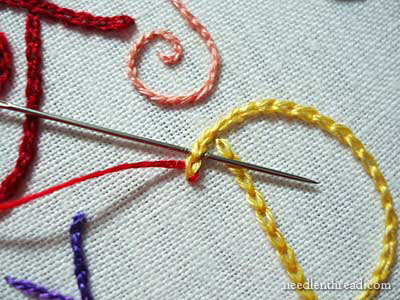
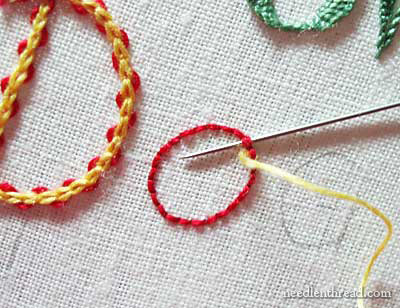
Once the chain stitching was done, I changed threads to the red floche, which I’m using to lace the chain stitches. I brought the new thread up at the tip of the line of chain stitches that I wanted to lace.
Lacing a stitch (like the chain stitch) is not the same thing as “whipping” a stitch. The thread does not wrap around the stitches, but rather runs in and out underneath the stitches. So my first step was to run my needle underneath the first chain stitch. I’m not picking up any fabric – just running right under the stitch.
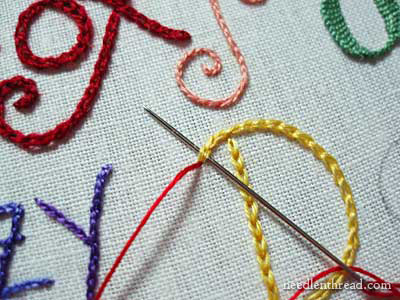
I gently pulled the working thread through, without putting too much tension on the thread. I want the laced red thread to be visible outside the yellow chain stitches. If you pull too tightly here, the red thread will not be as visible, so just pull gently until the lacing thread rests where you want it to. Then, run your needle in the opposite direction under the next stitch.
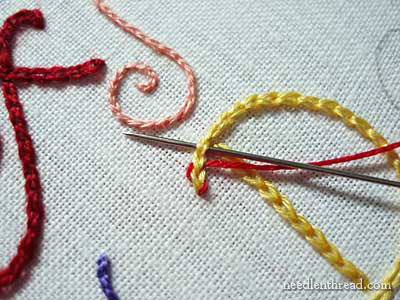
Continue alternating the direction of passing your needle underneath each chain stitch, so that you are basically zig-zagging underneath the chain stitches. Remember to keep the tension on the lacing thread relatively loose – don’t pull hard on it, but leave it resting visibly outside the chain stitches. Pull these stitches enough to keep them even. Occasionally, you might have to tweak them a bit with your needle so that they are even.
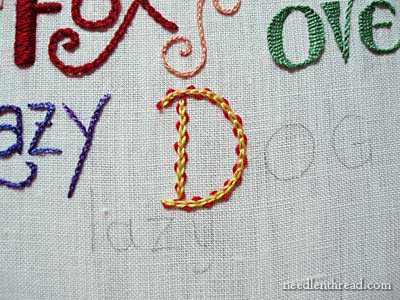
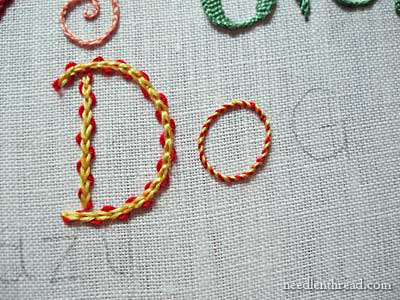
Continue all the way around the bump of the D, and then take your thread to the back of the fabric at the end of the bump. Bring your thread up at the base of the spine of the D, and lace the chain stitches up the spine. When you’re finished, it’ll look pretty much like this. Kind of cute and colorful!
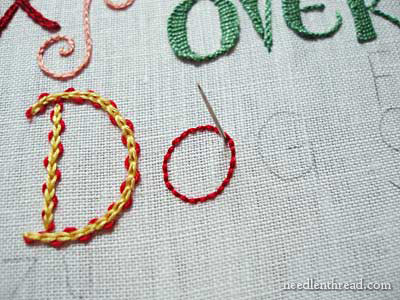
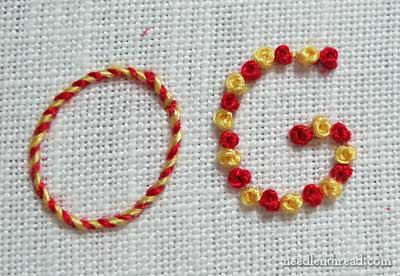
I worked the O in whipped backstitch. We’ve actually already covered whipped backstitch once in this series of tutorials, so I won’t spend a lot of time going over it here. After stitching the backstitches, I changed to the yellow floche and brought my needle up inside the O.
Remember when whipping backstitches or running stitches to always travel in the same direction around all the stitches. You can turn your hoop as you stitch, to make this easier.
Keep the tension loose enough that you don’t pull the whipped stitches straight. They should wind around the backstitches and should be clearly visible. When you arrive back around where you started, sink your needle to the back and anchor your threads by whipping around the stitches on the back of the fabric.
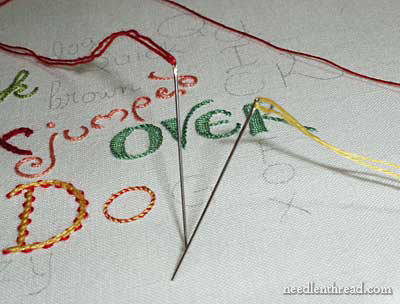
Now it’s time to move on to the G. I worked the G in alternating colors of French knots – red and yellow. To make this easy, thread two needles, one with one color and one with the other, so that you can trade off needles as you switch colors. To make French knots Really Easy, I use a milliner needle. They always pass through the knot with great ease. If you don’t have a milliner’s needle, though, that’s ok – embroidery needles work fine, too.
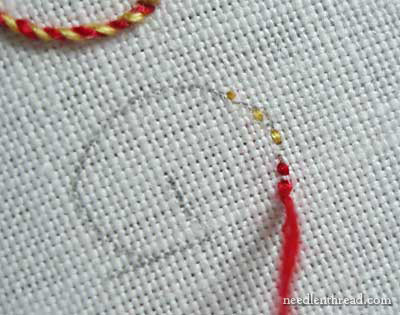
To begin, I anchored both threads with tiny backstitches that would be covered up with the French knots. Once both threads are anchored, you’re ready to knot!
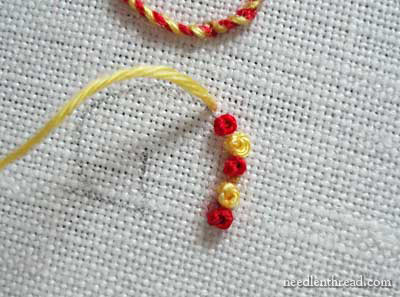
Simply follow the line of your letter, spacing your knots evenly. Don’t crowd them too much – you want them to stand on their own, not jam up against the knots on each side. French knots tend to look better when they’re not crowded tight together.
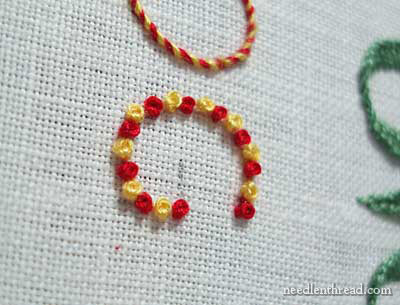
Work the French knots around the curve of the G and then into the center on the cross bar of the G.
At first I wasn’t sure how well French knots would form a letter, but once I finished the G, I was sold on the look. I like it!
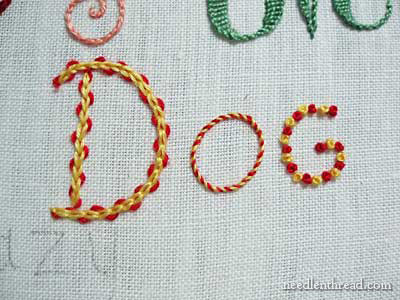
Here is Dog – colorful and a bit whimsical.
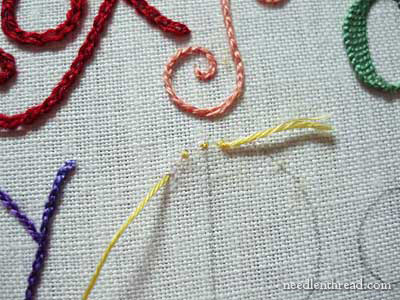
I wasn’t quite ready to stop there, though. The O seemed a bit skimpy, so I threaded up my yellow floche again, and brought my needle up just inside the lower edge of the O, in the center.

I worked two little fans of daisy stitches inside the O, at the top and base of the letter. Then I threaded the red floche…

… and added a little French knot and some straight stitches in red, to finish the inside of the the letter. At this point, I was thinking that things might be getting too cutesy and circus-like, but I left it.
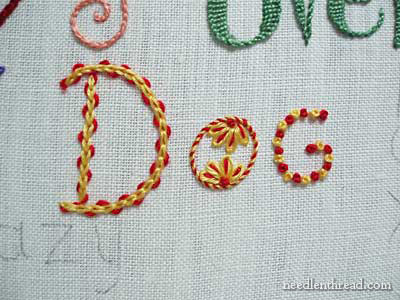
And here is Dog, again, finished.
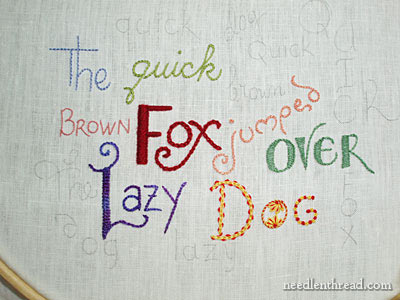
And this is the whole sampler so far.
I guess the whole point of this lesson is to encourage you not to restrict yourself to one stitch for a word, or even to one color. You can play around with stitches, experiment a bit, add little extra details and so forth to personalize your lettering – and have a lot of fun doing it!
Enjoy the lesson, and have fun stitching!
Wow… Mary..WOW…
This is toooo cute… The french knot G luks pretty.. And the new luk of O too.. Using two colour threads have really come out very well…
Deepa
Oh…its beautiful…Love the color combination.
One of the first two-color stitches I ever tried was whipped back stitch and I loved it! The combination of colors can change the mood of a piece from staid to charming.
I haven't tried laced chain stitch but as chain stitch is one of my favorites (so relaxing to do!) and it looks so lovely laced, I will include it in one of my next projects. Thanks Mary!
Mary, this is ABSOLUTELY FANTABOULOUSLY CUTE!!! I'm sold on the french knots for G. Up close they look like little rose buds.. 🙂
Am definitely going to try that one! Thank you so much!
How fun!!!!! I love it. Plus I love yellow and red together anyway. Love it.
No matter how long one has stitched and enjoyed it, it surprises me how much you can learn from someone else, today's lettering opened a whole new thought line on lettering, thanks.
BarbM
I love this series of lessons and this one in particular is my favorite. I love the creative stitches and color combinations. Thanks as always for your inspiration!
Nice!! I've never done laced or whipped stitches – I love how they look. I do have a question on color – is it usually best to keep the colors the same (or values/shades) on the same word for readability? What I mean is if you start the word "dog" in a red, keep it in red or a color very close, not do red "d" pale yellow "o" and then black "g" ???? Or is this a matter of taste or the effect you might be after, such as emphasizing a letter from different words to form another message?
I never would have thought to combine red and yellow, but the more I look at it I like it! I've done interlaced chain, but never the way you do it. Good ideas – this is a great resource.
Hi, All – I'm glad you like this one! It was particularly fun to do!
Gail, I think you're right about color choices. I wouldn't combine pale letters with dark letters in the same word, unless you are trying to achieve a certain effect – the pale letters would be hard to read, I think.
When I picked the colors for this – even though red and yellow are such different colors – I selected a yellow that was a primary, rich yellow, rather than a pale one, which I don't think would've looked quite right with the red.
Thanks for your comments!
MC
WOW!!! DOUBLE WOW! actually 🙂
Tq for showing this. I learn a lot of new stitching techniques from your videos.
Hi Mary,
I would like to know if you have any tips on how to make sure the wrong side of the sticthes looks 'OK'.
Thanks
Today's letters are so funny 🙂 Thank you very much. I'll use them one day.
Agggrrrrrrrrrrhhhhhhhh?
Why haven't I waited for the end of these lessons to finish my sampler????????
I DO LOVE those DOG letters, Mary!!!!
Thank you for sharing such brilliant ideas!
Mary you are THE Top French Knot maker if ever there was one! No one-but no one- could touch you on that!
Really fun Mary, beautifully done.
Thanks for a great series, Mary. I just found your blog today while searching for the best stitch for text. Thanks for great ideas!
I havejust discovered your site and I feel like it is Christmas morning. I have already watched 5 lessons and have learned so much. My embroidery work will definitely improve. In just a short while I have learned to do the stitches that haved stumped me for years.
Thank you so much.
Thank you for having this site it has been sooooo much help for me, because i am teaching myself how to embroider! Im 14 and i wanted to learn because my greatgrandma did it and we have some of the things around the house that she made a longggg time ago and my the rest of my family never took it on so it has been hard trying to learn it! But i love doing it is great after school for me to zone out and relax 😀
Hi, Jennifer! I’m glad you’re teaching yourself to embroider – I bet you’ll do a great job! I know what you mean about zoning out and relaxing after school…. embroidery is GREAT for that! I hope you have a lot of fun with it, and if you ever have any questions, just ask! ~MC
Miss Mary,
How did you do that?
Muito lindo!
(very beautiful!)
Mary querida!
Amo esses bordados lindos,puro encantamento…Es a fada do bordado.
Lástimo muito não saber ler e escrever em inglês.Me desculpe!
Obrigada por dividir conosco!
Sugiro colocar também no português,nós brasileiras iríamos adorar,Se tivesse a opção de tradução!
Bjao Mary querida!!!!
Vera!
Hello, Vera! Thank you for your note! I like to use Google Translate when I need to translate a web page. You can drop the URL into Google translate, and it will translate to whatever language you need. It is not the best translation, but it works! ~Mary
what a great tutorial thank you.