


The eye is the window to the soul, some poet said at some point, and embroidered eyes, I think, are a window to the soul of the artist – we see the artist’s skill and creative genious in the creation of just the right expression, in thread, on the face of a person or animal. Here are a few more examples of embroidered eyes for you to examine.
These eyes are an element of needlepainting – that style of embroidery that achieves a painted look with the medium of thread.
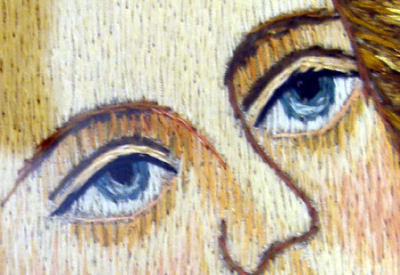
In this particular set of eyes, you get a good view of how a gleam is created. The pupils, irises, and the whites are created with straight stitches, with the whites and pupils worked in the same vertical direction as the rest of the face. Note, however, that the iris is stitched around its curve, and the gleam is added with a lighter blue, stitched on top of the darker blue, following the curve of the iris as well. Notice that the shading under the eyes is achieved with alternating darker flesh tones (more like brown), and that the edge of the top lid and the top of the lid itself are set off with stem stitch. Notices where the shadows fall underneath the eyebrow – in towards the nose. This stitching is perhaps not as fine as some of the eyes in the previous article on embroidered eyes, but it is effective enough that from far away, the result is a smooth, painted effect.
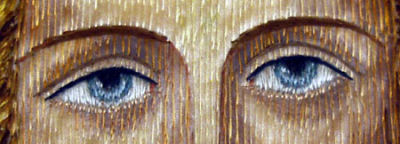
The camera picked up the gleam on the top edges of the stitches, but here is another fine set of eyes. Notice the lighter blue in the iris, and the glints (in a couple tiny white stitches) on the left sides of both pupils, extending into the irises.
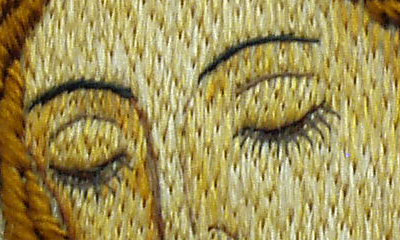
These eyes are mostly closed – looking down. You can get just a peek at the eyes underneath the lids. Unlike most of the other eyes here, these are bedecked with fine lashes created with long straight stitches. In context, on a face that’s no more than 2 inches long, the eyelashes are a nice effect. The dark tips of the stitches are again a result of the photographing of the work. They are the points where the stitches split. There is very little shading done in this face – only a bit around the nose. Notice that the eyes are created solely with lines of stem stitch, with the slightest shading on the very edge of the lids.
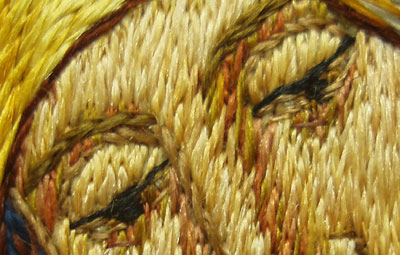
The stitching here is much heavier than in some of the other figures, but again, in context and from a little distance, the stitches fade into each other and create just the right effect. In this sense, these last two images remind me of impressionist paintings. They look rather splotchy up close, but from a distance, the picture is smooth and clear.
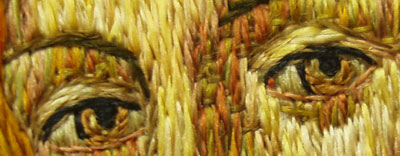
And finally, these eyes are in the same style as the previous photo, yet they are open. The heavier looking stitches make the work seem as if it would look thick and bulky, but, on the contrary, from far away, the result is a perfect expression. Note the glint in the left eye, and the variety of colors used to provide the shading. These two last sets of eyes belong to faces that are approximately 2 inches long.
Just beautiful Mary I wish you would do a Video Tutorial for eyes both closed and opened. I hope it’s not too much to ask. Thank you
j adore votre broderie je suis fan de vous merci pour tout
Mary, I love your site! I’ve only been stitching for about 2 months, and your site has been very helpful. I have been embroidering pillowcases, and recently have gotten started on faces. Thanks SO much for your help! Most recently, I have been creating my own patterns from photographs – now have several patterns & upcoming projects planned, just need to get up the nerve to stich them! My father recently passed away, and I wanted to create a needlepainting of him for my mom. I’ve created the pattern by tracing a photo & then transferring it – I just hope it comes out all right. I’ve never done anything like this before so…. any advice ?
Hi, Joy – Glad you enjoy Needle ‘n Thread! You might make a black and white copy of the photo that you’re using, so that you can see distinctly where the shades of color change. You might mark those on your fabric, too. And then keep a color copy of the photo and the black and white available while you stitch, and use them both as guides. Best of luck with the adventure!
Thanks so much, Mary! That’s such a good idea. I was wondering how I would approach handling the various shades. Can hardly wait to get back to stitchig! 🙂