


I’m still rather elated to have the linen pouch finished. It’s been delivered, so that project is completely behind me. I’m going to start on Something (???? so many ideas !!!!) with color in it now. Or perhaps dig out an old project! Whatever the case, my embroidery thread will be COLORED. But, anyway, I still want to show you how the pouch finished up…
After getting all the pieces together – the embroidery was finished, the piece was ironed, the cord, tassel, and button made, and the lining cut – it was time to put the pouch together. Unfortunately, I didn’t take pictures at every single step, but I’ll do my best to explain it!
First of all, the lining is the same as the outside piece of fabric, so I don’t suppose you would actually call it a “lining.” It’s just two pieces of linen (Alba Maxima by Legacy), the outside piece being embroidered.
I turned the embroidery to the inside of the two pieces, and pinned together the part of the pattern that comprised the flap (where the embroidery is) and the very base of the pattern – but not the actual sides that comprised the bag. At the center point of the flap, underneath the tip of the embroidered cross (so they lined up), I pinned in the cord and tassel and left them between the two layers of fabric.
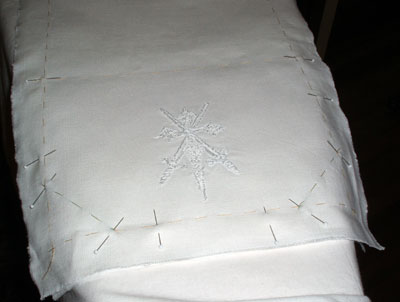
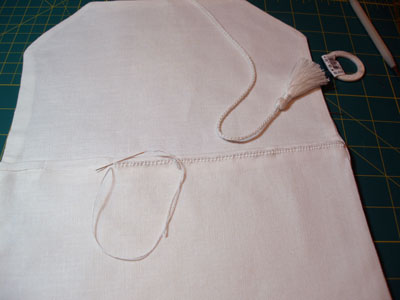
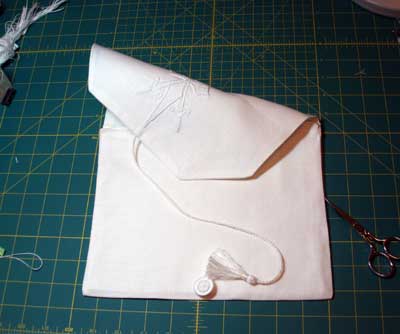
So right there, you’re looking at the back of the embroidery. Notice that the flaps of the pouch have angled corners. That was a last minute decision, but I think it improved the looks of it.
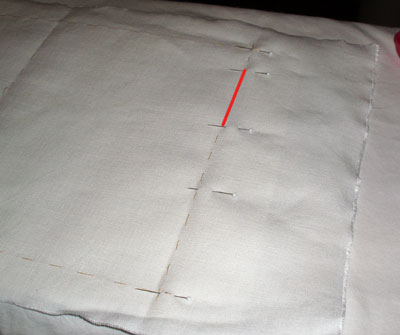
This is the base of the pattern. Think of the pattern as just one looooong rectangle, with the flap at one end – with the embroidery and angled corners – and this straight edge at the other end. I pinned the base together, but didn’t sew the whole thing, as I needed a turning hole. So the red line in the photo above represents the turning hole.
I sewed the base together (except the turning hole – and the top flap together (wrong sides facing). Now, refer to the diagram above, and I’ll explain what I did next:
I pinched together the outside layer of the bag at the folding line between sections B and C, so that sections B and C of the outside layer were now folded with the right sides of the fabric together for that piece of linen (not the lining) only. Then I did the same with the lining linen, creasing it at the folding line between sections B and C, and putting the right sides of the fabric of the lining face-to-face.
I pinned those carefully, up the point where they met the end of the seam of the flap (section A), which was already sewn together. So the base line of the fabric (where the turning hole is) was now meeting just below the seams on the flap.
Then I sewed up the folded sides, almost to the seam on the flap, but not sewing into it.
Then I turned the whole darn thing inside out through the turning hole, which was no small accomplishment! Next time, larger turning hole!!! In fact, I wonder if the base actually needs to be sewn together at all, until the rest of the seams are sewn up – that’s for further experimentation later.
But, it wasn’t that much worse for wear after turning.
Then, once turned out, I pressed the seams and pushed the lining down into the bag (which turned it “inside out” again, but only now it was “right side out, going inside.”) So the seams on the inside of the bag are completely finished. You don’t see any turned-in fabric edges or anything inside the bag.
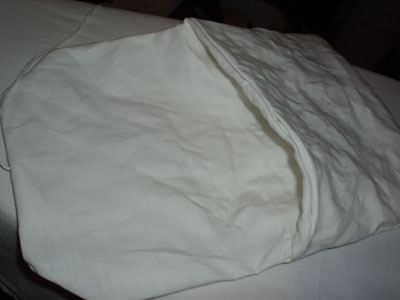
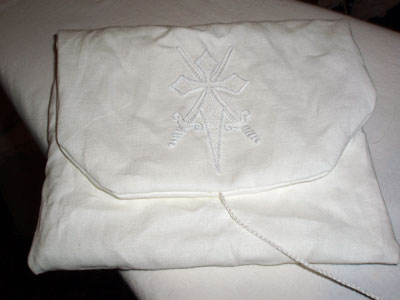
So there it is, ready to iron out…
…which I did, and then I decided to add a little knotted detail along the inside seam, in Palestrina stitch…
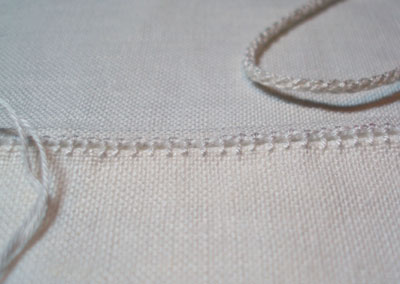
…which I did. I took the stitch horizontally and extended the leg, to overlap the seam. Actually, the way the stitch was worked, it becomes the “knotted pearl stitch,” which is exactly the same (in movement) as the Palestrina stitch.
And you can see there the back of the flap on the right side of the picture, and the bag itself on the left side, with the detail of where the seams meet to form the bag, and the decorative stitching.
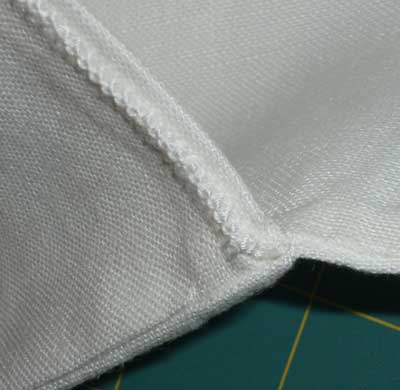
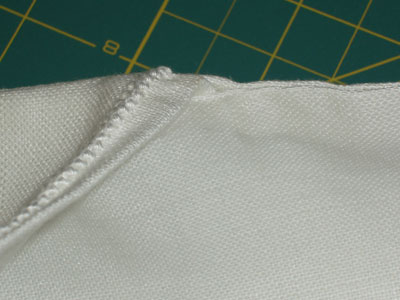
And that’s the seam on the right side of the bag, with the Palestrina stitch.
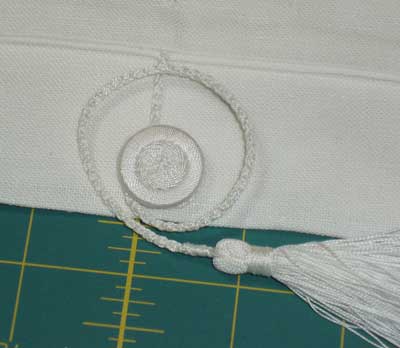
And now you know which button I picked – the mother of pearl one. I just couldn’t see using plastic on this! (Though I liked the stitching on the other button better!)
The finished piece is 10″ wide and 8″ high.
So that was a fun project, in a way, but a little tense, as I wanted it to be “perfect.” It isn’t, though. There are definite flaws, which is always good because: 1. it keeps me realistic, as it’s a bit humbling, and 2. it marks it as handmade by me! I’ve never made anything that’s “flawless”!!!!
But I’m glad it’s finished. Not only am I looking forward to working with color again, but I’m also looking forward to working on something that’s not got a pressured deadline on it. After I rumage around a bit, I’ll let you know what I came up with!
It’s been a pleasure to watch this from start to finish. Thank you for sharing.
It is gorgeous! It’s a clever way to make a pouch.
I understand very well you have a strong wiil to embroiderer with color!
Adorable, So shabby chic. I love it. Looks like it was a lot of work. Great job. Tracey
Beautiful!
I think maybe it’s harder to have something perfect when it’s all white, because the eye isn’t distracted by colour? (a humble theory)
What a beautiful pouch! I think your button choice is good. . .the bold design of the other might have dominated the piece.
Does it close securely?
So pretty.
Christiana
Hi, all!
Thank you for your comments and compliments! I’m glad you like the pouch!
Christiana – the button and cord doesn’t hold it as securely, say, as a snap would, but yes, securely enough. The pouch is usually just kept on a shelf or in a drawer in a sacristy – it doesn’t generally get flung about much, though it may be carried for traveling, at which point, it would be packed with other items. So the twisted cord around the button holds the pouch closed, to keep linens from sliding out, but it isn’t a “tight” close. It seems to be a well-liked method for these types of pouches, and I think it’s attractive (more so than a snap, or velcro! Agh!)
Well done an excellent set of instructions. The photos are particularly useful!
What will go inside?
Thank you for sharing this with us. Definitely one to put on the ‘to do later’ list.
Hi, Laura – Small linens go inside the pouch… you can see a picture of a pouch with the linens here:
Linens Pouch
Your finished piece is very beautiful! Thanks so much for taking us all along with you as the project progressed.
You know, after we are all long gone your beautiful needlework will still be loved and admired by others. It’s a very beautiful legacy you’re leaving, Mary. *hugs* – Jeannine
Lovely, Mary. I think you did a great job. The white work on linen is so beautiful and your hand made cord and button finished it off beautifully.
CA