


Last night, I was enthusiastically starting into the cutwork motif on my whitework sampler. I finished transferring the cutwork design and picking off all the paper and was super-eager to start stitching on it, just to see how it would go. So I started stitching, and to celebrate the occasion, I made a rather bumbling and obvious mistake!
Cutwork is a kind of whitework embroidery where the design is stitched along the edges, usually with little attached bars of sorts between different design elements, and then the background fabric in parts of the design is cut away. Here’s an example from an old post on whitework, where I reviewed the A-Z of Whitework, Book One:
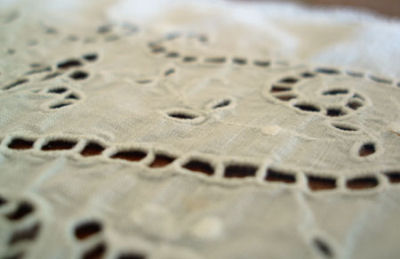
Here, you can see that the outline around the cutwork area and the bars between the outline’s lines are all about the same size, and the cutwork looks kind of “squarish.”
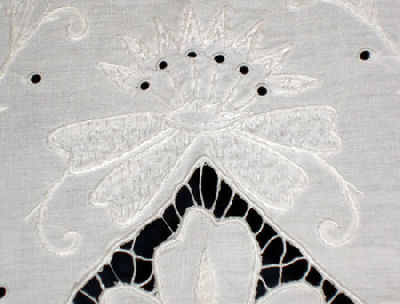
Here, it’s slightly different – the “bars” are not as bar looking, but look more like long web-like strands.
In both examples above, the main elements of the design have been stitched around the edges with overcast stitch, which is simply satin stitch worked in a very narrow line all around the outline. The way it works is this: you have your design. You stitch a running stitch around the area to be cut out. Then, the first thing you stitch are the bars, by the passing the thread back and forth wherever you want the bars, and then either overcasting them or buttonholing them on the return journey. Then, you stitch the edges, either with overcast stitch or buttonhole stitch. I’ll show you up-close how it’s done… eventually!
Well, I was very enthusiastic to get started on my cutwork motif after getting the design down. Funny. After transferring the monogram, I was keen to start on it, to the detriment of finishing the drawn threadwork, which I was eager to start on to the detriment of finishing the Schwalm pomegranate. I can’t keep doing this!
But can you blame me, really? Doesn’t that just look fun?
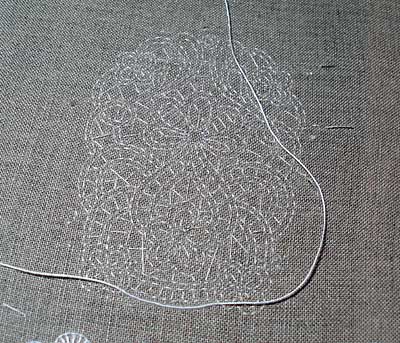
This is the cutwork motif. I like it a LOT. I LOVE IT! If I can do it justice, I will really be thrilled with it. So far, I think it’s my favorite bit on this sampler – but I know it’s also going to be the most tedious bit!
When you realize how much I love the design, can you forgive me for jumping around so sporadically and inconsistently?!
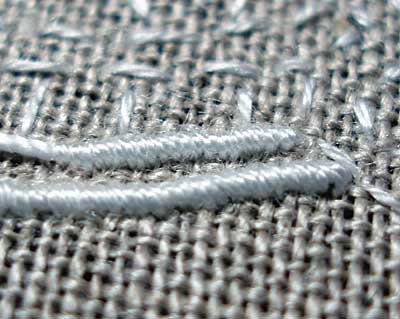
Anyway, my plan with this particular design was to use a cord underneath the overcast stitch along the edges, to make those stitches stand up. I want a bit of “relief” on the design – some height and definition in the outlines. One of the reasons is because of the relative roughness of the fabric. Mostly, you see cutwork worked on high count, firmly woven linen. This is rather not the stuff of cutwork, but it’ll still work…
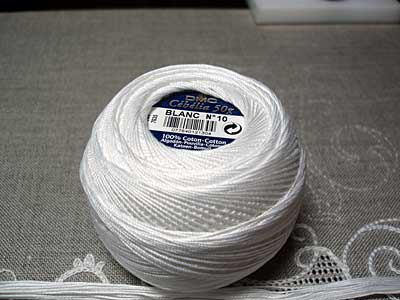
For the “cord” that I’m stitching over, I’m using DMC Cebelia #10.

I began the overcasting with enthusiasm! For the overcast stitching, I’m using #30 coton a broder.
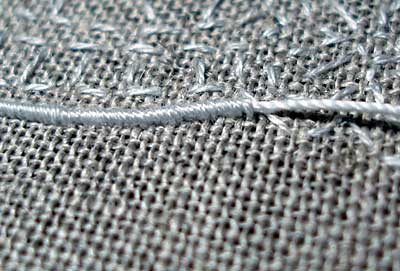
Stitching over the cord really lifts the stitches nicely. I like it so far.
The design has a kind of “double” outline around each cutwork area – that’s one of the reasons I like the design so much. So, here I am, starting back on the double line… this line is the line that directly outlines the cut out area. Stitching along, stitching along… very happy. Liking the whole thing a lot… dum dee doo… having fun….
Suddenly realizing…
?
What?
I’m getting kind of tired of these head-slapping moments.
I complete forgot to the put the bars in. Ugh.
Yes, well, the monogram’s looking pretty good! Maybe I’ll stitch on that tonight. Who needs this cutwork stuff, anyway?!?!
No problem, put the webs in from the other side. You can hook them to the stitching you’ve already done.
Jane
At least you figured it out now, rather than blithely snipping away the “voids” and having the center of the motif pop out in your hand!
I am so pleased you are doing some cutwork Mary as it is high on my list of ‘something – to-try’
It is a lovely design! I am looking forward to seeing more progress, hopefully there won’t be too much reverse stitching.
Susan
oooh this sounds interesting…. i so want to try thise. I cant wait for you to show us how to do it???
The design is really gorgeous. Are you going to start giving us cutwork designs too?! And to see how you stitched over the cord and the info about thread sizes and types is really enjoyable and helpful. Thanks.
I always love the work you do. Sorry you made a mistake, happens to the best of us. It’s still breathtaking and now I want to try it. I don’t have time!
You have not yet come so far. I would rip the couching and start again. I like this kind of mistake cause once I did it, I will not repeat that same mistake. 🙂
The bar are buttonhole bars aren´t they? You forgot about them because they are not in the transferred bastings. The original cutout pattern also calls for wide ribbon laces on those areas, not threads. good luck on the progress!
vince