


Time to finish up this interlude on combining fabric, paper, and embroidery to create little gift boxes using the Silhouette cutting machine and fabric interfacing. Day before yesterday, I reviewed the Silhouette, and yesterday, we looked at the first steps in making these small gift boxes out of paper and fabric. Today, we’ll finish those up, add a touch of embroidery, and construct them into boxes.
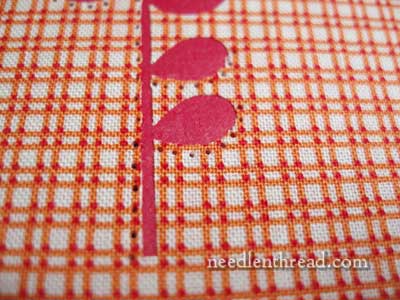
When we left off yesterday, I had adhered the fabric to the card stock by ironing them together. Now, it’s time to pierce the box wherever you want to stitch on it. There are a couple ways to do this – if you have a paper-piercing tool, that’s an easy way. I used the #3 sized tool, as the fabric and paper together are pretty thick and it took the larger tool to get the right sized hole. If you don’t have a paper-piercing tool, no biggie. Take a crewel needle that will make the size of holes you need (a #1 or #3 crewel needle would probably work well), and stick the eye in a cork. It works! If you have a problem with the needle staying in the cork, add some glue and let it dry.
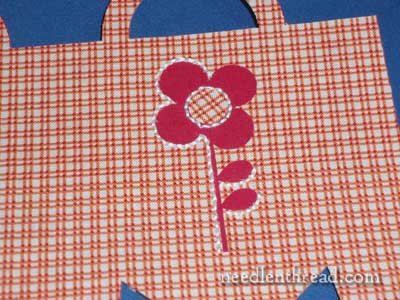
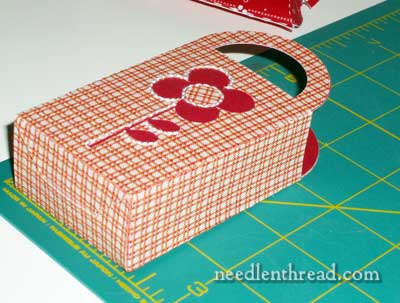
Notice that I haven’t folded and assembled the box yet. It’s really essential to do any piercing and stitching while the box is still flat and unfolded. I used three strands of white floss and a simple backstitch, just to accent the flower a bit. You can do anything, though! The easiest way, I find, to make a pattern (say you want to embroider someone’s name on the box) is to use graph paper, write or draw what you want to stitch, and then lay the graph paper over the area where you want your embroidery to be. Pierce the paper along the lines of your design, and to make sure things work out right for the stitching, start by piercing all corners and turning points first, then go back and pierce between them, spacing your holes evenly. This will assure that your stitching starts and stops at the corners correctly.
I’d advise piercing the fabric a bit further from the edge. I pierced right on the edge, and in spots, this pushed the fabric into little shards. They aren’t really noticeable from far away, but you can eliminate the chance by piercing a little farther in from the edge on the fabric, or, if you want to stitch right on the edge, then pierce just inside the edge on the paper, which is what I did around the center circle in the flower (lower part of the photo above).
When you’ve finished your stitching, it’s time to fold the box and get it ready for assembly. It’s very important to fold on all the scored lines, before gluing anything. You can see here that the fabric is scored for folding. The machine did that while it cut. It makes for a very clean, sharp fold on the corner. But the fabric / paper / interfacing combo is a bit thicker – a lot thicker! – than regular paper, so it’s important to really get the fold in well. I folded on the score lines, then took the barrel of a pen and really mashed the fold, to get the corner sharp.
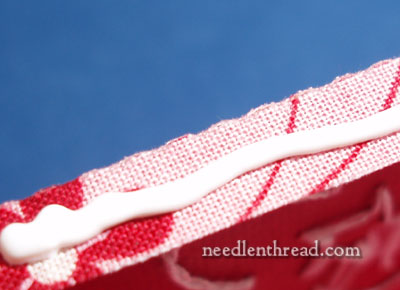
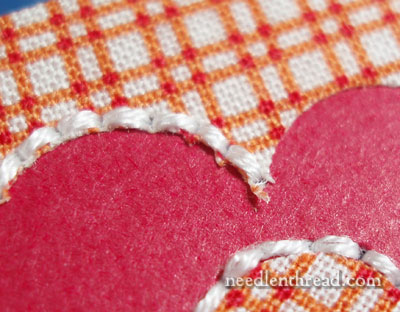
Once the folds are all in on the score lines, you’re ready to glue. On this bag-shaped box, there’s only one edge to glue.
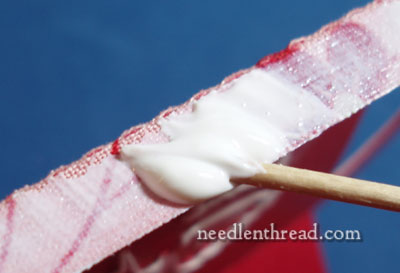
I used a quick-drying permanent bond craft glue, squeezed on a line of it, then used a toothpick to smear it into a thorough coating that wasn’t too thick. If too thick, you risk the glue oozing on the seams and on the inside of the box. Just a good smear job is all it takes!
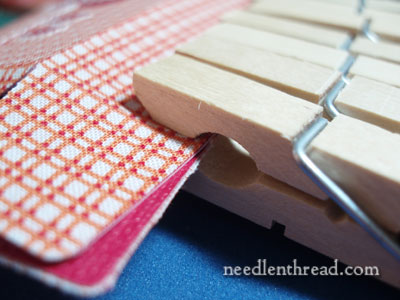
Then, bring out the handy-dandy, all-purpose, gotta-love-’em clothes pins. They are the Universal Tool for me. I use them for all kinds of holding jobs! I lined them up close together, pinching the seam, and left the box to dry for several minutes – probably about 10 or so, because I got caught up in doing other things.
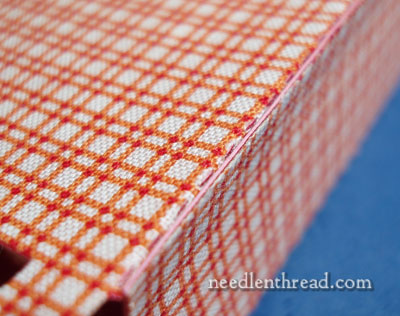
With the clothes pins removed, you can now re-fold your box into its designed shape. There’s the seam, where the box is glued. You can see the paper backing on the fabric, too. It’s a nice neat edge.
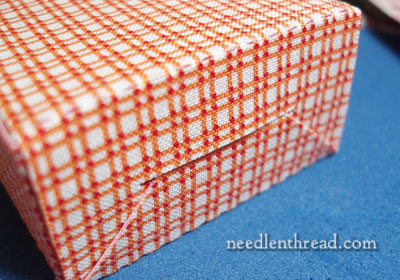
The last step – folding the bottom flaps in and tucking in the tab. This box is super-dee-duperly well designed. The tab fits perfectly, and the whole base of the box holds together without any glue.
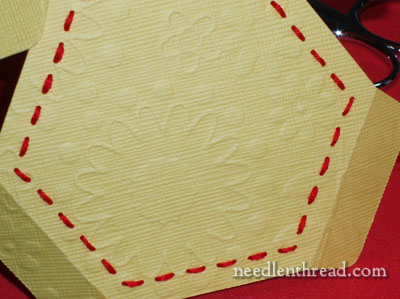
Another box that the machine managed was this hexagon with embossed paper and some top stitching.
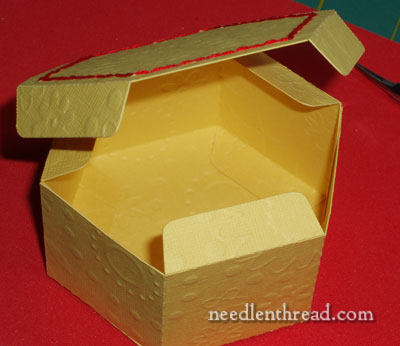
The embossed paper cut really well, and this makes a cute little box! Perfect for a chocolate truffle. Or two…
Or three…
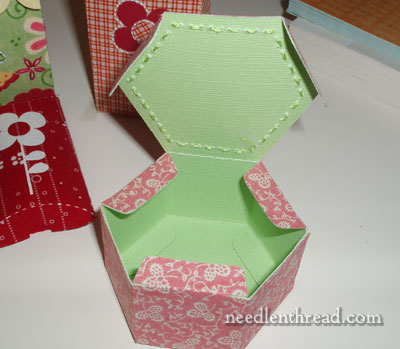
I also made a fabric & paper version of the same hexagon box, and it came out fine. It’s very sturdy.
And just in case a little size perspective is needed, the bag-box is about 3″ high by 1″ deep, not counting the handles. They’re wee things and cute!
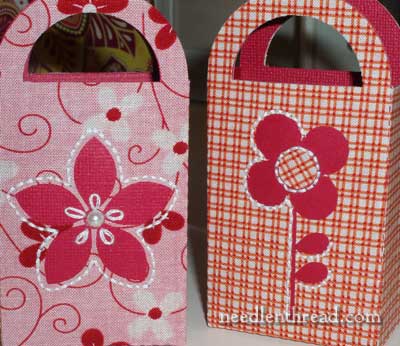
These two are my faves.
Those are my box-making adventures with the Silhouette! It was a lot of fun, and I’m glad to share them with you! For those who aren’t quite into this type of crafty endeavor, don’t worry – we’re back to regular embroidery tomorrow!
See you then!
It seems to be so easy to make all those lovely boxes.
Cute boxes, Mary! I went back and looked at some other reviews/giveaways, and one of them mentioned that if you had a question on whether it was OK to cut a certain material, you could send them a sample and they would test it. It’s nice that they do that, so you don’t end up ruining your machine trying it.
I liked the way you showed us how to construct the boxes and yes I agree with what you said yesterday… Tools merely help and are not essential. Thanks Mary.
This was fun to see how they come together.
The boxes turned out really – really cute.
My favorites are the last too as well, they are so cheerful.
I can imagine them with some pretty greenery as room decor in the right place.
This seems like a very good company, they have put a lot of thought into the machine to make the final product a success.
Like including the score lines … I was wondering how the 3 layer thickness would work to fold well … looks great!
Thanks for the review Mary, it was fun.
The stitching added a great touch to these boxes. It took them to another level and gave them a “take another look”. Great tip about the wine cork and needle. When you mentioned using the crewel needle my hands started hurting. Then, I read the tip…my hands thank you!
Deb