


If you’re doing any weekend embroidery, you might want to indulge in some Stitch Fun while you’re at it!
Today’s tutorial for a scalloped, beaded buttonhole edging (version 1) came about because a reader requested a tutorial. She was following directions on a kit, and the directions stated:
Work a loose buttonhole in the backstitches with beads for scallops.
There were no further instructions and no diagrams, so she was a little stumped. Looking at the photo she sent of the finished piece that came with the kit, today’s tutorial for beaded buttonhole edging is what I gather the designer meant.
This is a very simple scalloped beaded buttonhole edging. It can be used to add a little sparkle and zing to decorated edges on finished embroidery projects like needle books, pin cushions, ornaments, and the like.
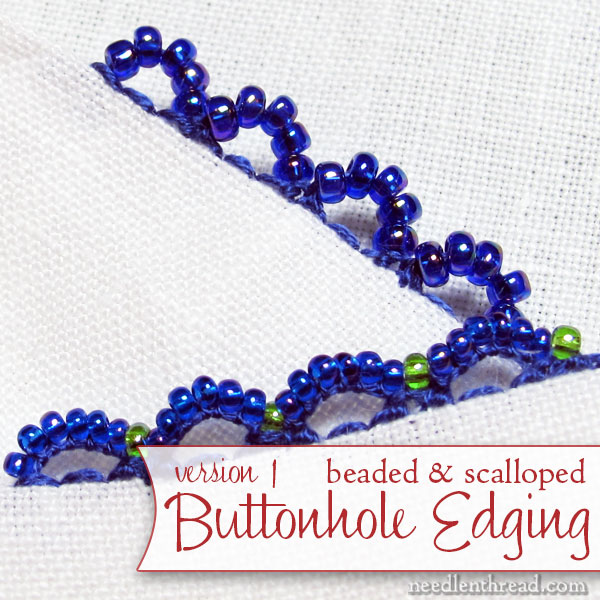
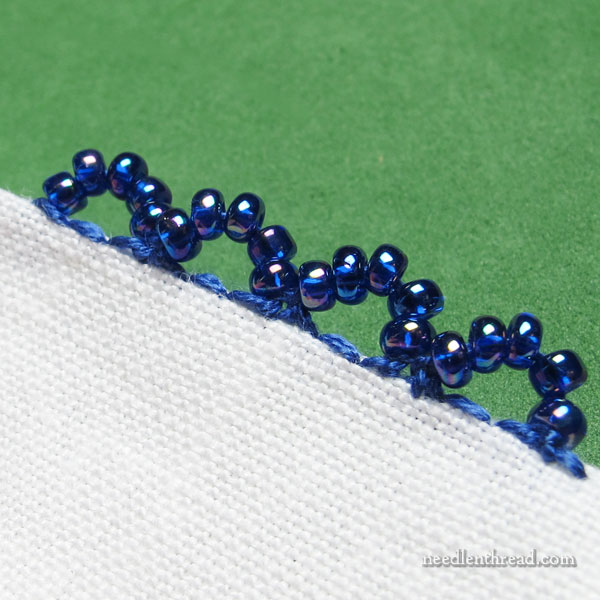
The scalloped and beaded buttonhole edging we’re going to work today is the top one in the photo above, in the back.
I’m using three strands of embroidery floss and a regular #7 crewel needle for this whole tutorial.
The beads themselves are rather large – about a size 8/0, which is what the design originally called for. I find it more difficult to work scallops like this with larger beads, because the larger the bead, the more difficult it is to make a smooth scallop with them. Smaller beads (11/0 or, better yet, 15/0) work better.
I’m working on a scrap of embroidery linen called Alba Maxima, which is a high count linen with a full weave.
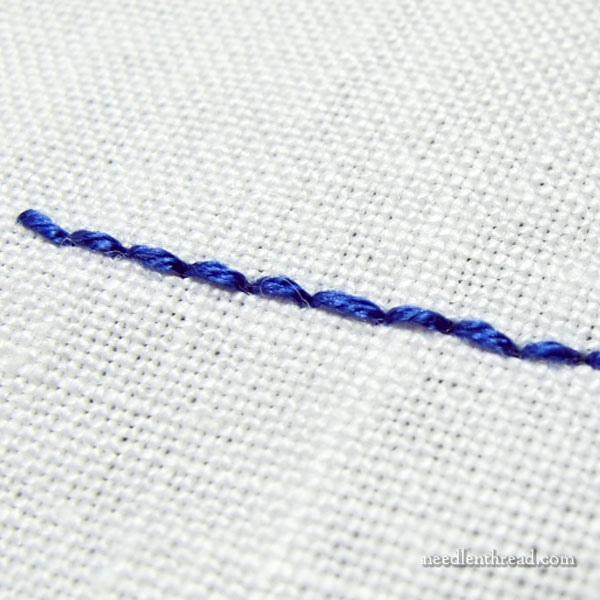
Start with a backstitch, which marks the edge of whatever item you’re making. My backstitches are approximately 1/8″ long.
If you’re familiar with my Lavender Honey & Other Little Things e-book, you’ll recognize this as the way I edge most of the little things, to make a simple, neat, finished turned edge. In fact, if you’re making any of the Little Things in that book, you can finish the edges with beaded buttonhole scallops like this after whipping the edges of both sides together, though I’d definitely advise using 15/0 seed beads, since the projects are so small.
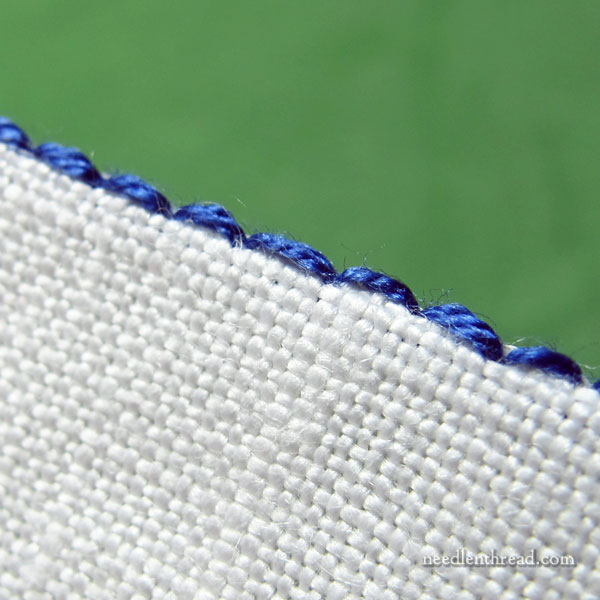
Finger press along the backstitch, to create the edge of the piece.
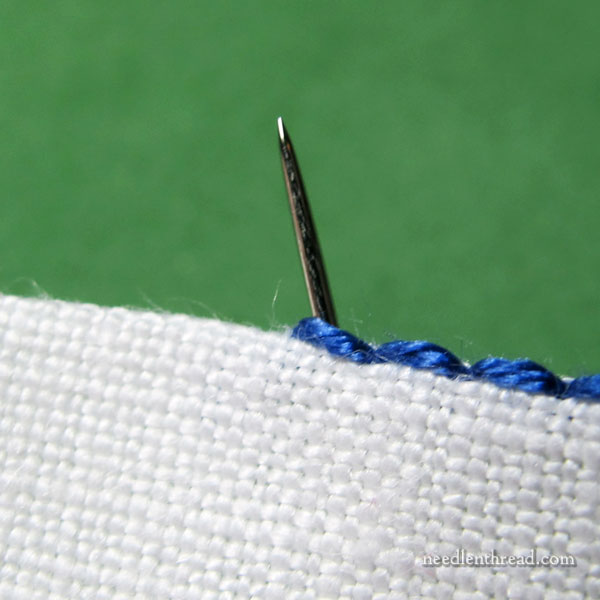
Coming up inside the fabric, underneath the turn-over and behind the first backstitch (on a square item, I’d start in a corner), bring your needle and thread to the front.
If you’ve already assembled an ornament or whatnot, you’re going to bring your needle and thread into the ornament somewhere along the edge, and out behind the first backstitch where you want to start your scallops, catching the thread inside the seam.
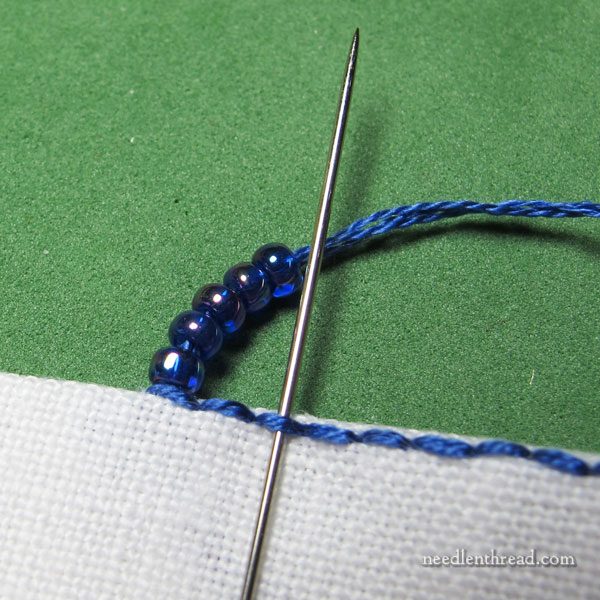
Now, depending on how large you want scallop, pick up an adequate number of beads to fill the thread to the end of the scallop.
In this case, to make the scallop, I’m skipping one backstitch, so I need enough beads to fill the scallop that forms between the beginning of the thread behind the first backstitch where I came up, and the end of the scallop at the third backstitch down the line. In this case, I picked up five beads.
Then, take your needle underneath the backstitch where you’ll scallop will end (without picking up any fabric), and take it over the working thread onto which the beads are strung, as shown in the photo above.

Pull the thread through and tighten it a little, but not too much – just enough to give you a nice scallop. If you pull too tightly, the scallop and beads will buckle.
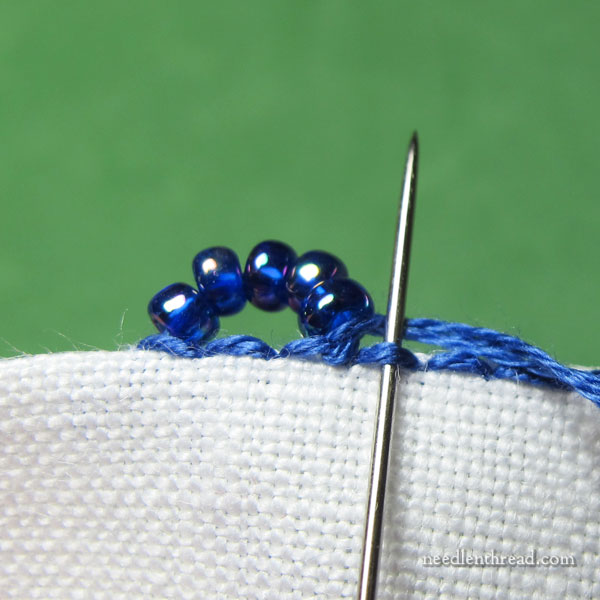
Now, because these beads are large, I found that a spacer stitch between the scallops worked better than trying to work another scallop right next to the first one.
So, under the very next backstitch after the scallop, work one buttonhole stitch without a bead.
Take the needle under the backstitch and out over the working thread and pull through, as shown in the photo above.
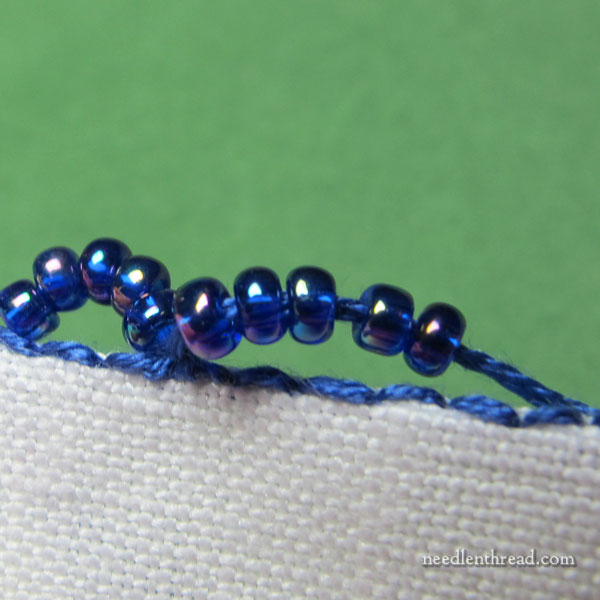
Then pick up five more beads for the next scallop…
…and, skipping a backstitch, pass the needle under the next backstitch and out over the working thread.
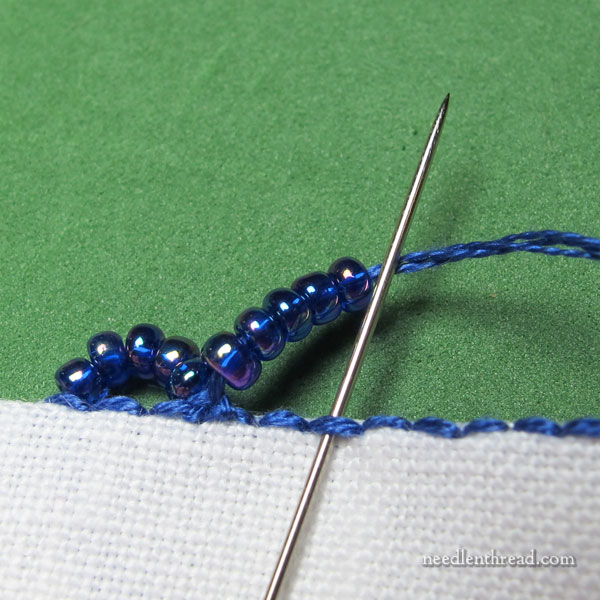
Continue in this manner to the end of your backstitch line.
If you find the thread too limp to keep the shape of the scallops – if you’d like to work with something a little stiffer – you can run your floss through beeswax to stiffen it up and give it a little more strength. This might help stabilize the shape of the scallops, and it might be easier to control the tension on the scallops as you progress.
Also, when working a scalloped edging like this, it wouldn’t hurt to look ahead and see if you need to adjust any spacing as you continue down the line, so that you don’t end up with a huge scallop, or a very small scallop, at the end of your edging.
So there you have it! A cute and simple way to add a little beaded, scalloped edging to your embroidery projects!
Next week, we’ll look at another version of a scalloped and beaded buttonhole edging that is a little more stable, that uses smaller beads, and creates an even cleaner finished edge.
If you’re looking for more embroidery stitch tutorials or ideas for unusual stitches to play with, you might check out the Stitch Fun! Index here on Needle ‘n Thread, where you’ll find a whole list of stitches, from simple to challenging, to add to your embroidery projects. If you’d like some video instruction on embroidery stitches, you’ll find over 75 embroidery stitch videos here, that will help you learn basic stitches and beyond! If you’re looking for instruction on a particular stitch and you know its name, feel free to check out my A-Z Stitch Dictionary, which links up to video and photo tutorials on Needle ‘n Thread.
Your timing is perfect! I am in the process of finishing a little embroidery as an ornament and was thinking of including beads, it will be fun to do it a bit differently than the usual whip stitch one stitch and bead the next. Thanks so much 🙂
Dear Mary
What a lovely edging and so unusual this definitely would look great on the Little Things it’s a shame I’ve finished them as I would use this beaded technique on them as they would look so decorative. I do like the Stitch Fun series as it is well, such fun. Thanks for showing us another great stitch tutorial and for sharing with us your techniques, I hope you have a great weekend. I’m sending you a personal email as I am so excited about something I ordered and received this morning look out for the photos.
Regards Anita Simmance
Hi Mary: – I know the difference between Beaded Backstitch and Beaded Buttonhole – your labeling says you are demonstrating beaded buttonhole, but the demo you gave is for beaded backstitch. Could you show how to do the buttonhole version as well? LOL!
I think the buttonhole one is even prettier and hope to use it on something soon!
Mary, this looks like a lot of fun! Thank you for sharing your ideas with us. Can’t wait to see version 2. Have a nice weekend, Jessica
This would make a gorgeous edge for a collar. Thank you for the wonderful explanation.
G’day Mary,
That’s a friendly little bumpity caterpillar if ever I saw one, even though it’s got the blues.
These edging would make practical and pretty edges to jug covers and table throw overs, food coverings too.
Thank you, love them.
Cheers, Kath
Cute! I really like this. But I do think it would look a bit better if worked with tiny seed beads, so I look forward to your Version 2 next week.
Sarah
I have been needing to “use up” some of the beads I have been accumulating. This looks like a GREAT idea. Will try it.
This is why I love Neednthread.com cause you do things like this for your readers with so much detail,your the best. Mary where can you buy embroidery linen like your using here?
Hi, Tempest – thanks for your note! You can find this linen (called Alba Maxima) through Hedgehog Handworks (www.hedgehoghandworks.com). The pieces are sold by quarter, half, or full yard, and the quarters are fat quarters, which makes a nice sized piece.
That’s a great stitch! Thanks
So cool! This is such a lovely edging. Thank you.
I always like your stitch fun postings. Clear directions, clear pictures — and always the encouragement to go out there and use the stitch. Thanks, Mary.
Just what I was looking for to finnish off my small needle case.Your stitch tutorials are excellent, thank you for all the time you give to make us stitchers so grateful.Kaye