


Good morning, folks!
Today, we’re going to add the leaves to the Garden Swirl project. If you’re just joining in on this stitch-along adventure, you can find the previous installments of the stitch-along here in the Garden Swirl project index.
If you are a member of the Needle ‘n Thread Community on Patreon, you received today’s information already, in the PDF that was posted last Friday. I can’t cover as much in a blog post as I can in a PDF, so usually the PDFs on Patreon have more information in them and they are a little farther ahead on the project. So don’t worry if you don’t see a post on Patreon today – you already have this information!
The individual leaves embroidered here and there on the vine in Garden Swirl are embroidered with a somewhat wonky fly stitch, with a modified starting stitch so that the leaf comes to a nice point with a bit of a curve to it.
I like this off-kilter start on fly stitch leaves, because it gives them a bit of personality and makes them look not-so-rigid.
If you’re not familiar with the fly stitch (worked vertically) you can find a tutorial for it here.
Remember to read through the instructions completely before you start.
On the finished sample, I used two strands of the lightest green (DMC 16) for the leaves and their stems.
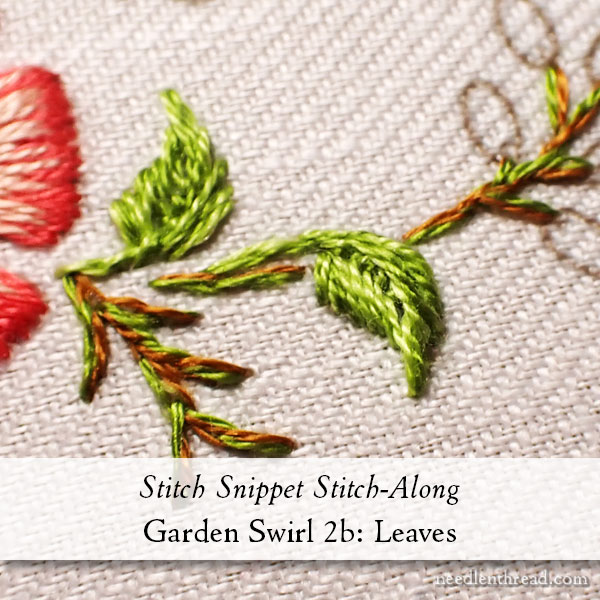
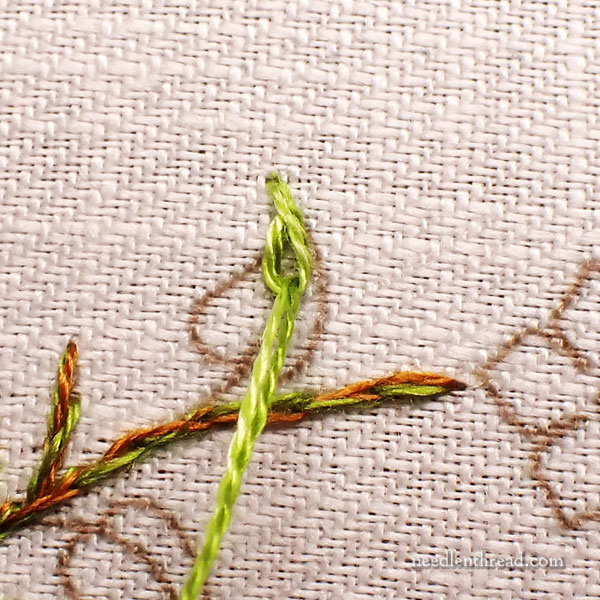
The first stitch on the leaf begins with the thread coming to the front of the fabric at the tip of the leave on the design line.
Instead of making a straight stitch to start, or instead of starting with a chain stitch, we’re going to start with something more akin to a very slightly twisted chain stitch, by taking the needle down into the fabric noticeably past the tip of the leaf where the thread emerged. Go down into the fabric about 1/8″ past the tip pf the leaf.
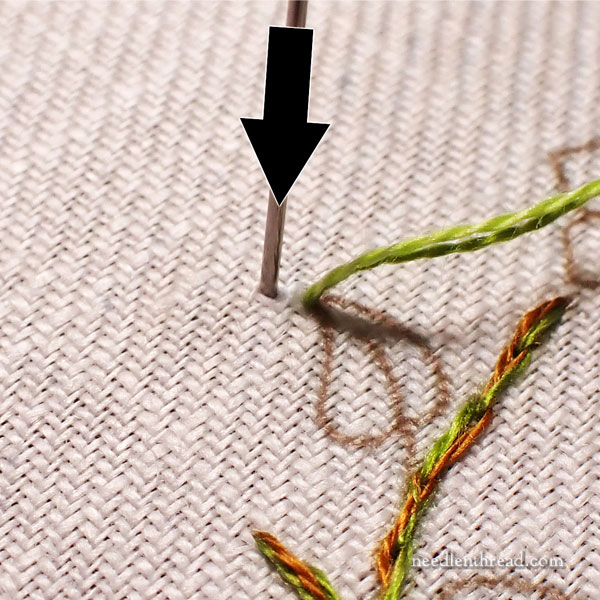
Pull the thread through…
…but leave a loop of working thread on the front of the fabric, as shown above.
(Note: because I know some people will ask about this, yes, there are two colors of green in the needle here. On some samples, I worked some of the leaves with one strand of medium green and one strand of light green in the needle at once time. For the final sample, I used only the lightest green on the leaves. I liked it better. The two combined greens made the leaves look muddy, while the completely bright leaves brightened the entire project up a bit more.)
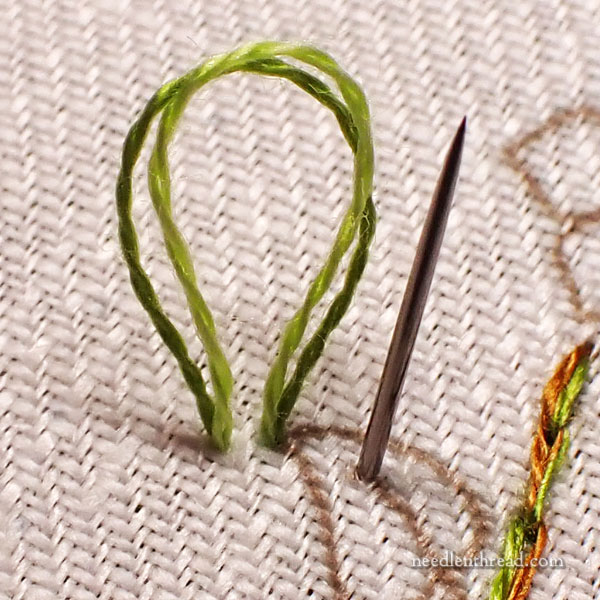
Bring your needle up into the fabric on the design line for the vein of the leaf and pass through the loop, as shown above. This is just like making any fly stitch or chain stitch at this point.
Pull the needle and thread through, pulling towards you (down towards the stem of the leaf), to tighten up the loop.
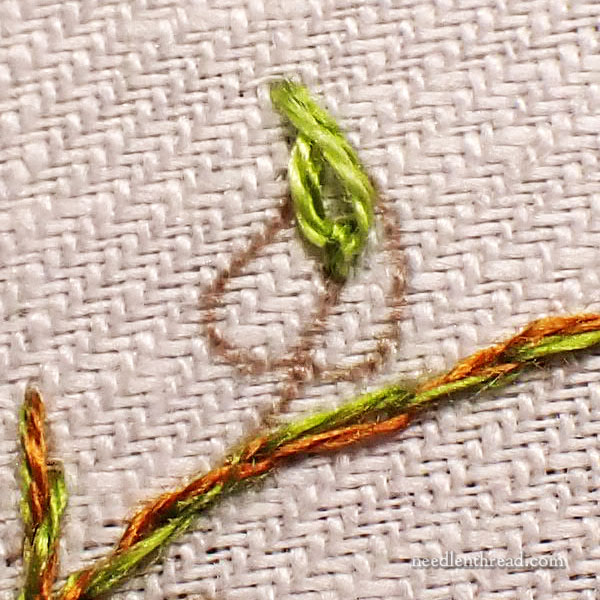
Take the needle and thread to the back of the fabric just past the end of the loop, on the design line for the central vein of the leaf, making the small anchor stitch that holds the loop of the stitch in place, as shown above.
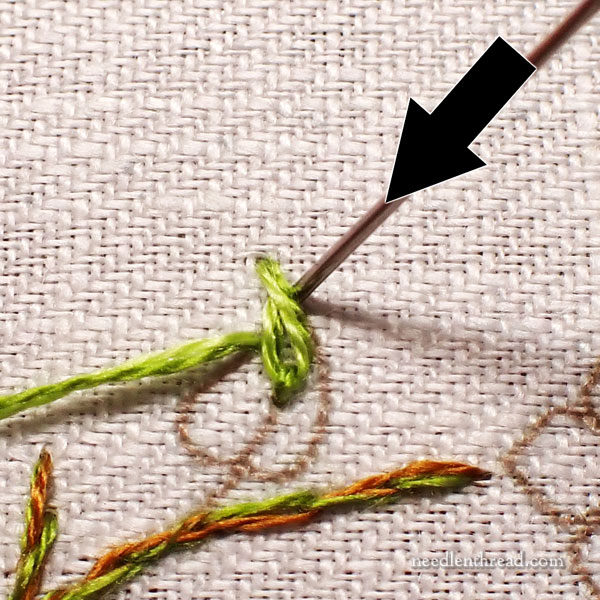
For the next fly stitch, bring the needle and thread to the front of the fabric on the left side of the leaf and take it to the back of the fabric on the right side of the leaf, following the “curve” of the leaf. The beginning of this stitch will likely be lower on the left and higher on the right, depending on the direction that the leaf is bending.
Work the rest of the stitch as before, bringing the needle up on the vein line just below the last anchor stitch (you can share the hole that ended the previous little anchor stitch) and pull through and downwards, then anchor the stitch on the vein line in the middle of the leaf.
Continue working the leaf in this manner, all the way down, until the leaf is full.
As you stitch, try to keep your threads from twisting up too much. You want the stitches to look smooth and to fill the leaf space.
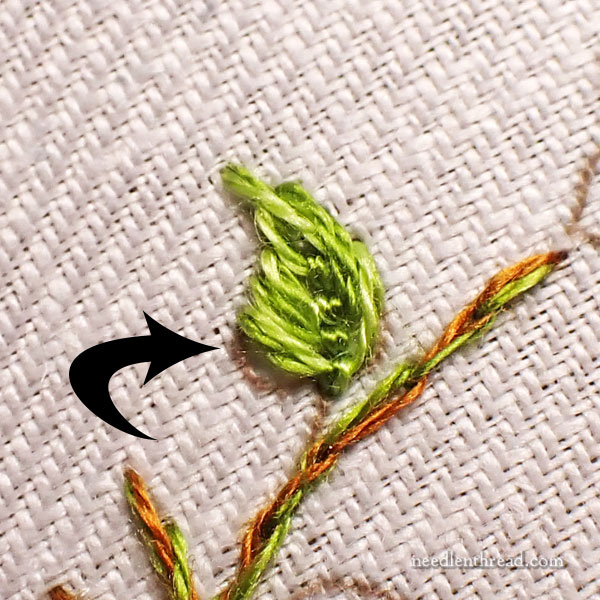
When you get to the bottom of the leaf, if you still have space on the lower edges (which is the case in the leaf above, where the arrow is pointing), but you don’t have enough room for another full fly stitch, just work a straight stitch there to fill the space.
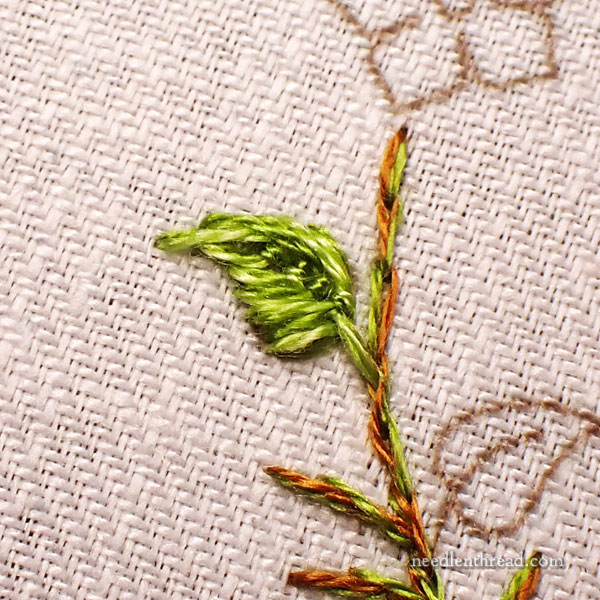
For short stems that attach the leaf to the fine, you can just use a simple straight stitch. If the stem is a little longer, use the same split stitch method that you used on the vine, to work the leaf’s stem.
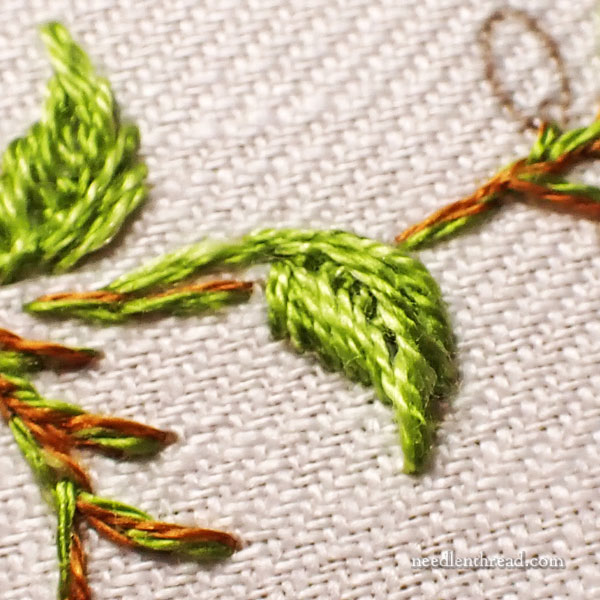
All the leaves on the project are worked in this method.
Once you get the hang of this twisted or off-set fly stitch approach, the leaves will work up very quickly!
Coming Up
In the next installment of Garden Swirl, which will be next week, we’ll add more flowers to the design.
Remember that the project is meant to be worked at your own pace. You can come back to the individual lessons as you need to.
We will have more kits and decorative boxes for this project soon! I’ll announce it here on the website when they’re available again.
Once again, if you’re looking for all the lessons in this stitch-along, you’ll find them listed here in the Garden Swirl Project Index.

Leave A Comment