


Schedule Reminder: The Studio and online shop are closed from Dec 3 through December 18, and I have limited access to email. If you email and don’t hear back from me, that’s why. Please leave all non-urgent communications until after December 18th. Thanks! Blog posts will continue through Christmas as planned, though, and there are a few other scheduled posts for you, too!
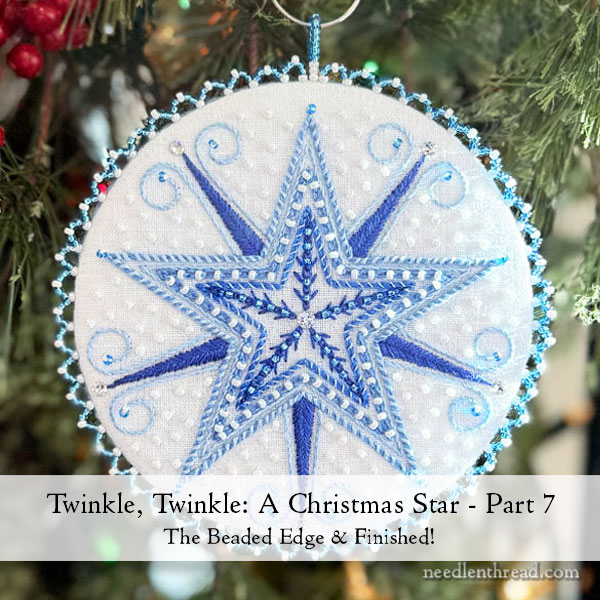
Welcome to the final installment of Twinkle, Twinkle, our Christmas ornament stitch-along for 2025!
If you’re just joining in, you can find all the previous lessons – including materials lists and embroidery design – available here in the Twinkle, Twinkle project index.
If you are a member of the Needle ‘n Thread Community on Patreon, you have already received all this information! Members of the “Avid Stitcher” level have also received access to thorough video tutorials for every aspect of this project. If you’re not a member on Patreon and you would like to access any of the videos, you will find them listed in this Collection on the membership page, where you can purchase access to individual videos.
Let’s get started so we can Finish!!
In our last installment, we assembled the ornament and glues the crystals into place.
Today, let’s look at working the beaded edge.
You’ll need the #8 crewel needle, white all-purpose sewing thread, beads, and, if you want, a ruler and a pencil, just in case you need to measure and mark anything for your own peace of mind.
Please Note: It’s important to read the instructions before you begin, so you understand the method. Please don’t rely solely on the diagrams. There is instruction in the text as well, so it will help you immensely if you read the text carefully.
Sometime, I have to read instructions a few times. I try to imagine working through whatever method is being taught, while I read the instructions. That way, I make sure that the steps make sense to me before I start. Then, when I start, I go step by step, re-reading and referring to diagrams or photos with each movement of the process, until I’m sure I have it down. I guess my point is really just to read the instructions, as well as referring to the diagrams.
Starting the Thread
Cut a long length of the sewing thread (I’d say about 36″) and fold it in half. Thread the cut ends into the needle, so that you have, on the opposite end, a “loop” formed by the fold of the thread.
I start my thread by coming up into the fabric directly above one of the tips of the star, right in the center edge of the linen part of the ornament. Just pick up a tiny bit of fabric (maybe two threads) and pull through gently, leaving the tail out so that you have a loop of thread sticking out of the fabric. Then pass into that loop and pull your thread firmly to tighten.
You’re now ready to start the beading by creating the hanging loop.
The Hanging Loop
Make sure your needle and thread are coming up dead center above the point of the star, in the center of the edge of the ornament.
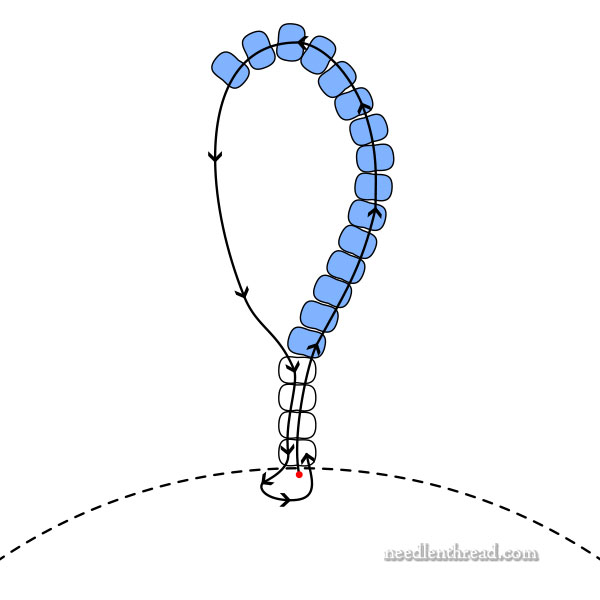
Referring to the diagram above, string 4 white beads and 15 blue beads onto the needle and thread and down to the fabric.
Take the needle and thread back through the 4 white beads only, and down into the fabric, bring the needle out towards the felt edge directly behind the hanging loop. You’ll only be picking up the tiniest bit of fabric – maybe 2 or 3 threads in the linen.
Then, turn your needle around and head back up through ALL the beads and out again into the fabric. As you bead the edge, you’ll always work a second pass through each element.
Once you pass through the hanging loop a second time, go into the fabric and work another tiny stitch behind the hanging loop, to secure the thread and the loop, pulling firmly but not too tightly to distort the loop.
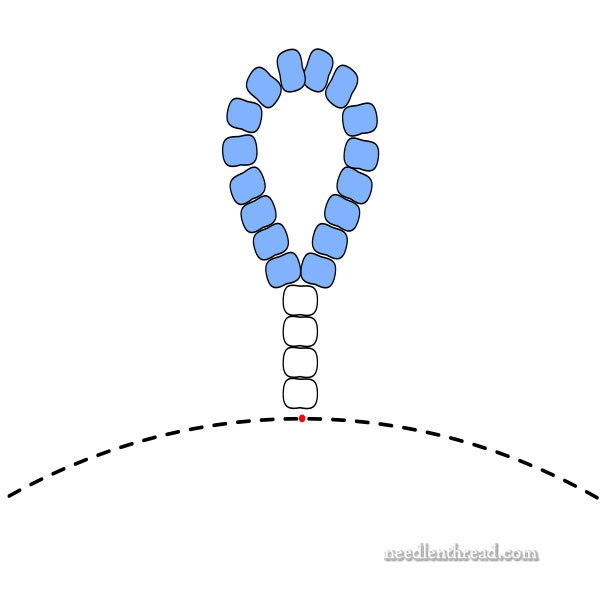
Use your fingers to “work” the loop, so that it looks natural, rounded, and tidy.
Now you’re ready to start beading the scalloped edge.
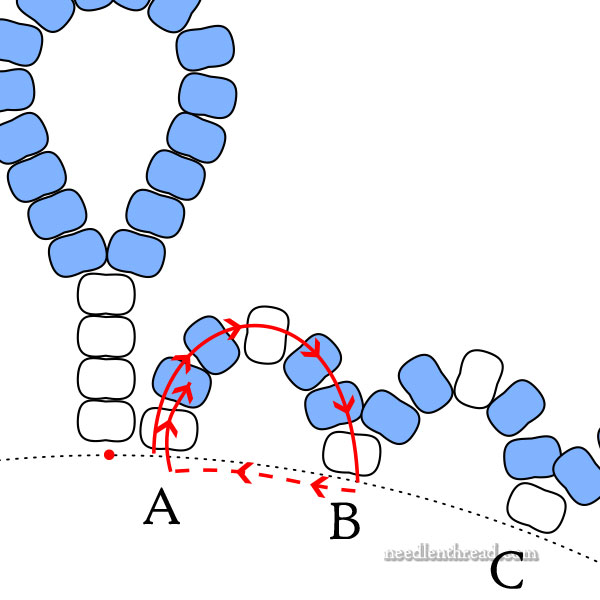
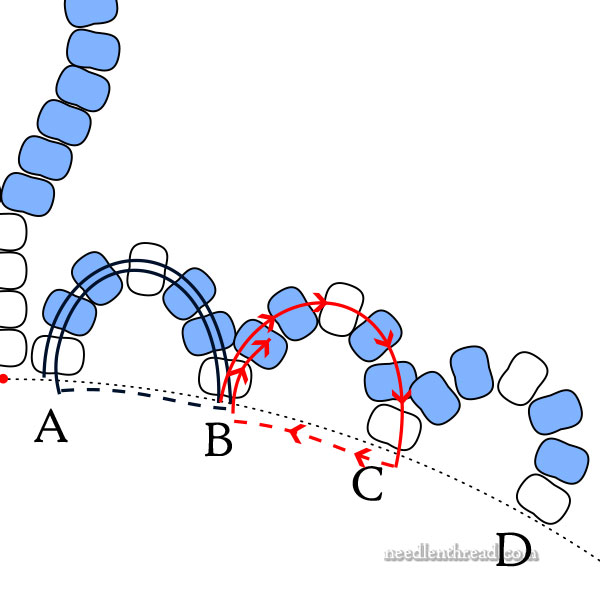
Come up in the fabric to the right or left of the hanging loop (it doesn’t really matter what direction you stitch around the ornament – I’ve done it in both directions multiple times). You’re coming up at A in the diagram above.
You want to be right next to the base of the hanging loop, so that a white bead can sit right next to the white bead at the base of the loop. These beads should sit on the fabric like a donut on a plate (as opposed to a tire on a road, like the other beads in this piece).
For the first scallop only, thread 7 beads onto your needle and thread in this order: 1 white, 2 blue, 1 white, 2 blue, 1 white.
Move down the edge of the ornament 1/4″ away from where you began the scallop. Each scallop should work out to approximately 1/4″ wide at the base, more or less, by tiny increments. You’ll get the “feel” of the stitch length, once you work a couple scallops and see how they round out when you adjust them after stitching.
You might have to take out a scallop now and then, if the stitch from A-B is too close or two far apart. That’s part of the process, until you get the hang of the stitch length.
Pass into the linen on the edge at B, and point your needle (which is under the fabric) back towards A. Come out in the fabric behind the bead at A if possible. If you can’t quite get the needle out behind the white bead at A, don’t fret. Just bring it out as close to A – front, back, or side – as possible.
Pass back through the 7 beads, bring the needle out into the fabric at the end of the scallop, pointing the tip of the needle towards the back edge where the felt is. Pick up just the tiniest bit of fabric (2 or 3 threads of linen).
Use your fingers to “work” the scallop, to manipulate the beads and thread so that it looks like a nice little scallop.
Now, take your needle and thread up into the last white bead of that scallop.
Pick up the following 6 beads in this order: 2 blue, 1 white, 2 blue, 1 white. (You’re sharing the white bead at the end of A-B.)
With these beads on your thread, move forward 1/4″ along the edge, pass into the fabric, and out again behind the white bead at B.
Take your needle up into the white bead and the rest of the beads in this scallop (B-C), and then out again behind C, picking up a tiny bit of fabric in the direction of the felt.
Work the scallop with your fingers to get it to look nice, and then proceed with the next scallop (C-D) in the same manner.
Do this all the way around the ornament, until you arrive back at the hanging loop.
Be aware as you approach the hanging loop of the spacing! You may have to “compensate” for space, by adjusting the last few scallops to make sure they fit well.
And that, my friends, is The End!
I hope you enjoyed this project and learned a lot! And I hope you love your new Christmas ornament!
Coming Up
I’ve got a few little bits coming up for you as we approach Christmas – and of course, a Christmas puzzle for you, too!
We’ve also been working ahead on upcoming plans for 2026. I think it will be a good year, and I can’t wait to share our ideas and new projects with you in January.
See you next week!
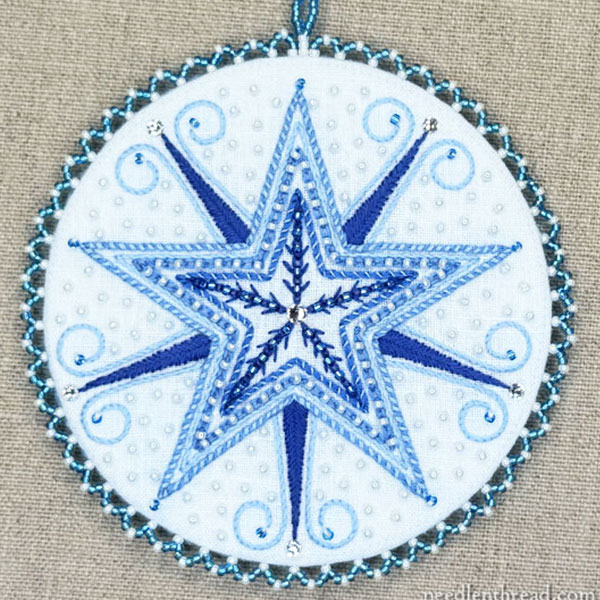
This is such a beautiful design. From a distance the star is prominent and the light sparkle of the beads is just the right complement. From up close, the curves on each side of the star points become more visible.
I thought I was going to be clever and premarked my scallop placement for consistency. But… I marked a slightly wide 1/4″ and they all ended up a little too far apart, so my scallops turned out to be a bit flat. On the other hand, they were consistently too flat, so from a distance it didn’t look bad at all! One error is a mistake; a whole series of consistent errors is a design choice. 😉
I had another hiccup. Somehow my matt board inner circle was about 1/8″ larger than the outer circle of the design, and the outer design line still showed when I put the ornament together! Yikes! I tried using some sandpaper to gently make the board smaller, but it was still too big when I put everything together. So I stitched a Palestrina stitch along that circle in one of the medium blues, and it hid the line and framed the ornament beautifully and looked like it was planned. Yay! (Of course, it is a teeny bit challenging to start and stop threads cleanly when the ornament is already constructed, but “where there’s a will there’s a way.”)