


My “home project” that I’ve written about here and here over the past many weeks is finished, except for the hem. The hem is almost finished, and hopefully, by the time you read this, it will be completely finished.
I haven’t taken as many photos as I normally would since I’m working on this at home. But we’ve done this type of work before here on Needle ‘n Thread, so I can refer you to previous tutorials, if you want to do the same thing on any of your own projects!
The project I’m working on is Arcadian Peony, a kit from Avlea Folk Embroidery that you can find available here in the shop.
Like I said, I’m hoping that by the time you read this, I will have completed this small runner, hem and all. If all goes as planned, I’ll be working another one of these kits at home – specifically, Clara’s Garden, which I’d like to have finished by Easter. Well… we shall see!
To finish the runner, I’m hem stitching it, but I’ve decided to do a double turned hem (I don’t want any raw edges visible on either side of this piece), and I’m withdrawing 2 threads from the fabric to make a more distinctive, visible line of hem stitching.
Hem Stitching Tutorial
In this stitch-along on Needle ‘n Thread from 2023, called Sweet Marguerite, we worked a decorative hem stitch that’s not too different from what I’m doing here.
On that project, though, the hem stitch has an additional decorative touch, with a thread running through the center of the “bars” left behind after withdrawing the thread.
I’m not doing that on this piece. I’m just using the hem stitch on both sides of the withdrawn line, to bunch together small bundles of three threads, which results in larger holes.
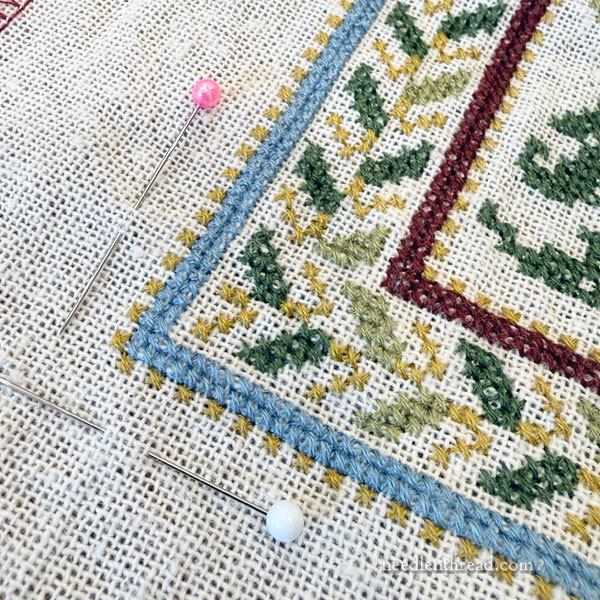
The first thing I did was mark where I was going to withdraw the threads, counting ten threads out on each side of the finished embroidery on Arcadian Peony. I used pins to mark the boundary where I wanted to withdraw the threads.
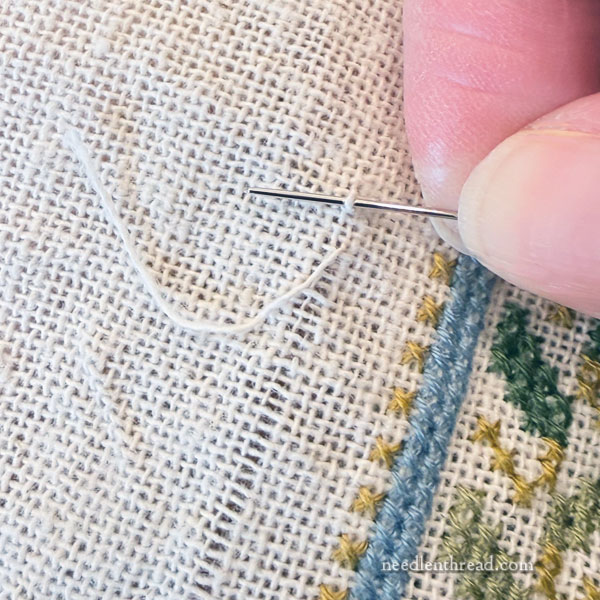
Then, I snipped the threads I was planning to withdraw, and I used my tapestry needle to ease out the the threads on all four sides of the runner.
Later, I realized that I didn’t want the threads completely withdrawn to the edges, so I went back and re-wove threads at the very edges of the design. When I post photos of the finished project, I’ll show you what I mean – if I remembered to take those particular photos!
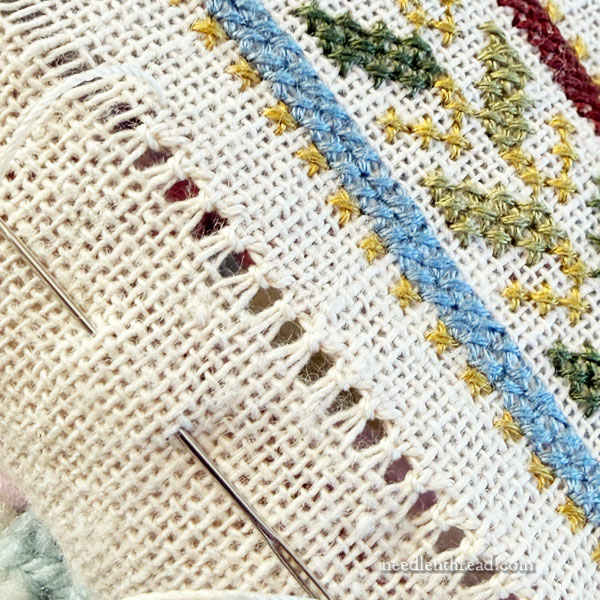
Then, I worked the purely decorative side of the hemstitch, working along the line of the withdrawn thread line closest to the embroidery. I say purely decorative, because this part of the stitching only serves to “decorate” the hemstitch line (by bundling one side of the threads). It doesn’t actually serve any hemming purpose.
We talked about this concept in the Sweet Marguerite stitch-along, if you want to check out the tutorials for that project, which I linked to above.
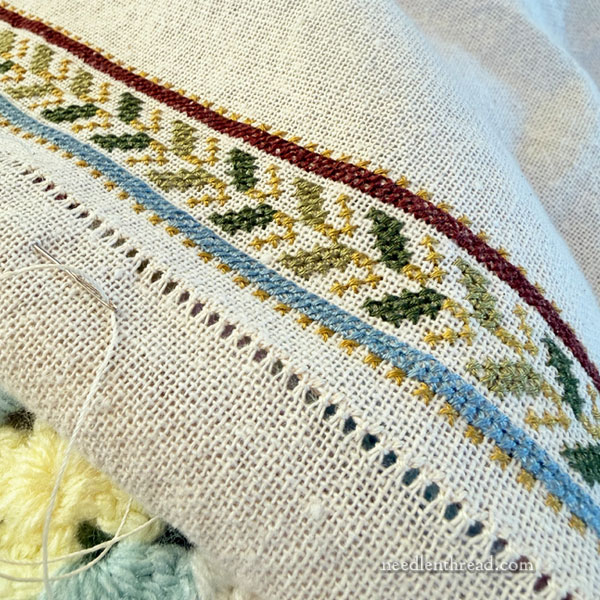
The nice part about this portion of the work is that it trucks along quite quickly, it’s easy to get into a rhythm of stitching, and it doesn’t require any close detail vision – at least, not with this fabric.
This part of the hemstitch worked up really fast!
I’ll show you the finished piece (and close-ups of the hemstitching) a little later. At that time that I’m waiting this article, I’m not quite finished with the piece. But I’ve got high hopes that it’ll be done quickly.
Oh, and I’ve got to fudge the mitered corners, because this fabric is not easy to make a clean miter on the corners. It’s too open of a weave for really clean mitered corners. (If you’re not familiar with mitered corners, we covered those in Sweet Marguerite, too – you can find that particular tutorial here.
Ok! That’s where I am when I’m writing this (mid-week last week), but hopefully when you’re reading this, I’m much farther ahead. As in, done!
I’ll keep you posted!
I’ve experienced the same difficulty with mitering the corners on that fabric. Mine ended up rather lumpy. But aside from that, I love working on that fabric.