


There’s a stitch called “encroaching satin stitch” that’s used in different types of embroidery. Essentially, encroaching satin stitch involves filling a space with rows of satin stitch, with the beginning of the stitches of each new row encroaching back between the ends of the stitches on the previous row.
The encroaching happens by coming up (or going down – depending on the instructions) between the satin stitches of the previous row.
You can also split those stitches in the previous row, even though technically, that wouldn’t be encroaching satin stitch. It would be more of a split encroaching satin stitch.
My point in explaining all this is to further illustrate the up-and-down question from Monday’s article about long and short stitch. Today, I just want to offer a further illustration on the difference you can achieve by choosing to split stitches going up or going down.
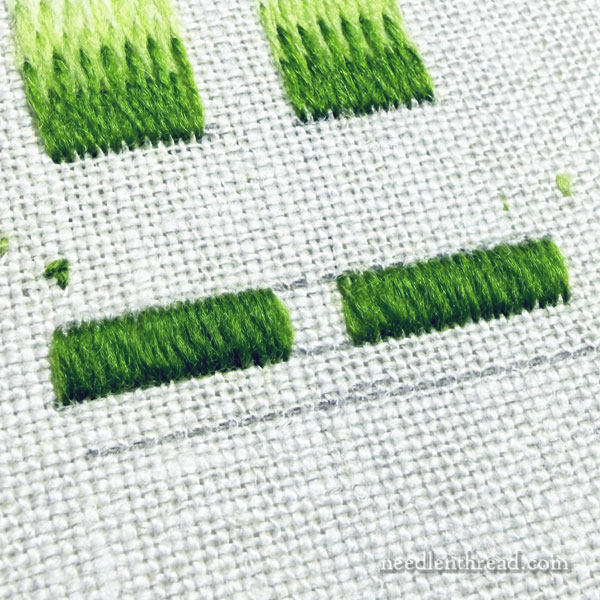
To demonstration the difference in the direction of the split, I’ve worked two small bars of satin stitch on my fabric.
At this point, the two small bars are exactly the same – they’re just satin stitch.
(If you’re not familiar with satin stitch – or you want to learn more about it – this past Wednesday’s article will open up a whole discussion of satin stitch, tips, techniques, projects, and more that you can find in the archives here on Needle ‘n Thread.)
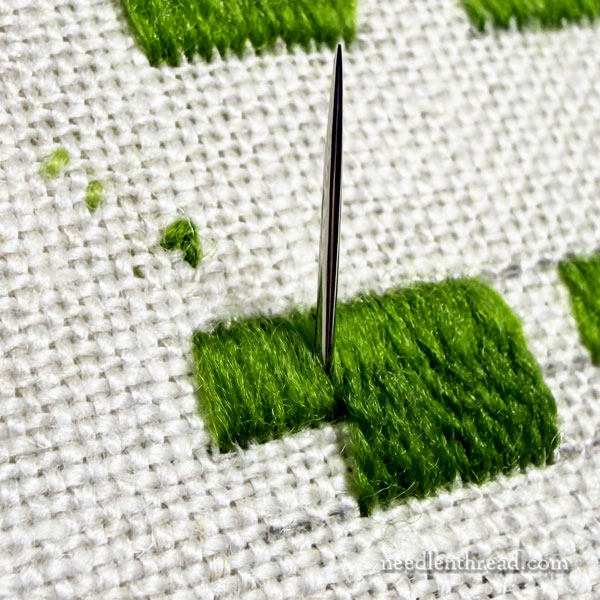
To demonstrate the effect of splitting up vs splitting down in previous rows of stitches, instead of working the “proper” or “typical” encroaching satin stitch, where I’d come up between the threads at the ends of the stitches in the previous row, I’m bringing my needle up right in the middle of the thread, at the end of each stitch in the previous row.
This is kind of a modified encroaching satin stitch, or split encroaching satin stitch – or heck! We could just call it split stitch, worked in rows. The idea is, we’re splitting the stitches, not coming up between them.
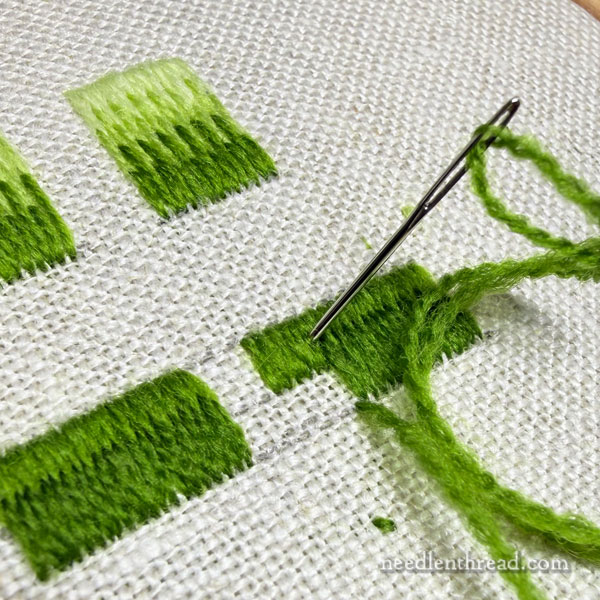
In the second sample, I’m splitting downwards at the end of each satin stitch in the previous row.

For the sample on the left, I split UP; for the sample on the right, I split DOWN.
Looking head on (and remember that we’re working with wool!), the difference is not insanely noticeable, but there is a difference. The sample on the right shows the ridge a bit more distinctly.
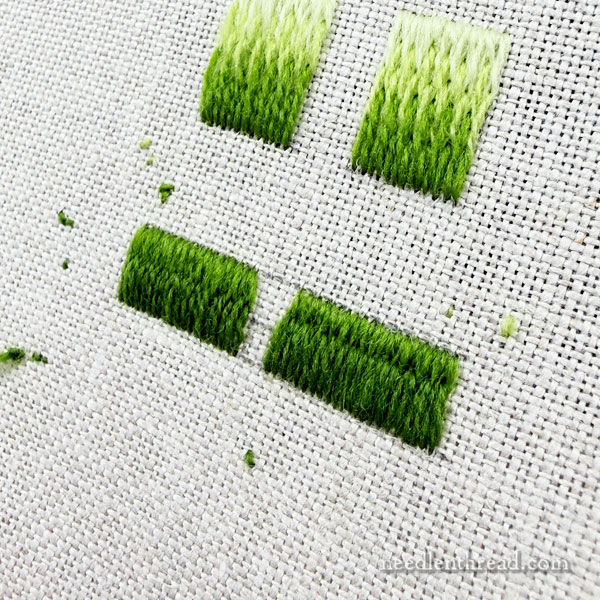
Viewing from the side, you can see the slight difference, too.
The difference is not remarkably great, necessarily, but remember two things: this is a small sample – over a larger area, with more rows, the difference would be more obvious; and I’m working with wool. Wool is a more “forgiving” thread in a lot of ways, because it has poof and a little more bulk than most embroidery threads. It spreads better.
Later, I’m going to show you samples of the same concepts worked with other threads, so that you can see how the thread choice affects your stitch choice.
When you see the differences between the way stitches look depending on the threads you’re using and the variations you’re making in the stitches, you can make informed decisions about the stitches you choose for the threads you’re using, to achieve the look you want for your finish project.
Most of the time, this type of information is really just a matter of experience. You can play with your stitches and test different stitch variations, different techniques and so forth, to discover what outcomes you prefer. As you experiment, you’ll increase your experience with threads and stitches, and this adds to your whole repertoire of knowledge and skill as you progress along your needlework journey.
We’ll get into it a little more with other threads, later! It’ll be interesting to see the differences in outcomes based on thread choices, don’t you think?
Have a lovely weekend!
Yes, keep going with this! Very curious. And grateful!