


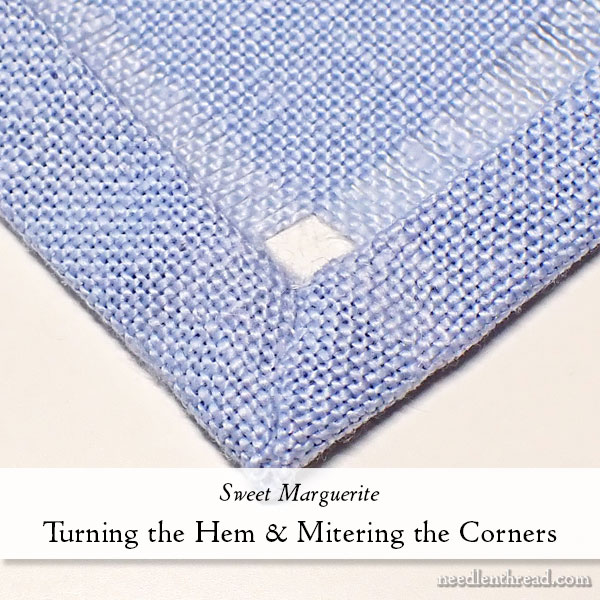
On Monday in our session on Sweet Marguerite, I demonstrated how to withdraw threads from the linen ground fabric and re-weave the edges of the fabric so that we can finish the accent linen with a decorative hemstitch.
Today, we’re going to turn the hem and miter the corners so that the only one step remains to finishing the linen: the decorative hemstitch. Hurray!
If you are a member on Patreon, you already have this information that we’re covering today available to you in PDF format. By the way, for members who didn’t catch the latest news over on Patreon, I’ve organized some “collections” in the Needle ‘n Thread community there, so you can easily find each post and PDF for the Stitch Snippets and other projects.
Let’s get this hem stuff finished, shall we?
Now that you’ve finished withdrawing your threads all around the linen, leaving a “frame” of about 1/4″ one inch inside the perimeter of the square, it’s time to address the hem itself.
First thing we’re going to do is turn up the hem and finger press it (or press it with an iron – your choice) and then we’re going to miter the corners.
We’ll be doing a lot of pinning and some basting, so you’ll need sewing pins, needle, sewing thread, scissors, a ruler and pencil.
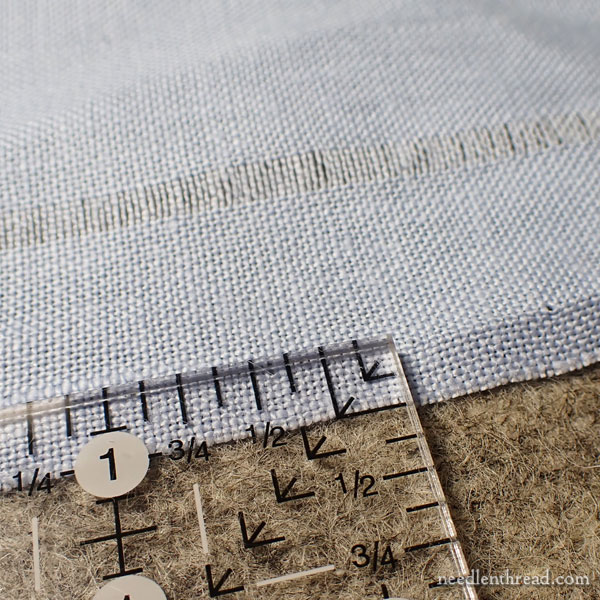
With the front side of the fabric face down, measure 1/4″ in around the whole edge of the fabric and finger press that 1/4″ into a fold, all the way around the linen.
On the back of the fabric, you can see the 1/4″ fold turned up and finger pressed in place.
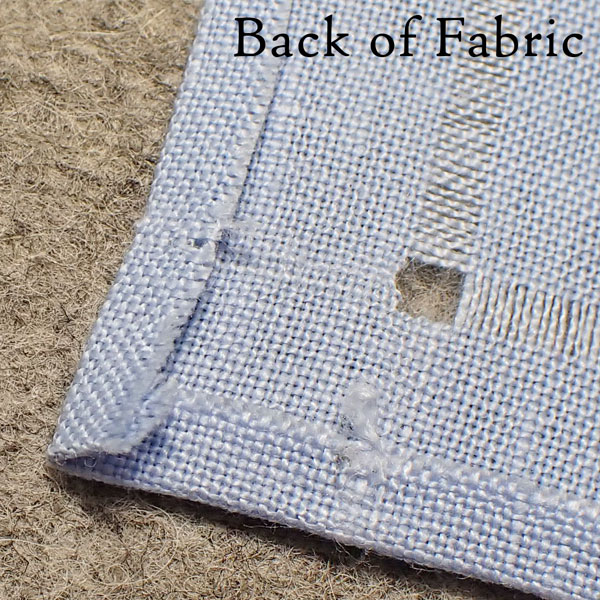
Fold the fabric one more time so that the outer edge (the folded edge you just created) aligns with the lower edge of the withdrawn thread area. This will be about a 1/2″ – 3/4″ turn. The folded edge should like just along the lower edge of the drawn thread strip, on all four sides. The original 1/4″ turn will be inside this turn.
Finger press or iron this fold in place on all four sides.
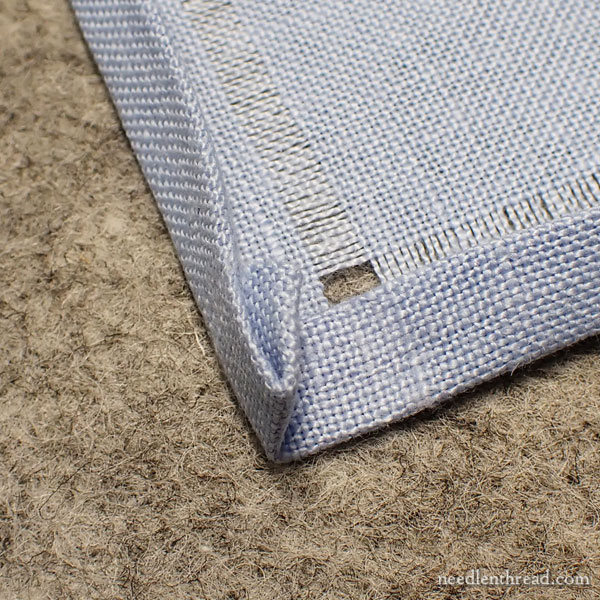
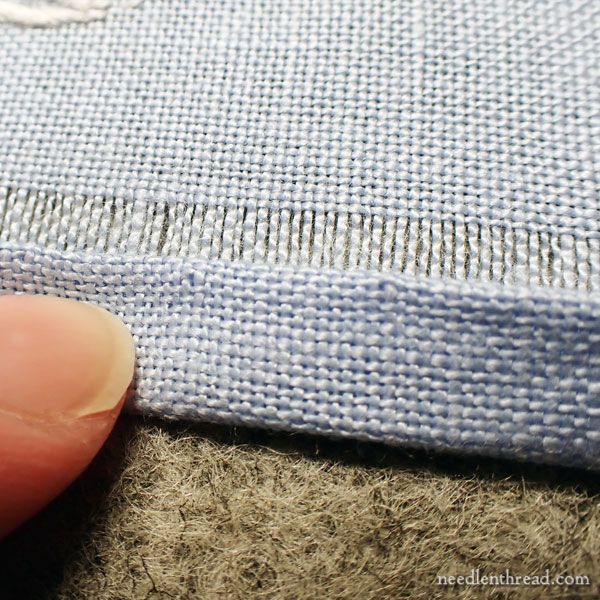
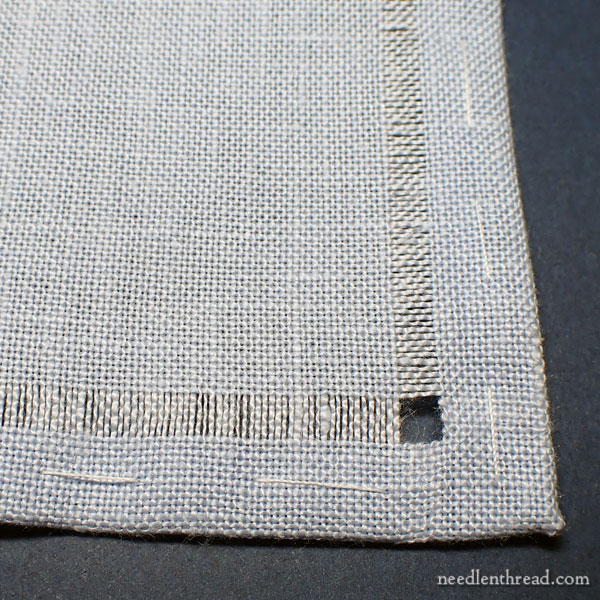
This is what the edge will look like, with both folds finger pressed in place.
In the photo, the lower turned edge looks like it is overlapping the drawn thread area, but it is not – it’s just the angle of the photo.
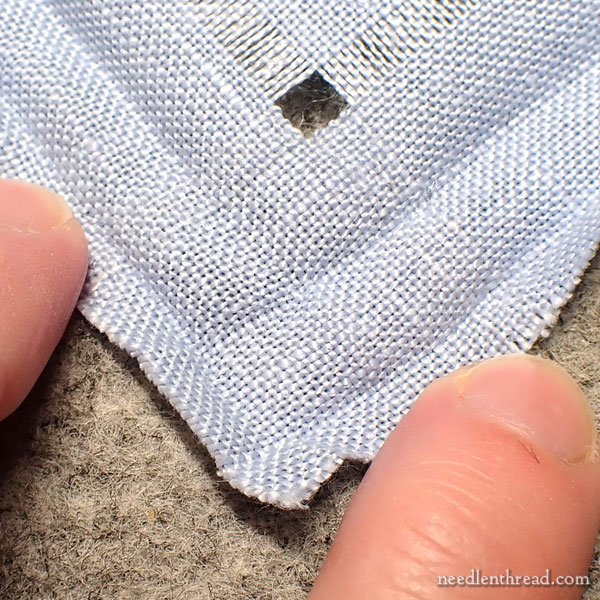
Now, unfold both folds so that you can see this series of crease lines in each corner.
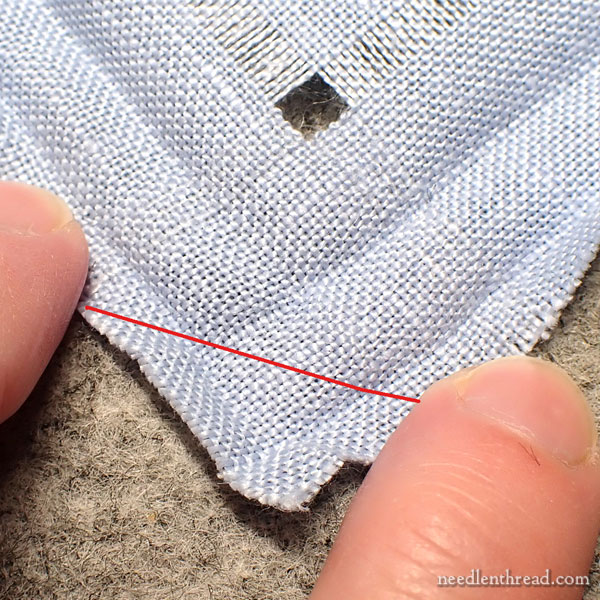
Imagine a diagonal line cutting across the corner, in the box formed by the folds, as shown.
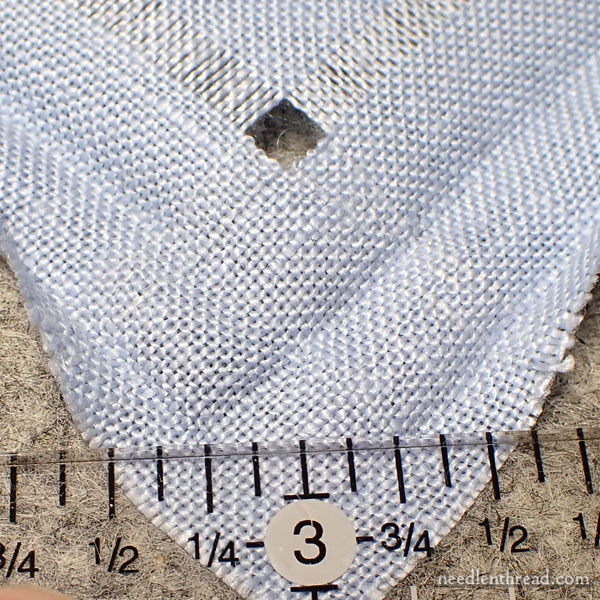
If you need to, mark a cutting line with a ruler.
Cut off the corner at the cutting line.

Turn the corner under 1/4″ and finger press.
With the corner turned under, re-fold the sides on all the previous crease marks, so that the turned edge aligns again with the drawn thread area.
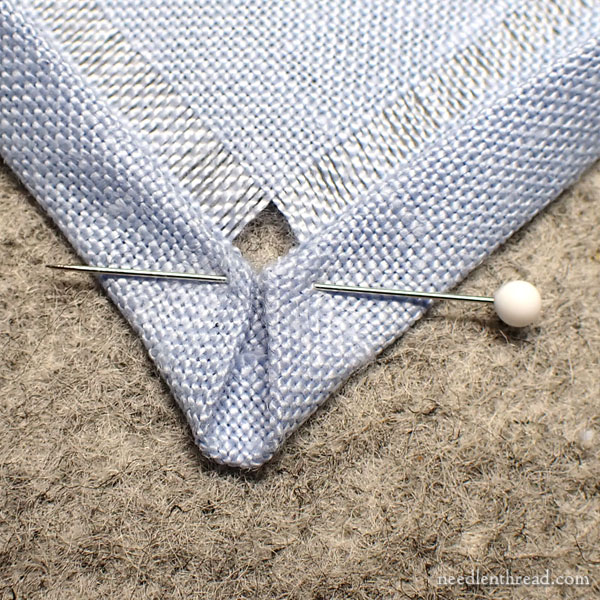
Pull the corners together as shown in the photo above and pin.
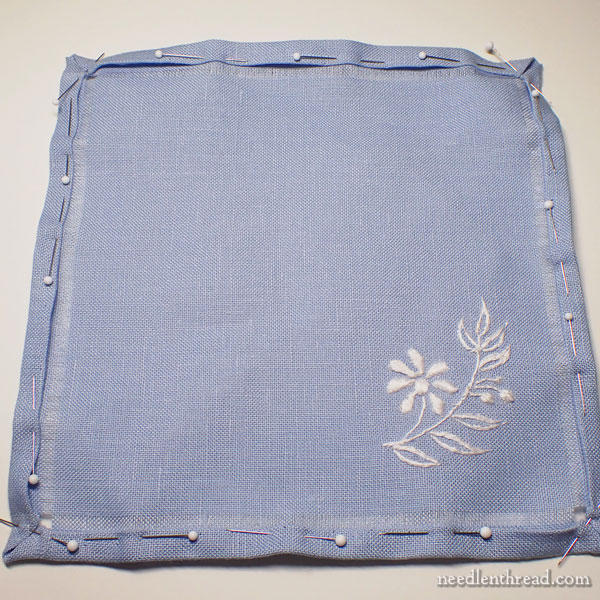
Now pin all sides all the way around the linen. As you pin, make sure that the folded edge aligns with the outermost edge of the drawn thread area.
using sewing thread, baste the sides all around to hold the sewn edges in place.
Remove all the pins except the corner pins.
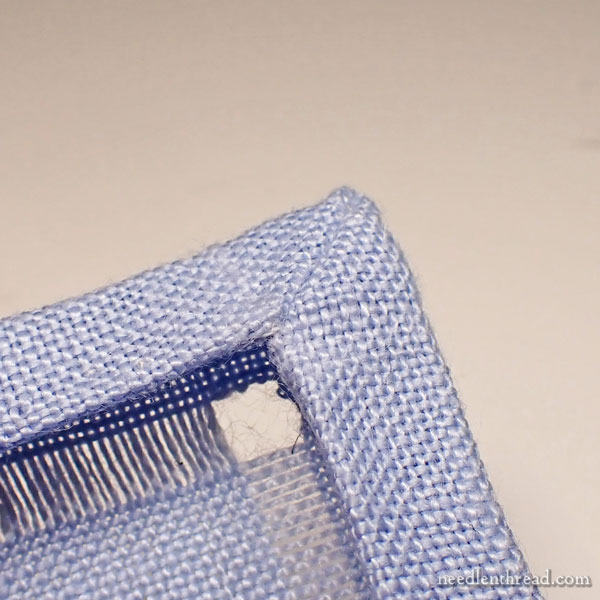
To miter the corners, thread some white sewing thread into a needle. Knot the end of the thread. Pass the needle under the fold corner fabric and bring the needle and thread out of the tip of the corner.
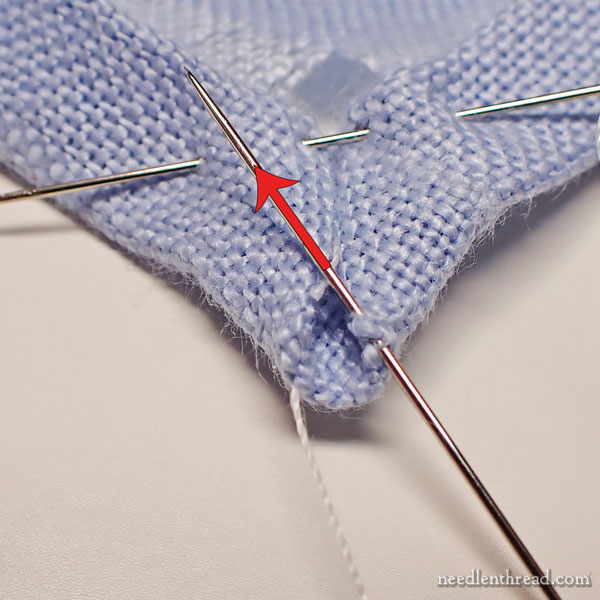
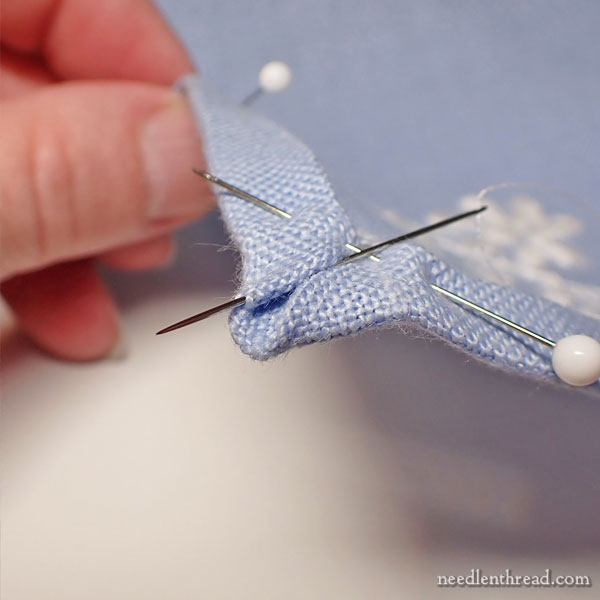
Take the needle and thread to the opposite side of the corner as when, and, pointing back towards the center of the linen, pass the needle into the edge of the folded corner and out again about 1/8″ down the edge as shown above.
Take the needle down into the corner on the left side, opposite where it just emerged and take another small 1/8″ stitch in the folded edge, towards the center of the linen.
Alternate stitching within the folded edge of the linen on each side of the corner folds, forming a “ladder” of stitches between the two folded edges.

The red lines in the photo above illustrate where the stitches should be inside the folded edges of fabric.
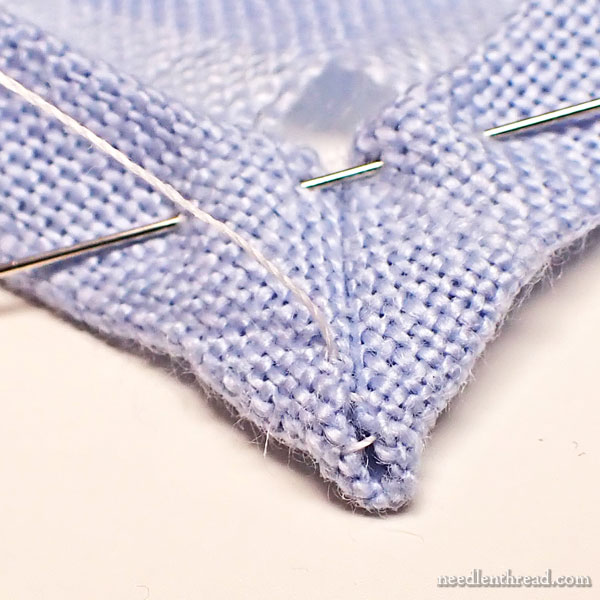
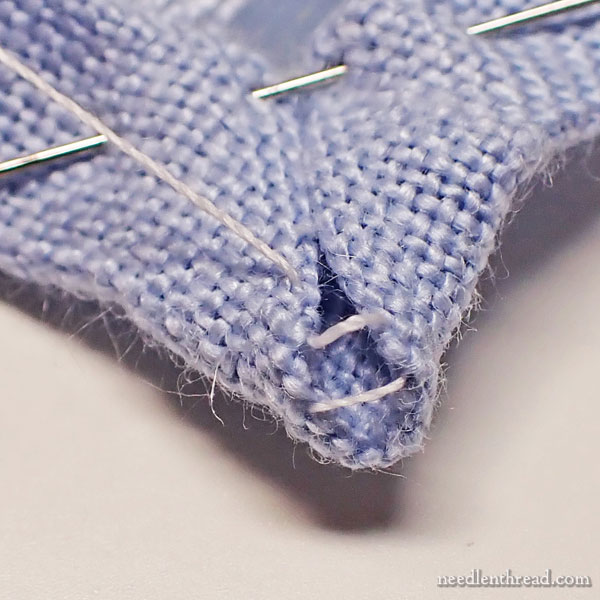
When you pull the working thread, the folded edges will pull together to create the mitered corner.
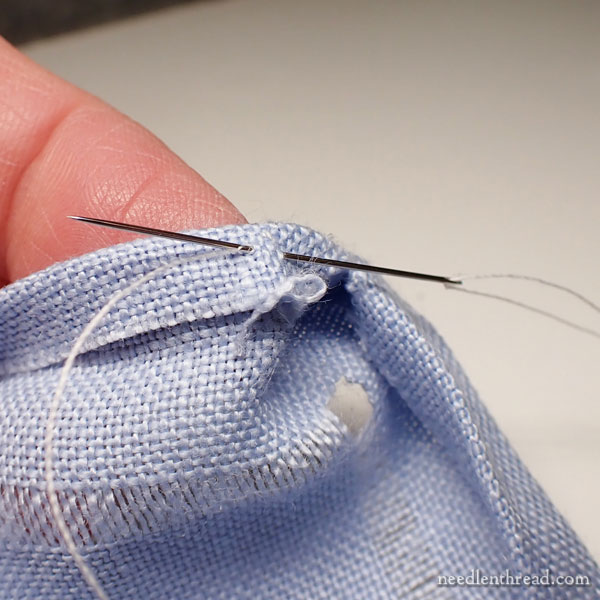
To end the working thread, take it into the underside folded fabric of the hem and knot it off.
The completed miter! Congratulations!!
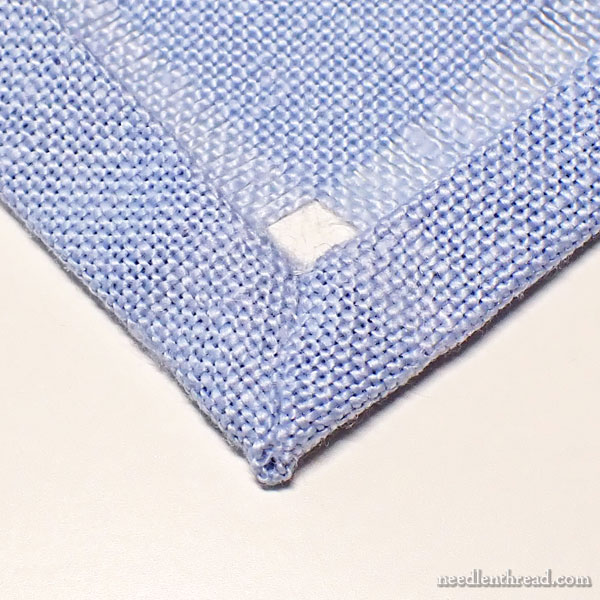
Another view of the completed miter, with the turned edges of the hem aligned with the drawn thread areas.
Now, with all the sides basted and the corners mitered, we’re ready to sew the decorative hemstitch that will hold the hem in place!
Looking for More?
If you’d like to read the articles for this stitch-along project, you’ll find the Sweet Marguerite Project Index here.
We have a few materials kits available still, here, if you’d like to work the piece with the same supplies used in the samples.
What’s Up in the Studio?
We finished kitting some of these Bee-Jeweled Pincushion kits this week, so we’ve got a rather limited quantity of that kit in stock for now. It’s from last year’s Stitch Snippets – you can find the whole project with step-by-step instructions here.
We’ve also restocked the poppy needle threaders and finished a small collection of needle minders, so that’s exciting! Those are in the Embroidery Equipment section of the shop.
We’re working on revamping some older projects and … is this a word? … vamping some new ones. I’m setting up a project to stitch over the weekend (and probably for evenings in the foreseeable future) so that I can show you something beautiful that will be floating over from Italy for you very, very soon. Can’t wait!!
Have a lovely weekend!
Mary,
Your instructions are the BEST! I’m learning so much from you.
Thank you! Have a nice weekend!