


Today, we’re going to get technical!
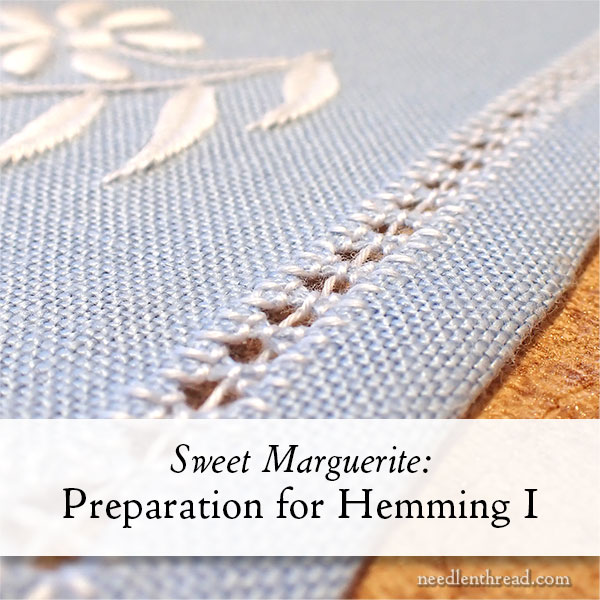
As we near the end of Sweet Marguerite, we have to prepare the hem for the decorative hemstitch. This process is going to be the most fiddly part of the whole project, and it will take two articles here on the blog. If you take it slowly and carefully, the results will be satisfactory, and the hemstitch will be a breeze!
For members on Patreon, I’ve already posted the PDF that covers everything in this article and in the next article, so you already have this information! Still, it’s helpful to read the blog post, too, because you never know what tips you might pick up!
The first step in the whole process of preparing for the hemstitching – once your embroidery is finished – is to damp stretch the piece.
I’ve written about damp stretching numerous times here on Needle ‘n Thread (and in many of the projects we’ve done so far), so I’m just going to refer you to these two articles – Damp Stretching & Blocking Embroidery and A Damp Stretching Tip – to show you how it’s done.
The second article is how I invariably damp stretch small embroidery items these days. You’ll need sewing pins, a spray bottle, and surface to pin your work down. Once the piece is completely dry (I usually leave mine overnight), you’re ready to move on to the rest of the preparation process below.
Let’s start with a brief summary of the process that I’m going to explain below. Then, please read through the whole process. There are a few points you’ll need to pay close attention to, and you’ll need to know where you’re headed as you take each step. So, read first! And then plow forward!
For this part of the project, you will need sewing pins, sewing thread, a needle (if you have a tapestry needle, you can use that, but it isn’t essential), scissors, tweezers, and some Scotch tape (cellophane tape).
Here’s the summary:
First, you’ll snip, one at a time, the threads in the drawn thread area that’s marked out by your basting lines and remove them to the edge of the basted area.
Then, you’ll remove every other thread in that area all the way to the edge of the fabric, making an open channel in the fabric.
Then, one thread at a time, you’ll take the remaining thread fragment that is still in the fabric, thread your needle with it, and re-weave the adjacent empty channel where the thread was removed all the way to the fabric’s edge.
In this way, you’ll finish the edges of the withdrawn thread area securely and pretty much invisibly.
In the next article after this one, we’ll miter the corners and baste the hem in, so that you can hemstitch with ease.
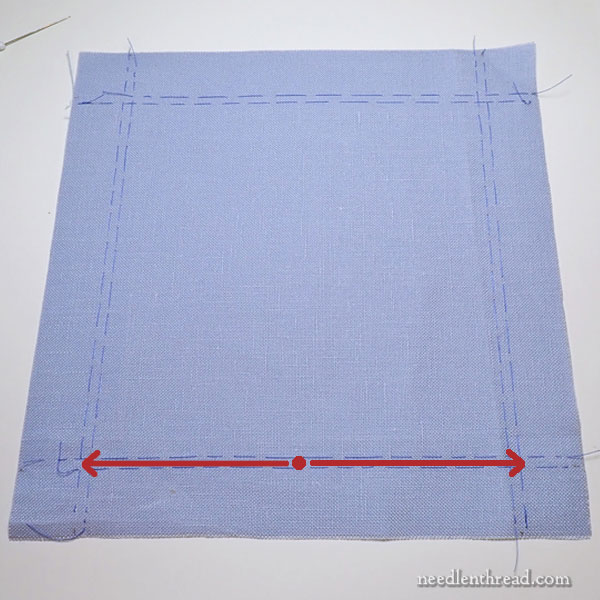
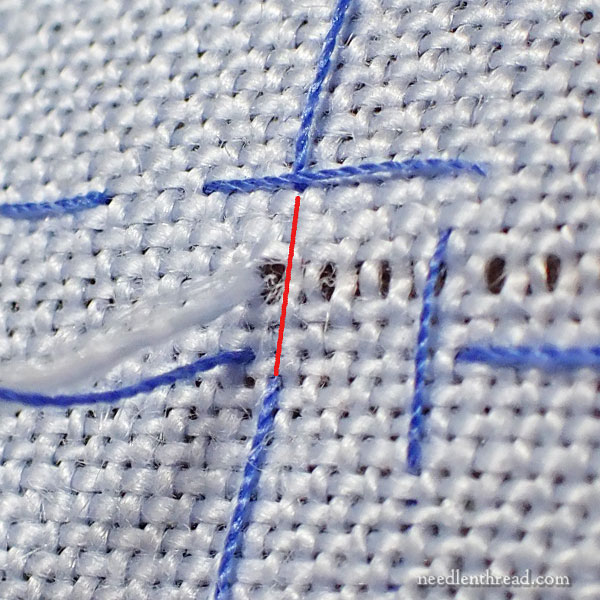
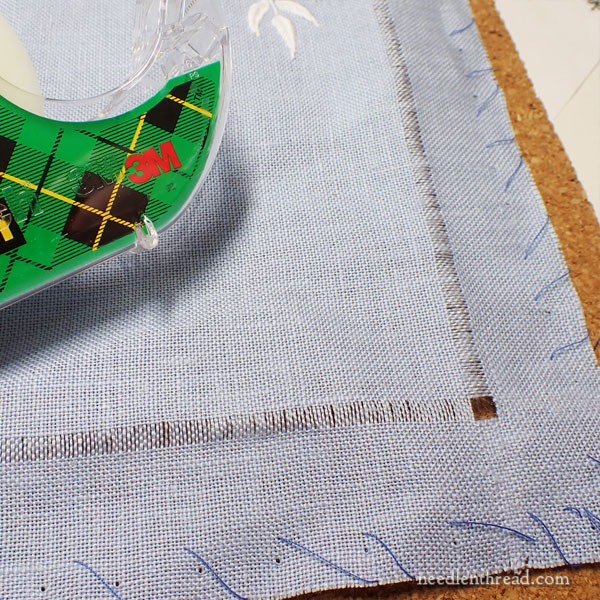
The photo above is the fabric that’s been basted before it was embroidered. You should have this basting configuration on your fabric. It is a 6-thread “frame” set one inch into the fabric.
You’ll be snipping the fabric threads in the center of each side (where the red dot is) and withdrawing the thread bit by bit (very carefully) out to the edge of the frame on one side, and then out to the edge of the frame on the other side (represented by the red arrows).
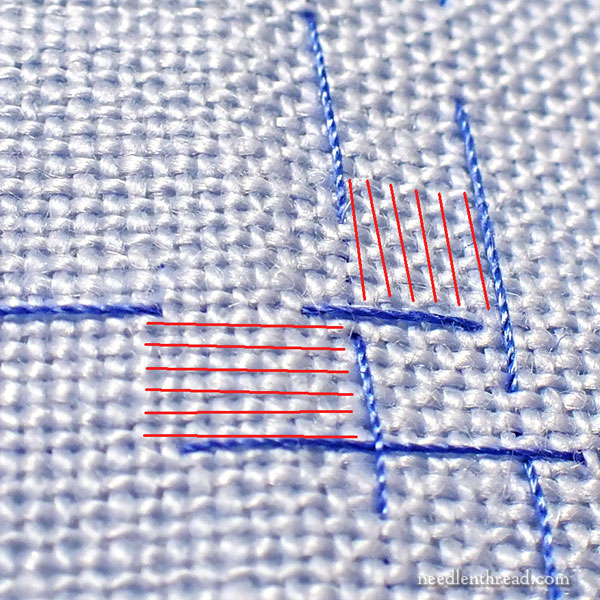
We’re going to remove the threads that run parallel with the basting threads, all the way into the corners of the “frame”. The red lines show the six threads that will be removed.
By the time you remove the six threads all around the frame, the corners will be empty.
Do not remove the thread past the outer perimeter of the corners.
So, begin the middle of the basted area on one side of the square, represented by the red dot in the first photo.
Slide your needle under one of the fabric threads and pry it upwards, so that you can slip your very sharp scissors under the thread and carefully snip it.
Then, bit by bit, use your needle to carefully pry that thread out of the weave, towards the outer corner.
Because the thread is being removed from the fabric, it’s going to lose a little stability and it can (it will) get somewhat fuzzy. This is why it’s important to remove bit by bit. Pry the thread out approximately every four fabric threads and carefully pull pull it out with your needle.
You want these threads to remain as much intact as possible as you withdraw them, so go easy!
When you get to the outer perimeter of the frame, in the corner, stop withdrawing the thread. Leave the intact, withdrawn thread there, and return to the center.
Withdraw the thread to the other side of the fabric, in the opposite direction, until you reach the outer perimeter of the frame in the corner.
Withdraw all six threads in this manner across the one side of the fabric.
You can do all four sides of the fabric first, and then re-weave the edges, but I prefer working one side of the fabric at a time, so that there aren’t a lot of thread tails all over the place.
Now, take a look at the corner where you’ve got your thread tails.
Consider the six threads that you’ve removed, that are still woven in the fabric within the 1″ hem allowance.
Leave the bottom most thread in place (that’s the one closest to the edge of the fabric – it’s the outer perimeter of the basted area).
Take the next thread up from that one, and, using your tweezers, very gently pull it all the way out of the fabric.
The result will be an empty channel.
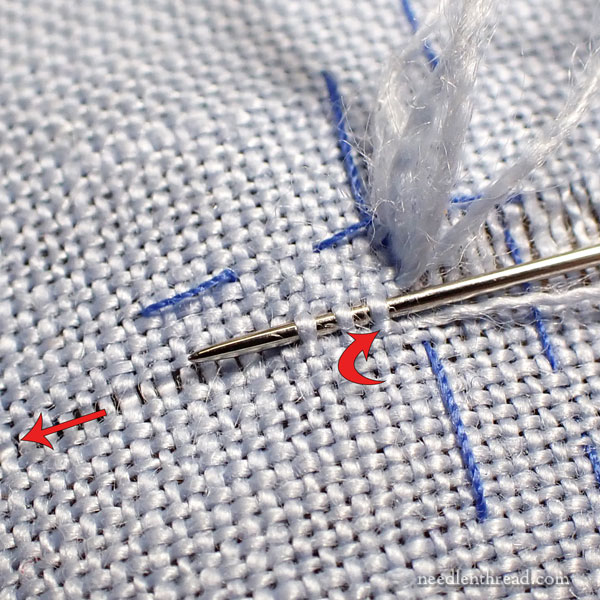
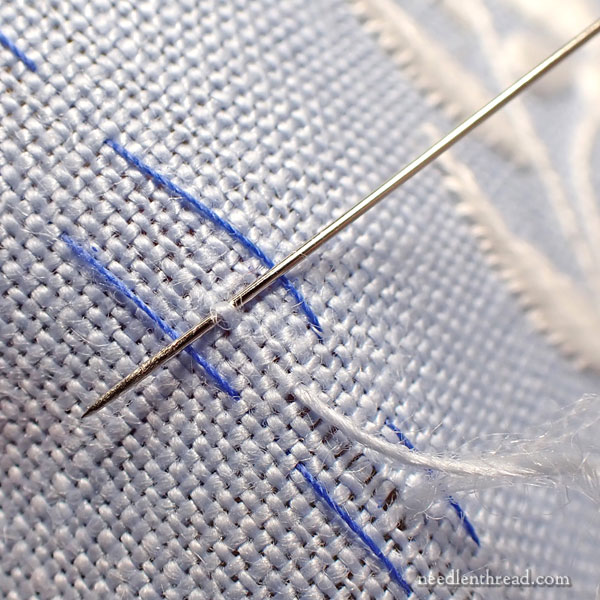
Now, take the tail of the withdrawn thread that’s still below the empty channel and thread the tail into your needle.
Using an over-under sequence that alternates with the weave of the thread that you are now sewing with, re-weave that empty channel.
In the photo above, the curved red arrow points to the thread that you are sewing with. It is the bottommost thread in the drawn thread area within the basted frame. The straight arrow shows you the empty channel that you are filling by re-weaving the thread below it into the empty channel.
You can see in the photo above the alternating over-under sequence. The sequence must alternate with the over-under sequence of the thread directly below.
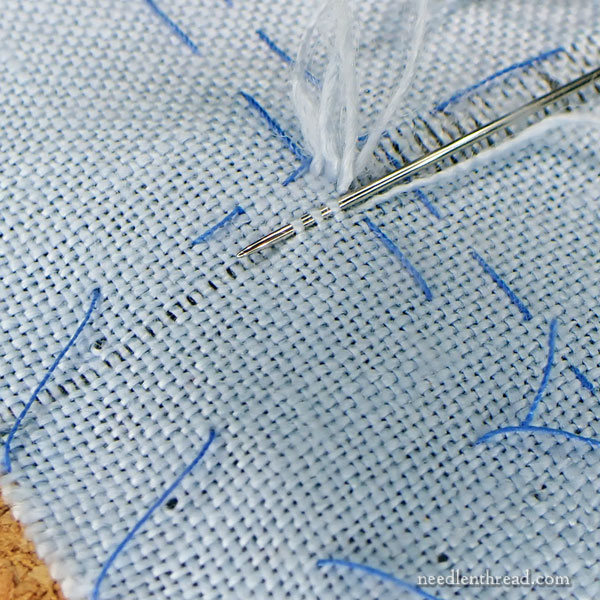
Now, leave the thread directly above the re-woven channel in place, but pull out the thread above that.
Re-weave the resulting empty channel with the thread tail from the thread below in the same manner that you re-wove the first empty channel.
And finally, do the same thing with the remaining pair of threads from the withdrawn area.
Work around the entire basted frame in this manner, to withdraw all the threads from the sides, leaving four empty corners with secure, re-woven edges.
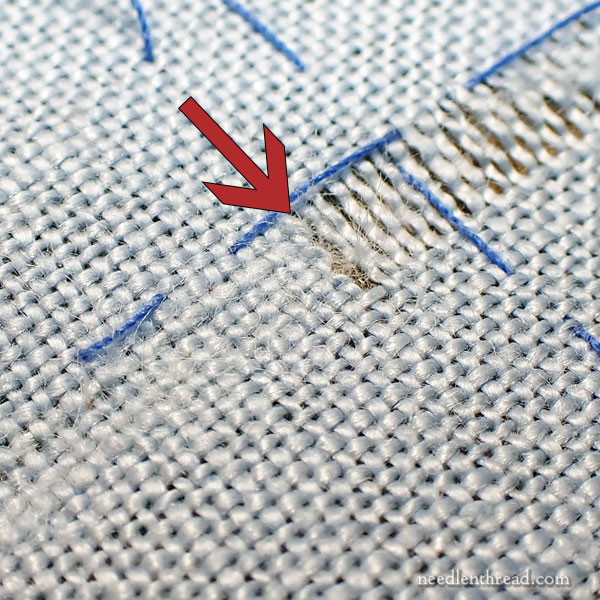
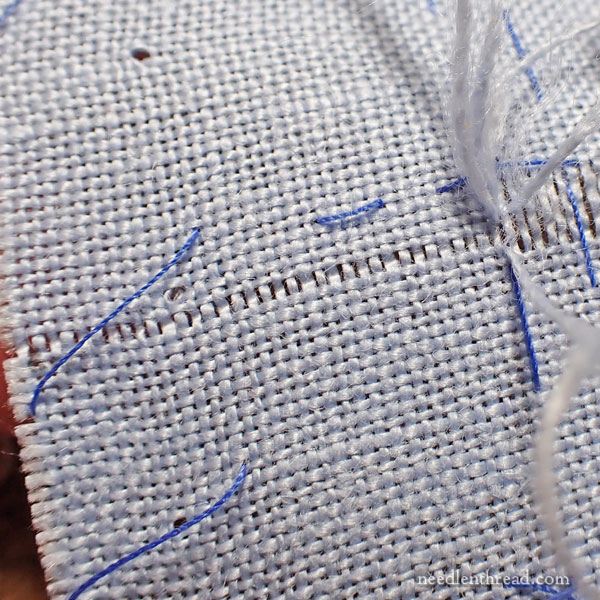
In the photo above, the arrow points to the re-woven edge. It looks a bit fuzzy, but the edge is secure and neat.
You can use your tweezers to pick out any extra fuzz in the area and along the drawn thread path.
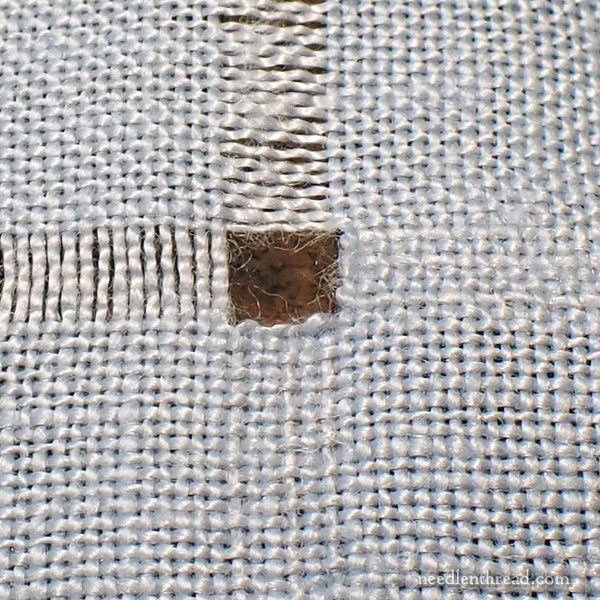
When you finish the process all around the frame, you should have empty corners that look more or less like the one above.
When you’re finished with all four sides, go over the piece with your tweezers to pick out any larger areas of fuzz. Then, grab some cellophane tape and, using the sticky side as a lint remover, tap all over the corners and the withdrawn thread sides to pick up any extra fuzz from the withdrawn threads.
Now we’re ready to turn up the hem and miter the corners. We’ll do that in the next installment!
Looking for More?
You can find all the lessons so far for Sweet Marguerite here, in the project index.
If you would like a kit for this project, I still have a few kits available here in the softly subtle lavender-pink and in the very yummy deep, buttery yellow. Both colors are beautiful – they’d make a perfect accent linen for under a spring vase!
The Book Sale
As of this morning, we still have some books left in stock that are on sale through the end of August.
I’ll be sorting out orders and getting those ready for shipping. Anything that was purchased after noon last Friday will go out in today’s post, so you should have the books pretty quickly.
Coming Up
We’re assembling some of our own kits and bringing in a few other textile-related kits for some local workshops and pop-up shopping that will be taking place here in Kansas as we approach the holidays. I’ll tell you more about those, in case you’re interested. Especially if you’re in NE Kansas, perhaps some of the upcoming events will pique your interest. If you’re not in NE Kansas, that’s ok! I’ll likely make the kits we’re working with available on the website as well, because some of them… gosh, some of them are just so much fun! The kits themselves would make great gifts
We are working on our next Stitch Snippet, too. It’s the final one for this year!
And now that August is coming to a close, we can look forward to receiving some lovely linens and threads from Europe again! A lot to look forward to this autumn!
I hope your week is off to a great start!
Leave A Comment