


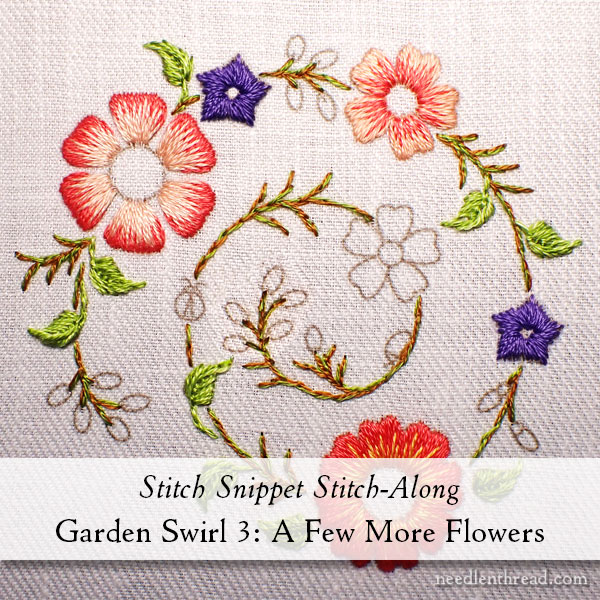
Happy Monday!
Today, we’re going to move right along on Garden Swirl, by stitching a few more flowers on the piece.
If you’re just joining in on the stitch-along, you can find the Garden Swirl Project Index here. There, you’ll find all the previous installments, including design and materials, listed in chronological order.
If you are a member of the Needle ‘n Thread Community on Patreon, you received today’s lesson last week, in a downloadable PDF format. If you haven’t picked that up yet, hop over to my Patreon page, where you’ll find it listed under “Collections” in the main menu.
Keep in mind that lessons for this project are sequential. With the first flower we stitched in this previous installment, we covered most of the basic concepts for stitching the larger flowers we’re going to address today. If you get stuck, head back to part 2, where we stitched the first large flower.
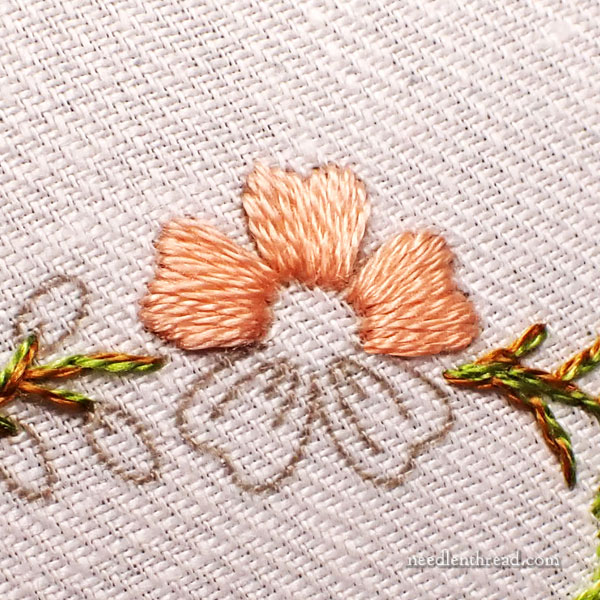
We’ll start with this medium-sized flower on the outer ring of the swirl.
This flower is worked with two strands of 353 and one strand of 3705, using mostly satin stitch.
The concept for stitching the petals is the same concept we used for the first larger flower, but instead of working layers of color, these petals on the medium sized flowers are embroidered with (more or less) a satin stitch. We’ll modify the satin stitch a little bit, to sneak in any filler stitches we might need.
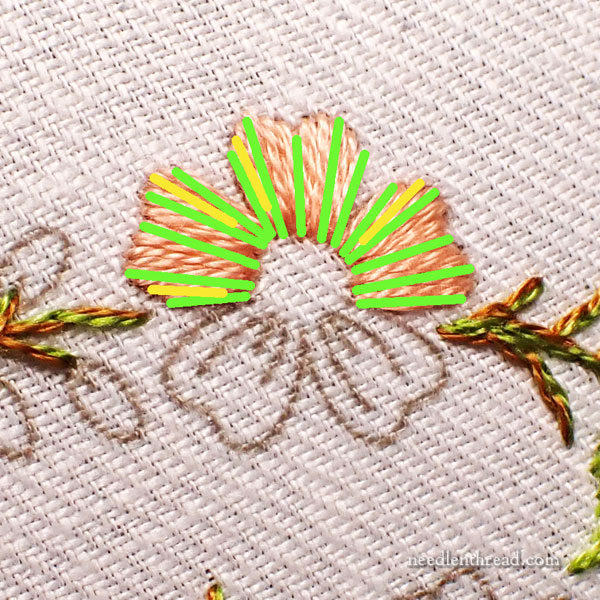
The idea, though, is the same: stitch towards the “growth point.” Start by working a satin stitch down the center of the leaf using two strands of 353, and keeping those strands as parallel as possible. You don’t want your threads to twist up on themselves, if you can avoid it.
Then, move out to the side of the petal and stitch in one satin stitch on each side of the center stitch, to set in your gradual angled stitch direction.
Then, just fill between those stitches to fill up the petal, trying not to crowd your stitches.
It won’t take many stitches to fill each petal.
Notice in the photo above the green lines (indicating full satin stitches that follow the slightly angled “growth point” direction). Between them, here and there, are some yellow lines. Occasionally, you may have to sneak in a satin stitch that fills a gap at the top of the petal, but won’t fit at the base of the petal without making things too tight or crowded.
In such cases, just work that satin stitch (represented by the yellow line) shorter than the others, and finish it underneath the previous stitches, by slanting your needle so that it passes under the bases of the other stitches, entering the fabric not quite at the base of the petal (wherever it best fits).
Your goal is to achieve a smooth filling on the petals, that is slightly angled on the sides of the petals, so that the stitches all lie next to each other without crowding, so that the petals look smooth.

Then switch to one strand of 3705 and work a long-and-short split stitch layout in each petal, coming up into the previous color and passing to the back of the fabric at the base of each petal.
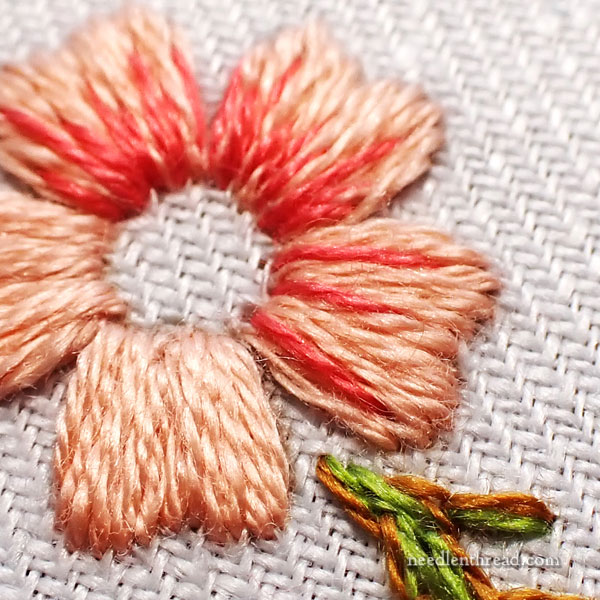
Like before on the first flower, work in three directional stitches, and then fill between them, alternating long and short to make the blend look as natural as possible.
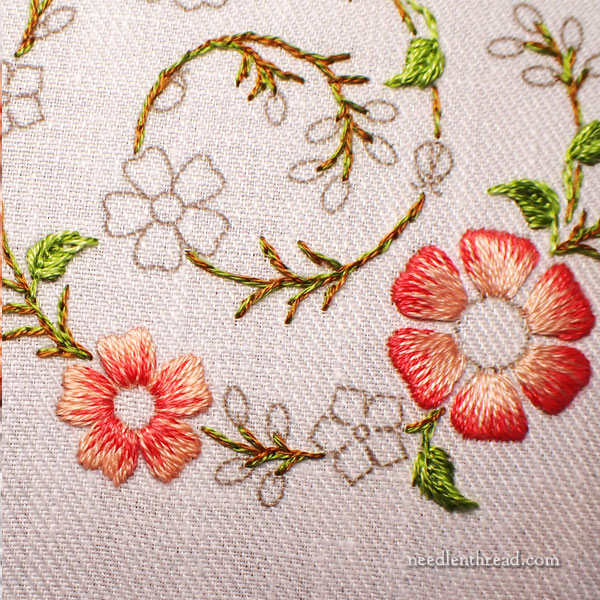
And these are the first two flowers we’ve stitched, almost finished. We’ll address flower centers a little later.
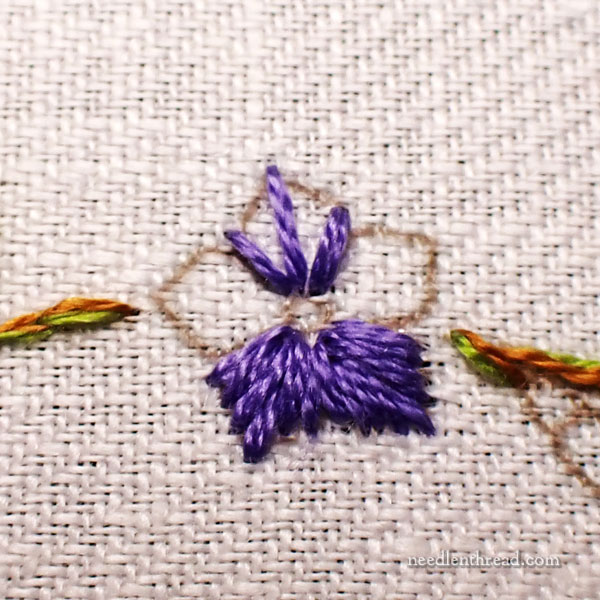
Now we’ll work the little dark purple flowers.
Use two strands of 3746 in the needle. Stitch a straight stitch from the tip of each petal to the base of the petal, and then work one straight stitch on each side of the petal, as shown above.
Once your three stitches are in, fill between them, ending at the base of the petal. You won’t need very many stitches on these petals – just about five, maybe six if your tension is a little tighter.
The petals on these little star-like flowers end up blending together, as you can see.
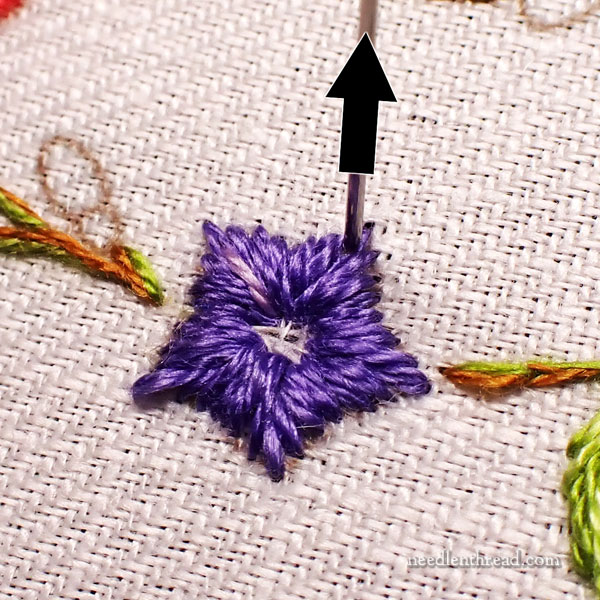
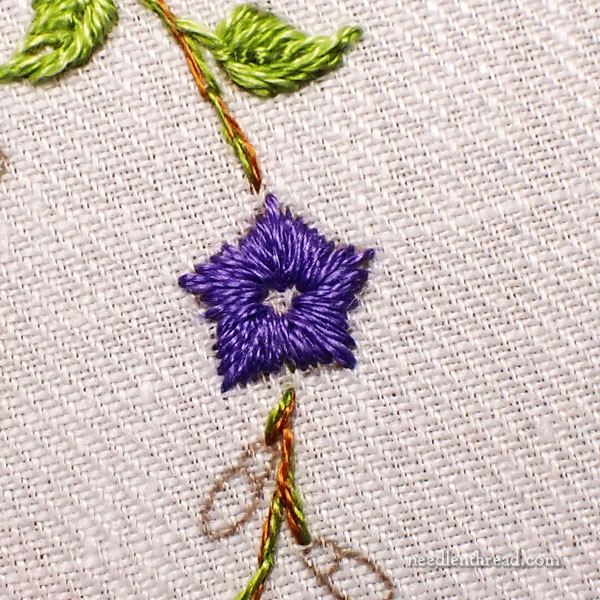
Switch to one strand of 210 and the smaller needle, and work a straight stitch from the tip of the petal (coming up into the previous color) to the base of the petal.
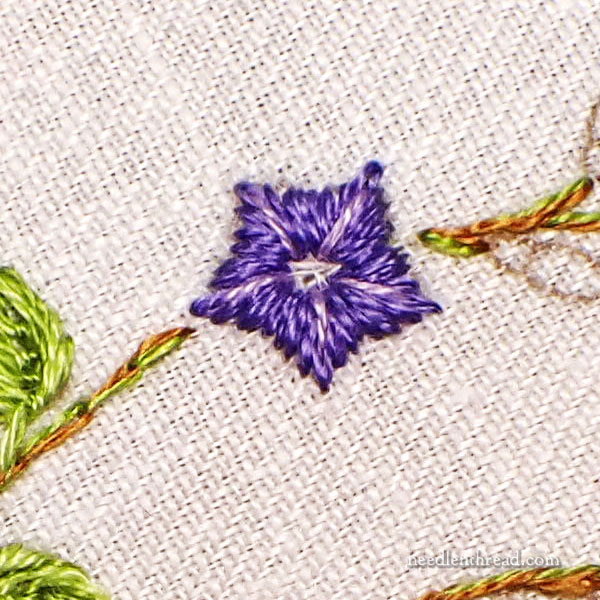
You’ll just work one straight stitch for each petal, as shown.
The center looks a bit pulled apart there, but no worries. We’ll fill that up!
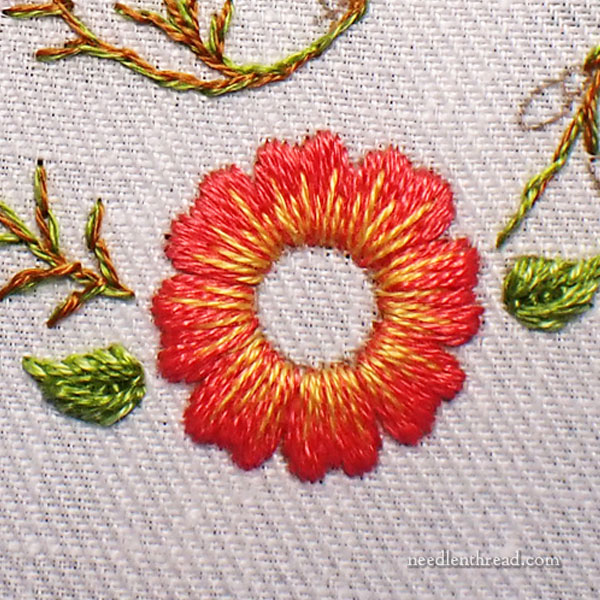
This large flower is stitched exactly like the light coral medium flower above, only you’re using two strands of 3705 for the satin stitch and one strand of 725 for the long and short.
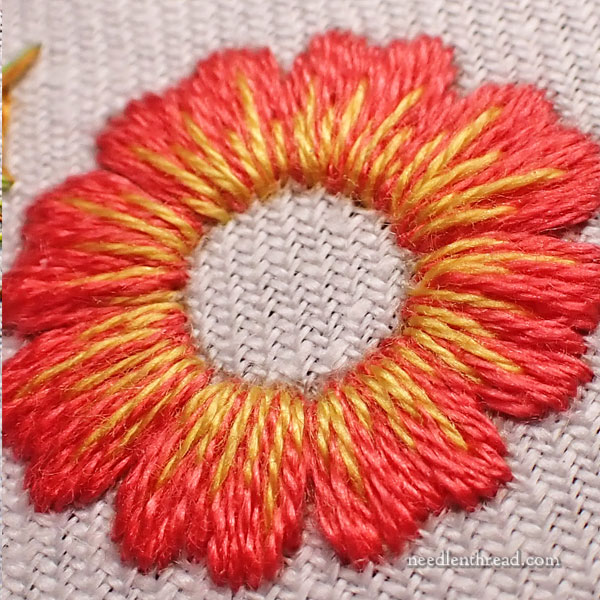
I worked the yellow long and short stitches a little more sparsely, because I’m not trying to “shade” as much as just stroke in some yellow.
Remember to start in the middle and work out on each side of center, to set in your angle of stitching. Then fill between.
These petals touch, but I still embroidered each one individually. If you try embroidering all the way around the flower in a more “linear” sequence, you’ll lose the angle of stitching for each petal and it will look a little too boxy and rigid.
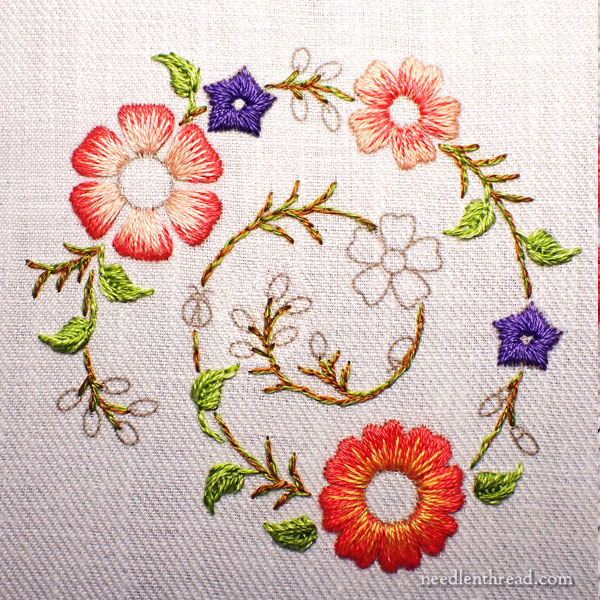
And this brings us officially here!
We’ll have the next installment of Garden Swirl next week!
Don’t forget to consult the Project Index if you’re looking for previous lessons.
Kits & Boxes
I’ll have news on more kits and boxes on Wednesday. Look for it!
Hope your week’s off to a great start!
Leave A Comment