


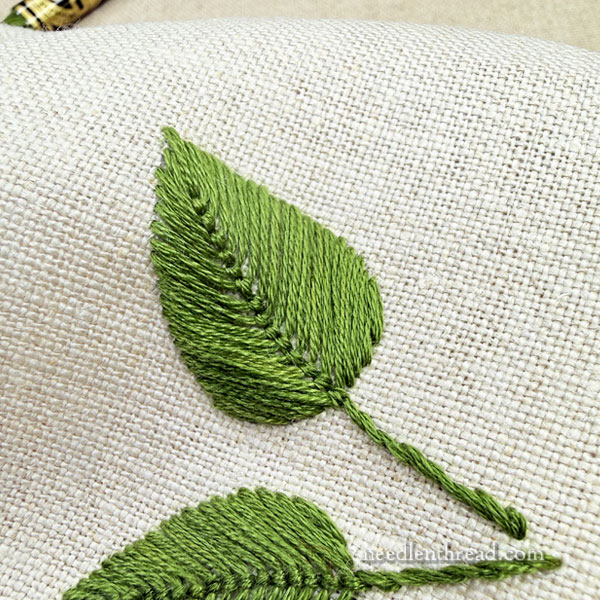
A couple weeks back, I showed you these green leaves and asked you what stitch was used on them.
From the front, they look like the same stitch, but the back tells a different story.
Then, earlier this week, I shared this tutorial with you for “faux” fly stitch, which is how one of the leaves was filled. The other is filled with regular fly stitch.
And while it’s a perfectly legit way to work a filling, there is a small problem with these leaves in particular, no matter which of the two stitches you use. I suggested that there was a problem and promised to talk about it and provide solutions.
But I know I’m going to be getting into some Sticky Territory here! It’s sticky, because the internet is overrun with projects, tutorials, and the like that actually promote the problem.
I think it’s a problem worth addressing, especially for those who plan to stick with embroidery for a while as a hobby, and who want to improve the long-term results of their stitching.
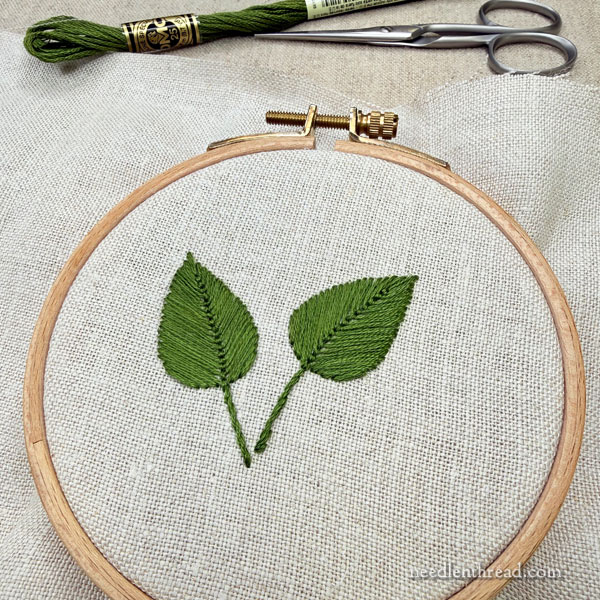
Here are the leaves again. They look pretty good, all taut and happy in the hoop!
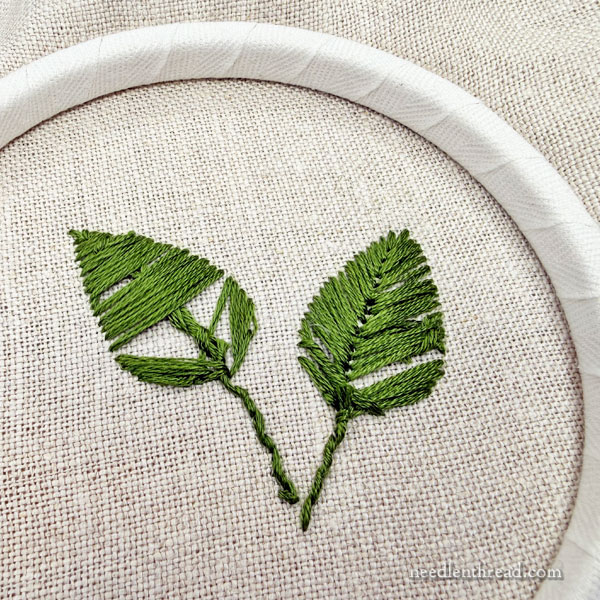
And here is the back of the embroidery, where you can see the back of the leaves.
Not exactly lovely, fine. But as far as the back goes, it’s ok.
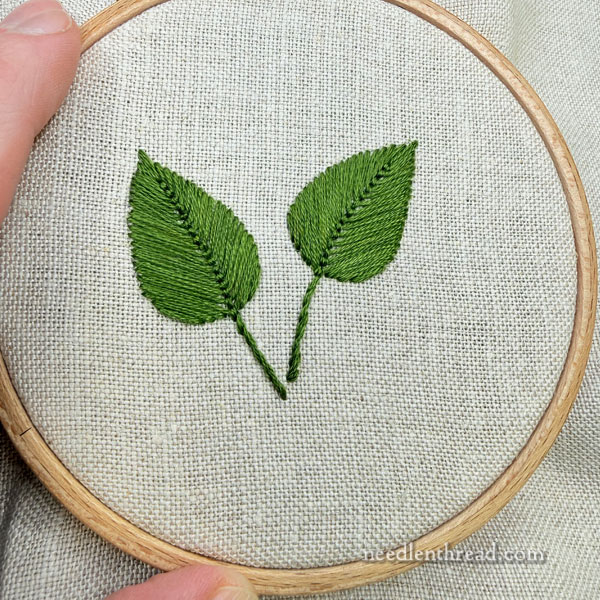
All looks well.
And really, it is well – but only in one particular circumstance. In every other circumstance, all is not well.
Let me explain…
If you leave these two leaves embroidered like this in the hoop as shown above (think: the “hoop art” trend), then there’s no problem with them (right now). Assume the hoop and fabric won’t be subjected to shifts in humidity, won’t be moved around much, and yes – all is well.
BUT…
If you plan to take this embroidery out of the hoop, if the finished product is meant for any use, if the fabric won’t be under the same tension, if the needlework will go through laundry, if you live in an environment prone to humidity, and many other circumstances that the embroidery could be subjected to, then all is not well.
And this is because of the size of the embroidered element and the choice of the filling stitches.
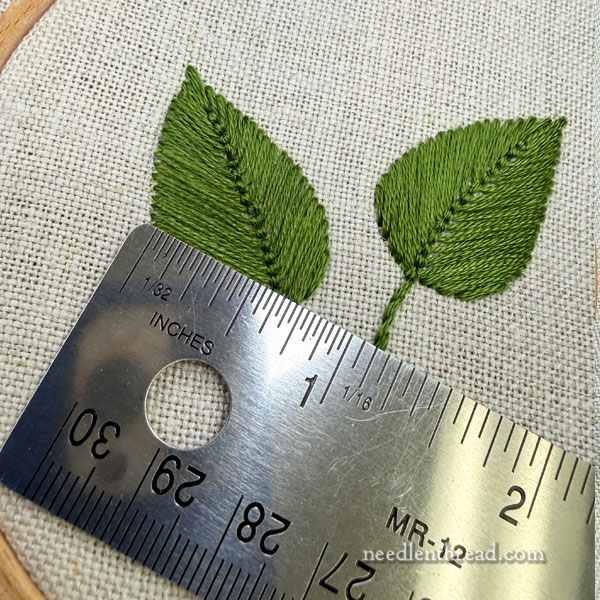
You can see here how long the longest stitches are on these leaves. They’re just under 3/4″ of an inch long.
That’s a long stitch. That’s a long distance for a thread to travel without any assistance to stay put.
Take the work out of the hoop, relieve the fabric of tension, move the fabric even just a little, and all of sudden, those stitches are not lying as smoothly. They aren’t as taut across the fabric. They aren’t as parallel as they were. They aren’t, in short, the same. They’ve relaxed.
Over time, they aren’t going to un-relax. They are going to relax more. They are subject to entropy, as all things are, and as time goes on, they will not keep their previously-pristine structure.
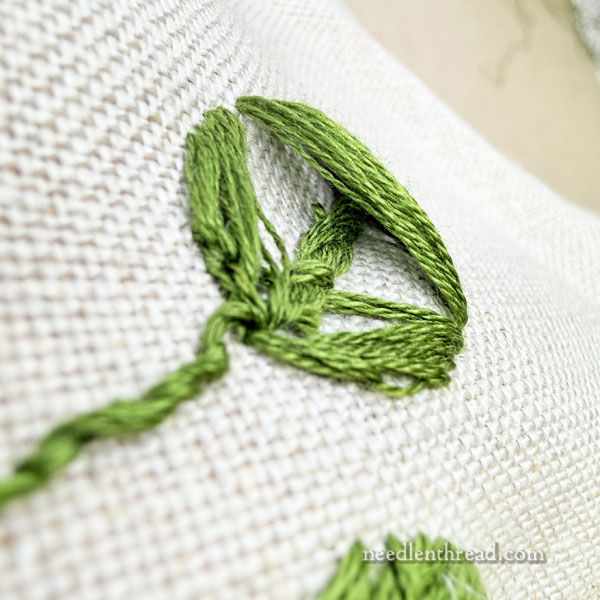
Turn the work over, and you can see that the stitches across the back are gaping.
If the shape were smaller, matters would be different. But on larger shapes, longer stitches are not desirable, unless they are somehow held in place. This is why, in laid work or on trellis stitches, it’s not enough to just work a grid of very long stitches that cross over each other. No indeed! You must couch the intersections on those long stitches, to hold the stitches in place.
Because they will shift.
Once upon a time, I recall watching a stitch video on satin stitch, where the stitcher (bless her heart) demonstrated satin stitch across a three-inch circle, using stranded cotton. While the video demonstrated the movement of the stitch, it also mislead a lot of people to believe that satin stitch was a good filling for a three-inch circle!
It’s simply not.
Filling large spaces with long stitches in embroidery is a recipe for disaster. If you want your embroidery to last and to look good over time, you have to consider the choice of fillings for large spaces.
Long stitches without some other technique to help them remain in place are never a good idea.
Does this mean you can never use these stitches for leaves? Absolutely not! You can! If you are using the stitches by themselves, use the stitches on smaller leaves:
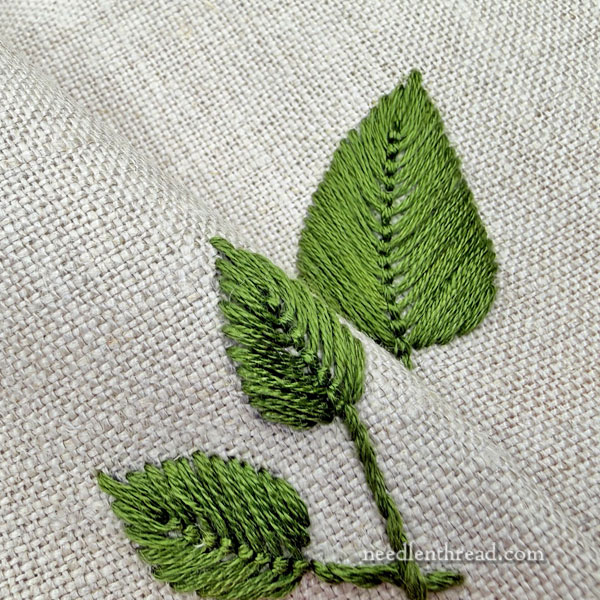
And if you want to work Big Leaves with either the fly stitch or the “faux” fly stitch, you can do that, too – but you just need to enhance them a bit to give them more holding power.

On the somewhat messy example above (funny what shows up in close-up photos that you totally miss in real life!), on the left side of the stitch, I worked a backstitch down the leaf, following the general shape of the outline and set inside that half of the leaf. It holds the long stitches down.
On the right side of the leaf, I worked a stem stitch.
I could have gotten a bit more fancy (and I would have seen the messier stitches more clearly) by using a different shade of green, to liven up the leaf a little. Or, if you want the extra stitch lines to remain subtle, you can use the same color green as the foundation leaf, as I did in the sample.
That extra line of embroidery over the too-long stitches will hold those stitches in place, keeping them secure from shifting.
You can use any kind of line stitch for this approach. Experiment! You’ll likely come up with some beautiful and interesting combinations!
And that, my friends, brings our green-leaf discussion to a close.
If you want to read the backstory on these two leaves, here are the previous articles:
Stitches: What is What, and How to Tell
“Faux” Fly Stitch Tutorial
Have a lovely weekend!
In Japanese embroidery (I am a JEC certified instructor), we are taught to never leave a satin stitch longer than 1 cm without some sort of holding/support. Because, tradtionally, this stitching was done on garments!
A good general rule, I think.
Yes!!
Interesting & intriguing solution. I’m going to try that in a contrasting color just as a doodle design element!
I’ve noticed SO many of the samples of long stitches like you mention online. I used to make suggestions but there are always those who say things like, “It looks great! There are no right or wrong ways to embroider! Just do what you like!”
Makes me shake my head.
I never use a hoop or frame. I put fuse woven cotton stabilizer to the back.
This is an excellent tutorial about stitch length. Something that comes up often among beginners who try to do satin stitch in areas that are just too big.
Thank you Mary. This is why I read your blog. Expert advice for perfect stitching.