September 13, 2022
Autumn Fire Materials Kits & More!
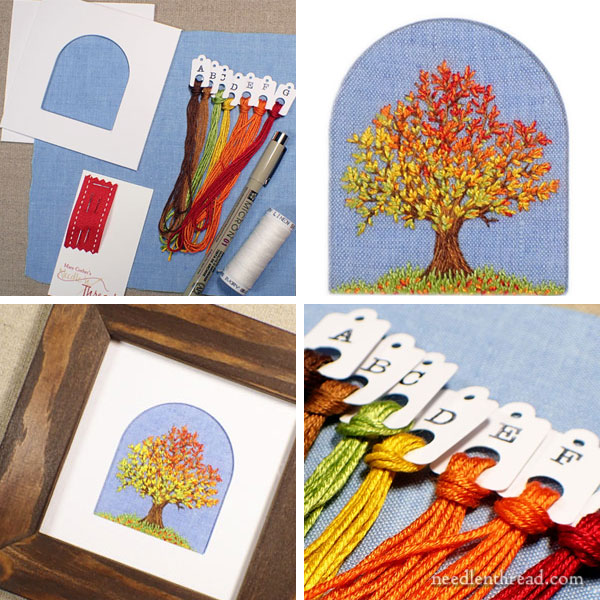
Good morning! It’s an exciting launch day here at Needle ‘n Thread! I love it when we can finally release a kit!
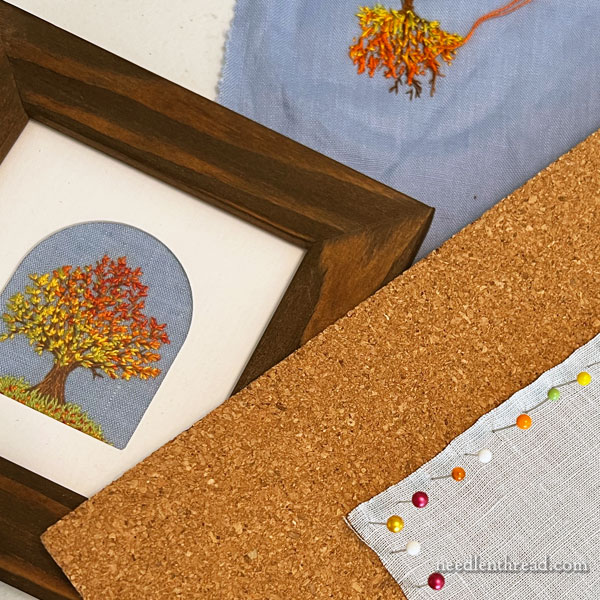
Autumn Fire is the third Stitch Snippet project for this year, and it is truly more snippet-ish than the Bee-Jeweled Pincushion and Cotton Quartet.
Autumn Fire is a small project. The embroidered autumn tree is just over two inches tall, and it fits in a custom-cut arched mat (supplied with the kit) for a 4″ square frame.
Here’s a little more information about the project and the materials kit, which you will find available here.