


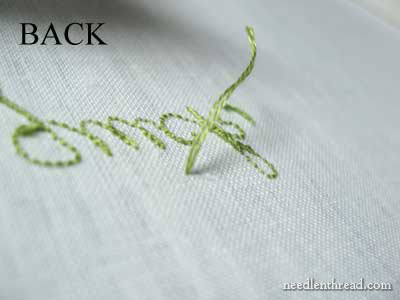
Remember when you learned penmanship and your teacher had to remind you to dot your i‘s and cross your t‘s? The same thing holds true when writing with your needle and thread – dotting the i‘s and crossing the t‘s are important, but dotting the i‘s is the part that’s tricky. The dot floats above the lettering, presenting the problem of traveling up to it to stitch the dot. You don’t want your thread to show through the front, so how do you get up there to the dot, without traveling a thread on the back of your work? Here’s one way.
When hand embroidering your lettering or text, by the way, it doesn’t really matter when you dot your i, not like it does in penmanship. With embroidery, you already have your lettering mapped out for you. You know exactly where that dot on that i is going to be. So while it may seem to be out of sequence to talk about dotting an i before we’ve even written the word, the fact is, it doesn’t really matter! Besides, since you might be writing a completely different text on your sampler, I thought it a good idea to address this question, in case you already have some i‘s to dot!

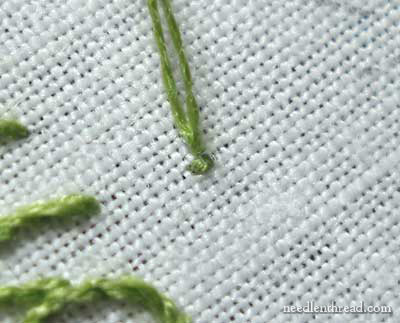
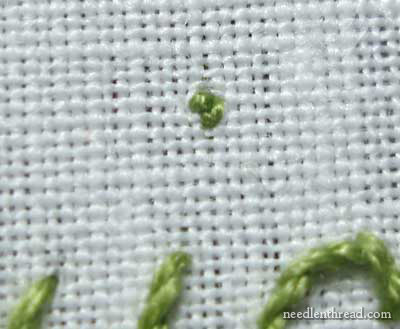
Start by bringing an unknotted thread to the front of the fabric, right where you want your dot. The thread does not connect to any other lettering – you’re just starting out with a new thread, and bringing it to the front of your fabric. In this particular tutorial, I’m using two strands of DMC cotton, but the technique applies equally as well to stitching with any kind of embroidery thread, really.
On the back of your fabric, leave about an inch-long tail, so that you can easily get ahold of it to snip it, later.
Now we’re going to work a couple anchoring stitches. Going back to the front of your fabric, take one tiny straight stitch over only one or two threads of fabric. If you’re working with a larger text on muslin or a high thread count cotton, you can certainly take the stitch over two or three fabric threads. It depends a bit, too, on what size you want your dot. If you want your dot to be relatively small, then take this anchoring stitch over as few threads as possible in your fabric, making the anchoring stitches as small as possible. After you take your first tiny stitch, bring the needle back up right next to that stitch.
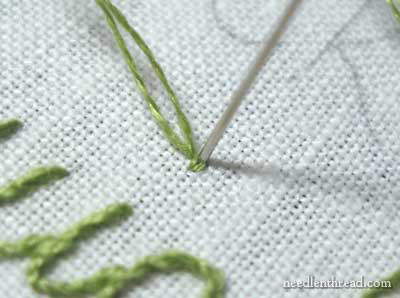
Now, take your second anchoring stitch straight into that first tiny stitch.
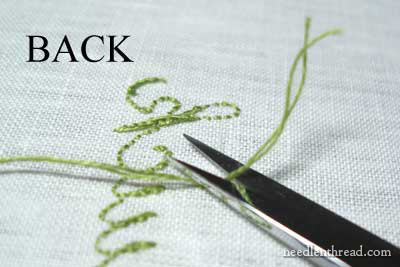
Now your thread is anchored sufficiently to stitch the dot. Turn the fabric over, pull your working thread out of the way, and snip off the one-inch tail that you left on the back. Snip as close as possible to the fabric, but don’t pull up on the tail with any force. Just try to snip right next to the fabric.
On the front of your fabric, this is what you’ll have – two tiny stitches, worked perpendicular to each other, the second stitch stitched into the first.
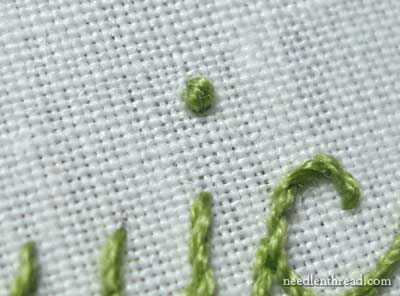
Now, stitch over those anchoring stitches with two straight stitches, side-by-side, that cover the anchoring stitches. Bring the needle up right above the anchoring stitches and go down right below them, then bring the needle up again in the same exact hole above the ancoring stitches, and go down in the same hole below them, arranging the two straight stitches to lie right next to each other over the anchoring stitches.
If you are working with a single strand of thread, you might have to take several straight stitches to cover your anchoring stitches. The trick is always going up and down in the same hole above and below your anchoring stitches, and making sure your straight stitches are lying side-by-side. This is what will make the dot look round.
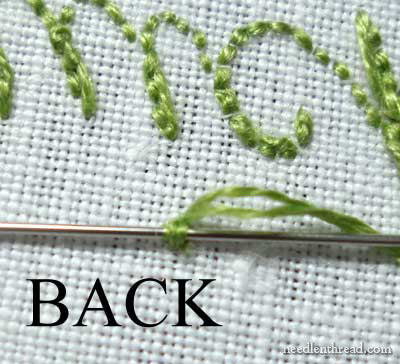
Now, turn the work over, and take the needle through the stitches on the back, running through them twice, once in one direction, and once perpendicular to that. If you can’t manage a perpendicular stitch, then run the needle under the stitches twice, going in the same direction each time.
Cut your thread close to the fabric, but don’t pull up on it before cutting. Just get as close as you can, without risking cutting your stitches or your fabric.
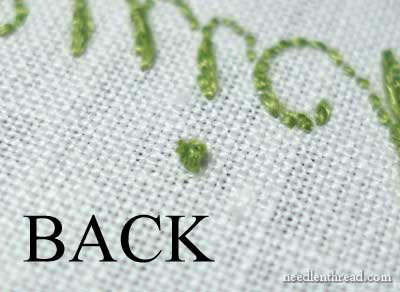
And there’s your perfect little dot, floating by itself above the text.
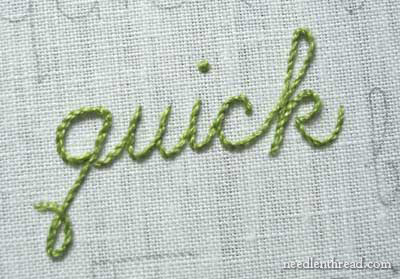
Next up, we’ll cover the lettering on that word, using stem stitch and focusing on connecting cursive text and keeping the direction of the stem stitch right.
For more tutorials on hand embroidered lettering and text, visit the Hand Embroidery: Lettering and Text Index of tutorials.
Any questions? Feel free to leave them in the comments below, and I’ll do my best to answer them!
Hi, I just posted a link to your site after winning a little award. I'm just passing on the love 🙂
http://homemakersguidetothegalaxy.blogspot.com/2009/10/feeling-love.html
I've always stitched a French or Colonial Knot, but this method is much neater!Thanks!
Beautiful stem stitching, Mary. When I first learned to stem stitch my biggest problems were curves and switching the thread lay direction going from letting it hang under the needle to flipping it over top of work similar to a buttonhole stitch. The result was very bad! So it is nice to see your neat professional results. Thanks.
I just tried your method, Mary, which looks much more orderly than my previous "improvisational" technique. Beautiful. Thank you!
My work is starting to look a lot neater. Thank you!
MARY linda no han llegado tus apuntes'''no quiero estar fuera''
me da error'
un abrazo
lidia
Wonderful! Thank you- I think this will be useful for many things…
Hi! I am brand new to embroidery! I am stiching burps clothes for my friends baby, do these no knot methods hold up in the wash?
Hi, Rachel – Yes, they do. I’ve never ever had a problem with them – they work better than a simple knot would, at least in my experience. Make sure you take at least three tight stitches into each other before working the knot. ~MC
Hi Mary, I want to work the embrodiery lettering sampler, The quick fox … . Do you have a list of the different materials and threads used? I plan to order from Hedgehog.
a novice member of EGA, Many thanks, Carol
Hi, Carol – I used whatever threads I had in my stash. Some of the particular tutorials in the series may mention the types of thread used, but I didn’t really approach this as a “planned project.” It was more or less just for demonstration purposes and I literally grabbed whatever thread would work to demonstrate what I wanted to demonstrate – and I didn’t keep track of the materials in one particular place (though, again, I think I made mention of some of the threads in the individual tutorials). Sorry about that! ~MC
Hi Mary,
I just found your site. I’m new to hand embroidery and was wondering what kind of fabric you are using in showing this technique?
Thanks.
Hi, Sharon – that’s linen a specifically, alba maxima linen by Legacy. It’s a terrific linen for hand embroidery! Glad you found Needle ‘n Thread!
Thank you for your prompt response Mary. I love your site! There’s so much great and helpful information on here.
Mary, I love your site. Your tutorials are clear and very helpful. I’ve been embroidering since I was 9 years old, but you’ve managed to teach me some techniques I didn’t know. Thanks for sharing your expertise!
Hi, i am a very new beginner and i found your youtube video about stitching.
Why wouldn’t you but lettering technic on youtube. Watching the video of how you are doing is more understandable.
Thank you
Extremely well presented, informative and by far the best I’ve seen on the internet. I have been cross stitching for about 6 months, and recently have tried some simple Blackwork pieces. In a densely populated area of the design, the starting and finishing off is reasonably easy because the tag ends can be hidden behind existing stitches. Some of the lettering I have had to do recently has presented a problem because the stitching has been isolated ( not COVID-19 I’m glad to say !) and hiding ‘support stitching’ has been difficult. Your photos and description are excellent but would it be possible for you to produce a video of your techniques as I find a visual description is, in this case, more easily understandable ?
Wonderful presentation. Much better than anything I’ve seen on the internet. Personally I’d prefer a video of your work only because, for me, a visual guide is so much clearer than one using still photos and an accompanied description. Can you provide a video description of your work ?