


Here’s the next stage of my goldwork and beetle wing embroidery practice – sewing some of the gold on! This is fun stuff! I’ll show you some photos here, and explain the types of gold I’m working with, as well as the particular techniques. I’ll also point out a few flaws, so you can avoid them if you take up goldwork!
After selecting which metal “threads” I would use on the project and jotting them down on my pattern, the real fun began!
I started with the main stem of the design, and worked it in Elizabethan twist. This is three strands of gold, twisted together to make a nice, sparkling twisted “wire” (only it isn’t as stiff as wire). With twist, you couch it on, and normally, you slightly untwist the twist when you couch, and pass your couching thread between the twists so you can’t see it. Then, of course, you let them twist back together again. Elizabethan twist is the smallest of the twists – it’s pretty fine – and I can’t for the life of me get my couching thread to disappear between the twists without distorting them – I think I may have to find a finer silk!
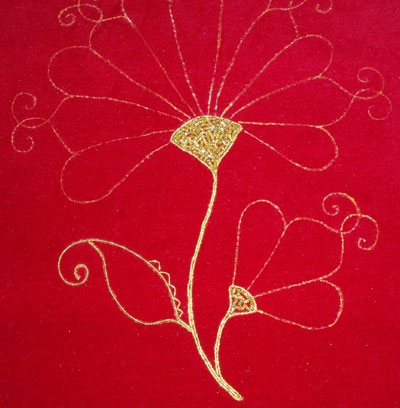
I worked up the stem, around the triangle at the base of the flower, and back down the stem with the Elizabethan twist. To couch goldwork, you use yellow or gold-colored thread (I use silk), which you run through a cake of beeswax. I run the thread through about three times, and then pass it through my fingers a couple of times to smooth the wax on. The beeswax gives strength to the couching thread. Working with the twist, you should couch in the direction of the twists, so that you see as little of the couching as possible.
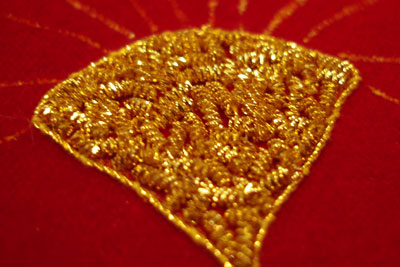
The triangle at the top of the stem is filled with what is called “chip work.” This is usually done over felt padding (yellow felt, if you’re working with gold). The metal here is called “check purl.” It’s a hollow, faceted, tube-like coil of very fine gold wire. You cut little pieces from it and sew them down like beads. Chip work can be packed very closely together (and the felt helps this process), or it can be randomly scattered over the ground fabric. This is kind of a cross between the two. The chips are worked directly on the ground fabric, and they are “tight,” but not super tight.
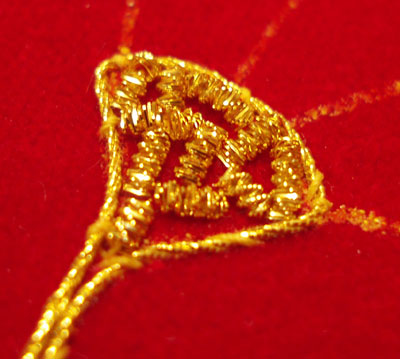
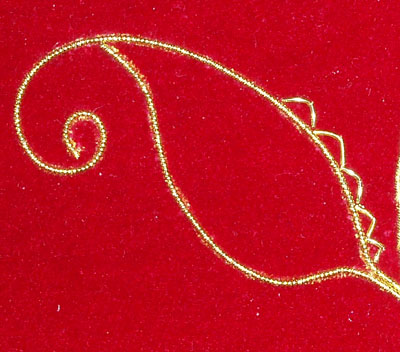
On the little stem, the chip work is even looser – but I have since gone back and filled in a little bit! You can see on the top left side of the photo above where my couching thread does not match the twist of the Elizabethan twist. It’s important to keep the couching thread even with the way the twists twist on this type of twist – since it’s difficult to hide the thread, you want it to at least “blend in.” If it’s going against the grain of the twist, it won’t blend in very well!
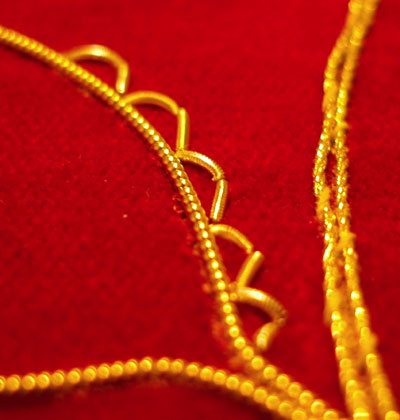
For the outline of the paisley-looking petal on the left side of the design, I used what is called “pearl purl.” Unlike the hollow wire of the check purl, the pearl purl is a thicker, nobbier spring. You couch it on using waxed thread, scooting the couching thread between the little “pearls” on the coiled wire. I like this stuff! It works wonderfully around curves and makes a nice decorative line. It looks very rich! It’s also much stiffer than most of the other metals (with the exception, I’d say, of the flat, ribbon-like metal called “plate”). Pearl purl also takes corners really well. You can pinch it into a nice square at the joints of the “pearls.”
After outlining the left leaf thingy, I cut lengths of smooth and rough purl. Like the check purl, these are hollow coils of very fine gold. In a long strand, they are limp and snake-like – really neat stuff! You cut it and sew it on like beads, the thread passing through the hollow core. I wanted a decorative edge around the leaf, so I took a shorter stitch length than the length of the purl, so that it looped out. Then I couched the middle of the loop, “splitting” the purl and making what looks like little zig-zag triangles around the edge of the top edge of the leaf. I alternated between smooth (very shiny) and rough (matte) purl, so that the light would play differently on the different golds.
This is that whole shape from afar. You can see how the shiny purls gleam while the matte (or rough) purls do not. Notice that you can see a wee bit of the paint line under the pearl purl outline. That is less noticeable with the purl zig-zag finished and the pearl purl outline tweaked a bit.
That’s it! The beginning of the fun part of the project!! I’m off again to thread my needle!
Regarding couching the Elizabethan twist….
I don’t know if you’re using floss or sewing thread, but sewing thread would be nominally thinner. (I’ve been using Au Ver a Soie silk sewing thread for goldwork couching; it feels wonderful.) I don’t think it would disappear all that easily, however.
I had a goldwork class once where we used clear thread (like really small fishing line). It was a rather bizarre experience trying to manage thread you pretty much couldn’t see. You definitely had invisible couching, though! 🙂
Fabulous. Wonderful detailed photos and text, and great that you are honest about what hasn’t worked as well as you would have wished. Thank you. BTW it’s looking gorgeous!
Hi, all! Thank you for the compliments!
I’m using the Au Ver a Soie (100/3)to couch all the gold – once waxed, I found it a bit thick to “invisibly” couch it with the small twist. I do have a very fine silk thread used for Kumihimo that’s gold. I should’ve used it, but I didn’t want to dig through storage to find it! (That’s what I get!)
I used nylon thread to sew the wings on – oh golly. You’re right, Margaret! It’s really bizarre working with thread you can hardly see! Actually, I found it irritating, and I just wanted to hurry to finish with it!
Mary, where did you find the fine silk thread (for Kumihimo)? Thanks!
By the way, the Au Ver a Soie sewing thread that I am using is the 100/3. I found some Gutterman silk sewing thread in a local store; I might try some of that next.
Hi, Margaret – I got it from Lacis. This is what it says: “First quality of identical tight twist as the Japanese KH silk” and the “size” of it is “00” – they sell it as silk suitable for Kumihimo, but it comes on a spool, not in a bundle. It’s probably not that much finer than 100/3, but it has more of a sheen to it, and somehow, it “seems” finer, so maybe it is slightly so.
If you go to lacis.com and search their online catalog for “Kumihimo” it’ll show up in the list.