


Here’s my run-down on the finishwork on my goldwork and silk Christmas ornament that I made for a swap…
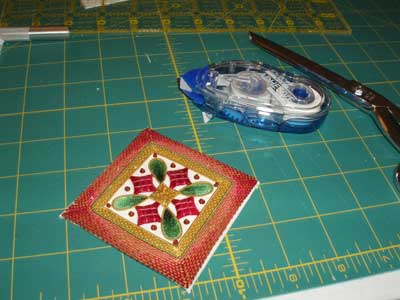
First, I gathered all the supplies I’d need to finish the Christmas ornament: threads, batting (which I didn’t use after all), fabric, scissors, etc.
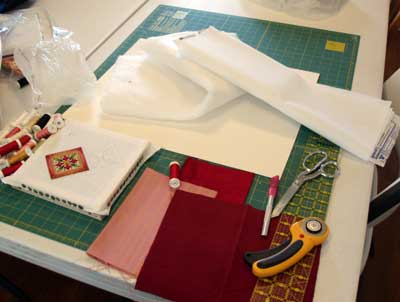
I wasn’t quite sure about which fabric to use for the back. I had some cranberry colored silk shantung, some burgandy velvet, and a dusty pink striped fabric. The ornament actually has quite a bit of pink in it!

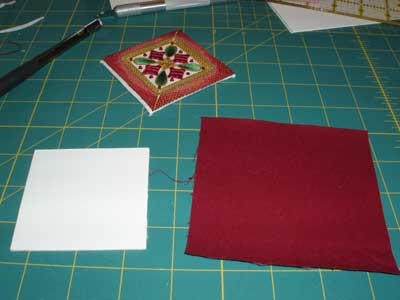
Next, I took the ornament off the frame and cut off the excess linen.
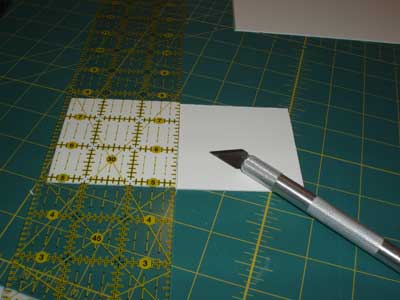
Next, I measured and cut out two pieces of acid-free mat board. I planned to cover one with the fabric for the back of the ornament, and the other I would mount the front on. Stay tuned, though – I changed my approach on this much later.
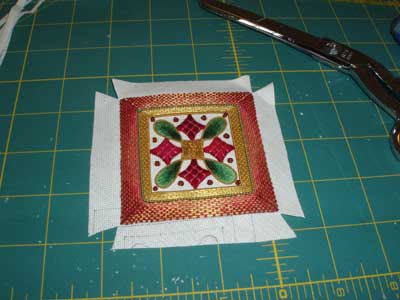
Then I cut out the corners on the linen, so that I could fold the linen more easily onto the mat board. I wasn’t exactly sure about this whole part, which kind of bugged me.
I didn’t want bulk corners, so I trimmed out little triangles, thinking that would help reduce the bulk. Well, of course it didn’t work – there was an overhang – so I cut squares out of the corners instead.
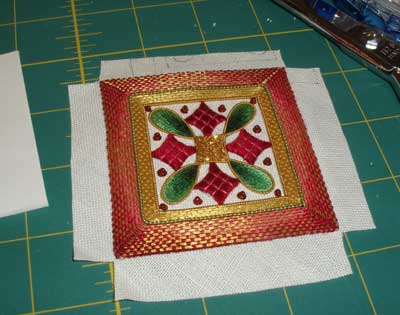
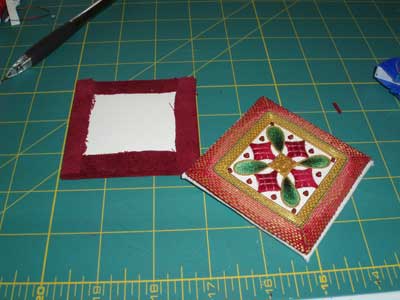
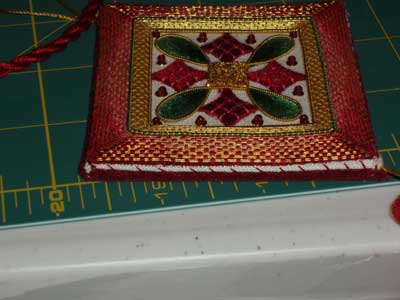
I folded the edges under, using a strip adhesive sold for scrapbooking (archival and permanent) to hold the fabric securely to the mat board. To do this part, I put the ornament face-down, and placed the mat board over the back of it. I put the adhesive on all four sides of the back of the mat board, then pulled one side of the ornament up and smoothed it onto the sticky strip on the back of the mat board. Then I did the opposite side, making sure to pull the ornament enough to give good tension, but not too much. Then I did the remaining two sides opposite each other.
It “worked” … but I wasn’t quite happy with it. The point was just to adhere the fabric so that it would remain in place while I stitched the front and back together. But I didn’t like the thickness of the top piece, and I really didn’t like the fact that the white linen was slightly visible on some sides. I tried to console myself with the fact that the edge would be covered with cording. But it was a lame attempt at consolation. I had to backtrack later. So stick with me, here…
At that point, the front was mounted, though not quite to my satisfaction, and it was time to move on to the back. I debated over fabrics and finally decided on a burgandy-ish scrap of something sort of resembling velvet but feeling more like a stretchy velveteen. Whatever. It worked – the color was right, and though it doesn’t have the shine of silk, I think it was more important that the color was right!
Now it was time to go through the same process of mounting the backing fabric.
I cut out the square to the right size, placed the other piece of mat board on it, and glued the edges as I had done for the top of the ornament. I liked the thick back with the mat board much better.
When I put the two pieces together, I was still concerned about the thickness of the top. I just didn’t like it. But I forged on! I should’ve taken a break at that point and thought about it.
My next step was to consider what to use for cording and trim. This, of course, is where the thickness of the piece started to bother me even more. I would have liked to just put a cord around it and cover up the place where the front and back were joined, but golly, that would have to be a huge cord!
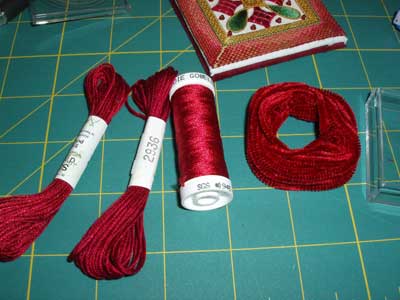
I went through my stash to pick out possible threads for cords. I was sure I would have all manner of types of thread and colors suitable for this project. Not so, not so. This is what comes of working from stash. You have to take what you can get! I had a silk chenille (on the right) that looked about right; a soie gobelin that looked about right, and two colors of soie d’alger that are in the ornament.
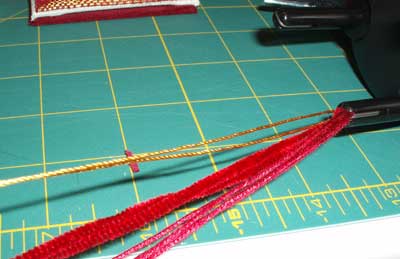
I tried making individual cords from all of them. I even tried making one big fat cord from several combined, with a gold colored Trebizond thrown in for the fun of it.
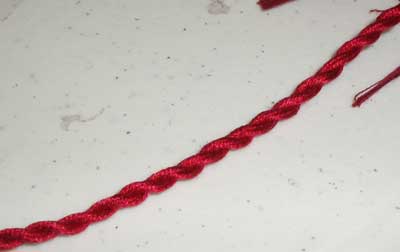
But none of it really worked, and I settled, instead, for a plain soie d’alger that I used to couch some of the gold passing on the ornament front.
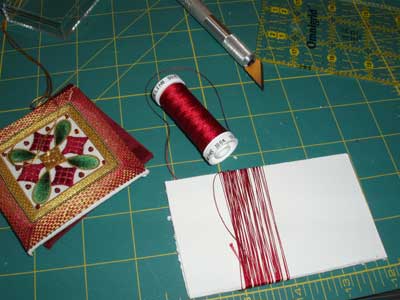
Then I turned my thoughts to tassel making. For a small tassel, the soie gobelin was really the only suitable thread. The chenille was too thick, and the soie d’alger would end up really fuzzy. The resulting tassel, by the way, stunk, so I improvised something else, which you will see later.
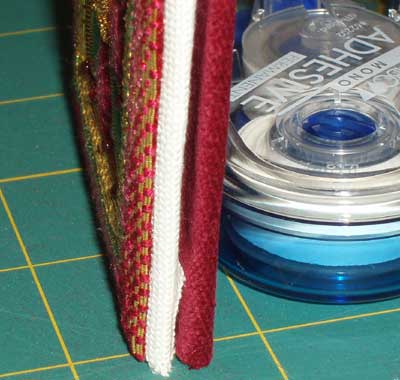
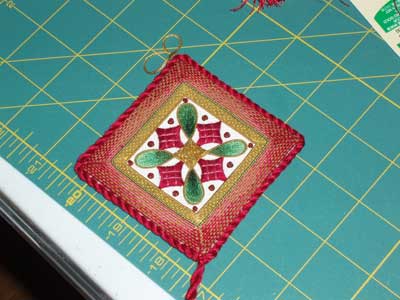
Next, I sewed the front and back of the ornament together, using a regular slip stitch, since I’d be covering that up with a cord, anyway. I didn’t like the thickness, especially of the front. I didn’t like the fact that so much of the white linen was showing, especially because I knew the cord probably wouldn’t cover that up all the way around. Aaaargh! SO…
At this point, I took the ornament apart, took the front off, took the mat board out, and mounted the ornament on a smaller cut piece of white (archival) card stock. The resulting edge of white was still there, but much thinner. That was much better. I sewed it up, then started with the cording.
I didn’t take a full picture of the tassel. I should have, then you would understand better. For one thing, it was just too “pinky-orange” – just a shade off from the colors in the ornament. For another thing, it was having a terribly bad hair day. Soie gobelin is probably not the best thread choice for making a small tassel – it might work better on a larger tassel, where length would give some weight to the threads. On a small tassel, the thread ends flipped all over the place and looked messy and awful. Couple that with the slightly off color, and… well. It just didn’t work. I got rid of it.
Here’s the cording, after the first round of slip stitching just to get it attached. I used a little piece of gold Trebizond at the top for the hanger, which I ran through between the front and ornament backing, and secured in place as I stitched the cording on.
Next, I addressed myself to the problem of the tassel. I didn’t want to leave the soie d’alger twist hanging there – though I probably could have knotted it and left it. It didn’t look bad. But I wanted more than that! I actually wanted a Big, Fat, Pretty Tassel!!! (Note to self: plan ahead!!)
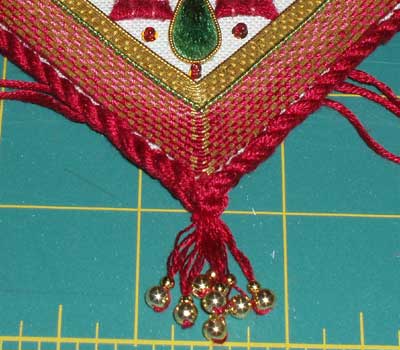
Instead, I opted for a tiny tail of little gold beads.
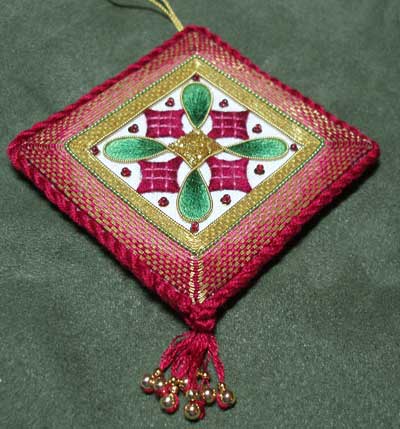
Once I had the beads on, I finished off the threads from the cord by running them individually into the cording (up the sides) and then, I gave the cording one more round of slip stitching to secure it and pull it a little bit more over the white.
My tree’s not up yet, so no tree shot!
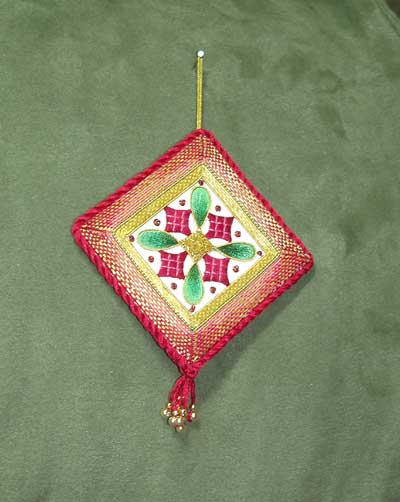
I suppose that, despite the strange tail of gold beads, she’ll do ok! I would have liked a heavier tassel for the finish. This picture above was taken from a weird angle, but the ornament actually does hang ok. I though the tassel would be essential for balance, but I could’ve left off a tail altogether. The beads look a little… well… I don’t know. They look kind of dorky. They have a nice gleamy sparkle to them that goes with the goldwork, but perhaps I should’ve left them off?
Overall, though, I was pleased with the final result, though I do think I’m going to have to make a concerted effort this coming year to polish up my finishing skills!
I hope the recipient likes it!
Looking for More?
If you want to follow this project from start to finish, here are all the articles about it, in chronological order:
Projects in Planning Stages – where you’ll see the first sketch of the project
Which Direction? Deciding on the design orientation.
Ornament Progress – some silk shading and goldwork
More Christmas Ornament Progress – goldwork along the frame
Finishing the Goldwork on the Frame
Goldwork & Silk Ornament – Almost Finished! Adding spangles and beads
Finishing a Goldwork & Silk Ornament – and the mistakes I made!
Whoa. Nicely done! Great of you to show us all the steps, good, bad, and OMG-I-changed-my-mind!! 🙂
Thank you!
The tassel, I think, I probably would have made about half again the current length, but then I’m a real tassel-lover. 🙂
This your work is wonderful!!! I like it more and more 🙂
Whew! It’s finally finished! Very nice job Mary. I actually like the gold beads on the tassel. They will add a little sparkle to the tree. Although, if I were the lucky recipient, I would probably hang it where it wouldn’t get lost among other ornaments…sort of showcase it on its own.
Your giveaway looks great this month, as it does every month! Mine is not quite as fancy, but it’s Christmas-y anyway. Deadline is Dec 18.
MGM
Oh my…you did all that work and created something so absolutely stunning and you’re going to give it away???? Gosh I wish I were on *your* gift list!!
Mary, I really hope that after all your hard work this ornament is being given to someone special who will appreciate it! I’ve stopped making handmade gifts for family and friends, and now confine myself to swaps with like minded textile enthusiasts. At least they appreciate the time and effort taken with design, making and finishing. I love your ornament and I hope the recipient does too.
Hooroo,
Christine.
http://missmuffettwo.blogspot.com/
Hi Mary
This has been a wonderful piece to watch you work right from the beginning.
I think any piece of embroidery from you would be treasured. I agree it is too pretty to just hang on a tree. Would look great hanging on its own somewhere where it would show it off. I like the little bead tassel – good choice.
Either way I am sure she will love it.
Have a great Christmas and many thanks for all the time you spend to show the rest of us how it is done.
Hugs
FredaB
It’s just Beautiful…I really love the gold bells on the tassel. Really sets of the entire ornament.
I’m really special so can I have it? lol
Annie in frozen Michigan
I LOVE the little gold bead tail! They sparkle so nicely…I love sparkly things… Beautiful work and thanks for sharing. Merry Christmas!
-Kirsten
Mary, the finished ornament is so beautiful! I have enjoyed this series so much.
I’ve scheduled a link to this post to go live on my blog tomorrow morning (Central USA time). I hope it brings you a few extra visitors.
Denise
http://needlework.craftgossip.com
Thank you for letting us look over your shoulder as you thought this one through. I spend forever ornamentizing my pieces and they’re not nearly as beautiful as yours.
The finished product is really worth all the time and care and thought that goes into it.
Hi Mary,
I came to you today via Needlecraft Gossip where I saw the picture of your GORGEOUS ornament. Then I realised that it was for the CB swap – the one I am also signed up for and haven’t YET received mine from… So here I am, sitting here wondering if the “global priority mail” that you’re sending it by is winging its way to here… or somewhere else.
Whoever gets it – what a treat!!
Yvette
Sorry, also should have mentioned that I made my ornament round so that I didn’t have the corner bulk problems that you encountered. I too used acid free mat board for body and shape, and only used what was already in my stash.
Also will let you in on a secret – I found a place to use the plaited braid stitch: on my Christmas ornament!
🙂 Yvette
Great insight into how you made your ornament. I like the fact you went wrong and changed your mind. It’s a beautiful ornament and I hope your swap partner loves it!
I really like that ornament, even with the little gold beads. Nicely done, and inspiring.
It’s beautiful and now you,ve got me thinking about Christmas already !!!