


Last summer, I had the best time embroidering this garden titled “Breath of Spring,” which was a project featured in one of last year’s Inspirations Magazine. I have to admit, this was one of the Most Enjoyable Projects I’ve worked on. Perhaps that’s a retrospective view – I do remember having a few frustrating moments while working on it. For example, I got quickly tired of working the bullions for the wheat. But when we’re satisfied with the outcome of a project, it’s easy to remember the whole project with intense pleasure, rather than to try recalling what we didn’t like about it, isn’t it?
A few days before Christmas this year, I set about turning this embroidered garden into its intended purpose, which, according to the original project, is as a pocket on the outside of a tote bag. I wanted to make the tote bag for my Mom for Christmas, so I gathered all my supplies, read (and re-read, and re-read again) the assembly instructions, cut the fabric, and set myself to constructing the tote bag.
Right away, I ran into a snag. The project called for a heavy fusible interfacing for the pocket, and in the assembly instructions, it said to fuse the interfacing to the pocket panel. Now, there are two pieces to the pocket, the embroidered panel, and the pocket lining. Since the instructions said to fuse the interfacing to the pocket panel, I automatically assumed they meant the embroidered panel. And they may have. I still, to this day, don’t know.
Whatever the case, I fused the heavy (very heavy – as in, stiff-like-a-board heavy) interfacing to the back of the embroidery.
You know that nagging little voice that tells you that you should probably double-check with someone before you take an irrevocable step? I heard it that day. But I didn’t heed it. Hmmm…..
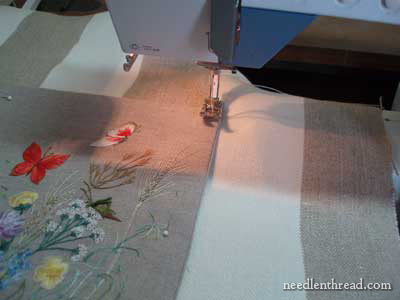
After fusing the interfacing to the back of the embroidery, I trimmed the embroidered panel to size, leaving a seam allowance, and I trimmed the lining (a piece of natural linen the same color as the background of the embroidery) to size, and then I sewed both pieces together, right sides together, as instructed, leaving a four inch opening for turning it right-side-out.
And this is what I wanted to show you. I was thinking I’d allow you to experience my anxiety. Oh, we’ve all been there, I’m sure – what IF? What if I ruin it? What if the whole thing flops? …
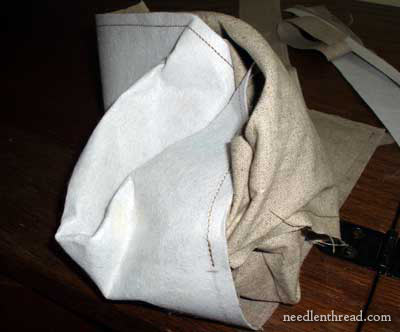
This is the beginning of the process of turning the piece right sides out. It took forever, just to get it into a position where I could start pulling the insides out, without snagging the embroidery or pinching that fused fabric into a permanent crack…
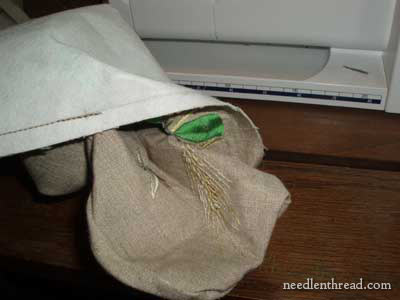
Finally, a leaf is peeking through.

Most of the garden is out.
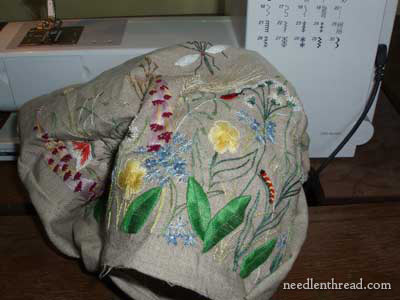
All of the garden is out, in one big crumpled mass.
Semi-ironed again, it’s lying on the fabric for the tote bag.
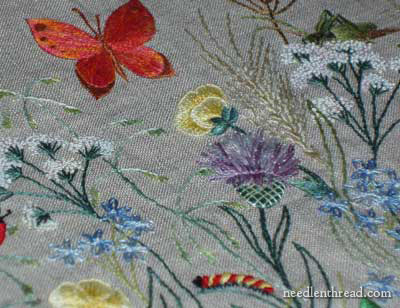
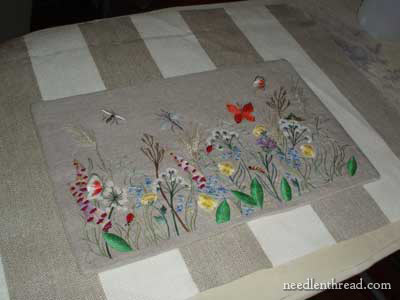
There was nary a pucker in this project when it came off the frame – that was part of its beauty. It was so crisp looking. So solidly straight and flat, even without ironing. I LOVE IT when embroidery comes out like that.
Now, no matter what I do to iron the piece, the fabric among the embroidered leaves, flowers, and grasses is ripply and bumpy….
I weep to think on it!
Ok, I don’t really weep to think on it. But it wasn’t one of my most pleasant finishing experiences, working on this.
I’m not a great lover of finishing, by the way. I think I may have mentioned this fact once or twice or ten thousand times.
This experienced confirmed it! Still, undaunted, I did continue in the construction of the bag, until I ran out of top stitching thread. My sister was out shopping that day, so a quick call was all it took to guarantee the arrival of more top stitching thread by nightfall.
With nothing else to do on the tote until then, I moved on to the next logical project:

…and I still haven’t finished the tote bag!
Crumpled or not it’s still beautiful. And after all it’s on the outside of a tote, it’s never going to stay immaculate.
That is a gorgeous project. Just love it 🙂
Pierrette =^..^=
Oh my…I told you you should have mailed it to me! Fusible interfacing will sometimes, most of the time, maybe even all the time, cause fabric to pucker. I don’t like it. Even on a plain old piece of cheap fabric. But on such a work of art…Oh My! That voice you heard that day was put there for a reason, and now you know what it is! Regardless, the bag will turn out just beautiful and your mother will love it, even with a little wrinkle in the garden.
The cookies look good too. They remind me of a sugar cookie recipe my own grandmother used to make every year and we would all decorate. Yum!
Finish the bag. I’m dying to see it complete.
MGM
Mary: This is still so beautiful. Good luck with finishing it.
I have a question and I don’t know who else to ask. I have designed a liturgical stole to be embroidered and wanted to do it on some white linen that I inherited when my mother died (she loved great fabrics!) I have read that the fabric should be washed and dried first, but this is so beautifully crisp that I hate to do that. Since the finished stole will never be laundered – is this necessary? The better question would be is it advisable to wash it first. Thanks for your help. I’m itching to get started, but don’t want to regret a decision made early on.
Thanks also for your great posts. You are an inspiration.
Candyce
Hi, Candyce –
The nice thing about linen is that, even if you wash it, you will easily be able to bring it back to a crisp state. Just don’t dry it. Rinse it in hot, hot water, then cold water, then hot water, then cold water, to shrink it. Then let it dry a little bit, but not all the way. While it’s still damp, iron it. It’ll iron crisp and immaculate.
Although you don’t intend the stole to be laundered, if the linen background is showing (if the whole piece is not entirely covered in embroidery), you never know if someone will wash it or not in the future. Better to pre-shrink, just in case.
Ahhh. Linen. I love linen.
MC
I think it is lovely!
It doesn’t look too wrinkled. . .
I love the bright garden colors on the oatmeal-colored fabric.
-Christiana
Hi Mary, and a Happy New Year to you and all fellow bloggers.
It’s summer here and I need something to do on those few days when the rain comes (and saves me from standing outside with the garden hose) so I thought I might get back to my embroidery and all those bits and pieces my sister keeps finding in junks stores and garage sales for me. One piece in particular I am keen to finish is the Siamese cat picture.
This is supposed to be done in Turkey stitch. I don’t know how to do this properly, so Mary, could you make this you next video library entry??
Thnak you so much.
Marian
Mary your bag is beautiful wrinkles and all. I had this same experience with a tote and a gorgeous smooth flat embroidered piece too, so I know how upset it made you. I bet the instructions really did intend for you to fuse the interfacing to the embroidered piece, but when there is a chance it might ruin my embroidery I’ve taken to simply adding a third piece of fabric — between my embroidered piece and the lining with the interfacing on that piece. I tried one with the interfacing on the lining and that made the lining very awkward when actually using the tote. I find adding the third piece of fabric leaves my embroidery still beautiful and makes the tote ‘stiff’ enough without distorting the lining either. Your mother is going to love this tote, so quit fretting over it.
It is very very beautiful.
Hi-Mary, Here's another one of my very precise & tedious solution to a trying result.
I am assuming that you already own and use a teeny-tiny iron wand. Use a small firmly stuffed and slightly rounded cushion. Place it face down on the top side of the embroidery. On the underside of the embroidery (the back side) use the wand iron but only on the wrinkled spots and pressing against the cushion. This will prevent the nooks and crannys from interfering in the flattening process. If you need further details of this explanation, let me know. Good luck.