


I’ve had time to embroider! Yippee! Though I was thinking I might have this whole needlebook finished by the end of the long weekend, and though I realize now that it probably won’t happen, I’m still pretty excited about the progress I’ve made on this French Maid Needlebook kit from Access Commodities.
I’ve finished the monogram, added some bullion roses to it, and almost finished one of the “fancy stripes” down one side of the front. Now, I AM excited about the project so far, but I have made some mistakes, and I’ll be pointing those out to you – not because I’m a negative person always looking for mistakes (!), but just so that you can see where I’ve run into some pitfalls. Maybe pointing out the pitfalls in my stitching will help you avoid similar pitfalls in your stitching.
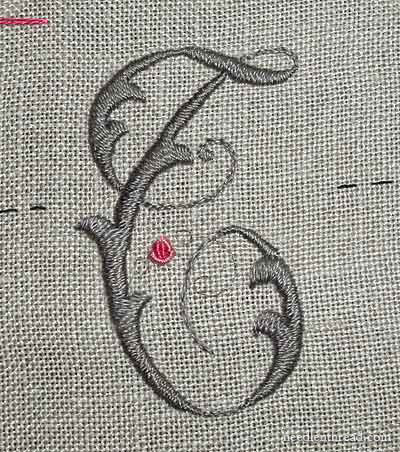
Here’s the finished monogram, and you can see that I’ve started adding the bullion roses to it. I would like the monogram, had I not made some little mistakes on it that bug me. The question is, do they bug me enough to pick out some of the stitching and re-do it? Ummmm…. maybe not!
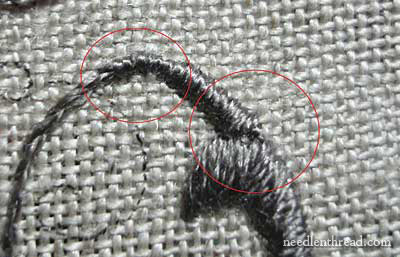
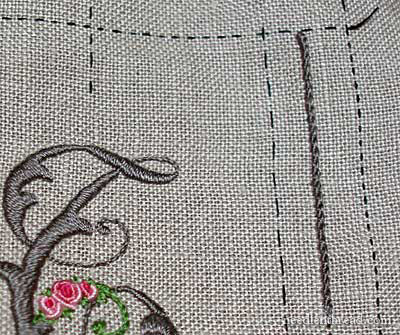
This is the upwards swash where the main part of the T curls up and around. The circled areas indicate the points that bug me. The circled area on the right: I should not have made such a clear separation for the last little section of the curve. The circle on the left: there’s a stitch in there that’s too small, and it makes the curve there look pinched, so that it is just slightly angular, rather than smoothly curved.
The latter problem isn’t that big of a deal – I don’t find it that noticeable. But the former problem (the right circle) does bug me (a LOT), so I’m thinking I might pick that out eventually!
I added the bullion roses to the center, using the pinks that were supplied with the kit. I used two strands of Soie d’Alger for the bullions.
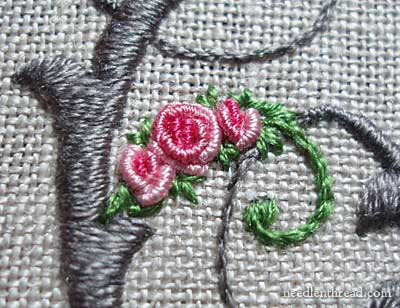
Once I finished the bullion roses, I used two strands of the brighter green to work in some straight-stitch greenery around the roses. Here, I should have worked in all three greens that were supplied in the kit. Later, I did go back and cut in some other green, but it isn’t very effective.
I also should have reduced to one strand, when working the rest of the curl on that green branch. You can see this point better in the picture below:
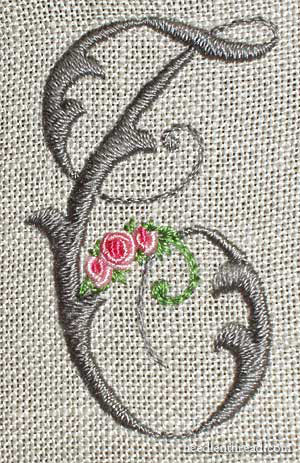
Here’s the completed monogram with the flowers.
In the original kit, the “fancy stripes” down the two sides of the front and back of the needlebook are bordered by a cross stitched edge, straight down the length of the stripe. Inside, are cross stitched roses. For my version of the surface embroidered needlebook, I wanted to keep the color and design scheme, but work in surface stitches. For the edges of the stripe, I chose Portuguese Knotted Stem Stitch. I like the little bit of texture this stitch provides, plus I like the somewhat wavy or scalloped look of the stitch.
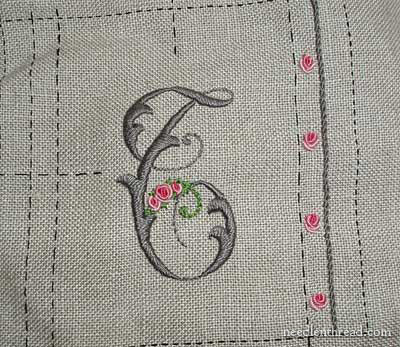
After working the one edge of the stripe area, I realized that, if I were going to stitch bullions in the center, it would be easier to do so if I were not stitching between two embroidered lines! Otherwise, I risk running into the embroidered lines with the tip of my needle and snagging them. So I added the bullion rose buds before stitching up the other edge of the stripe area.
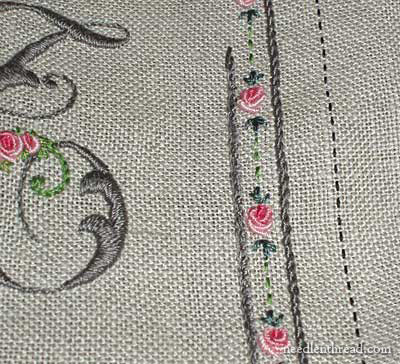
I added straight stitch leaves on each side of each rose bud, and worked a running stitch line down the center of the stripe area. The running stitch line is part of the original counted instructions.
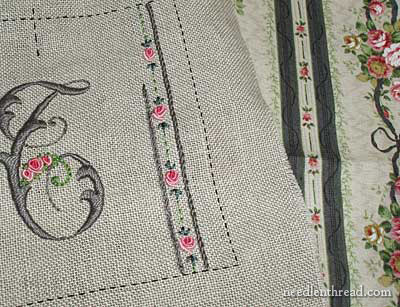
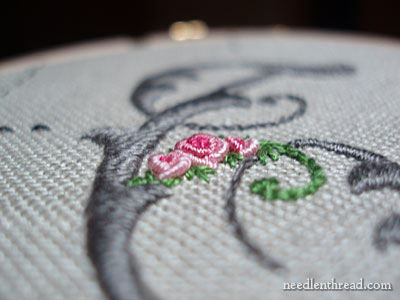
In the photo above, you can get a sense of the design of the needlebook cover and the matching lining fabric. I think they look great together! I like the way the stripes on the cover mirror the stripes in the fabric. In fact, I think that’s what sold me on the kit in the first place!
So, there’s my progress so far. I’m enjoying this little project! Keep your fingers crossed for me – maybe I’ll get the embroidery finished on it before Monday arrives again!
Enjoy the weekend!
The needlebook looks lovely so far and I am sure the finished piece will be treasured.
Beautiful! I the sharp contrast between the pinks on the greyish background. It reminds me of those black and white photos with just one portion left in color. Very sharp looking.
Lovely as always Mary. Thank you for sharing.
Hi there Mary,
As ever your work is wonderful.I am learning so much and have just watched your video of the Portugeuse knotted stem stitch…….so another stitch learned.
One day perhaps my monograms will look as good! I always have trouble with the curly parts and I must come back and look again, to know where I am going wrong in the way I do them. I mean the curled parts completed in satin stitch…………You always have your stitches just blending in so neatly…….
Thanks as always.
Hope you had a great Thanksgiving.
Love your blog. I'm a new embroiderer, and I love to learn more. However, I wanted to point out…if you have to circle the "mess-ups" so everyone can see where you're talking about…they're NOT mess-ups! Just my philosophy! Thanks again for sharing all of these wonderful tips and information!
Hmm…
For the "right circled area" you might just overlap the satin stitching rather than butting up the two areas of stitching (if I make any sense). It would be something that I would pick out personally, but I guess I am pretty finicky about these sort of things.
It is looking lovely all told though. I really like how you've decided to use the same sort of motif for the borders just in surface instead of counted stitches!
It is always a pleasure to see what you're up to.
Well, the end of the weekend is here – and I did indeed pick that section out and re-stitch it. It looks a lot better, I think. I finished the front of the needlebook and started on the back…. I'll show you an update later in the week!
Thanks for your comments and input!!
MC
Hi Mary
That looks Gorgeous… The bullion roses look brilliant along with the grey monogram.
I tried the bullion knot some 2 months ago, but I could not get it right… I think I did not secure it properly at the end, the knot was not firm, leaving it looking sagged. Think I need some more practice to get it perfectly… Hmm I'll try it when I get time…