


Progress! It’s slow, but it’s something! Yesterday, I had a bit of time to work on the Pomegranate Corners wool embroidery project, and instead of tackling more leaves, I thought I’d brighten up the chilly day by stitching with some red. I moved on to the pomegranate with eagerness. It’s the only element in the whole project that I knew exactly how I wanted to stitch, before the project was even underway.
The design itself sets the pomegranate up as a rather stripped affair, and I want to keep that striped look. So, starting in the middle and working outwards, every other section will be worked with padded satin stitch.
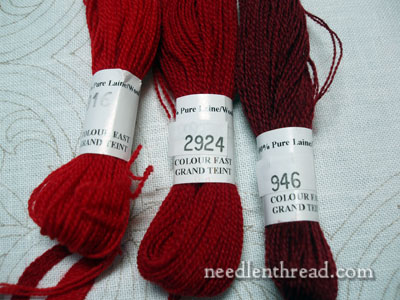
I’m using three different shades of red Fine D’Aubusson wool – 916 (the lightest), 2924 (medium), and 946 (dark).
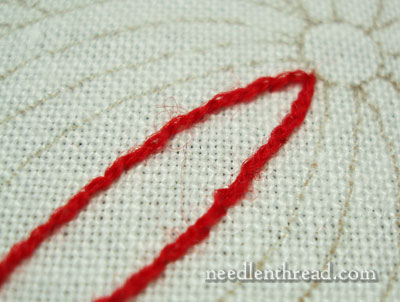
Beginning with the middle section of the pomegranate and using the lightest color of red, I worked a split stitch outline around the inside section of the pomegranate.
Some musing about working with wool: Lately, I’ve been working with stranded cotton, with coton a broder (we’re doing some whitework in my needle arts class), and with silk, so in moving back to wool for a bit, it takes a while to get used to stitching with it again! It’s so ….. woolly. Even the Fine D’Aubusson, which I find a lot easier to stitch with compared to Appleton or Paternayan wool, is definitely wooly, and its wooly characteristics require a few alterations in stitching methods. For one thing, I find that it works best “stabbed” (taking the needle and thread all the way to the back, rather than working a stitch in one scooped sewing motion). For another thing, short thread lengths are really essential. Wool gets itself all worked up and cantankerous after traveling through the fabric a lot – it can get pilled and it can fray. The Fine D’Aubusson tends less towards this than some other wools, but it still does happen, because it’s wool. So shorter lengths of thread work a lot better with wool. Personally, I work with nothing longer than 15″. I’d love to hear what other wool stitchers think – do you use shorter strands than usual when stitching with wool?
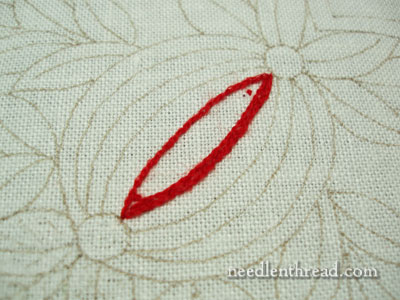
After split stitching the outline along the middle section of the pomegranate, I filled the area with long split stitches in the same color.
Lips, anyone?
Now, satin stitches don’t have to be padded, but I wanted a lift on these sections, so I padded the whole section. I don’t want a lot of lift, though – if you want a lot of lift, you can pad the area in one direction, then in another, with two layers of stitches. And even when I don’t pad my satin stitches, I normally do at least outline the area that will be satin stitched, because the outline also adds a little lift on the edges, and it also helps to keep the edges smooth and crisp. If you have trouble with satin stitch, try outlining your shape with split stitch first, then satin stitching.

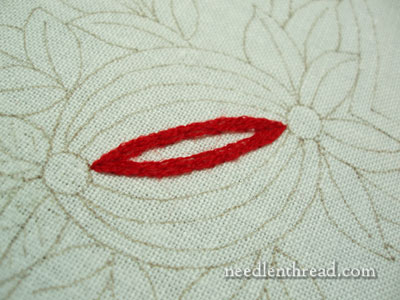
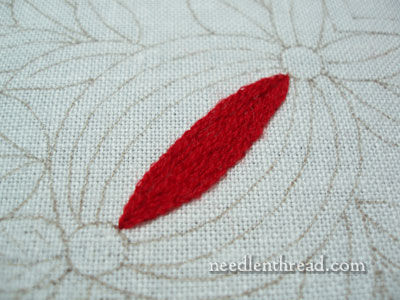
Starting in the middle of the shape, and working on a slight slant, I began satin stitching to one end of the shape.
Then I went back to the middle and satin stitched to the other end of the shape. (I apologize for the photos – on top of winter lighting conditions, red is just really hard to photograph!)
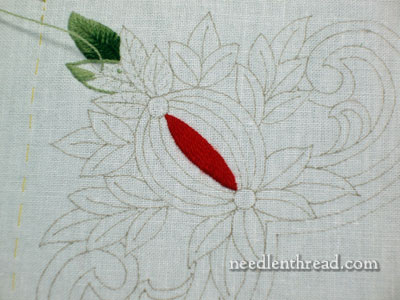
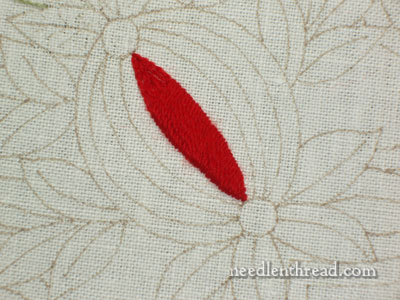
Here’s the center section, satin stitched, in perspective with the rest of the design… as yet unstitched! See the bit of red fuzz on the edge? That’s where I took a stitch out and restitched. That’s another thing to remember about wool thread – when you un-stitch, make sure you pick out any fuzzy residue.
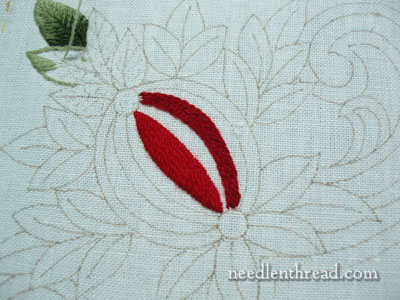
Moving to the medium red, I repeated the process of outlining and padding on the next section. I’ve yet to satin stitch that yet, but I will at first opportunity!
The last section out on the edge of the pomegranate will be worked in the same way, in the darkest red. Then, the areas in between the sections will be stitched (with a seed stitch filling).
The circles at the top and base of the pomegranate will be worked in one of the brownish golds – a satin stitched dot, maybe with a darker ring around it. By the end of this coming weekend, I hope to have a whole finished pomegranate to show you!
Feel free to check out all the articles relating to the Pomegranate Corners Wool Embroidery Project – you’ll be able to see the project from start to finish (once it’s finished), and you’ll also find the free pattern for the project listed there.
I like the floral pattern!
I love the names of your posts. They are so often so exciting. I click with eagerness!
Hi Mary,
Just want to say I love your daily postings. I found the 1st W.Morris App. book at my local Joanne’s in the premium book section and I got 40% off. It has some awesome designs that I can’t wait to try out. Also the M.Stewart pen you use-my Michael’s has discontinued the whole line. So now I’ll start looking else where for it. I was looking at old posts of yours and fell in love with the red freestyle needle/scissors case you made. Its beautiful! My question is-the red wool felt how heavy is it? Is it similar in weight to an acrylic felt? I want to play and I know I can get acrylic not so sure about getting wool felt!
Hi, All! Thanks for your comments!
Corinne – the wool felt I used is a bit thicker than your standard acrylic craft felt, so it holds up really well to lots of stitches. You can normally find wool felt at fabric stores, but the chain stores don’t always have a good variety of colors… I’ve generally only found browns and grays, though I did happen on this piece of red once. If you can’t find wool, look for a wool blend – those are usually a little more widely available. But the acrylic felt (craft felt) is usually too flimsy for a heavy amount of stitching. Hope that helps!
~MC
I’ve been looking forward to watching this piece worked on. It looks lovely!
Lovely reds Mary!
Question abou the satin stitch, once youve done this from the centre to the end, do you start a new thread before you go back to the middle and do the second half? Or do you just slide the thread under the “done” stitches
cheers
Julie
Hi, Julie – I just slid it under the stitches on the back and up to the halfway point. If your thread is frayed by then, you should probably go ahead and end it and start a new one, though. ~MC
Thanks for the info. I’ll check at my local quilt store plus my Joanne’s does have some wool blend felts. Plus I do have an Embellisher so I could make a nice heavy red felt on top of an acrylic felt base.
Thanks for the quick reply Mary!
I’m glad to hear that I have been doing this in the correct way as I am entirely self-taught (except for what I learnt in school when I was about 9 years old!!). Thank goodness for books and now the internet
cheers
Julie