


Sounds a little weird, doesn’t it? But I really do mean it literally – sanding (as in, with sandpaper) your embroidery patterns! It makes a Big Difference!
Lately, I’ve been using the prick-and-pounce method to transfer most of the embroidery designs I’ve been stitching. I like this method. It’s accurate. It’s “re-usable.” It works. So when a reader commented on my post about prick & pounce embroidery design transfers that she sands the back of her pattern and it really makes a difference in the transfer, I thought I should try that out.
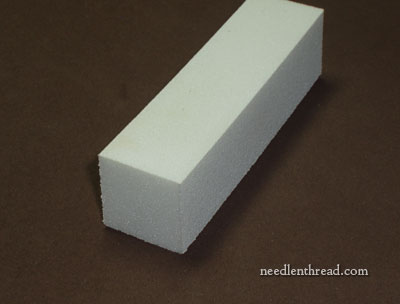
I didn’t have any fine-grade sandpaper on hand, because I don’t do a lot of fine-grade sandpaper stuff. But I did have a square nail buffer that has different grades for smoothing fingernails on each side of it. So I used that to test the whole sanding idea, and it worked well! Problem was, I didn’t want to ruin my favorite nail tool (that cost a whopping $4) by sanding paper with it. So I betook myself to a beauty supply store one day, and came across the above sanding block for fingernails. I figured it’s easy to hold onto, it’s fine grade, it’s only 89¢ – so why not take it home to try it out?
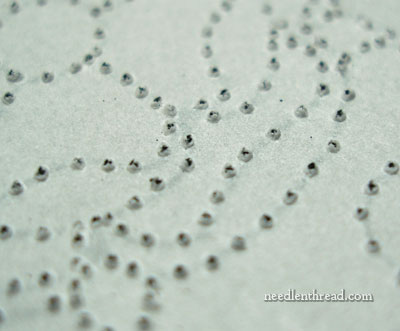
This is the back of the tracing paper, once the design has been pierced through. (You can see instructions for how this is done on my previous article about prick & pounce embroidery design transfer.)
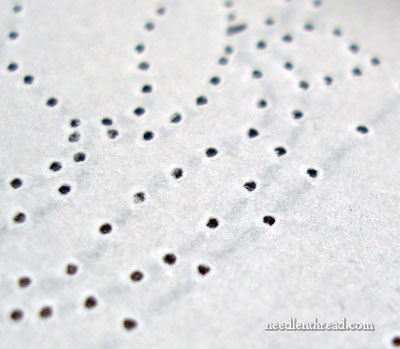
After lightly sanding the back of the paper, the bumps are gone. Without the bumps, the pounce powder makes a much cleaner “dot” at every hole. It really does make a difference!
And the really fun thing about sanding the back of your embroidery patterns is that, after you’ve finished sanding, you can pick up the paper and see this:
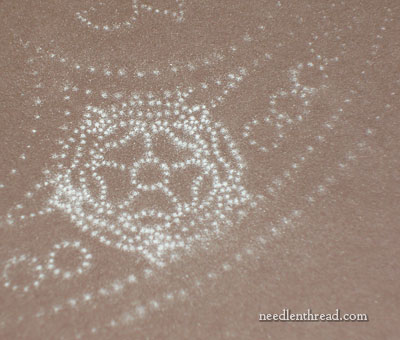
So if you like to prick & pounce your embroidery patterns, you might consider sanding the back of them, to get a cleaner transfer. You can use a very fine grade sandpaper, or if you happen to have one of these little fine-grade emery blocks for your fingernails, they work great, too!
I must admit I read this post with a great deal of skepticism – sanding and embroidery just don’t seem to go together somehow. What an amazing little trick – simple and yet so effective. Love it!!
As you said it seems weird but so clever. I’ll still go for the no sanding option because I like the way these little bumps grip to the fabric while pouncing. The pattern is more likely not to move.
What about a pummice stone, you know those stones you get to sand down the skin on your feet? Cheap and you can buy it from any pharmacy.
That’s rather clever. I like to prick and pounce my designs. I find they come out better looking that way than with any other method I have tried.
Thank you,
Now that I’ve read it and seen the pictures, it’s so logical. A little hole without all the extra paper in the way would give a cleaner, clearer mark. Wonder how long this trick has been around.
What a perfectly brilliant idea, Mary!
I just realised, that it was likely my comment your refering to. I’m totally blown away, you really tried it and even wrote a whole blog post about it.
Now I have to celebrate this with a nice cup of coffee 🙂
Hi, Susanne – Yes!! A perfect example of how we all help each other out! 🙂 The sanding makes such a big difference in the transfer – much clearer. The pounce doesn’t “spread” from the dots. It’s great! Thank you!! ~MC
This does sound like a good trick, and one that will make the way I use this method better as well. Instead of pouncing after I’ve pricked, I use a pencil to make a dot in each of the holes. I don’t end up with powder all over the place and I can just join up the dots or not, as I please and depending on the pattern.
Robin blue powder is mixed with some kerosene. When this solution is rubbed over the perforated design
the design will be easily transferred on to the cloth. At room temperature the cloth is left to dry on a cloth line. The kerosene evaporates and the dots stay back clear on the cloth.
I am afraid I don’t know what robin blue powder is. Can you explain please? I must say the thought of putting kerosene onto a piece of precious embroidery boggles my mind, but I suppose it does evaporate. But doesn’t it leave an oily spot too? Maybe methylated spirits or white spirit would be better. What do you think?