


Remember the star stitch tutorial that we looked at last week for the Stitch Play series? I had this odd feeling that I wouldn’t be able to leave it alone – that exploration of further samples and testing combinations was definitely a Must with this technique.
There’s not enough time in the day (week, month…) to play with every single possibility when it comes to embroidery stitches, but I did manage to squeeze in a few play sessions with the star stitch – some successful and some not so successful!
This is what developed…
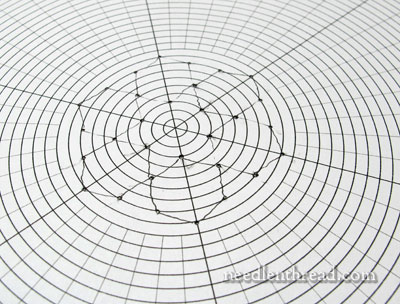
First, I wanted to explore the question of grouping. Using the polar graph paper that I wrote about before, I started with the typical six point star, using dots around the center of the polar graph. Then, I repeated this exact pattern of dots, radiating out from the center collection of dots, to create a layout for a grouping of stars consisting of a central star and six stars surrounding it.
Incidentally, if you connect the dots of any of these 6-pointed stars with straight lines around the perimeter, you end up with perfect adjacent hexagons, which opens up further possibilities for playing with stitches! But we’ll leave that for later…
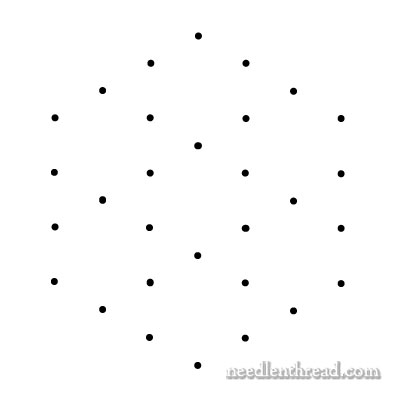
This is the layout of the dots that I ended up with.
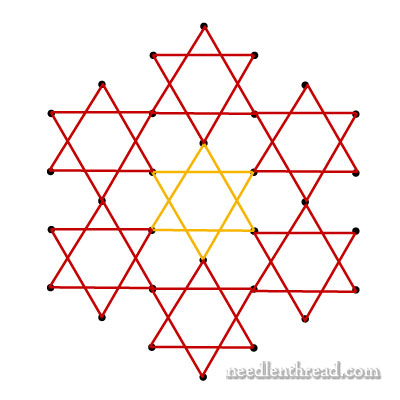
If you connect the dots into the star shapes, this is what you end up with – the center star, and six connected stars around it.
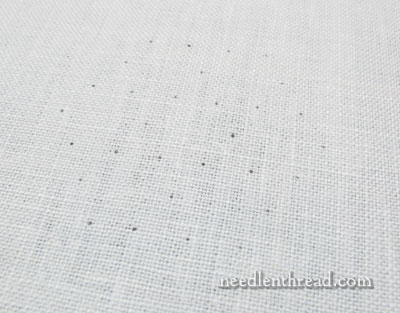
I transferred the cluster onto my fabric in the same manner as before – piercing holes at each dot on the layout, placing the paper over my fabric, and inserting the tip of a mechanical pencil into each hole to mark the fabric lightly.
Then it was just a matter of stitching up some stars! The center star is worked in a gold-colored Soie Perlee, and the surrounding stars are worked in a deep red Soie Perlee.
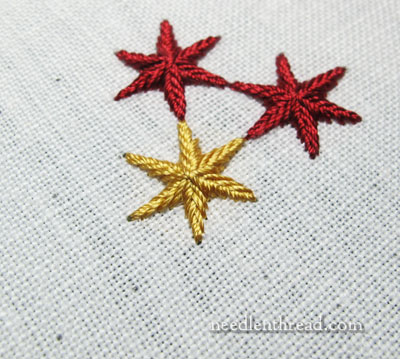
It really takes no time to stitch up one star – just a few minutes, really. Stitching up seven increases that time (sevenfold, as a matter of fact!).
I found myself enjoying the whole method of stitching the stars – it’s quite relaxing and simple, once you have that “forward two, back one” pattern that we talked about in the original star stitch tutorial.
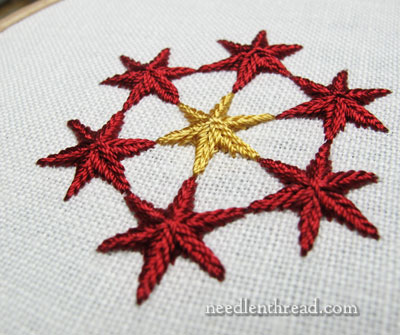
I liked the way the stars grouped together – the way the tips touch, the symmetry and geometry of the whole layout.
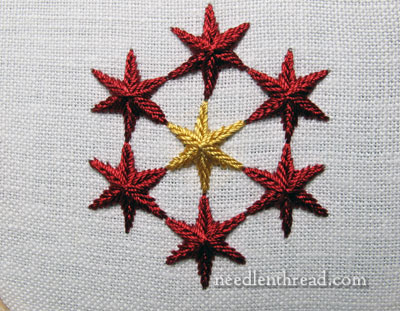
My original intention was that this grouping could make a pretty quick and simple hexagon-shaped Christmas ornament. Instead, it ended up looking more like a military badge, which isn’t really the “feel” I like to get across at Christmas! I think it needs something else to soften the look of it. Or perhaps a color change…
But in any case, it’s a start, and it was fun to play with the connected stars!
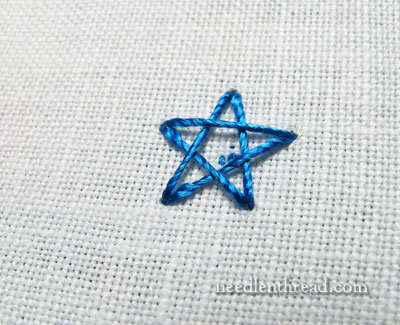
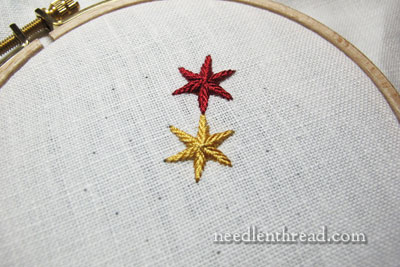
Next up was a 5-pointed star. Using the exact same method for making the 6-pointed star, I worked up a wee 5-pointer, to see if it would work into a good-looking star.
It does! And it was so simple, and so quick!
The 5-pointer is perfect for your starry skies in winter, and when you take up your sunny summer beach stitching, it’ll make a great little starfish!

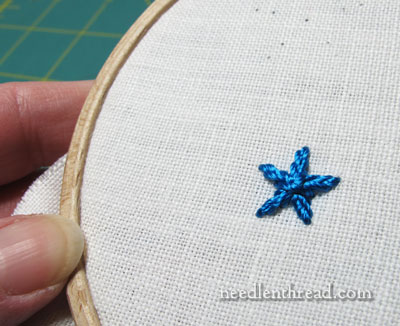
Then I tried to get all fancy with a much larger 8-pointed version with a long tail. This time, I went forward three dots, back two, forward three, back two, to work my way around the star. This brought the threads closer to the center, so that I wouldn’t end up with a hole in the middle of the star (as illustrated in the original star stitch tutorial, where I worked an 8-pointed star and ended up with a hole in the middle).

Oh gosh. Everything was going along semi-fine until the very end, when I must’ve gotten confused or interrupted or something. Those last two stitches just don’t seem to be in the right place, do they? Still, the concept worked. I just don’t like the ending overlap on those final stitches. I may have to play with this one a bit. I’m wondering about changing the length of alternating spokes…
In any case, as you can see, there’s a good many possibilities with this whole star stitch thing! It’s a perfect “Stitch Play” scenario – the more you play, the more you learn, and the more ideas are generated to play some more!
Have you played with the star stitch yet? Do you have any ideas you’d like to try out with it? Are you wondering how any particular approach might work, and you’d like me to try it out for you? Feel free to have your say below!
Tomorrow…. Thanksgiving Day! (Already?!?) I do believe the Textile Turkey is going to make an appearance. See you then!
Beatiful!!!
Wonderful!!!
hugs
Maria Filomena
Mary & Everyone, have a lovely Thanksgiving. I know the “Textile Turkey” will make an appearance on our Turkey Day”. Happy stitching!!!
Happy Thanksgiving! As you say, something not quite right with the 8-pointer but it definitely has potential … Christmas cards I’m thinking! Three wise men etc.
The yellow and red ones are BEAUTIFUL!!
Beautiful! I too like the red and gold stars, dad was military. Looking forward to seeing the turkey. Enjoy your Thanksgiving and family tomorrow.
That star is so cool. Love it!!!!
I think in order to have a more regular “swirl” in the middle, about half way through the crossing-over-the-top-to-the-other-side, you have to start slipping underneath some already-placed stitches. Tricky, but manageable. It’s a “jessica” thing…..
Wonderful idea! Thanks Bobbi!
I love how the last one could be used at the Christmas star!!
Dear Mary
These are absoloutely beautiful, I can’t wait to finish my present project so I can play around with these and add them to tags, cards and tree decorations.
Thanks for this
Regards Anita Simmance
Dear Mary
I forgot to wish you and your family a happy thanksgiving Day tomorrow I hope you have a great day.
Regards Anita Simmance
hello,
after reading your previous message, i tried to stitch a 5-pointed star, but the result was not nice because the points was not evenly spaced. i am mathematic teacher, so I know method to construct regular pentagon, but I am affraid it is … inappropriate for this situation.
Do you know a tips to do this or is it only the result of your expertise ?
(sorry for my ugly English)
Reading again your article, I realized my question was stupid. I suppose you used your polar graph paper.
I wish you a god Thanksgiving day.
Hi, Isabelle – Yes, you’re right – I used the polar graph paper to get an accurate layout. Try it!! It works wonderfully! ~Mary
This might be a silly question, but are you lining up your dots with the linen fabric you’re stitching on – so turning this into a counted thread type stitch? Or do you ignore the background threads when you’re doing hand embroidery on to linen?
I love the stars – wouldn’t silver on a dark background be lovely!
Hi, Lynn – In surface embroidery, the fabric weave doesn’t play as big a part as it does in counted work. For most surface embroidery, it’s important that the ground fabric will support the stitches, but the “grid” on the fabric doesn’t normally play a dominant role. So, no, I wasn’t lining up the dots with the weave of the fabric. Hope that helps! Yes – silver on dark would be really beautiful! ~MC
Has anyone mentioned… this reminds me of Japanese Temari. (Chrysanthemum stitch)
Love these stars!
I was thinking that the star with a long tail might look a bit more balanced if the two points either side of the tail were stretched downwards a bit so that they sit about 1 third of the way down the tail. (I hope that makes sense.)
Not sure how to fix the last two stitches, but I’m sure you will figure it out.
Irene
no not yet! too darn busy here but just love these! u make it look sooooooooooo easy! just wanted to wish u a happy turkey day! I just love your blog! ty ty ty
I just love your stars and tutorial!! I have to do the three starts on orions belt with a
wedding couple looking up…when the groom was stationed in Iraq three times, they used those
stars at the same time to look up and think of each other…definately going on a quilt!! Thanks so much for all you do!!
marvoles wonderful i always use to admire at all your works creativity, excllence. hats off
love hema
Post-Thanksgiving now looking at your past couple of days postings and think that the extended point star makes an ideal fairy wand…bibbity, bobbity, boo? Grateful for your outstanding inspirations and the confidence you provide to expand our stitch usage.
Mary: When are “The Little Things” coming out? I was hoping to use them as Christmas gifts to teachers. I especially liked the one with the lamb.
Linda
Thank you so much for this I’m making my own patterns for a folded flag with a shadow box and my family members military info and this is just perfect!!! I’ve been looking for days for the perfect star that is 5 points!