Today’s Stitch Play looks at a variety of different types of hand embroidered elements that feature petals or spokes. These types of circle-and-spoke elements come up often in hand embroidery, whether they are simple flowers made from detached chain (daisy) stitch to complicated affairs involving layers of petals in woven picots.
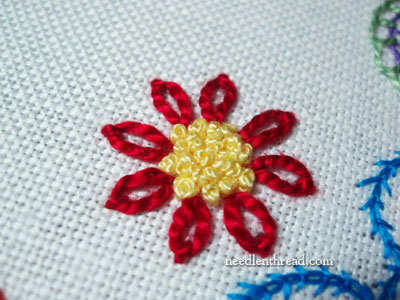
One of my greatest challenges of an otherwise simple flower is getting the spacing right on the petals. When the spacing is off on an isolated flower like this – or when one petal is decidedly longer or shorter than the rest – it can throw off the whole flower and leave me pretty disappointed when I finish it.
Today, I’ll also show you an easy way to get the spacing right on these circular elements involving petals and spokes.
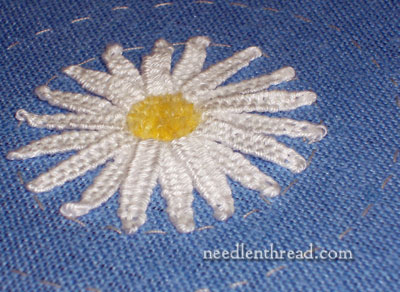
The circle-and-spoke approach to flowers is rather common in embroidery, but as simple as the concept is, they type of flower that results can be quite varied. Above is a woven picot daisy with a turkey work center, worked on blue linen with coton a broder #16 for the petals and regular stranded cotton for the center.
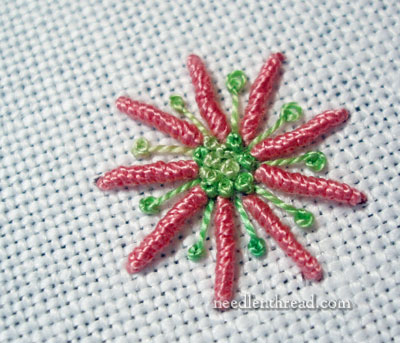
Circle-and-spoke elements aren’t always “flowers.” This, for example, is not necessarily a flower. While you can recognize the woven picot daisy as representative of a daisy, the bullion knot spokes above, alternating with pistol stitch in green, isn’t necessarily recognizable as a specific flower. However, in its circle-and-spoke shape, it can pass as a very stylized flower.
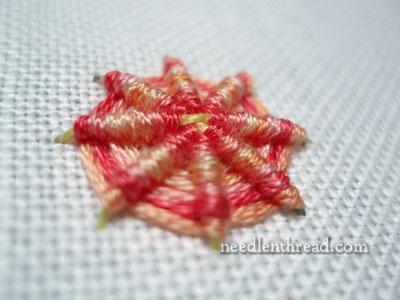
And then, of course, there are these elements that involve circles and spokes, but that don’t necessarily create flowers at all. Ribbed Spider Web wheels, for example, might work as an abstract sort of flower, but singly, they’re just really neat embroidered elements with texture that are fun to add to surface embroidery work.
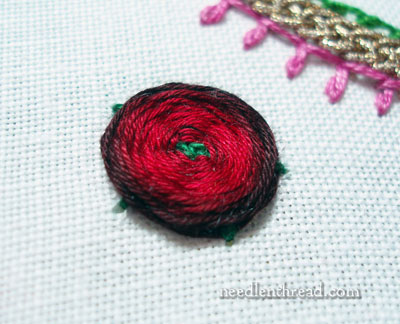
Take the same concept as the raised spider web circle-and-spoke element, weave it a little differently using the woven wheel stitch, and you create an element that is more flower-like.
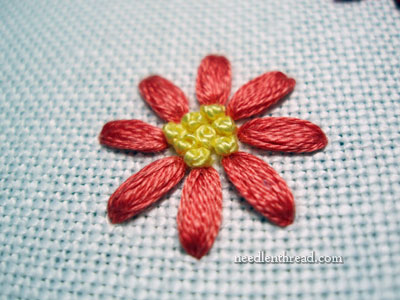
Granitos are a great way to make a perfect circle-and-spoke flower that reflects the same simplicity as a daisy stitch flower, but with plump, filled petals.
So there are lots and lots of ways that a circle-and-spoke element can come into play in hand embroidery.
What’s the key to good results with these types of elements? Consistent spacing and stitch length!
Consistent Spacing and Stitch Length
Polar graph paper comes in handy for creating circle-and-spoke elements that are evenly spaced and of even length. You can create and print you own polar graph paper online here. You can choose the number of primary and secondary spokes you want, and the the results will be perfectly spaced. You can choose the number of concentric circles in the graph as well, and these will determine the length of your circle-and-spoke elements.
Once you’ve created and printed your polar graph paper, you can use it to mark out the “petals” on your fabric.
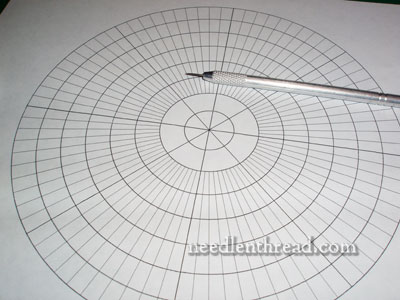
Using a needle (I use a paper piercing tool), pierce the piece of paper at the intersections of the circles and spokes, so that the holes in the fabric are large enough for a tiny pen tip to pass through.
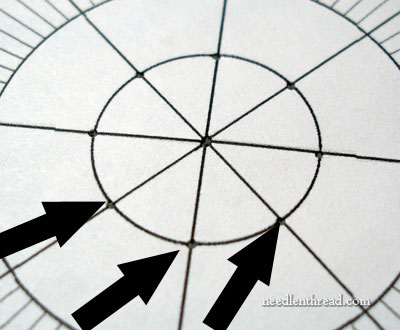
You can see in the photo above the holes pierced in the paper. I pierced along the inner circle and in the center of the circle on the polar graph paper.
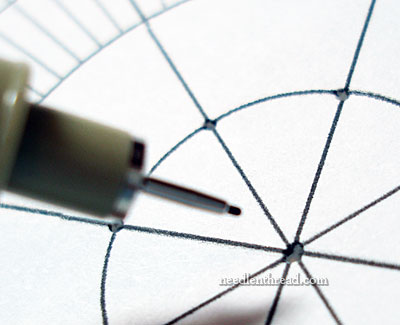
Place the polar graph paper on your fabric, so that the pierced holes correspond with wherever you want your circle-and-spoke element to be. I used a micron art pen with a small tip to mark the dots, but you can also use a pencil or other transfer pen, as long as the tip is small enough to fit in the holes in your paper. Insert the tip of the pen into each little hole and just barely touch the fabric.
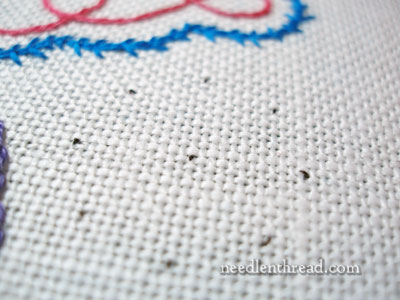
You’ll end up with tiny little dots, equally spaced, perfect for marking the length and spacing of your spokes.
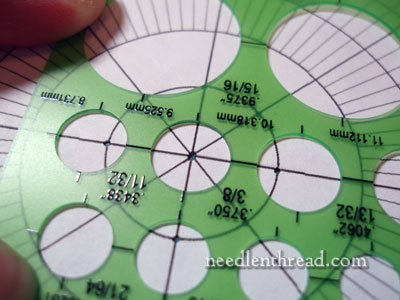
If the polar graph paper doesn’t create small enough circles for you, you can use a circle template (these are available at practically any office supply or art store) and create even smaller circles on your polar graph paper.
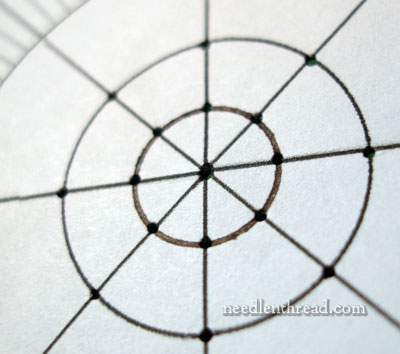
Pierce all the intersections you need, use the pen to mark the fabric, and you’re ready to to stitch your circle-and-spoke element.
Hope that gives you some fun Stitch Play for the weekend!


Thank you so much for this very usefull article (as usual !) I have already print my grid !
Thank you for this very helpful info! I always wondered how to create perfectly spaced flower petals etc.
Will definitely print my own polar graph paper!
It’s good to be able to make petals equally spaced and equally long, but if you’re shooting for realism in flowers, make your petals slightly unequal in both spacing and length. We rarely see a flower in nature that is perfectly placed so that we can see all the petals equally. Strategically unequal petals gives the illusion that you’re seeing the flower from an angle, which is much more likely in a real flower encounter, and more interesting in embroidery.
I’ve struggled with getting flowers even and didn’t know this type of graph paper existed. I’m off to check it out (thanks Mary!)
Hello Mary, thank you for today’s post on Stitch Play. I have never seen this type of graph paper before and will now go in search of it. How very clever to measure your spokes and petals like that. I already have the circles template. This is one area I always have a problem with and have mostly got by using just eyeballing the length and distance of the spokes or petals. This is a much easier way. Thank you for the post. Kind Regards Mandy Currie (mandycurrie@googlemail.com)
Thank you, it´s very interesting.
A hug.
Anna
Thanks, Mary! I always have a miserable time with tudor roses….getting the petals all the same width.
So simple, so useful. Your directions are so clear and easy to follow. The grid paper website is great. Thanks so much!
Wow! Thank you for the clear explanation about how to achieve evenly spced flower petals
G’day Mary,
Well…that’s a neat little corker alright. I’ve wondered about those beautifully spaced dots of yours. Not that I thought you couldn’t do them by eye, but…!
Thank you Mary. Cheers, Kath.
Flower petals that aren’t quite right, that’s one of my embroiderer’s Nemesis. Feels good to see I’m not the only one. However floweres aren’t always seen full-face, sometimes they are seen in profile or from the back. The Japanese are very good at designing flowers and leaves seen from different angles as their stylized vegetation on kimono textiles and embroideries show.
Another matter is the number of petals. Some simple flowers have six, others five, and what to say of flowers which have differently shaped petals like irises, sweet peas, snapdragons, and even pansies?
Hi Mary,
Just stumbled upon this article and instantly printed out a whole bunch! 🙂 Thanks a million (Love, love, love this site)
Glad you enjoy it, Geetha!
I am very new to embroidery and creating a perfect flower has been the biggest hassle. But the custom polar graph is going to make things simple and perfect.
Thanks!
Thank you so much for this graph generator link! It’s helping me solve all sorts of design problems, floss/thread based and other. Such a time saver.
I just sent you a email about polar graph paper. I went looking at our local Staples store and Michaels store and they never heard of it. But I went back to your article and didn’t realize that you printed your own graph paper.
Just for funzies … and maybe some help in placing leaves and petals, check out Vi Hart’s 3-video set on tbe Fibonacci Sequence. She’s awesome and funny, and those 3 videos are chocked full of stuff to learn.
https://m.youtube.com/watch?v=ahXIMUkSXX0
Oh, and you might want to check ILL for a copy of The Algorithmic Beauty of Plants. It’s technical math (and programming) stuff, but it’s still way interesting
You are an amazing resource! I just found you looking for a six sided snowflake, to patch a hole.