


After a nice little break over the holiday weekend, it’s time to get back to stitching! And what better way to do so, than to forge forward with our embroidered strawberries?
This is the second-to-last installment of this project. Today, we’ll look at the last strawberry – the small one, embroidered in long & short stitch – and we’ll see how to stitch the very simple blossoms.
Next time we visit the project, we’ll talk about stems and the large leaf.
This is a quick little episode! Ready?
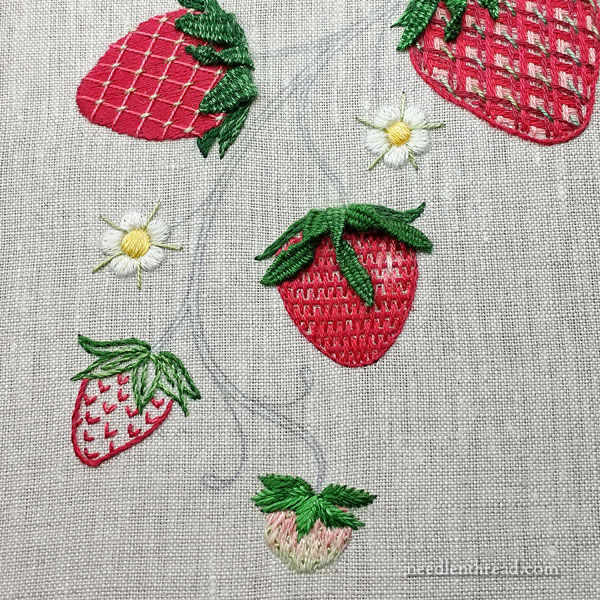
In the photo above, you can see the elements we’re going to embroider today – the smallest strawberry at the base of the design and those two little white blossoms.
Before we start, you’ll find the supply list with the DMC colors I used listed in the first installment in this series. I’ve been referring to the colors in a generic way (white, light green, pale pink, etc.) because many folks aren’t necessarily using the exact colors I’m using. Rather than refer to a specific number, then, I just refer to the general color. There aren’t that many colors in the project, so there shouldn’t be too much confusion.
Since this littlest strawberry is worked in long and short stitch, you may wish to familiarize yourself with the techniques of long and short stitch. You can read through this series of tutorials for a long and short stitch sampler that I put together quite a while ago (2009!). The content is still relevant and you’ll pick up lots of tips for working long and short stitch.
You certainly don’t need to become an expert by any means for this little strawberry. It is quite simple.
You’ll also want to know how to work the fishbone stitch, for the leafy bits.
Finally, the long & short stitch is worked with one strand of floss in the needle at a time. A #9 crewel (or “embroidery”) needle works great when working with one strand. If you only have a #7 (that’s the size I think I use most frequently), that’s fine. It’ll work!

Instead of working from top down, which is how I’d normally work an element like this, this one is from the bottom up. The palest white-green is the dominant color here, and you don’t want to run out of space for it. The element is so small that it’s not going to make any difference whatsoever if you go from top down or bottom up, unless you run out of space for the green!
If desired, using one strand of the palest green, you can split stitch just along the base of the strawberry on the design line, to give the edge a bit of lift off the fabric.
Start at the base and work a jagged row of adjacent long and short stitches in the lightest pale green, coming up on the design line (or just on the outside of your split stitch along the base of that line.)
Then, for the next row up, switch to the palest pink, and work a jagged row across the berry, coming up from behind the first green row and splitting into those stitches.
The “looser” your interpretation of long and short, the sketchier the strawberry will be – and that’s what you want. Rather than very formal, exact rows of “long-short-long-short,” shoot for varied lengths that are not precise. I always think of “sketching” the stitches in, rather than a very strict approach to the length of the stitches.
To achieve good blending, always split upwards into the previous row of stitches – and go relatively deep into them. (Obviously, in a very small space like this, your stitches are not going to be super long, but you don’t want tiny, short, tight stitches. Go for longer stitches that come up deep into the previous row.)
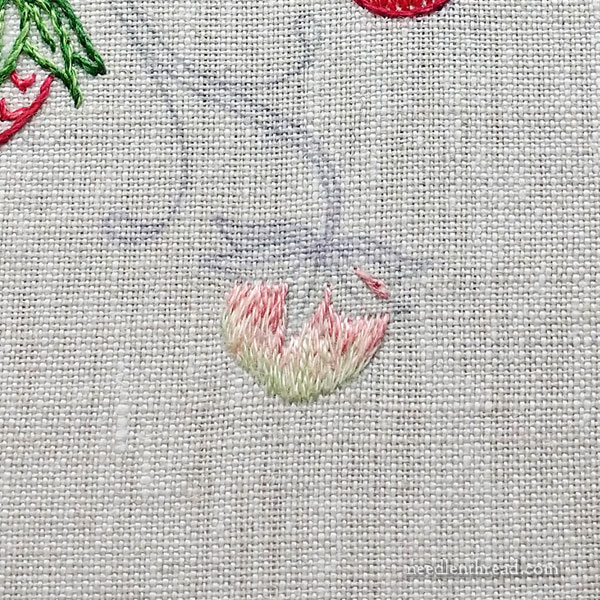
In the photo above, you can see the very sketchily-worked pale green and pale pink rows.
Switch to a medium pink, and “sketch in” some medium pink stitches, coming up into the pale pink stitches and going down into the design along the leaf edges.
Work some small pink stitches into any areas of the strawberry that show between the leaves, too.
There are only three shades here – pale green, pale pink, medium pink – so the final layer of color up by the leaves is the medium pink. You don’t need a lot of medium pink there – just enough enough to fill the rest of the berry by the edge of the leaves.
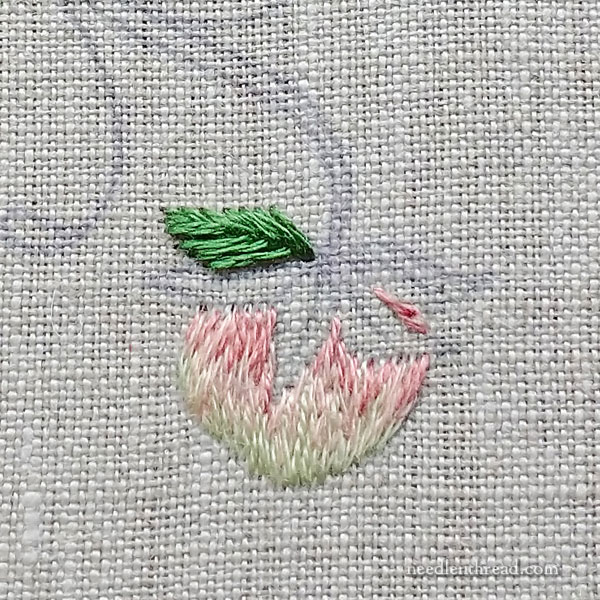
Using a darker green and two strands of floss, work the leaves farthest back in fishbone stitch.
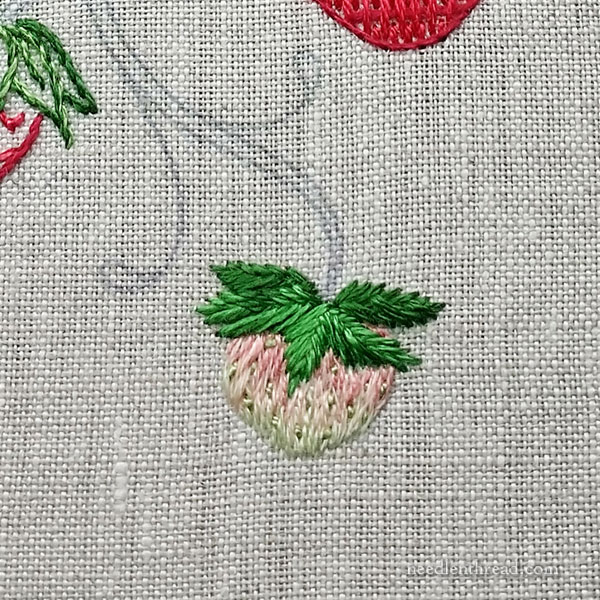
Using a lighter green – or blending a lighter green and a darker green in the needle – stitch the foremost leaves in fishbone stitch.
Using one strand of #12 perle cotton in a lighter green (if you’re using overdyed threads, you might snip out a lighter green section for this), work tiny straight stitches vertically over the surface of the strawberry, to give the impression of strawberry seeds.
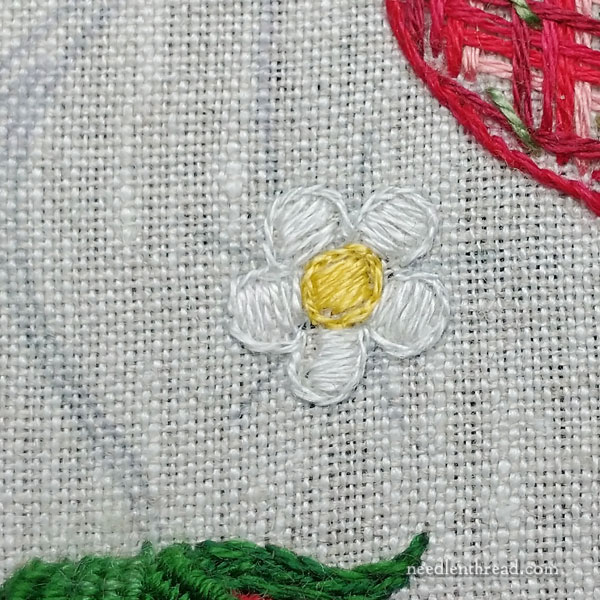
For the blossoms, split stitch the center circle with one strand of bright yellow, and split stitch around all the petals with one strand of white.
Switch to two strands of yellow, and work straight padding stitches inside the center split-stitched center outline.
Switch to two strands of white, and work straight stitch padding stitches inside the split-stitched petal outlines.
Refer to the photo above for the direction of the stitches for the padding.
You can use two strands of floss for the satin stitching, as long as you use a laying tool to keep the two strands from twisting.
Satin stitch the center in yellow, over the split stitch outline, first. The satin stitch should be perpendicular to the padded filling stitches.
Then, satin stitch the petals, coming up in the fabric over the outer split stitch outline, and going to the back of the fabric right next to the satin stitched center.
If you begin on the outside edge of the petal, just outside the split stitch line, and in the center of the petal, that will establish your stitch direction. Move from the center of the outside edge to the side of the petal, and then return to the other side of center and work to the other side of the petal. You want all the satin stitch to go in the same direction across each petal, and pointing towards the center of the flower, as shown in the photo above.
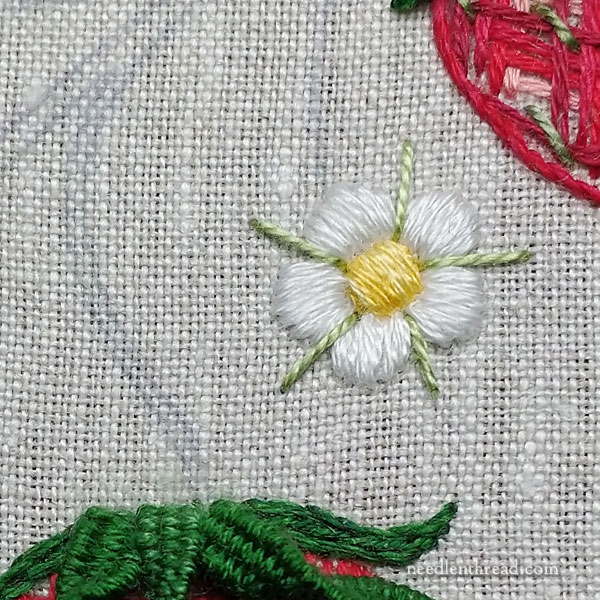
Finally, take a light green #12 perle cotton and work long straight stitches between the blossom petals as shown in the photo above.
Optional: If you want to add more color to your petals on those blossoms, you can work three colored straight stitches inside the petals, fanning out from the center. We tried this with light green, and it’s not that noticeable, but something like the pale or medium pink used on the small strawberry might show up better. I prefer them just white satin stitch, but you might want to touch in some extra color! Up to you!
Looking for More?
If you’d like to follow this project from beginning to end, in chronological order, you can do so by visiting this index of tutorials in this series of How to Embroider (Blank). You’ll find all the projects in this series listed there. So far we have five ways to embroider wheat along with this strawberry project. The next project features some pretty sweet daisies!
For members on Patreon, we’ll be finishing the strawberries, including the blossoms, the vines, and the leaf, later this week. The printable PDF that ties up the whole project will be available for members over there, before the weekend.
Here on the website, we will tie up the project (vines and leaf) early next week!
This Friday, we’ll be looking at something a little different, though – it’s fun, and I can’t wait!
See you then!
Thank you very much this series!
Even though I haven’t been embroidering along (too many other projects going on at the moment) each new “Strawberry” post has made me smile – this is such a pretty design! I love the colors and how each strawberry is different.
Mary, I’m just continually in awe at your artistry! Even though surface embroidery isn’t my thing, I love seeing what you create. And I learn so much from you about tools and other resources for my lacemaking.
Why, thanks, Sarah! 🙂
Dear Mary
The last strawberry is so sweet and so small compared to the others but it will grow into a ripe red glowing strawberry like it’s siblings. The blossoms are lovely and match the design so well and the fly stitched leaf is different and stands out from the other strawberry leaves it’s lovely. Thank you for sharing with us this tutorial on the tiny growing strawberry and the blossoms so lovely. I look forward to the next instalment concentrating on the stems.
Regards Anita Simmance
Mary, Thanks for all of the different patterns, especially this last strawberry that is not yet mature in color…and the flowers just waiting to become strawberries! It makes me dream of June when the Strawberries are in season here in Buffalo NY!