


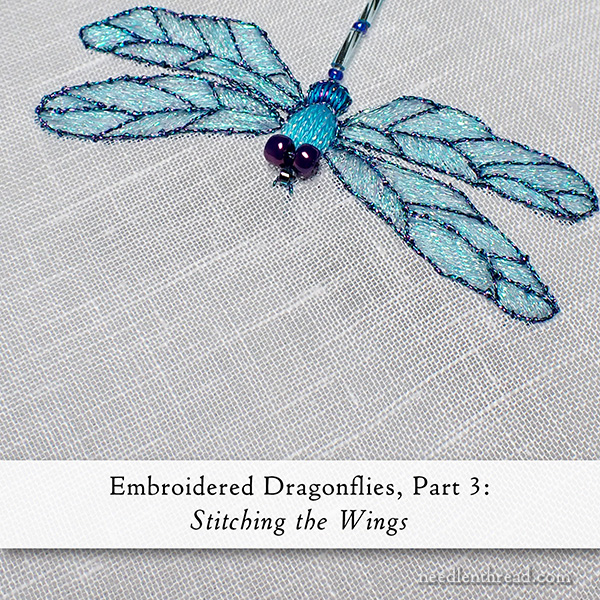
I’ve been waiting to write this post, just so I could title it winging it.
Today, we’re going to look at an easy way to embroider the wings on a dragonfly, and we’re going to go about it with a very loose approach. You’ll see what I mean!
The last time we looked at the dragonfly, we stitched the little body or thorax of the bug. Today, wings…
The wings on the dragonfly are embroidered with one strand of Accentuate #301, a very light blue sparkly blending filament.
When using this type of thread by itself, especially if you’re not using the glass linen, cut the length rather short. You’ll have to change the thread more frequently, but it will handle better in short lengths.
If you’re using the glass linen, which has a very open weave, you can get away with longer lengths because the fabric doesn’t wear as much on the thread.
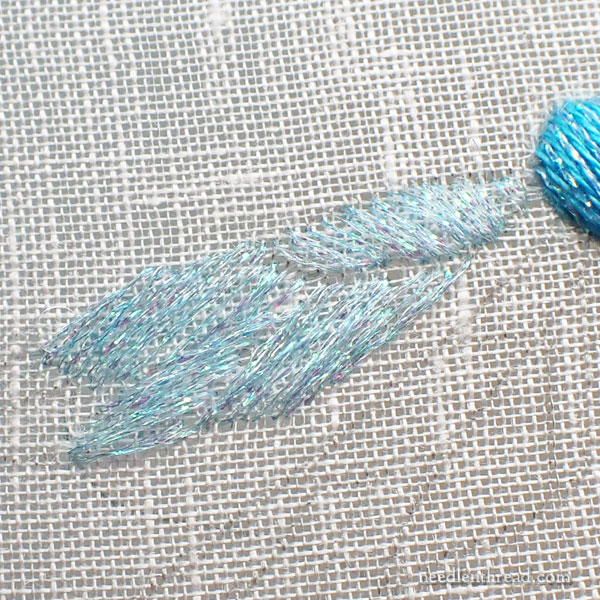
This is what I mean by a loose interpretation! Very light. Very not-crowded.
Satin stitch the sections of the wing, but don’t cram the stitches in. You don’t have to even cover the ground fabric completely, although when the dragonfly was finished, we put some filler stitches in the wing to make up for some of the areas that were a little more “open” than others.
The idea here is to keep the stitching quite light, but to give a sense of color and sparkle in there. You don’t want the wing to look heavy.
In each section of the wing, change the direction of the satin stitch. This will make a difference in how the light plays on the stitches.
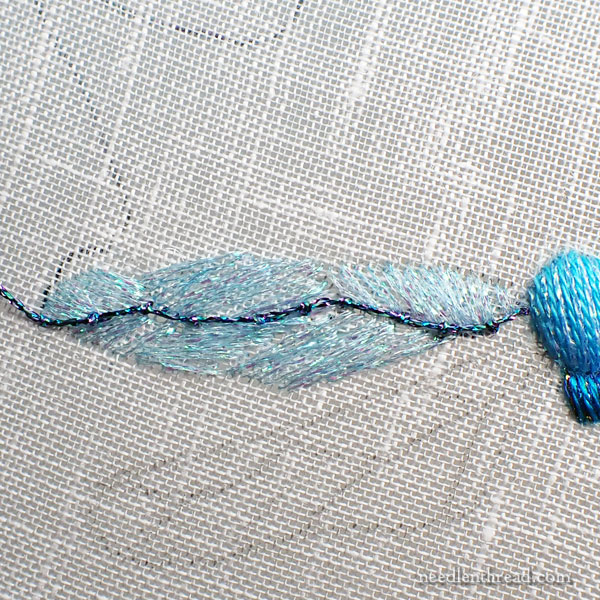
Once finished filling each section of the wing with some light and open satin stitching, it’s time to work the veins and the outline of the wing.
We used AVAS #4 braid, in color 1229, to work the veins and the outline. Couch the longest vein on the wing first, laying down the 1229 metallic and then stitching over it with the same thread, situating the vein into place.
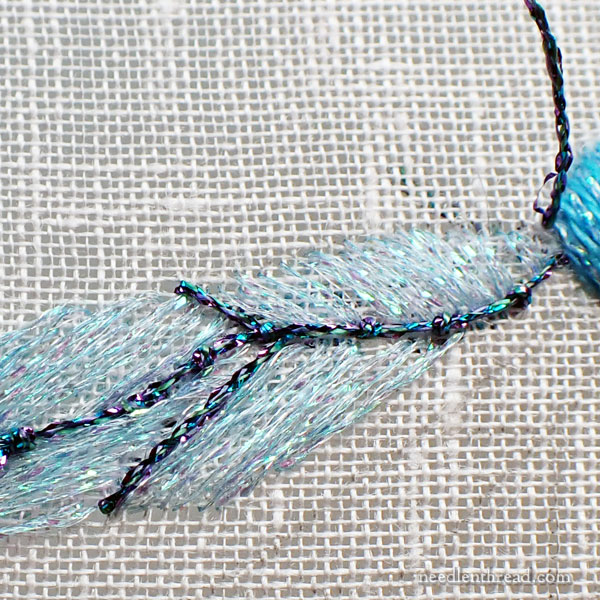
Then, go back and work straight stitches with the same thread, wherever a small vein “branch” inside the wing needs to be covered.
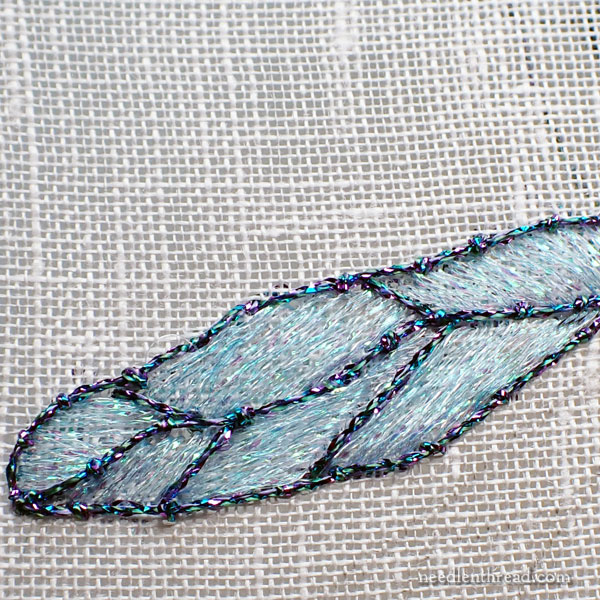
Finally, thread a cut of 1229 into another needle, and couch around the outline of the wing, laying down a separate piece of 1229 and couching over the outline.
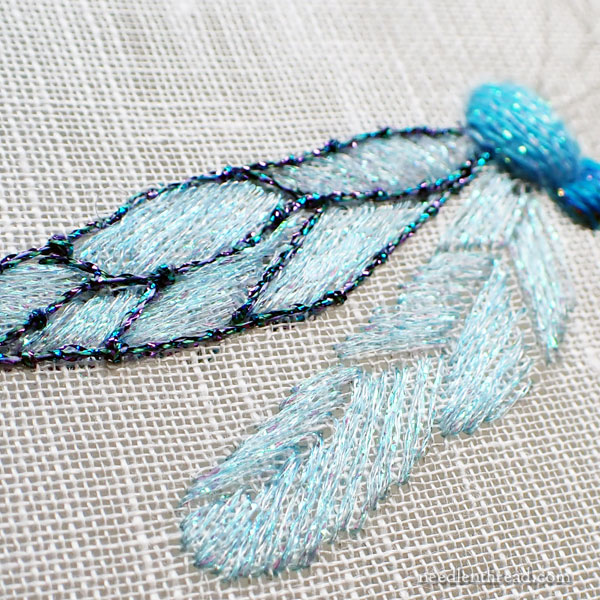
Work all the wings the same way!
Remember to satin stitch in different directions for each section on the wing.
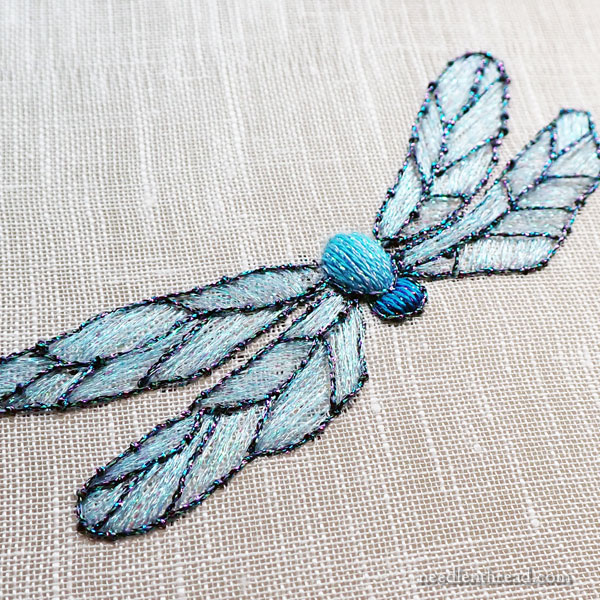
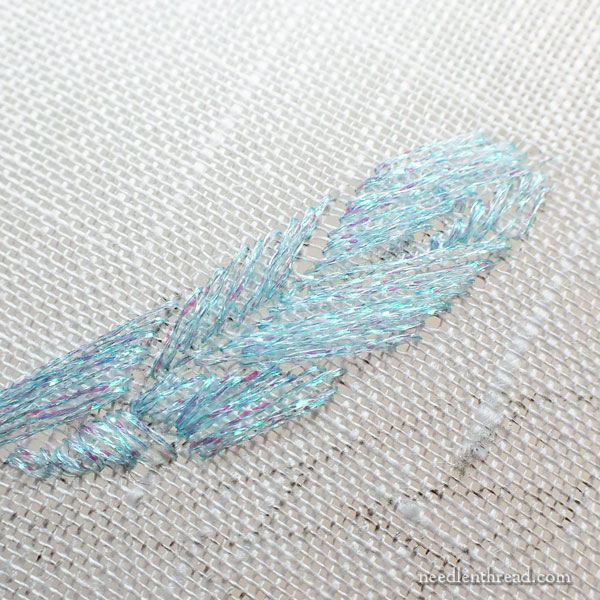
The finished wings.
At this point, use the same metallic you used on the wings to work a fly stitch at the base of each section of the thorax.
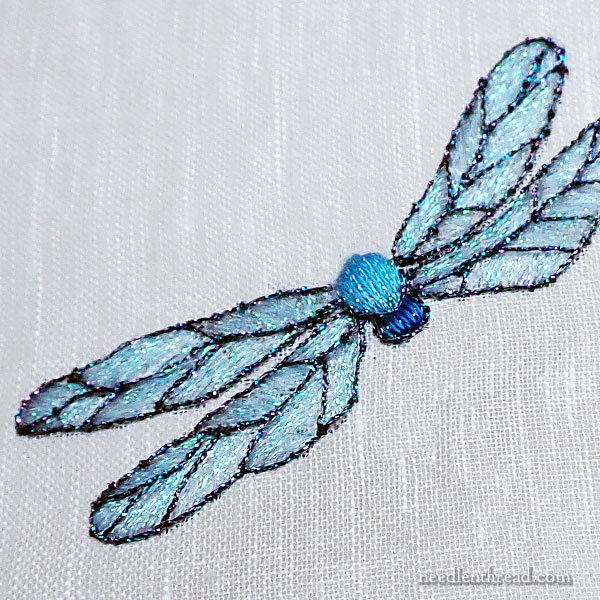
In the photo above, you get a better sense of the sparkle from the Accentuate, and you can see that it isn’t really essential to pack the wing sections with closely worked satin stitch.
Still, if you find areas that look sparse, you can easily go back in there and add a stitch or two where needed. Just don’t overload the filled areas with thick satin stitching.
Next time up, we’ll finish this little guy!
As usual, I’ll be posting the PDF download over on my Patreon page for members who wish to download a print-friendly version of the tutorial to save for later… or use now! I’m going to roll this tutorial and the next one (the finish) into one PDF, so you can look for that in the next day or so.
You can find this tutorial and all the other tutorials in this series indexed here.
Happy November!
Dear Mary
This is very lovely and so sparkly and colourful and the contrast of the different colour threads really contrasts well. Although I don’t particularly like dragonflies this is a lovely take on them. Thank you for sharing with us your tips and techniques on the How to Embroider a Dragonfly and for the photos above really nice embroidery.
Regards Anita Simmance
Thanks so much for sharing a great tutorial on how to do the embroidery of dragonflies wings, this will look great on a blouse or on a small pouch as dragonflies have lots of meaning to me, doing the embroidery with one strand and in different directions make the embroidery to stand out.