


Sometimes – often, in fact – as you embroider, you’ll be faced with the dilemma of swapping out an old thread for a new thread midstream – that is, when you’re in the middle of a line of stitching.
Lately, I’ve received several questions about changing threads in the middle of embroidery – when to switch to a new thread, should I switch to a new thread, how do I switch to a new thread, and so forth. I think the topic was prompted when folks were reading about floche, because it’s a thread that works best with slightly shorter stitching lengths.
Guess what?! This is a subject we’ve covered a few times here on Needle ‘n Thread. So let’s talk about it, and then I’ll show you some examples. I think that, if you see how it’s done on a few stitches, you’ll get the hang of it for any stitch.
Some Basics
First, let’s cover a couple basic principles:
Embroidery threads should be cut at a length that they can reasonably be stitched with, without their showing wear (and without their being wildly inconvenient to stitch with).
Let’s tackle the latter half of that notion: “without their being wildly inconvenient to stitch with.” You might have a long-wearing thread that stands up really well to stitching, but if you work with a really long cut, it can be frustrating to stitch with – prone to twisting, knots, etc. Cut your thread to what you consider a comfortable length in cases like this, but at a length that won’t be frustrating.
Regarding the thread wearing out, though, that’s a more complicated question. Different threads wear out differently. The length to cut an embroidery thread is determined by many factors: the type of thread, the type of fabric, the type of stitches – all of these influence how the thread wears out.
A safe rule for thread length is to measure it from the tips of your fingers to your elbow, for most threads: that is, around 18-20″. This will be more or less depending on the make-up of the thread. If you have a very soft and delicate thread, 18″ might be a good maximum length, though 16″ might work better. If you have a long-wearing, sturdy thread, 20-24″ may work fine.
The more you embroider with different threads, the more you’ll get the hang of a good length that’s comfortable for you and that works well with the thread.
When to Switch
These two principles doesn’t fluctuate:
1. If you’re running out of thread, you need to switch to a new thread.
and
2. If your thread is wearing out – if it’s starting to look dull, if it’s starting to look fuzzy, if it simply doesn’t look as good as it did when you started stitching – you need to switch to a new thread.
There are sometimes triggers to alert you to the above conditions: you might notice fuzz getting stuck around your stitches, you might notice the thread is knotting more or pilling, you might notice it’s not as shiny as it seemed at first, things like that.
At What Point in the Stitch do I Switch?
There might be a few exceptions, but for the most part, the “how-to-end-a-thread-and-start-a-new-one” question normally involves embroidered lines rather than filled spaces. It’s pretty simple to switch threads when you’re filling with satin stitch, long and short stitch, or the like.
But when you’re working line stitches or decorative bands or composite stitches, the question is a little more complex. These are the types of stitches that may stump you when it comes to where to start the new thread.
The general principle is this:
End the old thread at whatever movement in the stitch takes the thread to the back of the fabric, and start the new thread at the next movement in the stitch, where the thread comes to the front of the fabric.
There are exceptions, but for the most part this principle holds true.
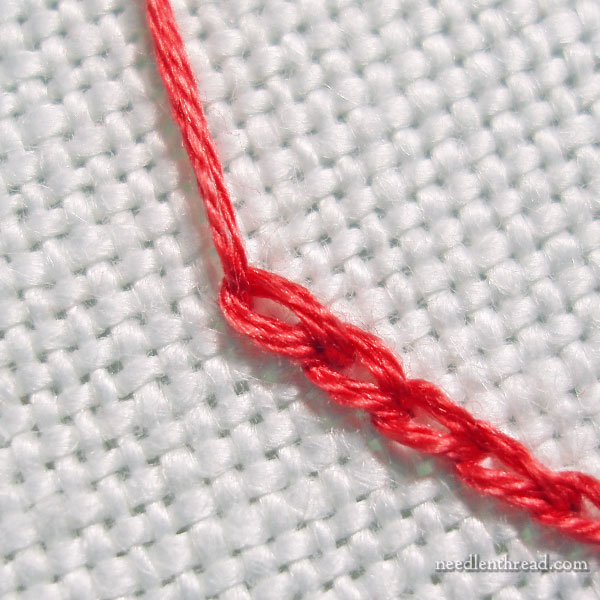
Chain stitch might be an exception, for example, and we discussed this very question of ending a thread and starting a new one in the middle of a chain stitch line here. There are two approaches, and both work.
Some stitches require an anchor (like chain stitch) – they don’t necessarily have a movement that takes them to the back of the fabric, or that holds the working thread in place securely when it does pass to the back.
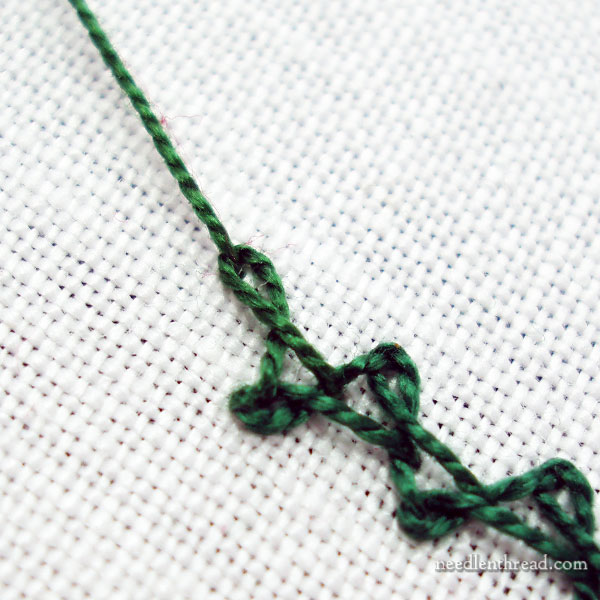
In those cases, you can provide a subtle anchor stitch where it will be least noticed and in the part of the stitch that makes sense. Another example of this, besides chain stitch, is Spanish Knotted Feather Stitch, demonstrated here.
But when it comes to most stitches that have a movement that passes to the back of the fabric and then to the front again, that’s when you end the thread and start the new one.
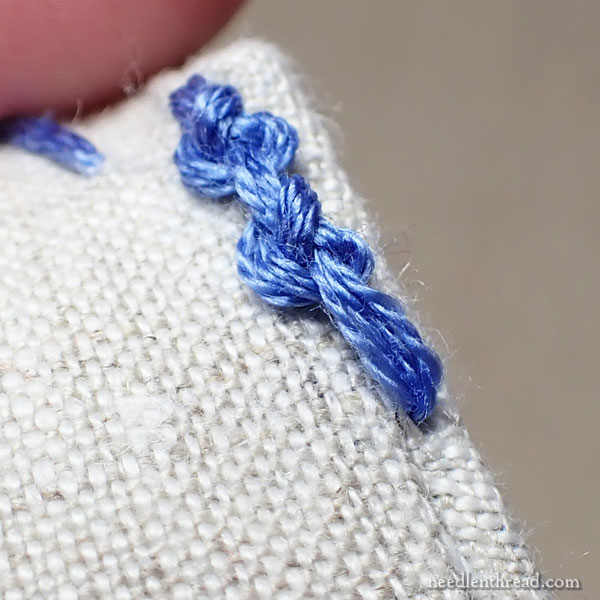
In this article, for example (read through to the point on starting a new thread), this happens with Palestrina stitch.
Sometimes, the old thread has to be ended after the new thread begins, like in this example with Hungarian Braided Chain Stitch (scroll to the discussion on starting a new thread).
Think Ahead
Ending an old thread and starting a new thread is simply part of embroidery. You will have to do it at some point or another. It’s not something that should intimidate, because it’s just part of the embroidery process.
The one tip that will make it easier to manage switching to a new thread is this: Think Ahead.
Don’t wait until your thread is less than an inch long.
Don’t wait until your thread is shredding to pieces.
Find the most sensible place to stop your current stitch while you still have plenty of thread to do it comfortably, where you can discreetly anchor your stitch or where you can end the thread off on the back, and where you can start a new thread in such a way that it melds seamlessly into the previous stitches.
Don’t worry! You can do it! Remember: it’s part of the process.
And the process is fun!
Great article, Mary. As an experienced needlewoman, I found your advice – to think ahead – spot on. Hand embroidery allows us the time to do this comfortably and shouldn’t be feared.
Question – on those stitches that don’t have a good spot to change, like chain stitch, would it work to make that last loop (don’t pull it tight yet), start the new thread in the proper spot, then go back and finish off that last stitch and end the thread? OTOH, maybe that’s just too much fiddling about and flipping the work back and forth, with too much chance to end up with a tangle of thread.
Hi, Gail – If you follow the link about chain stitch, you can see we did discuss that in that article. There’s nothing wrong with doing it that way, and it makes good sense to do it that way when the anchor thread might be seen, but if the anchor thread isn’t going to be seen, why go to the trouble to do it that way?