


Aaaaaaand…. we’re off!
It’s time to start the stitch-along series for Garden Swirl, a decorative embroidered insert for a box lid. It’s a sweet little piece – I love the color scheme! – and it’s not too taxing. The results are very pretty, and the whole finished project is quite satisfactory. I think you’ll have fun with it, and I hope you learn a lot along the way.
As we kick off the adventure, I’ll recap below what you can expect with the stitch-along and how it will progress; I’ll share the embroidery pattern with you; and I’ll share my materials list and tools that I used to work the samples.
If you’re following along using the materials kit, you will have everything you need to stitch the project, including the pre-transferred design on your linen. If you’re working from your own materials, feel free to make substitutions, as you wish.
What To Expect as we Progress
Each week (and in some cases, twice a week), I will post the next stitch-along installment here on Needle ‘n Thread. Between lessons, I’ll be posting regular needlework content on the website, as I normally do.
I will create a project index for Garden Swirl in the “Tips & Techniques” section on Needle ‘n Thread, under “Hand Embroidery Lessons & Step-by-Step Projects.” That’s the first section under “Tips & Techniques.” In the project index for Garden Swirl, I’ll list each lesson as it’s published, in chronological order, so that you can easily find the lessons and go through them in order.
If you have not already done so, I encourage you to subscribe to the (free) Needle ‘n Thread newsletter, which arrives in your email inbox. You can find the sign-up form in the left column of the website, if you’re on a computer or laptop. If you’re on mobile, click on the “hamburger” link in the top right, and scroll down the pop-out menu. You’ll see the newsletter sign-up area. You can also subscribe on this page.
If you are a member of the Needle ‘n Thread Community on Patreon, you will receive these lessons over there, too, but they are formatted into a downloadable PDF that you can save on your computer and that prints in a convenient, easily readable format. When possible and practical, I include extra tips, techniques, and instructions in these PDFs, that I can’t normally fit in a blog post on the website. The PDFs are pretty handy!
Materials
At the beginning of any project, it’s always a good idea to gather your materials! So let’s do that for Garden Swirl!
Fabric
The ground fabric I used for Garden Swirl is a lovely, crisp white linen twill. The kit includes a 9″ square of this fabric. It’s a fine linen twill, as opposed to the heavier twills that you might see for super-dense crewel work or similar.

You can see the twill close-up in the image above. Notice that twill is a little different from the typical plain-weave fabric linen that I normally use. It has a slight texture to it, a diagonal looking weave, and the ground is completely filled by the weave.
If you don’t have access to this twill, I recommend a plain weave white linen that is no heavier than “medium weight.” You can also use a lightweight (handkerchief weight) linen, but you’ll need to back it with another lightweight white fabric, like a cotton batiste. This linen twill that we are using has enough “oomph” to it, without being heavy, to not require a backing fabric.
Please Note: If you are finishing this as the lid insert to the decorative box, the weight of the fabric you choose will make a big difference in whether or not the custom cut board will fit the insert space. You’re better off going with a lighter fabric than something that’s too heavy.
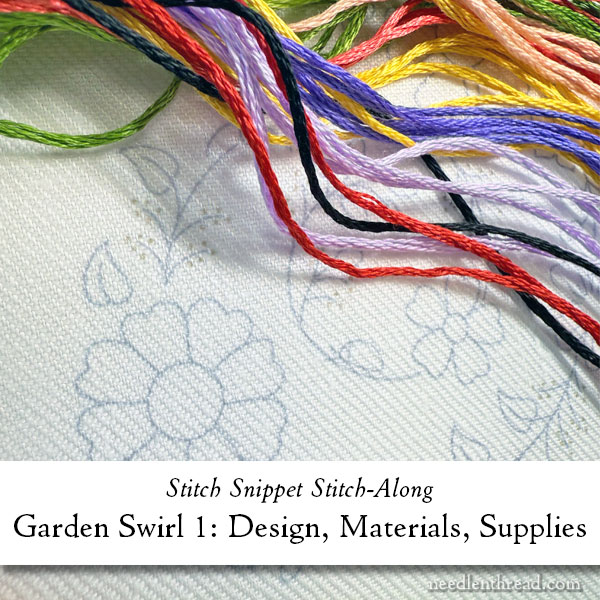
Threads
I used DMC stranded cotton (“floss”) for this project. If you substitute a different type of thread, be aware that the weight (thickness) of the thread can affect the final outcome of the project. This design is somewhat small, so a heavier thread like wool or perle cotton or similar may not work.
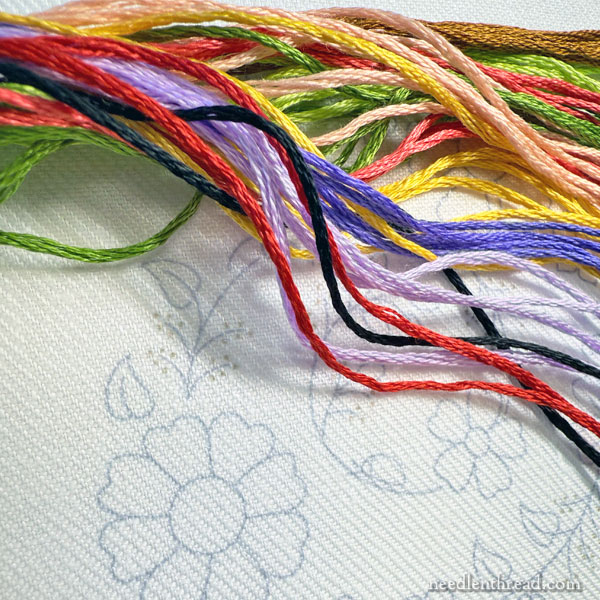
For this project, I used DMC stranded cotton in the following colors:
16 (bright green)
210 (light purple)
310 (black)
353 (light coral)
470 (medium green)
725 (medium yellow)
780 (brown)
817 (red)
3705 (dark melon)
3746 (dark blue-violet)
Tools & Miscellany
The project requires just the typical basic tools of embroidery.
Transfer Tools
The kit comes with the design pre-transferred, so if you are stitching the kit, you don’t need to worry about transfer materials.
If you’re using your own supplies, use your favorite transfer method! If you chose a light enough fabric, I’d probably just go for tracing the design with a fine-tipped (.05) mechanical pencil. Otherwise, you can use methods like prick & pounce, tacking and tissue paper, or even fine-tipped iron-on transfer pens (though you’ll have to make a special effort to cover the lines, as they might be a bit heavy).
Needles
I used a #7 crewel and a #9 crewel needle for the stitching. “Crewel” needles are sometimes also labeled “embroidery” needles. They have a medium length eye and a sharp point.
Scissors
You’ll want a nice pair of small, sharp scissors. I carry Dovo scissors here, if you want to invest in a really good pair of scissors that will last you forever. I also carry these little Sew-Mate Thread Cutters that are great little scissors and quite affordable – perfect if you travel with your needlework and you don’t want to risk losing your good scissors.
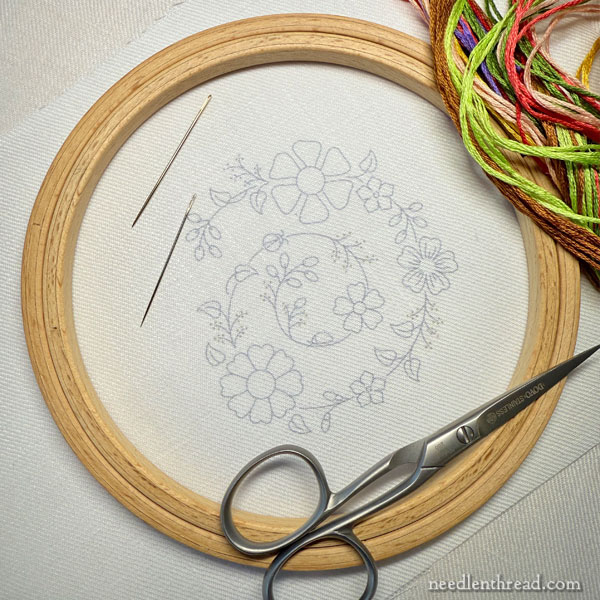
Hoop or Frame
I used a set of stretcher bar frames when I worked my sample that will be illustrating the stitch-along. The stretcher bars were 8″ square.
If you use a hoop, a 5″ or 6″ hoop is adequate. The fabric is large enough to use a 6″ hoop; the design fits well in a 5″ hoop (shown in the photo above). Although the design is small enough to fit in a 4″ hoop, it is not a comfortable size for stitching the project.
You can find embroidery hoops listed here in the shop, if you you’re looking for a good one. (Please note: the 7.5″ hoops are too large for this project, but they are in stock, for those who were looking for them.)
Finishing Supplies
We will talk about the supplies that I used for finishing, when we get to that point in the stitch-along. But just briefly, I used a custom-cut board that fit into the decorative box lid, I used a low-loft soft interfacing / batting, glue, paintbrush, pins, and clips. More on all that when we get to that point!
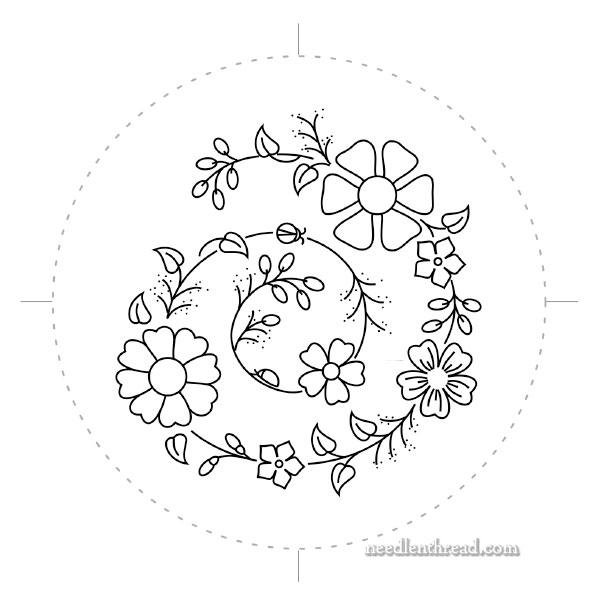
Garden Swirl Design
Below, you will find a PDF of the design for Garden Swirl. When you print the PDF, please choose “actual size” or “100%” or similar, from your printer dialogue box. The design should print at 3 7/8″ (3.875″) in diameter across the outside dotted line. Everyone’s home printer may be slightly different, so it’s a good idea to measure your print-out and make any adjustments you need to, to get the right size.
Garden Swirl Embroidery Design (PDF download)
If you bought a kit, you don’t need to download the design unless you want to.
Set Up
When you transfer the design, you do not have to transfer the dotted line, but it may help you during the finishing process. It will be covered by the lip of the decorative box lid.
Once your design is transferred using your favorite method, you can mount your fabric into your hoop or frame, and you’re ready to stitch!
We’ll be putting in the first stitches on Friday!
Thank you so much for the PDF for Garden Swirl Design. It looks lovely and
I’m looking forward to start embroidering it!
With my best wishes,
Liana
Well I am going to see if I can do this. Just had surgery about a month ago due to arthritis in my left hand. So, hopefully I can do this design. Thanks for the details.