


Welcome to Part 1 of Twinkle, Twinkle, a Stitch Snippet stitch-along here on Needle ‘n Thread, where we will explore together how to create a very pretty Christmas Star ornament.
The stitch-along will be published here on the blog in installments. Unfortunately, we are sold out of materials kits, but of course, you can source your own materials or make substitutions if you want to follow along.
And even if you don’t want to make the ornament itself, you can certainly follow along for stitching tips that you can use in any of your own embroidery projects!
If you’re a member of the Needle ‘n Thread Community on Patreon, you have already received this installment, plus the next one (with the first stitches), all in one PDF.
Today, we’ll talk tools and materials, design and set-up.
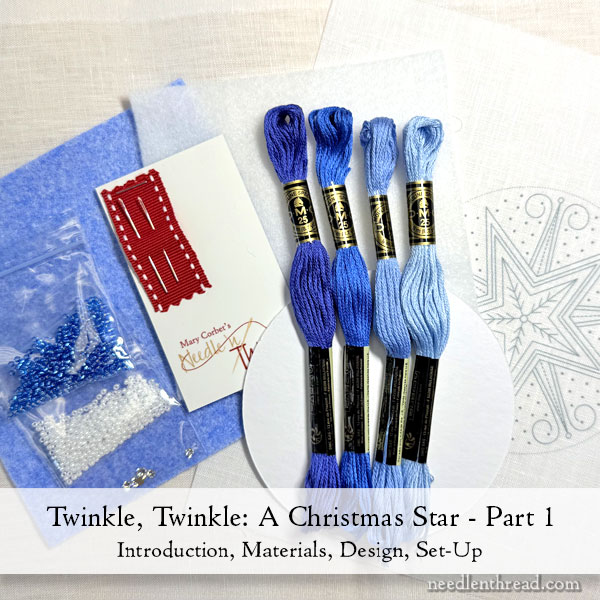
For Twinkle, Twinkle, you’ll need the following materials:
Fabrics
An 8″ x 8″ (minimum) piece of ground fabric. The ground fabric I chose is a fine white embroidery linen, about a medium-fine weight. It has a smooth hand and a full weave. I have used two types for our samples: one is Graziano’s 6363 in optic white, and the other is Sotema’s 450 linen in optic white. Both of these fabrics are suitable for this type of embroidery, and they don’t require a backing fabric for this project (although you can use one if you want one).
These linens would be sourced through fine needlework shops. You can always check with Cathe at Needle in a Haystack in Alameda, CA. They may have the Graziano in stock.
You can substitute any fabric you wish that is suitable for surface embroidery.
You’ll also need a low-loft interfacing – I use Pellon thermolam TP970.
Finally, you’ll need felt for finishing the back of the ornament. I used a lovely blue and white mottled wool blend felt. You can substitute whatever felt you wish. You can also substitute other fabric besides felt – up to you!
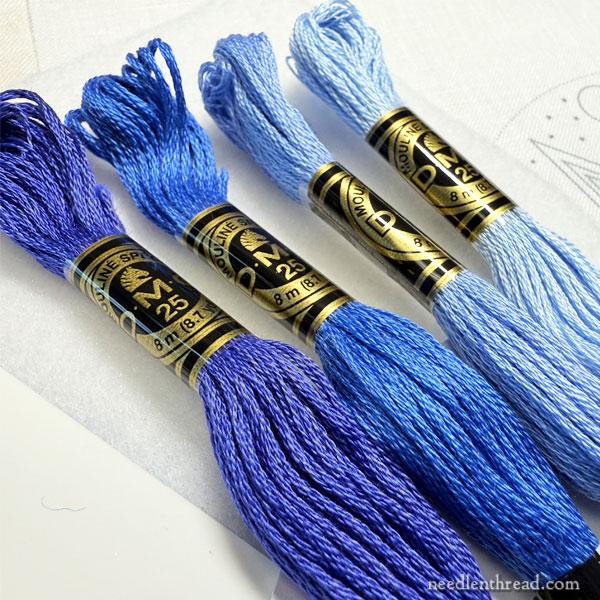
Threads
For the samples, we used DMC stranded embroidery cotton (floss) in the following shades of blue: 797, 798, 799, 800. You will not need a full skein of any of the above, so if you have the kit, you have plenty of floss for an additional ornament or two.
A good quality all-purpose white sewing thread (for finishing and for sewing on beads) is required.
Embellishments
Miyuki 11/0 round seed beads – #0420 (opaque pearl luster) and #0019 (silver-lined sapphire blue)
Austrian round flatback crystals of a specific well-known brand – five 3mm crystals and one 4 mm crystal. If you can’t get ahold of the specific well-known brand, you can find substitutes for flatback rhinestones through bead suppliers.
Needles
#8 crewel (English); and #26 Tapestry (English).
Board Foundation
3 7/8″ straight-cut round mat board or Bristol board (archival quality) in white.
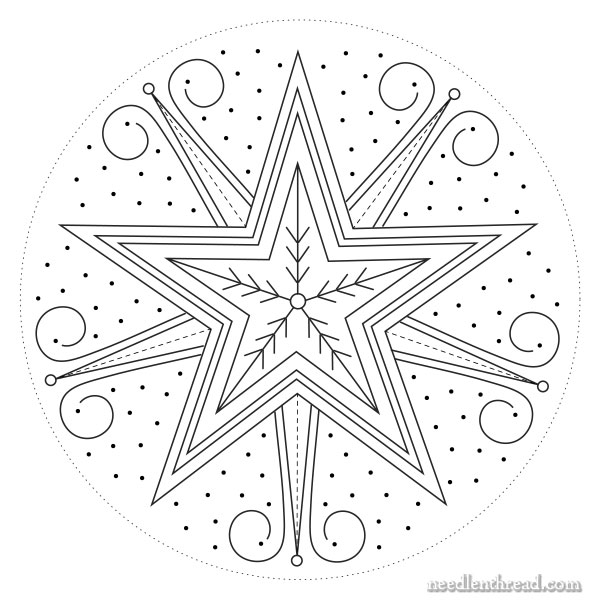
Twinkle, Twinkle Design Download
The design for Twinkle, Twinkle is provided below as a downloadable PDF:
Twinkle, Twinkle: A Christmas Star Ornament (PDF link)
When you print the PDF, you’ll need to print it at “actual size.” It should print at 3.90″ in diameter, from the dotted outer lines. The design itself (minus the outer dotted perimeter) should be slightly smaller than 3 7/8″. You may have to adjust your print job in minute increments, if your printer does not print the correct size. Otherwise, you can simply cut yourself a board backing that will work with the size that you settle on.
Keep in mind that, if you reduce or enlarge the ornament, the look will change because of how the stitches will fit the design. You may also need to adjust, for example, the weight of your embroidery thread (up or down) depending on whether you enlarge or reduce the design.
For those who have the materials kit, the design is pre-transferred for you, so you don’t have to worry about all this.
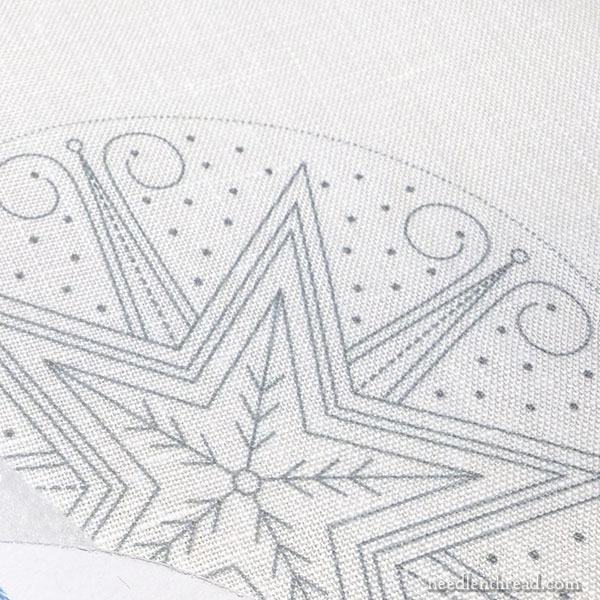
Transferring Your Design
For those who have the materials kit: You do not need to prep your fabric in any way. You just need to hoop it up and start stitching! Don’t iron it. If it is slightly creased from being folded, this will come out when you hoop it up.
For everyone else:
You will likely need to iron your fabric before you transfer the design.
The easiest and quickest way to transfer the design if you don’t have the kit is likely going to be tracing it with a light pad, light box, sunny window, or some such arrangement. You’ll want to use a ruler when you do that, to ensure nice straight lines.
Please be careful with your ruler, though! Sometimes, residue sticks to the edge and you don’t want to mess up your fabric!
While there are iron-on transfer pens out there that could work for you, I don’t think the lines they produce will be fine enough to cover completely. You might have to test first, if you plan to go that route.
You can also use a printable water-soluble stick-on stabilizer (like Sulky’s Sticky Fabri-Solvy), if you like using this option. They are not my favorite method, but if you like stitching with it, it will likely work fine for you.
Hoop or Frame
This project is best worked in a hoop or frame. A 5″ or a 6″ hoop will work well. I like a 5″ hoop, personally, but a 6″ will fit. The design does not fit well in a 4″ hoop (because the hoop size doesn’t usually take into consideration the inner ring of the hoop).
You can also use stretcher bar frames or whatever type of frame you prefer. If you are working with the 8″ x 8″ square of fabric, you might need to “enlarge” your fabric to fit a frame comfortably, although the fabric can be tacked just fine on the top edge of an 8″ x 8″ stretcher bar frame (that’s what I used for the videos of the project).
If you need it, here’s some information on how to “extend” the size of your fabric to fit a larger frame.
Other Tools
You’ll need a few other tools: a decent pair of sharp scissors; a pair of tweezers; and, for finishing, sewing pins and the like. We’ll talk about additional finishing tools down the road.
Up Next!
So that is what you need to get started with Twinkle, Twinkle and to get the project set up.
In the next installment (coming up this Monday), we’ll begin stitching!
This coming Friday (day after tomorrow), I’ll publish the project index for the stitch-along, so that you have access to one convenient spot to find all the lessons as they develop.
Between installments for the stitch-along, I’ll still be continuing with regularly scheduled blog posts. If you don’t want to miss anything, be sure to subscribe to Needle ‘n Thread. You can do this on your computer browser in the left column of the website, where it says “Daily Newsletter.” On mobile, use the menu “hamburger” in the top right corner and scroll down to “Daily Newsletter.”
Have a wonderful Wednesday!
Thank you so much for this beautiful pattern. I have what I need to get started. This will move up in my projects boxes.
I hope you enjoy it!!
It is sooo pretty!
Thank you for sharing and teaching!
Thanks, Natasha! 🙂
After hours searching on line for flat crystals and visiting 3 stores, I finally found them today 11/16 AT MICHAELS. They are by the charms and findings jewelry section AND they are currently priced BUY ONE GET ONE HALF OFF! The correct size at Michael’s are SS20 for the 5MM and SS12for the 3MM.
Hello Mary,
I am sourcing materials, here in Australia, for Twinkle, Twinkle.
What is the thickness of the archival mat board or Bristol board listed in “Tools”, please?
Many thanks
Kathy
It’s called 4-ply mat board here, if you’re using standard mat board. It’s about 1/16″ thick (about 2mm or so?).
I have heaps of beads, but don’t have flatback rhinestones
can you think of an alternative? Because I really don’t want to buy them
Satin stitch the area? Stitch on a ring of small seed beads? Do a cluster of French knots? You can do anything there! It just won’t be as sparkly.
What’s the mat board for? Do I really need it?
Yes. It is the form for the ornament. You’ll need something stiff, for the ornament to keep its shape.
Hmm. It’s just for me. I guess I could just use cardboard?
How big is the final product?
The board foundation is 3 7/8″ in diameter. The whole project is slightly larger because of the finishing and the beaded edge.