


I don’t normally like to use the word faux. It sounds so pretentious for something that just means fake.
But I guess faux (the way many people use it today) carries a nuance that the fakeness in question is not only ok, but even perhaps desirable.
And that’s the case with what we’re getting ready to talk about. Sometimes, faux works!
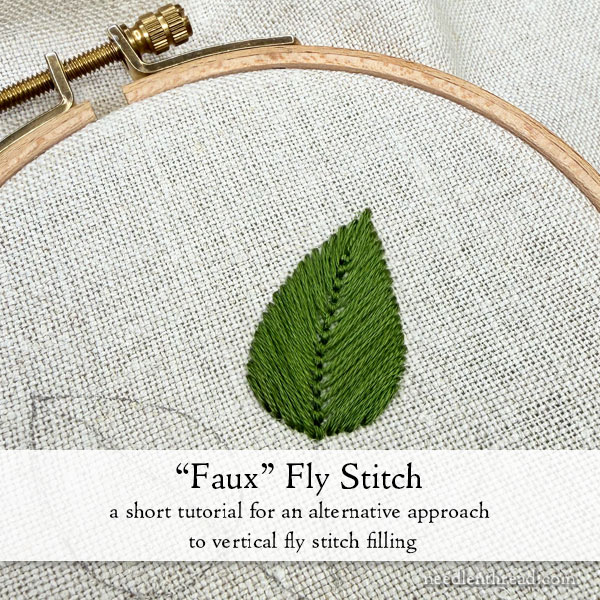
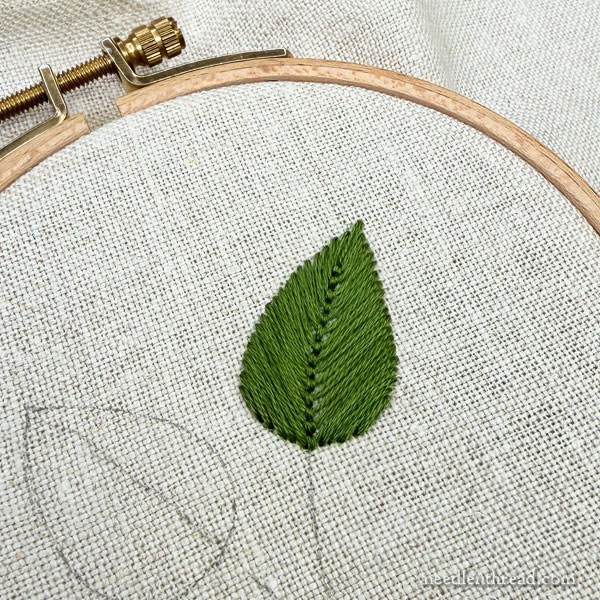
Remember these two green leaves that we looked at last week?
If you guessed that they are fly stitch leaves, you’d be correct – from the front.
But one of them is actually a fake. And I’m going to show you how it’s done.
If you have trouble with vertical fly stitch for filling a shape, you might like this solution, because it works. And it looks pretty good. And it normally comes out even and tidy.
So why not?
Fly stitch is a pretty basic stitch. If you’re not familiar with it, here’s a video tutorial for the fly stitch worked vertically.
It’s really nothing more than a wide-open chain stitch.
Worked vertically, it can be spaced far apart, or it can be worked close together for a solid filling.
It’s wonderfully suitable for filling in leaf shapes, because the small holding stitches end up creating a vein down the center of the leaf with very little effort.
(You can see a tutorial for tiny leaves worked with vertical fly stitch here. In that tutorial, I start with a twisted chain stitch, to give the tip of the leaf a little curve. The thread, which is perle cotton in that tutorial, is quite heavy and twisted, so the whole look is different, cut you can at least see the concept!)
For those who have difficulty following the center design line on a shape when using vertical fly stitch worked close together, there’s a very simple solution in this “faux” fly stitch filling we’re looking at here.
For this tutorial, I’m working on linen fabric, and I’m using 5 strands (out of 6) of DMC stranded cotton.
I drew the leaf shape on the fabric free hand and drew a center “vein” curving down the middle of the leaf, to give the leaf a little bend to it.
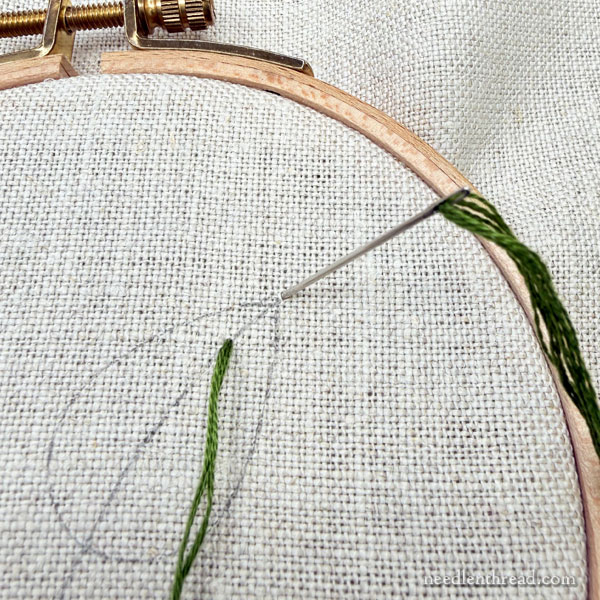
Begin at the very top of the leaf shape where it comes to a sharp tip.
Whenever you want to form a nice sharp tip on a shape like this, extend your first (center) stitch out beyond the design line, just beyond the tip of the leaf by a little bit.
As you can see above, for the first stitch, then, I’m working a straight stitch starting about 1/4 of the way down the inside of the leaf on the center line, and ending the straight stitch about beyond the tip of the leaf.
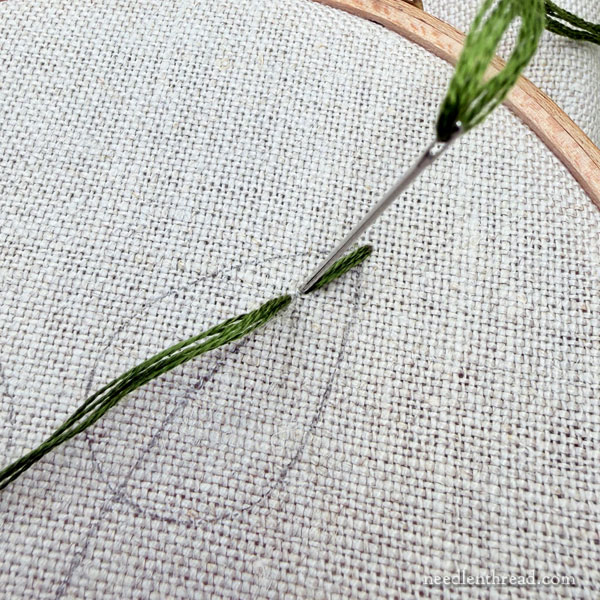
After working the straight stitch, I’m going to backstitch down the center line of the leaf, working small backstitches that are about 1/8″ long (or just a hair over 1/8″). In a normal vertical fly stitch, these small backstitches would be the holding stitches on each fly stitch.
For the backstitch, I emerged from the fabric a stitch length down the design line, and then took my needle and thread back into the fabric in the same hole where the longer straight stitch began.
You can find a tutorial for backstitch here, if you’re not familiar with it.
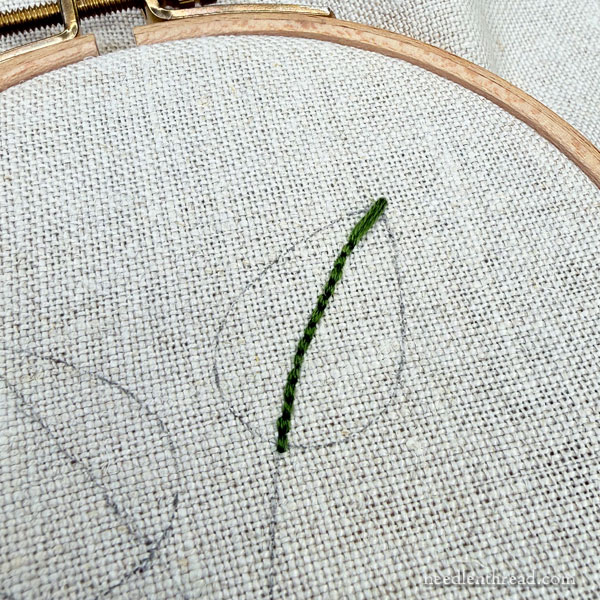
Backstitch down the whole vein of the leaf, keeping the stitches as uniform in length as possible.
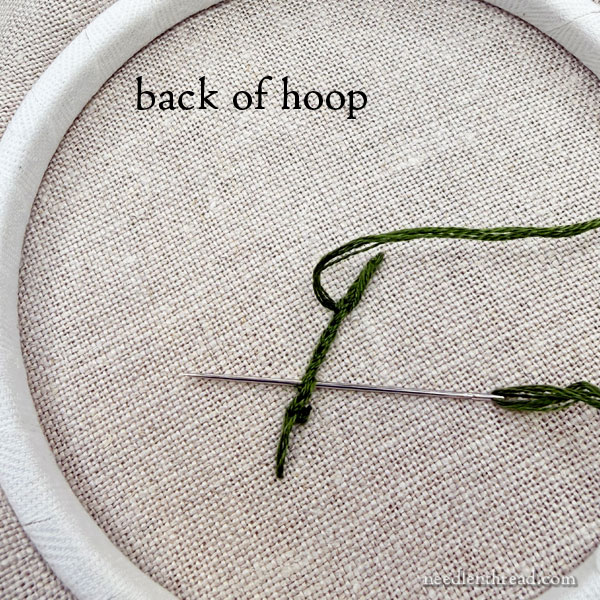
When you get to the end of the backstitch, assuming you have more usable thread on your needle, turn the hoop over and return to the tip of the leaf by whipping through the backs of a couple stitches. This prevents a long loose thread on the back of the fabric.
Now, bring the needle and thread to the front on the design line, just next to the first straight stitch.
(See where this is going?)
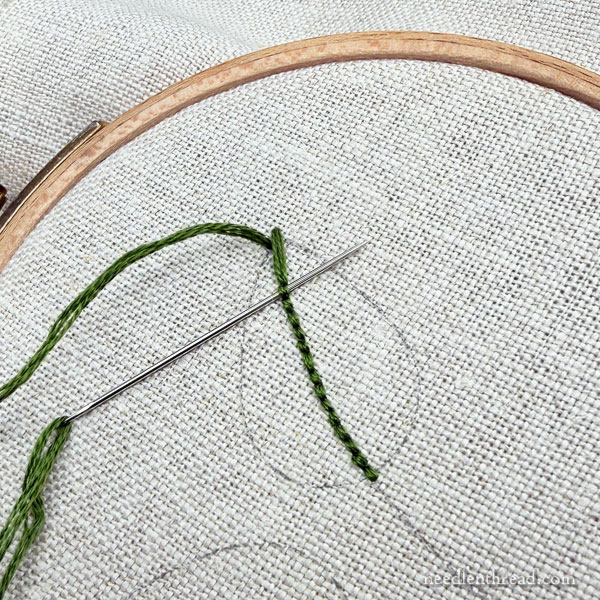
Pass the needle and thread underneath the first backstitch, traveling towards the other side of the leaf…
…and then take the needle and thread to the back of the fabric directly across from where this stitch started, on the opposite side of the center straight stitch.
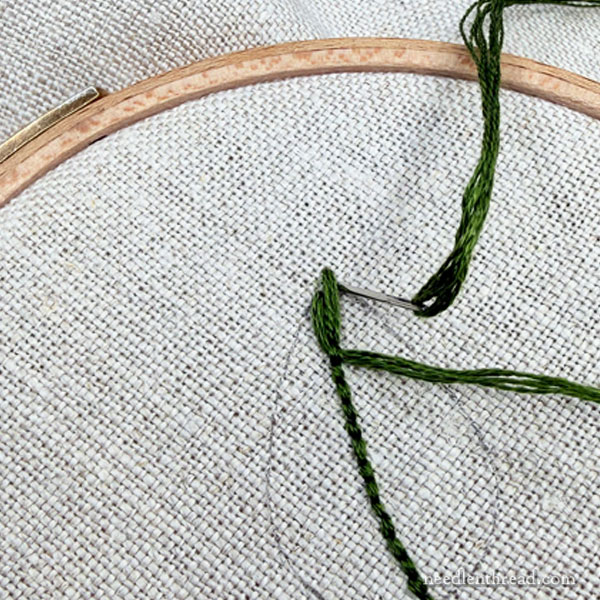
Emerge on the other side of the leaf, on the design line, slightly below the beginning of the first “fly” stitch, and continue this process down the shape of the leaf.
Maintain a Slant!
As you work down the leaf shape, try to maintain a nice slant on your stitches. They should slant towards the “growth point” of the leaf – the center base of the leaf – as much as possible.
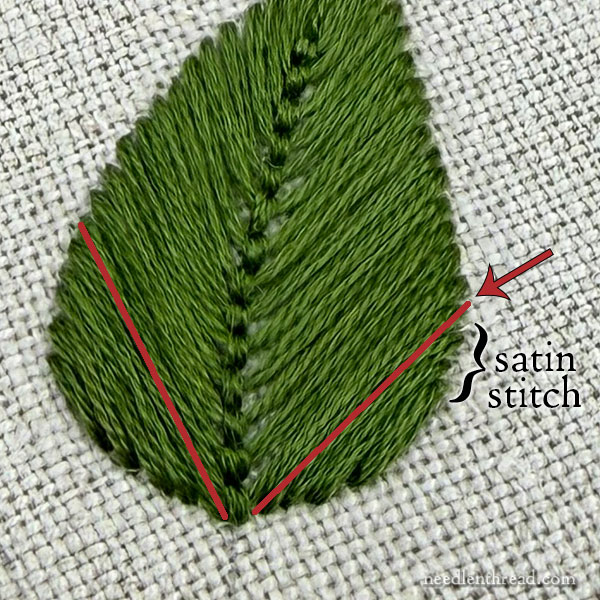
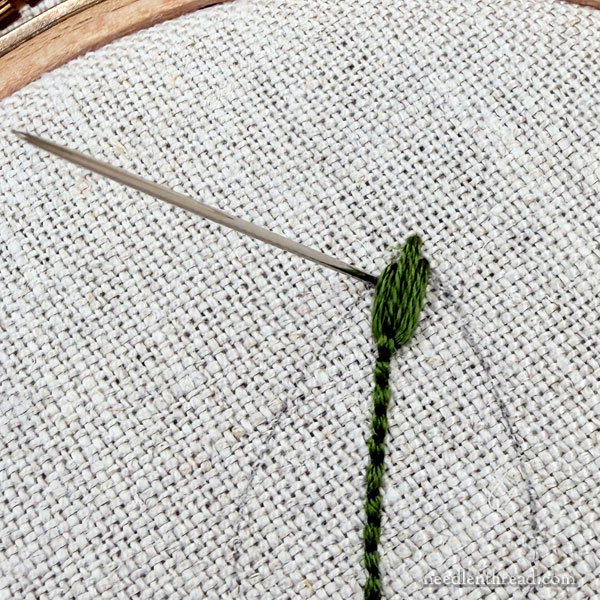
Depending on the shape of the leaf, there may be more space to fill at the base of the leaf even after you’ve passed under the final backstitch.
In this case, work satin stitches to fill in that space, as shown in the photo above. The red lines highlight the last “fly” stitch, and below that, filling in the rest of the base, I just worked a few satin stitches (still maintaining the slant).
And there’s the leaf!
But Wait! There’s More!
So you see there’s no big reason why you can’t use this method to create a filling similar to (and, from the front, identical to) a vertical fly stitch filling.
Does it take up more thread? Not really. Does it make a neat filling from the front? Yes. Is there anything technically “wrong” with working the filling this way? Not at all!! Will anyone ever even know that it’s not fly stitch? Probably not! And if they did know, does it matter? Certainly not!
BUT… there’s still a problem here with the green leaves that’s worth investigating. Can you guess what it is?
We will discuss that problem the next time we visit the leaves and I’ll offer some possible solutions.
Any questions, comments, suggestions? Feel free to use the comment form below to join in the conversation!
May your Monday be Most Magnificent and the rest of the week equally so!

Love this way to do the stitch! I would think it would use less thread.
Thanks for the tutorial.
Along the lines of faux, I call my faux flowers/plants “everlasting”. Sounds less pretentious to me.
Love your column with coffee every posting. Thank you for your service to all needleworkers.
Best,
Mary Ingram.
So, like reverse chain stitch?
Yesssss…. kind of, but not quite. Reverse chain is worked in each subsequent chain. Because fly stitch doesn’t close like chain stitch, the second movement of the stitch (the “fly” part) doesn’t form a holding stitch. So you have to work the holding stitches first. With reverse chain, you work one holding stitch, but after that, each loop becomes the holding stitch.
3/16″ is NOT just shy of 1/8, 2/16 = 1/8, so 3/16 is shy of 1/4 because 4/16 = 1/4.
Just thot you should know — sorry, but Arithmetic was my best subject.
Whooops – sorry! I meant to correct that when proofing, once I took my ruler to the stitches. It’s 1/8″ to just a hair over 1/8″…
A great tip! Thanks for sharing it.
I think the problem is that the stitches at the vein of the leaf are too far apart. Even though you did the tiniest backstitch I’ve ever seen, the threads along the spine of the leaf are too far apart. They need filling in with some short stitches that go from the vein out about a quarter inch or a little more, or possible stitched the other direction.
Hi
I have stamped dishtowels that I would like help to start this craft.
Whats my first step?