


The other day, I received a nice email from a reader who explained an embroidery problem that was perplexing her. This is her note:
Whenever I want to stitch small leaves on an embroidery project, I’m always stumped. The only stitch that comes to mind is the single chain stitch [detached chain, or daisy stitch], but I really want to add a little more variety to my projects. Do you have any recommendations for stitching leaves?
Since leaves have been on my to-do list for a while now, there’s no time like the present! So today, I’d like to kick off a series-within-a-series. As part of the Stitch Fun series here on Needle ‘n Thread, we’re going to look at a variety of ways to create individual embroidered leaves, using stitches other than the detached chain stitch.
First up, fly stitch leaves!
The advantage of embroidering leaves using fly stitch is that you can very easily change the look or shape of the leaf simply by altering the way you begin the leaf or where you start and end the fly stitches. You can also vary the size of leaves by embroidery more or few fly stitches.
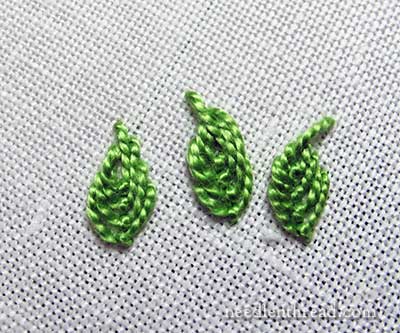
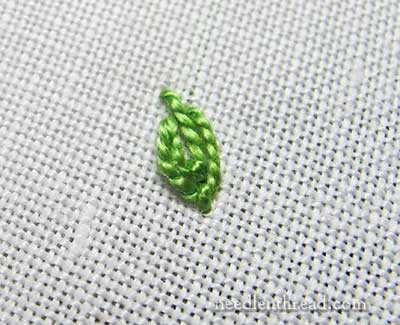
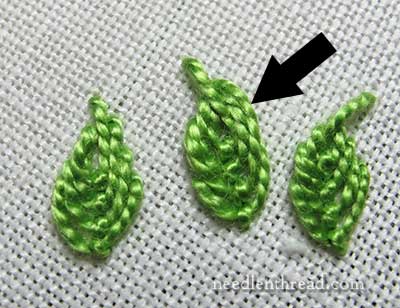
In the photo above, you can see three leaves worked with the fly stitch. The center one is a bit wonky. But they all serve as leaves, and they were simple to stitch!
If you’re not familiar with fly stitch, feel free to take a look at my fly stitch video tutorial.
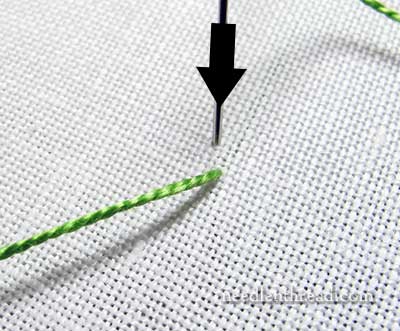
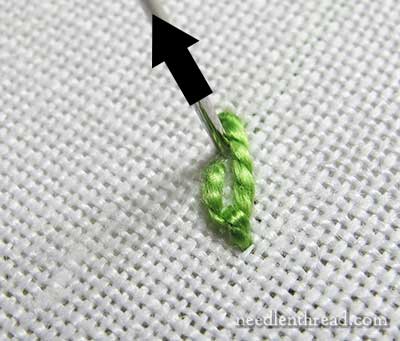
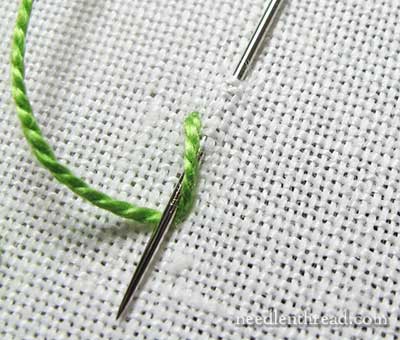
For the first fly stitch leaf, I’m starting with an uneven fly stitch, with one arm longer than the other, and the “arm” on the right ending above the arm on the left.
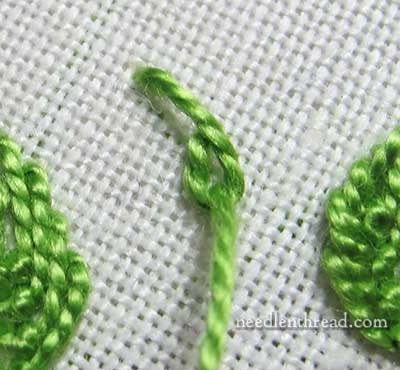
So, I brought the needle to the front of the fabric, and I’m taking it down just above where I first emerged.
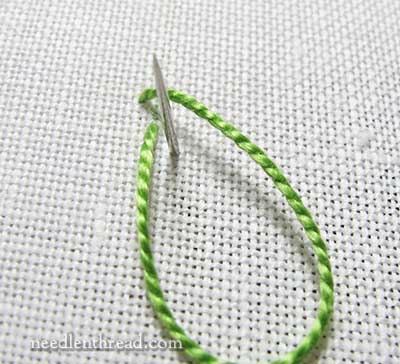
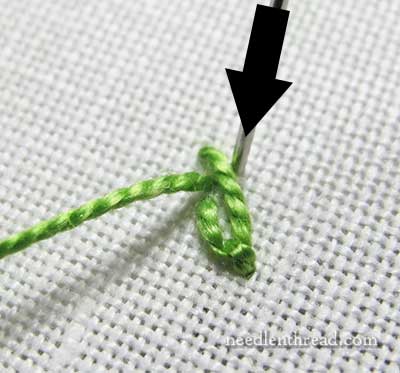
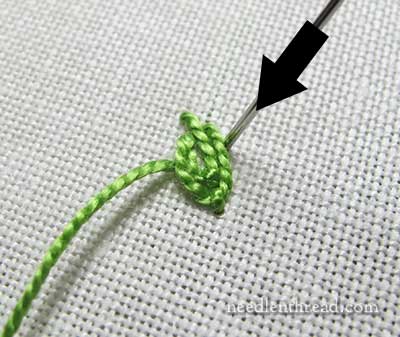
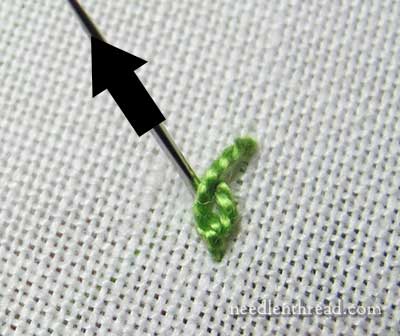
Pulling the needle through, I’m leaving a loop of thread on the front of the fabric, and coming up inside the loop, below where the stitch first began. This is going to create a partially closed, off-set fly stitch.
Pull the needle and thread all the way to the front of the fabric and down towards you, so that the loop catches around the working thread, as shown in the photo above. This is going to create a rather odd looking, uneven fly stitch, but it will be perfect for building a leaf around.

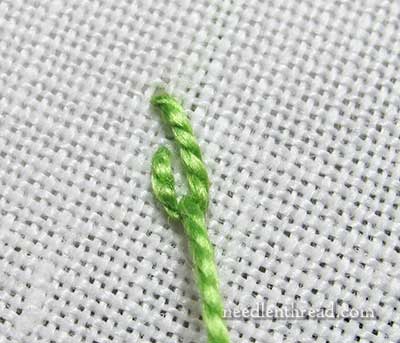
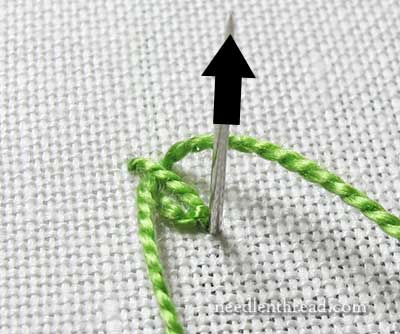
Anchor the fly stitch by taking the needle down just over the loop, just as you would with chain stitch or fly stitch.
Now, for the next fly stitch, I’m bringing the needle up through the fabric, right above the arm of the fly stitch on the left, and right next to the longer arm on the right.
Take the needle down into the fabric just to the other side of the longer arm on the right.
Start the anchor stitch in the same whole where the last anchor stitch (on the first fly stitch) ended. Come up inside the loop of the working thread, just like before, and catch the loop around the working thread as you pull the needle through.
Anchor the working thread, and here’s the next layer of the leaf!
Now, if you want a small, simple leaf, you can stop here. But you can also continue to build the leaf with fly stitches, to fill it out and make it larger.
So let’s do that.
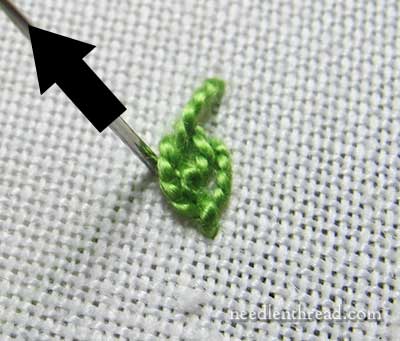
Bring the needle to the front on the left side of the leaf, and take it down on the right side, for the next fly stitch.
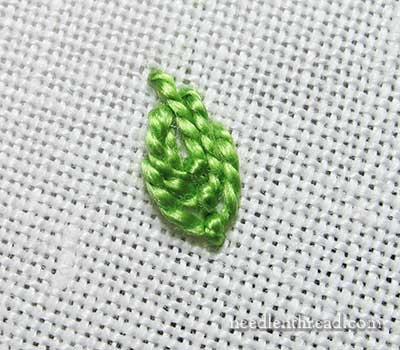
Anchor the stitch as before, and now you have a slightly fatter leaf!
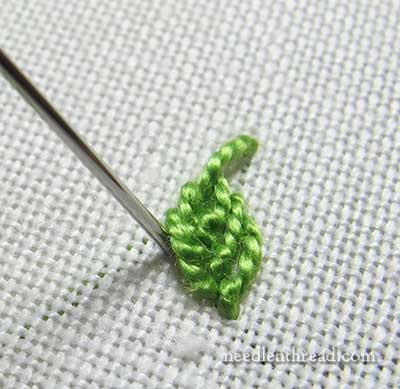
And you can add yet another fly stitch (four all together), to fatten out the leaf a little more.
I’m working these samples with #5 pearl cotton, but you can use regular stranded floss (say, two strands at a time) to create very tiny, much more delicate leaves.
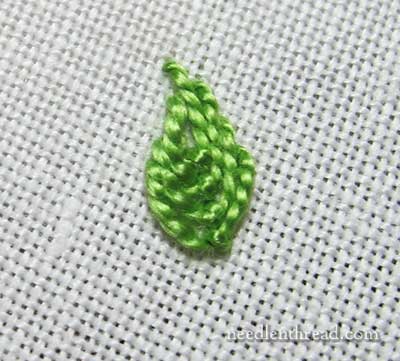
Now, let’s put a little twist on the leaf tip…
For this next fly stitch leaf, I’m going to start with an isolated twisted chain stitch. If you’re not familiar with the twisted chain, you can check out my video on twisted chain stitch here.
You can see that one arm on the twisted chain is much longer than the other, and that it forms a little tip that points to the right.
Now, build your leaf by adding fly stitches around the twisted chain.
Keep adding to the leaf until it is the size you want. You can stop at one fly stitch around the twisted chain, or you can build the leaf with several more fly stitches.
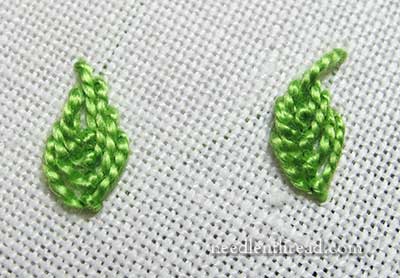
Here are the two fly stitch leaves so far, and though they were pretty much made the same way, they look slightly different. This is a great way to add different leaf shapes to a cluster of embroidered leaves.
Here, I’m starting with a twisted chain stitch pointing to the left, which will give the leaf yet a different look.
I wanted the right side of the leaf a little fuller than the left, so I tried taking one of the lower fly stitches out and around one of the higher ones. It made for an elongated, wonky look. Better, probably, to add thickness by building outwards with the fly stitches, rather than trying to stitch above previously stitched fly stitches.
So, those are fly stitch leaves. You can begin your fly stitch leaf with a regular chain stitch, with a crooked fly stitch (like we did with the first leaf), or with a twisted chain stitch pointing in either direction, to give the tip of the leaf a little twist.
You can vary the thickness of your thread for more delicate leaves, or you can use fewer fly stitches to create smaller leaves, too.
Next time, we’ll look at a different filling stitch that works up well into a leaf shape.
Hope this helps you add some variety to your stitched leaves!
For more Stitch Fun articles, where we explore different combinations of stitches for different effects, feel free to drop by the Stitch Fun Index!
Oh – I’m already loving this leaf series. I had much the same problem with leaf variety. So glad you are doing this. Thanks. Linda
Obrigada! Obrigada!
Esta aula será muito útil para mim!
Um abraço!
Egléa
Thank you! Thank you!
This lesson will be very useful to me!
Hugs!
Egléa
This is my most favorite way to do leaves. I “learned it” while doing crewel work. (Wool threads work wonderfully!) Another idea — do the first stitch or two in red/pink (flower color) and then change to green to finish. A perfect little flower bud.
What a great idea, thank you!!
beautiful and cute, stitch fun is my favorite day. thanks Mary..
Dear Mary
I’m late today involved in family get togethers whilst nice I’ve not done any embroidery “sigh” and I’m away next week in South Wales on a coach tour, which should be interesting. So no sewing for next week.
What a great tip on how to embroider small leaves, I like the way you can fill out the stitch to make it thicker and they look so pretty. Thanks for the tip and I look forward to the different filling stitch for leaves.
Regards Anita Simmance
Oh I love this so much. I’m really looking forward to learning new techniques for stitching leaves. Thanks!
Wonky leaves are perfectly normal if you’re also a gardener!
Bobbi – genius idea!
Wow! Those fly stitch leaves are really great 🙂 Something I’m definitely going to try! I have the very same problem, and always end up using detached chain; once I tried Oyster Stitch (using your excellent video!) and that turned out well. Really looking forward to the rest of this mini-series! Stitch Fun is always interesting 😉
I often use fly stitch like this for small leaves. I also tend to use one strand of fine cotton (DMC) or silk (Colour Streams) with more fly stitches. This tends to keep them fairly flat and looks better at this small scale, imho of course.
I know there are other stitches people have used for leaves but so far this is my favourite.
Me encantan sus clases, quiero saber como bordar una hoja grande.? Muchas gracias
What a lovely little tutorial! Thank you so much for taking the time to document and share your work.
hi
i am pournima from Bharat . I love your style to teach so simpaly . i like this simple but sweet stich , thanks for this
Its really beautiful,simple & easy.I am embroidering a kurta where I used this stitch.I am from India.
That wz superb..the leaves r so delicate n lively..im falling in luv with embroidery seeing ur tutorials..thanks mary.