June 2, 2011
Church Embroidery Pattern: Decorative Cross & a Question
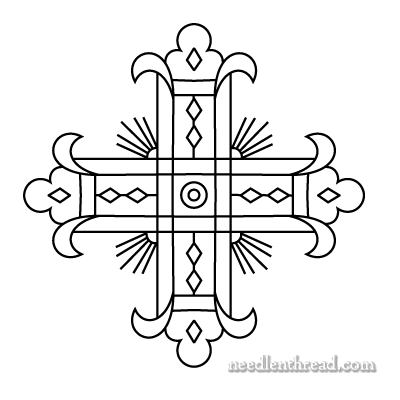
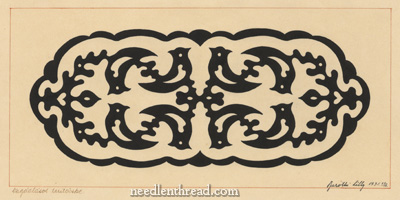
I’m in the midst of cleaning up a bunch of ecclesiastical embroidery designs and developing several new ones. Today, I’ll share a little decorative cross with you. It’s definitely suitable for all types of hand embroidery, but it would also work well in other arts & crafts designs, too – banners, applique, paper crafts, leather work, printing and coloring, and so forth.
I’ve also got a question for you, especially for those of you interested in church embroidery patterns – but I’ll save that for the end!
Here’s the embroidery design: