


Split stitch is a perfect stitch for hand embroidering lettering and text. In this tutorial, we’ll talk a little bit about threads and take a look at using the split stitch to embroider words. We’ll also look at stitching an isolated French knot.
If you’re just joining in on these hand embroidery tutorials for writing with your needle and thread, you might want to take a look at the index of lessons so far in this series. In previous lessons, I’ve covered subjects such as starting and ending threads, traveling threads on the back of your work so that they are invisible from the front, and combining stitches.
Before venturing into this tutorial, you also might want to check out my split stitch video tutorial, especially if you’re not quite sure of how to do the split stitch.
In this tutorial, I’m embroidering the word “jumped” using the split stitch. I’m using cotton floche in a coral color. (I love this color, by the way!)
Floche is a four-ply cotton thread with a very nice shine. It is relatively softly twisted, and it is one single strand – it is not normally strandable. That is, you don’t normally separate floche into smaller strands to stitch with.
I chose floche because it’s a beautiful thread for split stitch. I prefer working split stitch in a single-strand thread, rather than working it with two strands of cotton or silk. Why is that? Because I think you achieve a better looking split stitch with a single strand of thread. Using two strands of floss, the split falls between the two strands and separates them so much that you don’t get the close “hugging” of the fibers around the working thread. This close “hugging” makes a solid-looking split stitch.
If you don’t have floche, try a perle cotton #8, or, if that’s not available, a #5 will also do, but it will be slightly thicker.
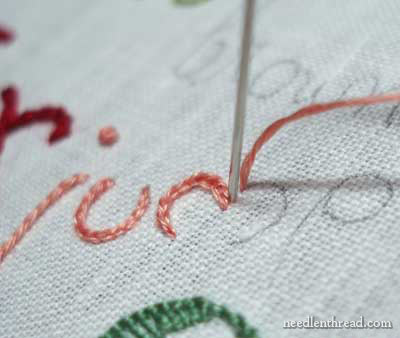
When working the split stitch, the key to getting a nice looking stitch is to split the thread in the middle. With floche, the thread is thick enough that it’s pretty easy to see. It is more difficult to find the middle of a single strand of DMC cotton floss, because it is much finer than floche. Because of this, it’s hard to split the thread right in the middle. With floche, the middle split is not so difficult.
To split the thread easily, make sure that your straight stitches (before splitting them) are pulled firmly so that they hug against the fabric. If they are loose and bulging up from the fabric, it’s harder to split them in the middle.
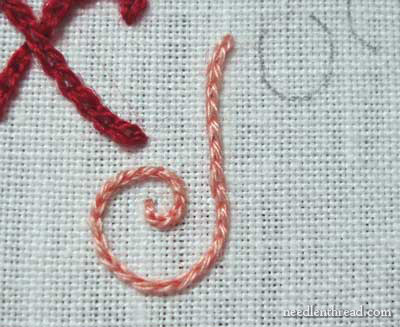
So in the photos above, you can see that I began at the top of the J using the same method of starting my thread discussed in earlier tutorials. Then I just worked the split stitch straight down the letter. As the tail curved, I didn’t really have to turn my work, because the split stitch doesn’t depend on stitch direction. But if it’s easier for you to turn you work, then by all means, turn it!
To end the thread, turn the work over and whip the backstitches that were formed on the back of the fabric, anchoring the thread under these stitches.
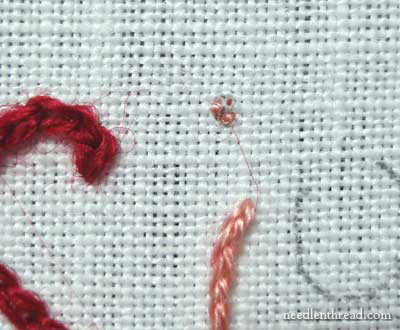
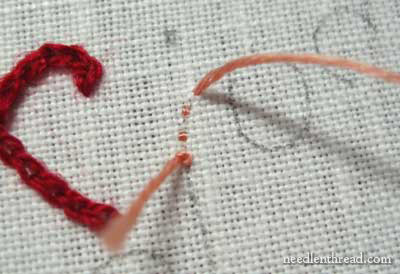
I’m going to use a French knot to dot the J. To dot the J (it’s lower case), begin in the same manner as discussed in the article on dotting I’s. Stitch three anchoring threads very close together, over only one thread of fabric, stitching each stitch into the stitch before. This will require you to stitch perpendicular stitches. I didn’t do that in the photo above – but it will work better if you do it that way!
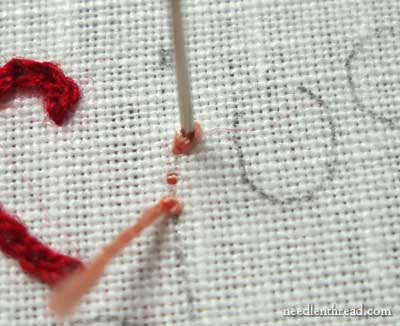
Now all you have to do is work your French knot over your anchoring stitches, making sure that the knot is fat enough to cover the anchoring stitches. I used three wraps on my needle for this knot.
Turn your fabric over and hitch your working thread under the stitches behind the knot. Then cut your thread.
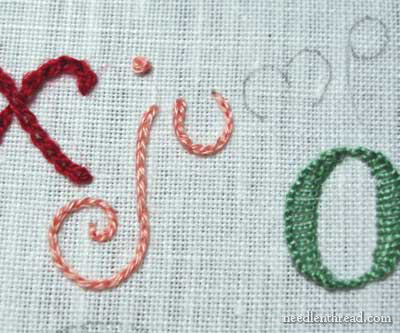
The U is split stitched just like the J.
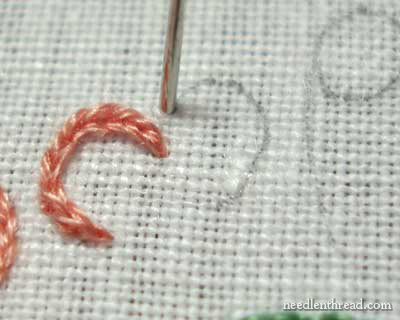
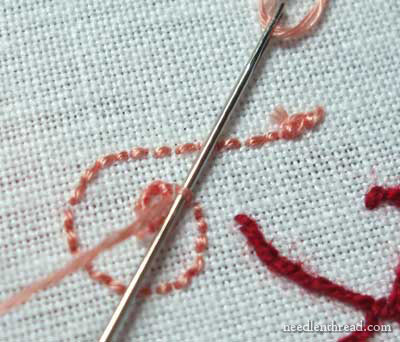
In working the M, when you come to the point where the direction changes, end your split stitch line and then begin the next split stitch line.
Instead of taking a straight stitch forward, notice that I brought my needle up a stitch length away from where I wanted my line to start, and took a stitch length backwards. Then continue split stitching as normal.
Keep your stitches relatively small when working around tight curves. This is the M, finished.

Here you have the P and the E finished. Pick a starting point on each letter that makes sense, so that you can follow the flow of the letter easily. With the P, I started at the base and worked up. With the E, I started in the middle of the letter, worked around the loop and down the tail.
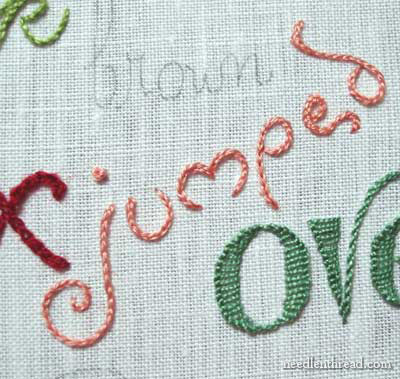
With the D, I started at the top of the tail and worked down around the loop.
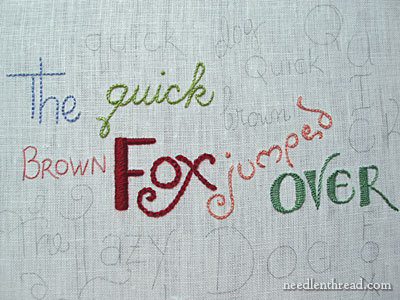
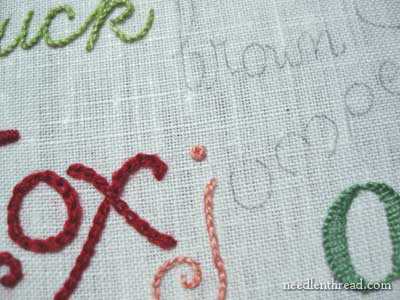
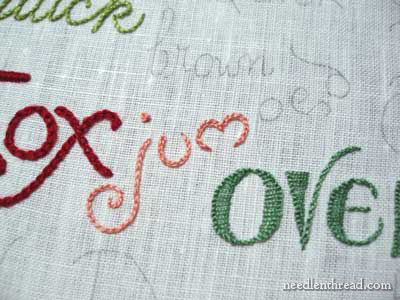
And here’s the sampler so far! I still need to add an “S” or two to the text! This word is supposed to be “jumps” rather than “jumped.” That’s what I get for relying on my foggy memories of junior high typing class!
If you’re practicing on text yourself and have a blog, feel free to leave a link so we can check out your progress. Yo
u’re also welcome to post photos in my Needle ‘n Thread group on Flickr, if you like. If you do post any, drop back by and let me know, so I can check them out!
Enjoy the tutorial! If you have any questions or comments, feel free to leave them below!
Hi Mary
I just love the way you have drawn and embroidered the letters. The curved, almost cursive-like letters look beautiful. The way you have embroidered them make them stand out. I think I will practice drawing some of my own letters in this way. Thanks.
Nora
I think I'd tend to end each letter on its loose or dangly end because the split stitch makes such a neat and elegant point…
You do such good work, I think I'll just live vicariously–mine's nowhere near that pretty!
The split stitch is very graceful looking; more so than the chain stitch. I did notice that the split does not lie as flat as the chain, though, around curves but I like the way it looks. Many of the Original Jacobean motifs were filled in with chain stitching and I can see why, since it fills out the ground fast.
The entire piece is coming out great, Mary, as a Sampler piece.
you are an inspiration to all of us. You make me want to try everything….never thought I could do all the fancy things. It is so beautiful!
This project is just adorable!
I noticed something today, though, and I wonder if anyone else has caught it: your fox jumped over the dog, but the fox in question jumps over the dog. If he jumped over the dog, then there'd be no "s" in the sentence!
But who am I to nitpick? This is so cute!
I knew I was missing something when it came to dotting I's with a French knot — that would be the anchor stitches. Thank you so much for this tutorial. I think I'll go read the rest now of them. Thanks, Mary!
Hi Mary,
Can you please help me in making this word on my daughter’s Handkerchief..
The word is PRANITHA.
Thanks,
Divya
Mary,
I’m beginning a small sampler on plain muslin or linen. I want to use perle cotton no8 but what needle do you suggest?
Thanks again for all your inspiration and tutorials!
T
You’ll need a crewel needle, Trudi, probably a size 8, but you should try sizes 7-9, depending on the fabric. Some fabrics are easier to work through than others, and some will require a larger hole for the thread to pass through. -MC