


Here’s the last installment of this series of tutorials on hand embroidered lettering and text! Today, I’m going to take you quickly through the end of the stitching on my little sampler. For the final words, I’ve tried a couple new threads, but the stitches are ones we’ve already seen. If you’re just joining in on the end of this series, you might want to take a look at the previous tutorials in the series, which cover all kinds of ways to hand embroider lettering.
I’m stitching the small filler words here, using three different types of threads for the remaining four words. I have few comments to make on the threads!
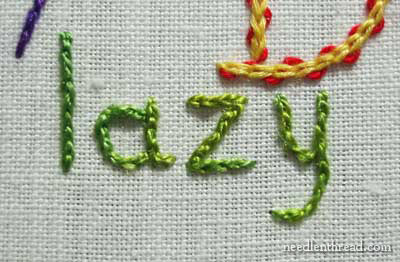
I stitched this short little “lazy” at the base of the sampler, using a relatively bright green over-dyed silk from Sassa Lynn. I liked these threads ok for this sampler. They’re very soft. I think they’re worked best in short lengths. I could see them being very nice threads for crazy quilting.

Here’s the sampler after this word was added.
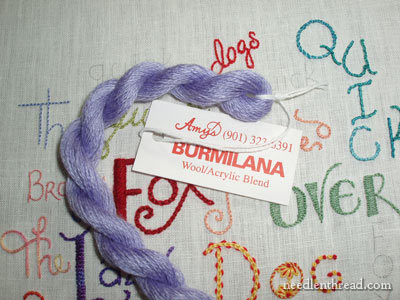
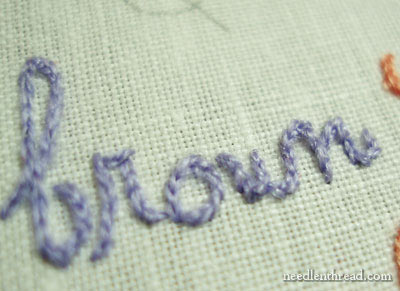
Now I ventured into this Burmilana, which I picked up on one of my shopping stops last summer while on vacation. This is the first time I’ve stitched with it. It’s a wool and acrylic blend.
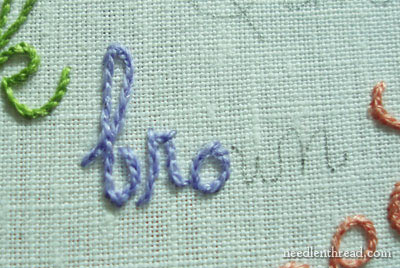
Oh my. I don’t usually knock too many threads. But I don’t think this one is made for surface embroidery. It is a pill. And it pills – and it fuzzes – and it’s just really difficult to work with. I tried working with a crewel needle, a chenille needle, and even a milliner (thinking the round eye might wreak less havoc on the thread), stitching with short lengths of the thread, but really, what it boils down to is that this is a difficult thread to stitch with.
Perhaps, on a large-holed canvas, it may work better, and indeed, that may be what the manufacturers had in mind for this thread. But I’m pretty sure it wasn’t made for surface embroidery.
The whole time I was stitching with it, I was thinking to myself, “Oh. Yuck.”
And this brings me back to the whole question of embroidery supplies. If you’re going to invest in supplies, do make your investment worthwhile by purchasing items you know are made for surface embroidery!
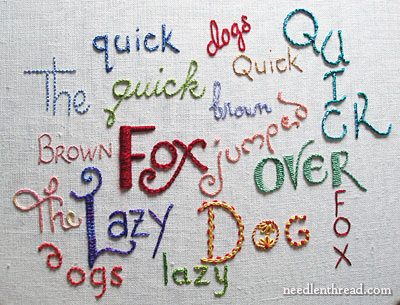
Here’s the sampler so far, on an angle….
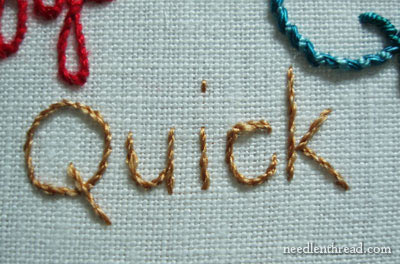
Using one strand of Pearsall’s in a wheat color, I stitched this tiny “quick” in stem stitch.
Pearsall’s is a nice silk. It’s a little pricey, but it is a nice thread. It’s softly twisted filament silk, so it has a very nice sheen. It also snags on things easily.
My advice is not to stitch with Pearsall’s right after you’ve put up your Christmas tree – or you’ll end up with a lot of these:

This is Pearsall’s in red (which I used for the very last word on the sampler), after snagging it on my scratched and raw tree-fingers!
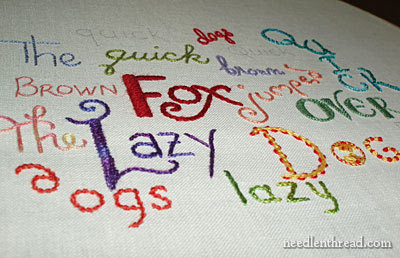
And there’s the finish of my rather crowded and somewhat colorful and fairly nonsensical lettering sampler.
When you embroider text, remember the golden rule of all writing: The purpose of writing is communication! If writing does not communicate, then what is the point of writing? If your lettering does not communicate what it is meant to communicate, then the effort is wasted! Choose stitches that best communicate to your reader, and arrange the words so that they communicate your thought clearly to your reader, too. If you follow those rules, you’ll have no problems with stitching readable text!
I hope you enjoyed this series! You can find the rest of it under Tips & Techniques in the main menu above. There, you’ll find all kinds of useful articles for beginners and beyond.
Hi Mary,
I haven't posted a comment in quite some time. I love all the wonderful things you have posted on your site and I look forward to it each and every day. I happened upon it quite by accident awhile back and have been reading it ever since. I want to thank you for all of your inspiration and talent you have so graciously shared with us.
I hope Santa fills your stocking with good health and happiness for the coming year!
Annie in Michigan
Thank you so much for this series of lessons on lettering. I feel much more confident about using lettering in my crazy quilts and other embroidery. I know I'll refer to these lessons often. Have a wonderful holiday.
Cindy
Merry Christmas, Mary!
Mary, I thoroughly enjoyed this series on lettering and used your dotting the I technique on one of my Christmas presents. Thank you!!!!!!
Do you have any suggestions for commercial embroidered items? Things that are currently popular? But simple, as I’m a beginner.
Thanks.
Hi, Judith – I’m not sure what you mean by suggestions for commercial embroidered items? You can pretty much embroider on anything. For gifts, I sometimes use “blanks” – commercial items that are finished already, made to embroider on (usually with machine embroidery, but they work just as well with hand embroidery). So, aprons, towels, baby blankets, bibs, and so forth. You can find blanks at online stores like All About Blanks or EmbroiderThis. Hope that helps!
Gostaria de adquirir algum livro ou material com riscos e pontos para bordado richelieu.
Se puder ajudar..desde já muito obrigado.
Thanks for these really clear and easy to follow instructions and ideas.
Good morning to you.
I have a dream ! I will just try to do YOUR lettering embroidery which is so fabulous, and learn your lessons. And as I am a french (new) embroiderer I will learn english language as the same work !
Thank you for all these so marvellous topics and it is so kind to you to help the new pupils …
Have a nice day
Jacqueline
I wish I had seen this sooner. :/ Oh well…:/
Thank you a million times for this. It’s been very helpful and your sampler turned out beautifully. 😀
I’ve just read each of these lessons in turn, in anticipation of a text embroidery I’m planning to make for a friend. This has been so, so helpful. I’m new to embroidery, and you blog and website are a godsend! I’m so grateful for all the wonderful detailed resources and instructions. Thanks a million, Mary!
Thank you so much for this series. This set of posts on embroidering text is very well thought out, with beautiful photographs and clear advice. I will be going on to read more of your site! Due to everything going on right now, I am planning to make as many Christmas gifts (and buy as few) as possible; you have made my literary tea towel gift idea seem a lot more achievable! Thank you for your hard work in creating these posts.