


The cover for my needlebook (or, as some may call it, a “hussif”) is coming along. I’ve almost finished embroidering the back of it, and then will only have one more panel. Then I can add the inside layer, embroider the book spines, and start on the little inside accessory spaces.
The whole project is developing according to practically no plan at all, so I don’t actually guarantee the finished product! I have an idea in my head of what I want it to look like, so hopefully it will turn out the way I want it to. It’s nothing fancy.
It started as a road trip project, and I’ve posted a couple updates, here and here, along the way.
So, here is a photo of the front and back, side by side:
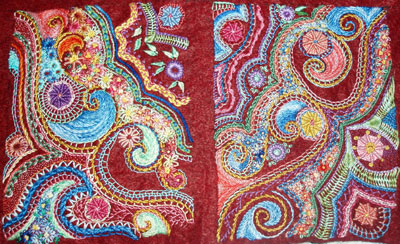
The space between the two panels is about three quarters of an inch. This will serve as a spine, into which I will stitch another “page” in the book, and then I’ll cover the spine with some decorative stitches. The left side in this photo will be the back.

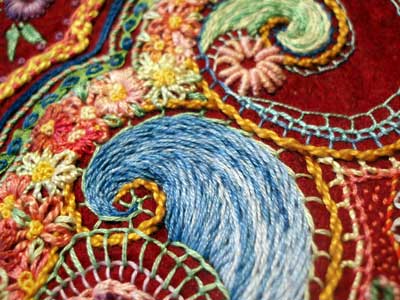
Here’s a close-up of a good bit of the back panel, and you can see that some of the stitching is not yet complete. For example, I still have to fill in a few of the flowers, add leaves, etc.
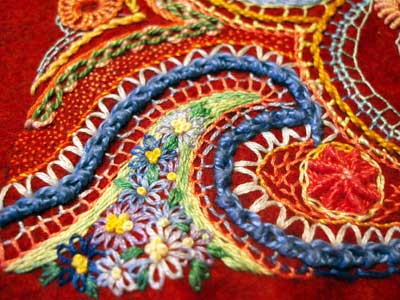
This little section is made up of a variety of stitches. The bold blue line is Portuguese knotted stem stitch. On the outside of this, in light blue forming the little pointed outline, is a fly stitch border. Inside the “wave” are a few rows of open buttonhole, and then a stem stitch filled area (in green), and the center of the motif is filled with lazy daisies with French knot centers.
On the right side under the tip of the wave is a ribbed spider web wheel, surrounded by chain stitch, with some feather stitching filling in.
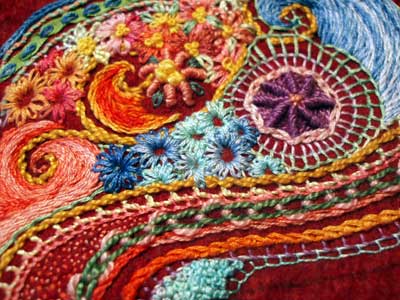
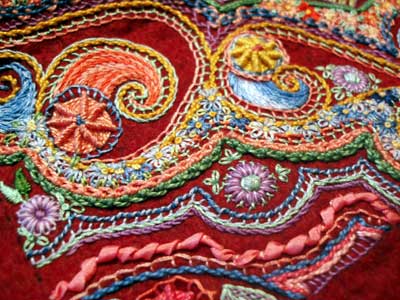
Here’s another close up of a part of the back panel. The waves or swishes are stem stitch, used as filling. There’s a little cluster of French knots filling in down at the base of the photo, and some seeding can be seen above the dark green chain stitch band.
I’ve been using a variety of threads in the whole thing: regular stranded DMC, variegated DMC, Caron Collection Waterlilies (overdyed silk) and Watercolors (overdyed cotton), DMC Perle #5, Eterna silks – twists and minitwists, some (but not much) Soie d’Alger, and some YLI silk ribbon.
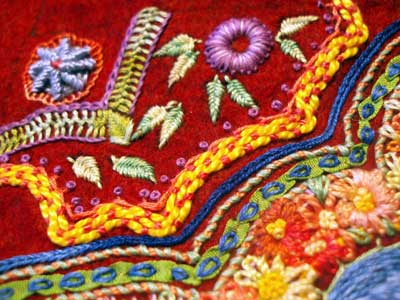
Towards the bottom of this photo, the green band with the blue isolated chain stitches, is a length of YLI ribbon, which I stitched down and then worked the isolated chain stitches over. Directly above that line is a whipped stem stitch, which began with a coral-colored stem stitch, whipped with green. Directly above this is a blue band of heavy chain stitch.
Directly above this, I couched some yellow DMC Perle #3 with some pink Perle #5, in a kind of bricking pattern. Some of the stitches have been joggled about a bit, due to carelessness in holding the project (I’m working in-hand, as opposed to on a hoop or frame).
Above the couched line is a buttonhole line in pink, topped with purple French knots, and floating above all that is a random selection of leaves worked in fishbone stitch. The leaves adorn the purple flower, which is made up of two layers of lazy daisy in dark purple and light, and which hasn’t been filled in the center yet.
The “V” directly above this is worked in cretan stitch, edged with stem stitch in purple on the bottom of the band, and chain stitch on the top of the band. Another spider web wheel surrounded by buttonhole stitch is worked inside the “V.”
This is a close-up of stem stitch used as filling. You can also see, in the distance in a variegated pink / yellow silk, a flower worked in bullion stitch.
And, a final shot, this is back to the front panel, looking at my favorite part of it. I prefer the front panel. I think I got carried away on the back panel, so that things look a bit too thick for me there. The front has a crisp look to it, despite the crowded areas, whereas the back seems to jumble together a bit too much. Still, I’m having fun working on it. I’ve got a commissioned project, though, that’s demanding my attention now and probably into March, so I’ll just be snatching a few stitches here and there on this one, as time allows. It may be a while before the project is completed! But I won’t relegate it to the deep interiors of the closet just yet!
Again, all these are pretty much what I would call “basic” embroidery stitches (although the bullion stitch takes a little practice), and you can find video tutorials for most of the stitches in the Video Library of Stitches Index.
this project inspires me. Learning all the stitches is like learning the alphabet. Looking at this project is like reading a lovely sonnet written with those letters.
wow i really don’t know what to say to this. It is so creative. The stitches themselves are easy enough to learn (especially with your videos) but to put them together like this is just genious.
Thanks for your website. I am a learning embroiderer and it has been very helpful.
What amazing work! I think your “beginner embroidery” tag is underestimating yourself. 🙂
Lovely stitching
Thank you so much for posting the shots on your Flickr, which brought me to this post. I was going to ask to see the whole thing, and now I have. It’s marvelous. None of it looks too crowded for my taste. I love this kind of work, so spontaneous. So colorful! So textured.
this is a wonderful piece mary. So inspiring – love the colours and the texture! Thankyou for sharing
What an amazing piece of work- love the free, flowing style- you’ve inspired me! Thank you. x
Your work just blows me away. Beautiful. jan
thank you for creating and mantaining this site. i just love your work.how to- vedios are very explanatory. i’m learning a lot from you. you are an inspiration.
As a designer for a very controlled technique (ccs), it feels disloyal to say that free hand embroidery, with no pattern, is the MOST fun. I’m doing a canvas I painted in very broad areas of a chicken and am having so much fun with my stash bag and an old book of canvas stitches.
wow amaizing
I would like to buy this pattern, please advise me how
Thank you
Kind regards
susi
Hi, Susi – this project wasn’t based on a pattern. The embroidery was completely free-style – I just stitched whatever came to mind as I covered the fabric. I used wool felt and threads in my stash, and whatever stitches seemed to work as I went. You can do the same! It’s really just random stitching!