


The silk work sampler that our embroidery group is working on is coming along. After spending a lot of time on set-up, we’re finally stitching! Here are some photos of progress on the embroidery sampler so far.
We started with the middle flower, working it in long and short stitch. This was an adventure! I chose to do my flowers in reds, and first, the plan was to work from light on the outside to dark on the inside. I worked the first petal that way and didn’t like it at all, so I picked it out and worked from dark on the outside to light on the inside. I liked it much better!
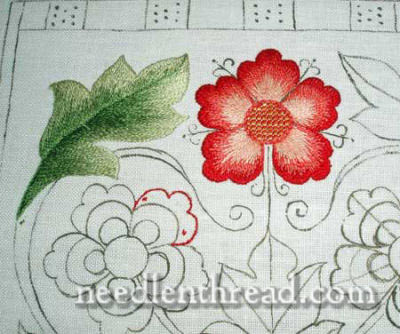
So, the center flower and the top left leaf are worked in long and short stitch. The idea is to work towards the “growth point” on flower petals, leaves, etc., when working with long and short stitch. Down below, I’ll show you some close ups where I messed up!
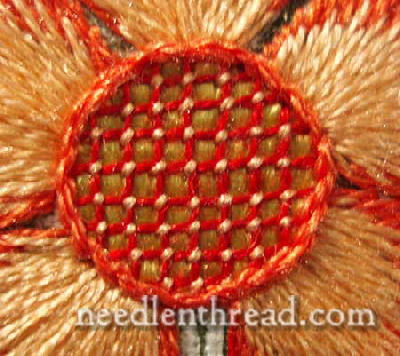
This is the center of the flower. The image is a bit fuzzy (!) This is how I stitched it: I began with a light gold Soie d’Alger, and backstitched around the circle. Then, inside the backstitch (so, on the inside of the circle), I stitched one layer of loose satin stitch in the Soie d’Alger. Then, I satin stitched the whole circle (going outside over the edge of the backstitch) in a flat silk, in gold. Then, I worked a square lattice in the dark red, and couched the intersections with the lightest coral in the flower. Then I worked a stem stitch around the circle, using two strands of Soie d’Alger in the medium red.
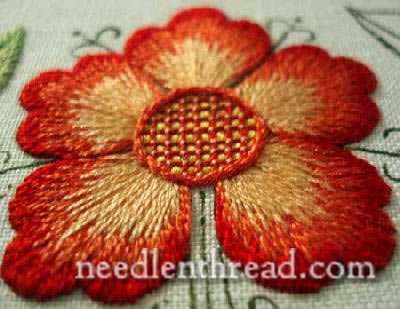
Here’s an odd angle on the flower, so you can see the “dimension.”
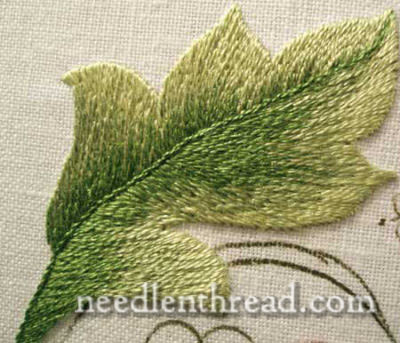
The leaf is worked in long and short stitch in three shades of green, light on the outside, and darkest by the central vein. The whole leaf was first outlined in the light green in a backstitch. The long and short stitches should be directed towards the central vein, and slanting downwards (to the growth point of the leaf). If you look closely, you can see where I messed up! But if you can’t see it here, you can here:
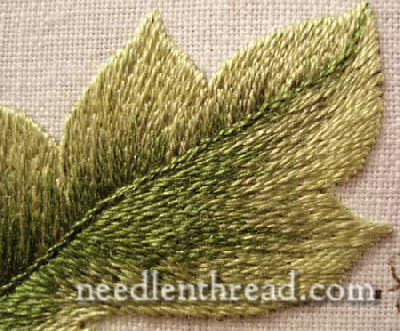
The central vein is worked in a stem stitch, in the darkest green. The problem in the leaf is in the lower left-hand corner of this photo. I marked the difficulties in red in the photo below:

The three middle red lines show how the stitches angle too far up. I should have taken that out and restitched it…. but I had too many layers in before I realized how far off it would go. In the scheme of things, it’s not “too” noticeable, but it still bugs me! Live and learn!
So that’s the progress so far… Next, we’ll be working the flower on the left, which is worked in satin stitch, in flat silk. The shades change according to the lines in the pattern, and there’s a “voided” line between each shade. The satin stitching will be vertical, without any radiation, so it will be a completely stylized flower. I’ll let you know how it goes!
Hello again mary wow that is just beautiful, can you give me any tips on long and short stitch. I just can never get mine to look right I have tried and tried but they just don’t flow right. So any help would be great
many thanks and happy stitching
Joyce
Well, one thing to remember is that the stitches are better off longer than shorter – when you lay down your first row, be generous in the length of your stitches, and then, in the second and subsequent rows, you’ll want to take longer stitches than you think, going deeper into the first layer of stitches than it seems you should. I work mine rather freely, as it’s a “forgiving stitch” – I go back and fill in here and there, or I jump forward to put in a couple stitches to establish the angle I want, then jump back to fill in as I’m fanning around a curve.
Hello again Mary thank you for your help I will give it a go and see howit works out, I have avoided doing long and short stitch as I could never get it to look right. So I will start on something small and work my way up, once again thank you for your help.
I have another request mary if you are able some time do you think you could show how to make a rose using wool embroidery
many thank Joyce