


I’m not sure if you like the step-by-step on these types of embroidery projects! It just occurred to me as I started writing this that, since goldwork and beetle wings are rather specific, this could bore people to death! I’m going to take a chance, though, since I’ve got this little practice project on my plate. So this is the next step in my goldwork and beetle wing project – preparing the beetle wings for embroidery.
Goldwork usually photographs ok, but the beetle wings actually don’t. I can’t seem to get across the beauty of these little things in a photograph! Keep in mind that they aren’t predominantly black, as they look in some of these photos – they are a bright jewel green – like an emerald – with all kinds of hues reflecting in them (blues, purples, yellows, coppers). They really are lovely, even if they seem rather flat in the photos!
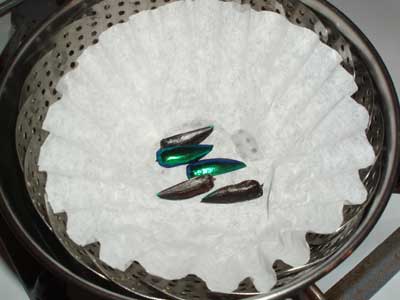
Thanks to Michael Cook of Wormspit, I knew in advance how to prepare the wings and didn’t have to go through much of a trial and error process. Before trimming the wings up, they need to be steamed for 5 minutes, in order to soften them just a bit for cutting. I started with just a few, since I figured if I had too many, they’d dry out again anyway before I could get to them all. I put a tiny bit of water in the bottom of a regular pot, put in a metal steaming basket (from which I removed the center ring), and inside this, I put a coffee filter, since I didn’t want to have to pick the wings off the steaming basket. With the filter, I could just lift the paper right out.
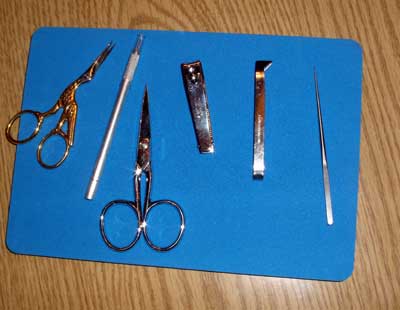
While the wings were steaming, I laid out all my tools: goldwork scissors, paper piercing tool, regular embroidery scissors, fingernail clippers, tweezers, and stiletto. I wasn’t exactly sure what I would need here, although Michael had mentioned that he had better luck with the clippers at first, so that’s one tool I knew I’d need. I thought I’d use the paper piercing tool to pierce the holes in the wings, and then, if I needed to, the stiletto to enlarge them.
The first thing I did was use the fingernail clippers to clip around the top, rounded part of the wings, which are thicker and curved. Once the tougher edges were off, I found that my goldwork scissors worked fine, trimming the wings into more regular shapes (for this pattern, petal shapes and half-petals).
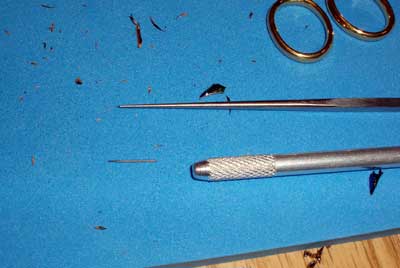
Guess what? The paper piercing tool didn’t work for very long! Those wings are tough, and they have a grip! The tool stuck in them, and eventually, even though I was being very gentle, the tip came off the tool.
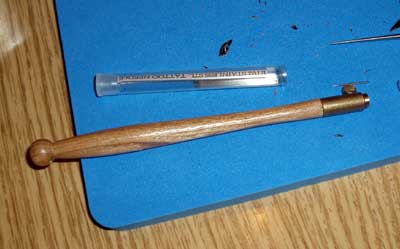
The stiletto (which is actually my laying tool – it’s stainless steel with a very sharp point) didn’t work, either, because the taper at the point goes from tiny to too large too quickly! The holes ended up too big. So, luckily, I have a tambour needle handle and a pack of eyeless needles which I found worked just great for piercing the wings.
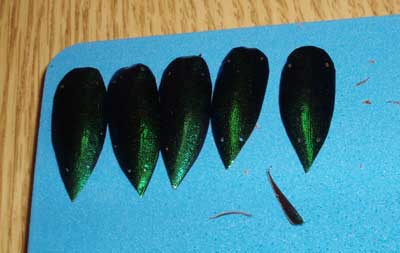
I trimmed the wings to petal shapes, working with wings approximately the same size so that the petals came out relatively even.
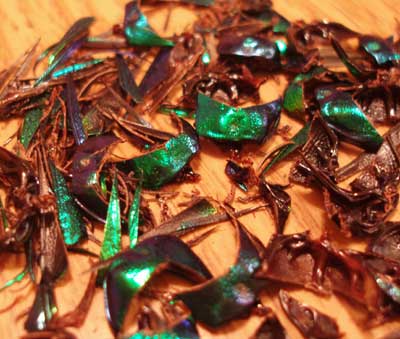
And this is the left-over beetlewing “carnage.” You can get a better sense of the colors in this picture, although, relatively speaking, they still look rather “flat”!
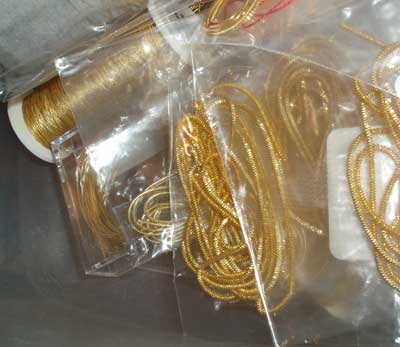
Once I finished preparing the beetle wings, I went into my storage closet and dug out my goldwork supplies. I found that I had a good bit of metal “scraps” for this – purl, pearl purl, check purl, passing threads, twist, about three inches of milliary wire, and even some spangles. I doubt I’ll work every type of gold into the piece, but I’m set for a good variety, anyway!
And now for the fun part! I’m off to thread my needle!
I, for one, really like the step-by-step instructions/photos and appreciate the time and effort you put into sharing your projects.
Thanks, Margaret! I’m glad to hear that!
I love the step-by-step projects!
Okay first time for commenting and really I’m no different to the other two who have already commented, but I’ve been reading at another blog (In a minute ago)that comments are appreciated, I love the step by step and comments about what worked and what didn’t. Thank you.
Thank you!! Yes, it’s true, most bloggers (and especially the crafty type) love comments. I read Sharon’s summing up of the comment question, and even added my take on it (as usual, I went on quite a bit!)
I’m glad to hear that you all like the step-by-step and the low-down on how things work. It’s good to know!! I’ll keep you posted on the progress!
Thanks for the comments!
John Neal Booksellers (actually a calligraphy supplier, if you know him) has a selection of cheap awls. These are meant for piercing multiple pages to make books.
Maybe one would be good for beetle wings?
Yep, E-R, I think that’s a great idea!
Thank you so much for the link, too! I’ve been looking for shell gold – and they carry it!
It’s worth shopping around for shell gold (try Paper Ink Arts as well?) because it is so damnable expensive.
You’ll need some binder as well (eg Gum Arabic) to mix with it before using it.
Would you like some info on it’s use?
Hi, again, E-R! Thanks for the heads-up on other sources! I will look at them. And yes, sure! I’d love some pointers on how to use it!!
The step-by-step posts are really informative! If I ever try working with beetle wings and gold work, this would sure help! Plus, it’s just interesting to read about!!
You using the beetle wings reminded me of the work of Belgian artist Jan Fabre, who used beetle wings in his work as well – for example to decorate the royal palace in Brussels, it’s very different from embroidery. But still worth seeing.
Just about to steam, pierce and attach my first beetle wing! You’re a life saver!
Whoooohooo. I love beetle wings – I have a project coming up that incorporates them. Well, it incorporates 4, cut into small pieces…. MC
I found that it wasn’t quite as labor intensive to prepare the wings for application. Like you I used a pair of finger nail clippers to shape the upper/thicker part of the wing and used a dremel tool with a very small drill bit to drill the holes at both ends. I was able to do about 200 in roughly 3 hours this way.
I know this is an old post, but I reviewed it again as you’ve just written about beetle wings again.
I wonder if the smallest setting on a leather punch would work for putting the holes in the wings? If I’m ever brave enough to try it, I will report back.
Hi Mary, I just came across this and am fascinated by the idea of using beetle wings! I’d love to give it a try. Do have any particular place where one can get these?
Thanks!!
Natalia
eBay! Search for “elytra” – lots of options should come up.
Thanks for this article, Mary! I just got a batch of beetle wings and didn’t know how to work with them – you’ve saved me some frustration! This is going to be fun!
Good to know that the beetle wings are so much work to get ready to use. Thanks for the very interesting and detailed instructions.
Hi, Mary – you can actually skip the steaming, though I find it makes it easier to trim them and shape them and pierce them. Sometimes, if you trim them undreamed, the color will chip. But for the most part, you can work with them unsteamed.
Are these from real beetles? Isn’t that a bit “crewel”? (pun intented) or do they drop their wings naturally….
The beetles have a very short life span – a month or two? They’re harvested after they’re dead.
This is incredibly helpful! I’m working with this type of wing for the first time & had no idea how to prep them.