


Here’s Lesson Four in this series of long and short stitch shading lessons. If you’re just joining in, you’ll find an index of the long and short stitch shading lessons available here on Needle ‘n Thread, where you’ll find all the links necessarily to easily access these embroidery lessons.
In Lesson Four, we are looking at how to embroider a circle in long and short stitch, in such a way that it looks shaded. Now, there are a couple different ways to go about this, depending on the type of shaded circle you are trying to achieve.
For me, personally, when I’m looking at needle painting, I’m looking at achieving a realistic effect with the long and short stitch. But for others, the two-dimensional flat effect is what they want.
So, in this particular lesson, I’m going to address two methods of long and short stitch: the “textbook” method (comprised of rigorously uniform long and short stitches) and the method we’ve been following here in these lessons so far, which, over all, is a much freer and more relaxed approach to the technique.
Instead of writing out the exact same lesson that you will find in the PDF at the end of this article, I’ll stick to the bare bones for those of you who just want the gist of it. Then, if you want more detail, you can take a look at the PDF.
Colors The colors used in the circles are 347, 349, 351, 353, and 745.
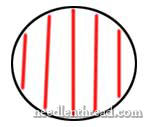
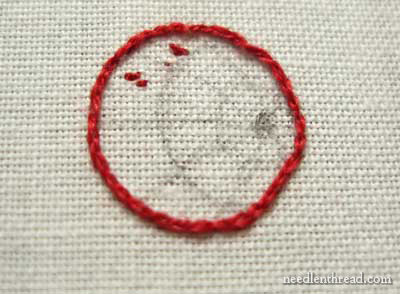
Begin with the top circle, with one strand of 351 threaded in your needle. Split stitch the outer edge of the first circle in 351. Then draw directional lines in pencil inside the circle, like so:
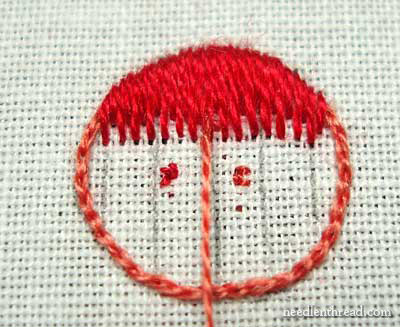
Once you have split stitched around the circle, begin with your needle coming up in the fabric about one third way down the diameter of the circle, on the middle vertical line, as shown by the green dot in the diagram below:

Emerge from the fabric at this point, then take your needle down on the other side of the split stitch line, following the stitch direction marked by the vertical lines. For the next stitch, bring your needle back up into the fabric to the right of your first stitch, right next to it but not crowding it, and just slightly higher in the fabric, and then take it over the split stitched line. Now you have one long stitch and one short stitch. Continue in this manner all the way to the right side of the circle, beginning your long stitches along the same long and your short stitches along the same line.
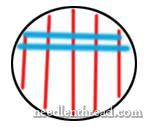
To help you determine where to begin your stitches, you might draw two horizontal lines inside your circle, like the blue lines in the diagram below:
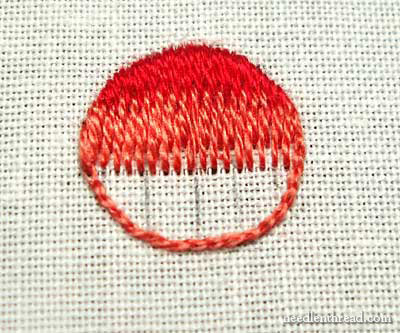
Once you reach the right side of the circle, go back to the middle and work to the left side of the circle. You’ll end up with a row that looks something like this:
To begin your next row, using color 351, bring your needle up, splitting the centermost long stitch in the first row. You’ll want to split this stitch only slight up into it – a good gauge would be to split the stitch next to where your short stitches in the first row end.
Your second row will look somewhat like this.
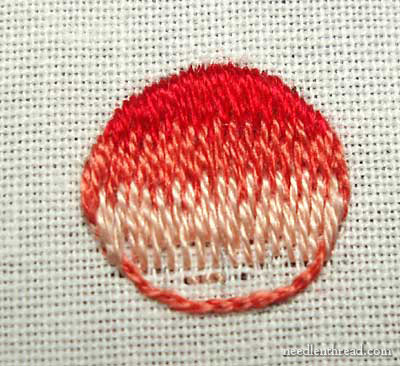
For your third row, use 353, and work the row in the same manner as the two above.
Finally, for the last row, use 745 and stitch the last row over the split stitch edge.
That’s the first circle, worked in the “textbook” method of long and short stitch.
Second Circle
The second circle is the next one down, slightly to the right.
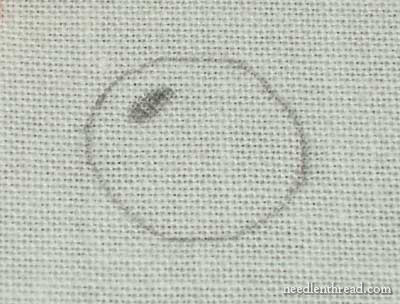
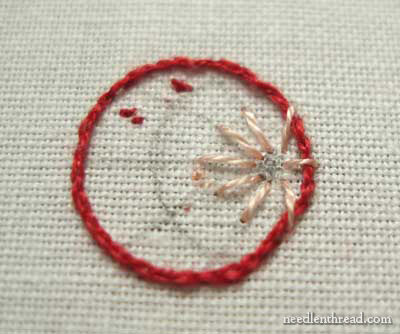
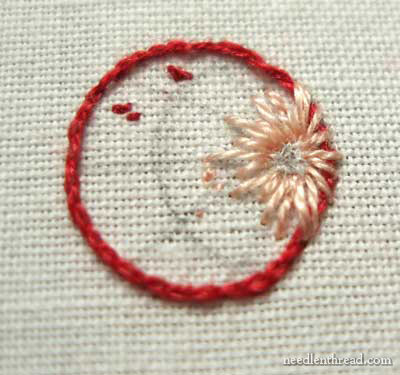
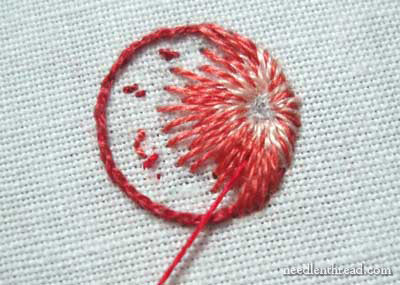
Begin by drawing an elongated dot at the top left side of the circle, leaving a little space between the dot and the edge of the circle. If you look at the circle as the face of a clock, the elongated dot will be at approximately 11:00 o’clock.
Next, draw directional lines radiating from the dot, as shown in the photo above.
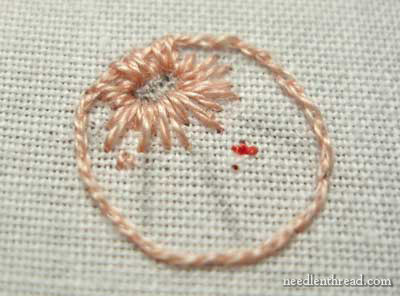
Using 353, split stitch the edge of the circle. Then, begin your long and short stitching on the edge of the elongated dot. You don’t want to go into the center of that dot – just consider the edge of it the place where you begin your stitches. As you stitch, fan the stitches out to follow the directional lines, and vary the length of the stitches. On the sides, stretch the stitches over to the edge. Don’t hesitate to take a few over the split stitch line.
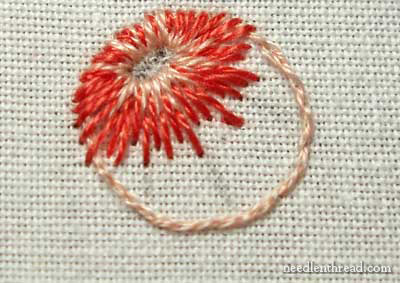
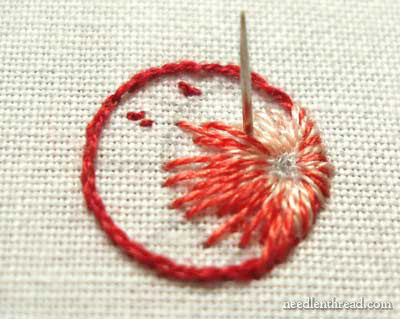
Fill in all around the elongated dot, so that the stitches fan out into the circle, and then begin the second row in 351. You’ll want to fill in any gaps left by the first row, and build up a thickness of stitches here. You don’t want them to overlap each other, but you do need them to cover the ground fabric, so make sure that you tuck in stitches where necessary to fill the area and cover the ground fabric.
I wasn’t really satisfied with the lighter stitches on the left side of the elongated dot, so I went back in with 353 and tucked in a stitch to balance the top of the sphere out a bit. Yet another testimony to the forgiving nature of the L & S stitch, when stitched in this manner!
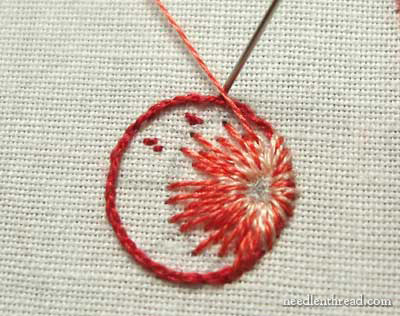
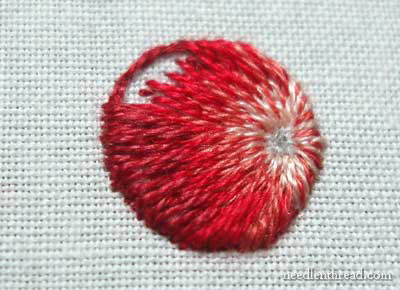
Your second row will look approximately like this.
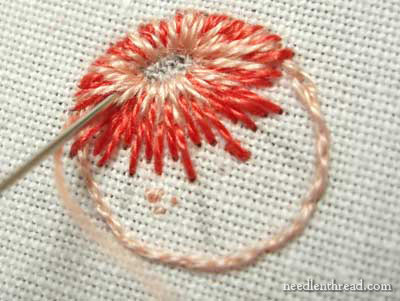
Your next row is also worked in 351, filling in the center a bit more and building up a full foundation of stitches.
Then switch to 349, and fill in the rest of the sphere, following your stitch d
irection lines, and taking the thread over the split stitch line when necessary. You will probably stitch at least two rows of 349.

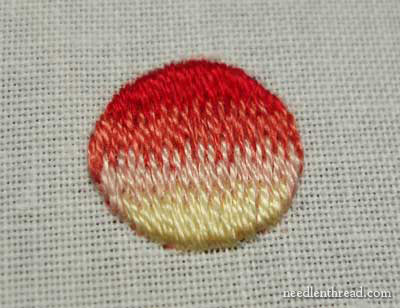
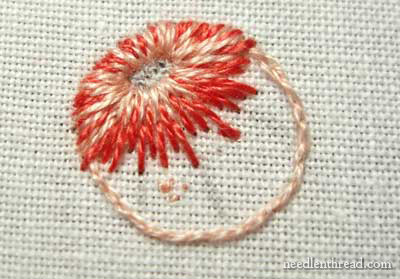
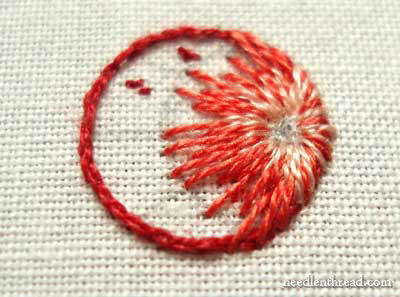
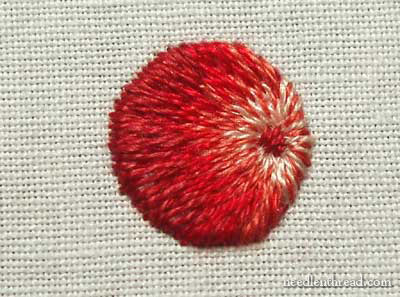
When you finish filling the sphere, which looks a bit like a berry, you’ll have something close to this.
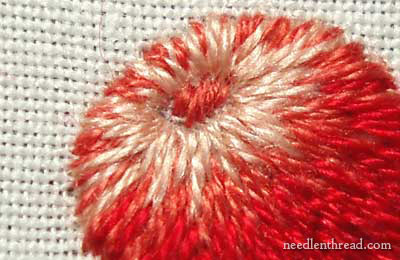
Using 347, stitch a few satin stitches across the elongated dot.
Third Circle
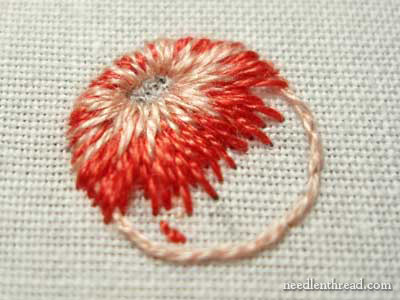
The third circle is going to be stitched much like the second, but the “berry” is turned to the other side.
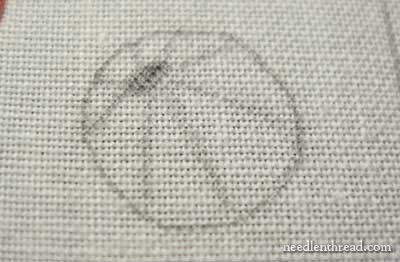
Place a fat dot on the right side of the circle, about halfway down the length of it, and near the edge, but not touching it. Draw lines that radiate from the circle, as shown in the photo above. You can also draw in “layering” lines, which will help you know where to layer your colors.
When you have drawn your directional lines, you can split stitch around the circle in 349.
Beginning with 353 again, stitch in your directional lines radiating from the edge of the circle on the right.
Once you have the directional lines in, go back and fill in between them, varying the length of your stitches.
Begin the second row in 351, fanning your stitches out to follow your directional lines. Keep varying the length of your stitches, as seen in the photo above.
When you need help setting in a directional stitch, remember that you can pull your working thread in the direction you want your stitch to lie, then put your needle into the fabric underneath your working thread, so the stitch ends up in the right spot.
When you finish your second row, it should look something like the one in the photo above.
The next row is worked in 349. Remember to take your thread over the split stitch line as it becomes necessary to do so.
The final row is stitched in 347, over the split stitch line.
When you finish filling in the circle, using 347 again, add a few satin stitches to the inner circle.
Congratulations! You have now finished the first three elements of the Long and Short stitch shading lessons.
You can see all the other available lessons in this series in the Index of Long and Short Stitch Shading Lessons.
You can print or save this lesson (PDF) from the following link:
Lesson Four: Circles, Flat and Round (PDF)
You will probably notice that, of the three circles in this lesson, the last two are far more realistic looking than the first. The techniques used in the last two circles would be the same technique you would use to work such things as fruit (cherries, grapes, berries, larger round fruit, etc.) or vegetables (peas?!) or any spherical item that you want to look more dimensional.
Have fun with it!
Mary
many thanks
that seems so easy with your tuto.
Michèle
This looks a little bit harder, Mary!!!
A Happy Monday Morning to everyone,
Mary, you make it look so easy and I love all the tutorials…When I go to do it, wellll, that's a different story! lol
Annie (can't wait for cooler weather in michigan)
Hello Mary,
A very interesting Tutorial.Never tried Long and Short stitch in a circle.Thanks for the post,will try out soon.
Very inspiring, I like the radiating effect! I'm still on the boxes but hope to catch up soon. Justine
I think I will try one circle "inverted colors" (dark-to-light) and see what that looks like – I origianlly learned the traditional long-short-long method and never liked the way it looks! Your explanations are so wonderful…I can tell you are a great teacher! 3 more weeks before I go back and this is my "sanity project" for the fall.
Your instructions and photos make this seem so much easier. I think I'll have to get back to doing fancier embroidery pieces after seeing your wonderful blog!
You have just explain the secret of long and short – divide and conquer.
Thank you, thank you. I have been waiting for this for years.
Judy
Fabulous pictures and directions! Thanks for this posting.
Susan in NJ
Your lesson is just perfect ! Thanks a lot. I was very scared by these circle, and finaly, I am pleased by the result.
You can see it here :
http://elena33.canalblog.com/archives/2009/09/21/15140479.html
Спасибо! I'm from Belarus, find your site as very interesting so I'll recommend it to my friends
Bom dia, amei essas aulas de bordado, é uma pena eu não falar ingles, mais mesmo assim valeu a pena . obrigada
Hi Mary, when you “fill in” the stitches to get a good foundation in the three dimensional berries, do you just tuck in the stit hes (in order to increase the number) or you also split through the stitches of the previous row? Decreasing the stitches as in the triangles was pretty easy, increasing makes me a little confused. Thank you
Hi, Manuela – Do both – split the previous stitches, but also “tuck in” new stitches to increase the filling! Hope that helps! ~MC
hello,
sorry for my poor english.
I’m at home for a long time, because of health problem, and your lessons give me a very interesting entertainment.
Love, love, love your tutorial…will keep your site for when I have time for my most favotite craft,!! Beautiful results
Can I add my mouth waters as I scroll down ☺️
Thank you SO MUCH for this tutorial!!
I did this thanks to you.
It really helped me! 🙂