The needlework project that’s consuming most of my stitching time lately – especially those 15 minute bouts of stitching – is this spot sampler for the high school level Needle Arts class that I’m currently teaching. I’m desperately trying to get Far, Far Ahead of my students, but I’m not quite as far enough ahead as I would like to be.
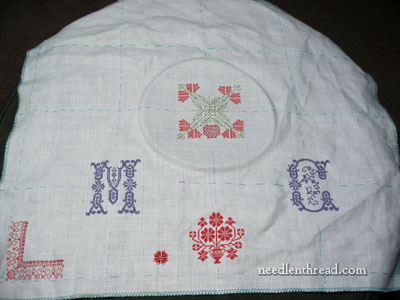
The first step in working the sampler was to apply initials. Signing the work usually comes at the finish line, but in this case, initials seemed a good place to start.
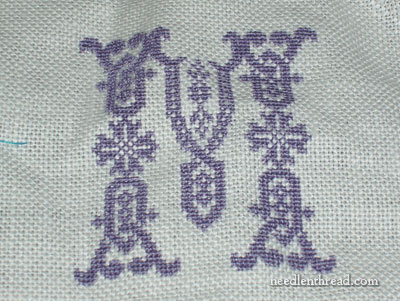
The first semester of the Needle Arts class is devoted to learning stitches, and the first quarter is devoted to learning counted stitches. The most basic counted stitches are the cross stitch and the backstitch, so those were first up. The initials were worked in cross stitch, then.
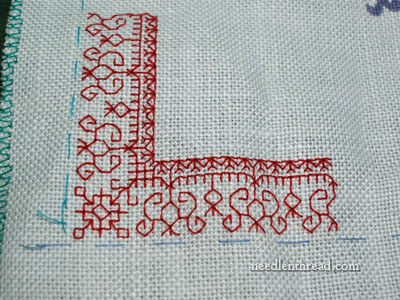
After cross stitch, we’re moving on to Holbein stitch, or reverse running stitch, or double running stitch, or one of the many other names by which the stitch is called. I like “Holbein stitch,” personally, because I like the historical association in the name (artist Hans Holbein the Younger, a 16h century painter, showed detailed blackwork embroidery in his portrait paintings…) Holbein stitch is the basis of blackwork, which is worked in such a way that it is more or less reversible – the design is the same on both sides of the fabric.
To incorporate some blackwork on my spot sampler, I chose a nice little corner design. Obviously, it’s not worked in black, but that’s ok – the technique is there, and that’s the point. I’ll probably talk a little bit more about the student samples for learning Holbein stitch and the various “journeys” involved in gridded blackwork later on.
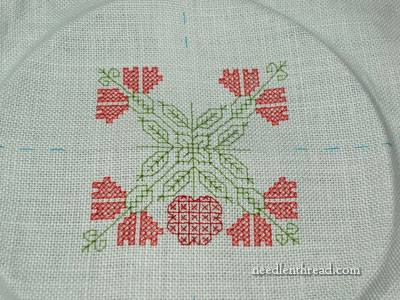
After finishing the corner design, I couldn’t just leave blackwork there. I wanted one more element of it on the sampler (it works up really quickly!), I decided on this design (not quite finished with it), which is a little larger than I intended. Initially, it was going to be stitched in only green, and the colors were added as an afterthought. They look ok, but it’s not exactly my “favorite.”
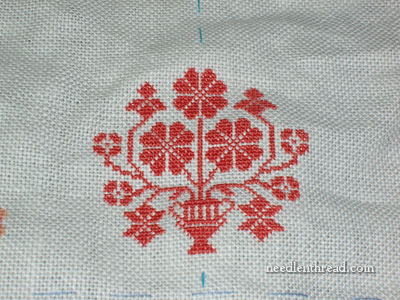
What’s an educational spot sampler without a Quaker motif on it? I added this one after working the initials. I’ll be stitching the date on each side of this little urn.
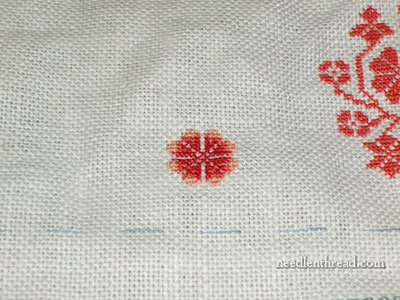
And here’s just a spot on the spot sampler. Using the Quaker motif, I extracted one flower and shaded it. I’ll put a corresponding one (or something similar) on the other side of the urn, eventually.
So that’s what I’m stitching on. After the blackwork element on the samplers, we’ll move on to other counted stitches, maybe a (very) small Assisi motif, some pattern darning, and some typical canvas stitches, some of which will be worked on this linen, and some of which will be worked in wool on canvas.
In addition to the spot sampler, I’ve got some behind-the-scenes developmental work going on with a major project, and I’d like to share that process with you eventually. But what I really NEED to do this week (*sigh*) is clean my studio. Why didn’t I think of building that as a self-cleaning studio? Just turn the knob, press the button, walk away…..
Tomorrow, I’ll be announcing the winner for the Stumpwork Tiles Book Give-Away. If you haven’t signed up yet, do visit the original post and join in!
Hope you had a terrific weekend!


I wish there had been a class like this when I was in high school. Would you consider doing the same class online for us? Probably after the year is finished for the high school students, so you wouldn’t be running two classes at once. Even though I do know (so far) most of these stitches, I’d still like to take it. Just a thought 🙂
I’m a sucker for double running stitch under any name. 🙂 Your little corner is adorable. It’s got that linear lacy look that makes the stuff so strong and delicate at the same time. Working logic for double running is a constant source of fascination for me. I’d be interested in seeing your take on it. I just put up a three part series on reversible (and non reversible) double running stitch methods at String (link on my name), and am always looking for new ways to approach the style. Thanks for posting. Kim
Will the finished project have some kind of organized look to it or will it be little blocks of this and that? And will you be teaching them about variegated flosses? I sure wish I was in your class.
Lovely, thanks for sharing.
Hi Mary, its looking beautiful! Just being cheeky here, but do you want to know that there is a very small mistake in the red blackwork border?! I’m sure you’re just doing the “only God is perfect” thing…
Heh heh. Actually, there are four mistakes in the red blackwork border!!!! But who’s countin’?
I love the initials so much I may just go find that pattern and make them up myself. But like you, I have got to clean the sewing room. Although I do like the idea of calling it a studio, it sounds so artistic.
When you find a studio that you can ‘turn the knob’ with will you kindly share? I NEED one of those so badly!!
The sampler is just just lovely!
You have very lucky students!
Hmmmm 4 mistakes in the corner? I’m not sure I see any, but I haven’t done blackwork, so I’m not sure what a mistake would look like.
I hear you on the self cleaning studio. I’ve been looking for a few miracle products – Chef-in-a-Box, Maid-in-a-Box and Gardener-in-a-Box. Just to have on hand for those times when normal upkeep gets behind. So far I’m not finding them.
That is a lovely sampler… your students will be well nourished in the art of needlework by the end of the year ! I too would have loved a class like this one when I was in HS. (btw… the Quaker motive is my favorite).
I wonder if any of your students is blogging about their needlework journey… it would be nice to have a peek at how they are performing :-).
Hi mary
I have never done a sampler and I think
Is time for me to do one
However, do not know where or how to start
So, I was wondering if you could
Share some information how to
Go ahead with one
Many thanks
Marianela
Xoxoxo
I love the cross-stitch monogram pattern you are using on your sampler. Where is it available? I am new to your site – what an inspriation you are!
Hi, Emily – the monogram is available at Pattern-Maker: http://patternmakercharts.blogspot.com/2009/12/sajou-no-604.html It’s Sajou 604, so if you click on that link, scroll down to find the monograms. You can click on the images for larger versions, or if you have any of the cross-stitch software they support, you can download it for whatever software you have. But if not, just click the image for a larger version, and you can then right click it, save it to your computer, and print it. Hope that helps! ~MC