“Hands-free embroidery” (or needlework) is a term often used to describe a situation wherein needlework frames or hoops are held by a stand of some sort – a device that holds the frame or hoop so that your hands don’t have to.
When talking about hand embroidery, I always chuckle when I hear that term (“hands-free embroidery”) to describe using a stand. I find it a bit oxymoronic. But maybe that’s just me…
In any case, there’s nothing as wonderful as a needlework stand, whether it’s a floor stand, a table stand of some sort, a lap stand, or any other device that can hold your hoop or frame for you, so you don’t have to. It frees up both hands so that you can use both hands to do your work.
For techniques like goldwork and many types of silk embroidery, a stand is really essential because you need two hands for much of the work. But even for other embroidery techniques, a stand is so helpful – it allows you to work faster, with more ease and and with more precision. French knots and bullion knots when you don’t have to hold the hoop? So much easier!
I have two stands that I really love, both for different reasons – the Necessaire stand from Needle Necessities and the Needlework System 4 stand, and both of which I’ve reviewed here on Needle ‘n Thread.
So you might wonder why I’m doing this:

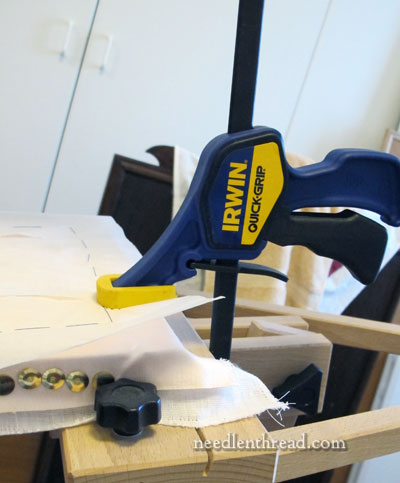
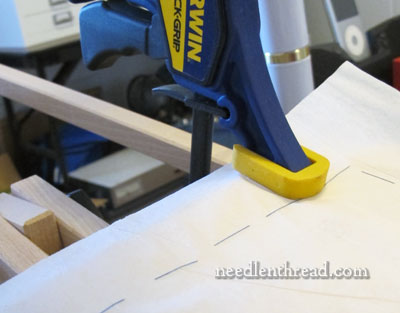
What you see in the photo above is a clamp from the hardware store. I use two of them in my workroom for a variety of odd jobs, from holding lights in place while taking photos to holding warping pegs in place while measuring out lengths of thread.
And now I’m using it to clamp my embroidery frame to my Necessaire floor stand. Why?
Well, I loaned my Needlework System 4 stand to a former student who is working slowly but surely through a goldwork project, and so it is out of reach for now.
And the Necessaire stand from Needle Necessities works great with the 20″ roller bars, but not so well with a 10″ stretcher bar frame.

Using a clamp, though, I can clamp the smaller stretcher bar frame to the main part of the Necessaire floor stand, and I’ve got a whole new configuration of a floor stand that works really well!
I know floor stands are expensive. But clamps really aren’t too expensive, and they come in all kinds of styles. This one that I’m using is easy on the hands and it’s easy on the embroidery and frame surface. It doesn’t un-clamp and re-clamp quickly, like regular quick-grip spring clamps do, so that’s a draw-back, and it has a very long shaft that the clamp moves up and down on, which can get in the way of some things. But overall, I like these clamps, especially because they have a wide, flat rubber surface for gripping the frame.
My point is this: you can actually rig up your own “hands-free embroidery” station, without the expense of a floor stand if you need to. I find table height a little low, personally, for most of my embroidery, preferring my frame to sit about 4″ – 6″ higher than table height, which is why I’m clamped to a floor stand here. But if you stitch at table height, you can clamp your embroidery to a table edge; and if you want it higher, with a little imagination, I bet you can rig a device that allows you to clamp your work where you want it.
Ideally, if you can rig a situation where the frame can sit at a slight tilt, this would probably be best – it’s easier to stitch on a slight tilt.
And if you’re hesitating about the expense of a floor stand, you can always put off the purchase until you’ve saved the funds (I’ve written here about how I budget for all my needlework stuff – it’s a good way to go!), giving you time to shop around for exactly what you want at the best price. And in the meantime, a $10 or $12 clamp and a little manipulation of your surroundings might do the trick until you can buy the stand you want.
It’s just a thought…..


I find these particularly useful when I travel. They are light weight and I can ususally find something in my hotel room to clamp it to. Just be careful clamping it to the edge of a glass tabletop. I accidently clamped it to one with a big chip/crack on the edge… It cannot be easily used on belved edges. There are some micro clips that come in a pair. Depending on the size of your frame, using both clamps can provide as much stability as one larger clamp and they are lighter in the suitcase.
I’ve been a fan of clamps for a few years now-not so much for at home but instead of lugging a stand to class in different cities. I usually fly and the stands just take up too much room in my luggage. Yes, it means working at the the table level but they do give me “hands free stitching”. They were my husband’s idea!
What a splendid idea, especially for erratic needleworkers, like me, who like to move around the house with different projects, and dragging a heavy Lowery stand around can become somewhat tiresome…
Looks like they are coming in 2 sizes in UK – 6 and 12″, which one would you recommend to use?
Oh, and an update on NeddleNeeds – the website is back and working, all emails replied and even got through to them on the phone. What a wonderful team they are, but absolutely swamped by the orders, so I had to go on waiting list for the stand (the previous stock of a 100+ stands was sold out within an hour!).
Wow, what a timely post. I’ve been doing heavy research into stands lately as I do much more embroidery than usual (you have something to do with that, Mary!). Much as I would love a commercial stand, I can’t justify the expense, so I’ve been wondering how to make my own. Or, to be more precise, how to get my woodworker-extraordinaire husband to make one! It hadn’t occurred to me to use clamps, and he has a whole workshop full of them. This brings me one step closer to that hands-free ideal! (I know, and I’ll do what, embroider with my feet???) Anyway, thank you, as always!
Dear Mary
Thanks for the review on clamps and floor stands, I love both my system 4 and my Necessaire floor stand and after using them for a year or 2 I could not do without them now. the Irwin quick grip clamp in your photo above looks ideal if you haven’t got a stand and I’ve just checked out the prices here in the UK and they range from £10-£12 which is quite reasonable. Yes I agree with you I prefer my frame to be higher then a table which I find quite low when stitching. I hope you have a springy weekend.
Regards Anita Simmance
I just had to comment. I have a fair number of these clamps-in 2 different sizes. While I do have a floor stand which I use from time to time, I have a table sand that I really like as well. My current project is also on stretcher bars so I have it clamped as do you, to my table stand- It’s nice because the work can then extend out also so my posture is better when working as well. I use the smaller clamps to hold the project onto the frame and the larger clamps to attach the table frame to the table. Works like a champ.
Bette
Hi Mary,
Thanks for your interesting post. It’s nice that you feature economical stitching solutions as well as the more expensive custom-made options available. I do have a Necessaire floorstand which I’m delighted with and I have even found a way to partly dismantle it so that I can shoehorn it into the car along with my Ogle Goggle maglight when we go on holiday (my family are very patient!) but the clamps you feature might be rather more travel friendly!
I also enjoyed reading your previous article on budgeting. Like you, I have a hobby budget which I enjoy spending on embroidery supplies and books … in fact, quite a few of the ones you have recommended! However, if my wishlist includes a more expensive item I can let my hobby money build up for several months until I can afford it. You’re right … it is a stress-free, guilt-free way to work towards something you really want. 🙂 Thanks for the practical ideas, Mary. Have a nice day.
Kathryn
Hi Mary,
I love to use these clamps. There are even smaller ones that are just as “grabby” and strong. Also, it usually works out that I can clamp from the bottom so my leg doesn’t bump it and allows a bit more arm freedom up top. The larger ones that form an “0” are fantastic for clamping at workshops that use folding tables. It fits over the ledge perfectly. I’m a big fan of the woodworking tools!
I was looking back at the Necessaire link. It has the Medallion project on it barely started. Ah what memories. 8) I have an Ergo stand that I love, and it works wonderfully well with the magnifying Dazor lamp. My tired old eyes need all the help they can get!
Happy stitching,
Susan in Texas
My husband got me a set of Irwin miniclamps for my Christmas present–I was thrilled. I use them to clamp my Japanese embroidery frame to the stand when stitching for added stability. I also use them at a table with my smaller JE frame. They’re really portable for traveling to workshops, too.
Oh ~ Thank you! I am in the Cayman Islands and do not have an easy access to supplies. This is a lifesaver for me. Hugs and a big bouquet of hibiscus to you!