


Well, it’s December 23rd – two days before Christmas, and time to hang a new hand embroidered ornament on the tree!
So far in this mini series, we’ve set up the Christmas ornament and started embroidering it, we finished the embroidery on the first side of the ornament, we finished embroidering the second side of the ornament, and now, we’ll do the finish work.
This is the fun part, because this is where it all comes together!

The finish work for this particular embroidered ornament is pretty simple – we’re going to do the classic “biscornu” finish, where we join both sides of the ornament by whipping the backstitch outlines together.
Before we start assembling the ornament, we need to make a cord for hanging the ornament on the tree.
For my cord, I cut a 22-inch piece of #3 perle cotton in red and #5 perle cotton in white. They would have both been the same size thread, but I didn’t have a #3 in white or a #5 in red, so I made do.
I tied the two strands together at one end…
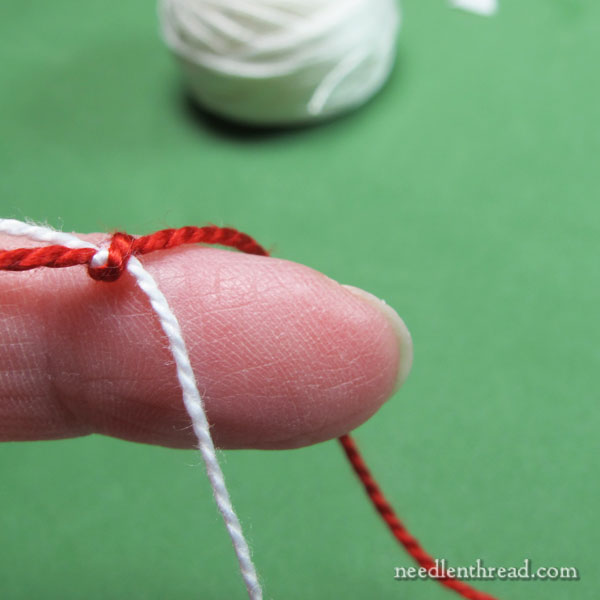
…and then I looped the knotted end over my left hand index finger like this, and held the other ends in my right hand.
Then, I just twisted my left hand clockwise (towards me), twisting the thread and twisting it some more, until it was tightly twisted.
It’s about right when it’s starting to choke your finger.
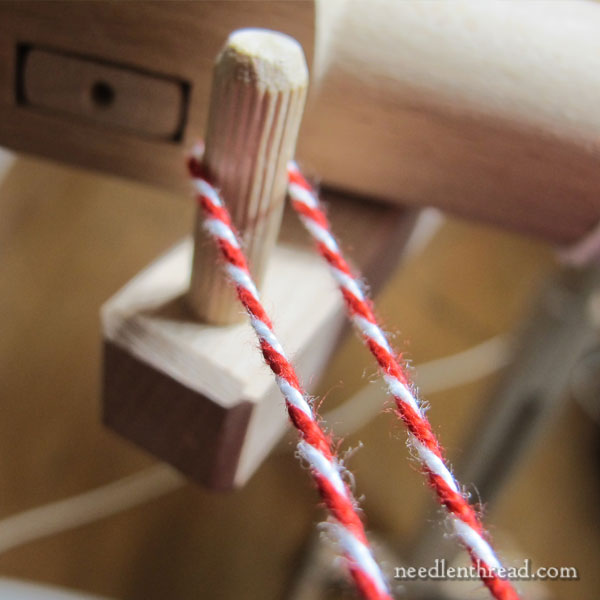
Once it gets to the desired level of twistiness, I keep it under tension, until I can secure the two ends together, with the thread folded in half at the half-way point.
To do this, I usually loop the thread around something and bring the two ends together, keeping the twisted piece under tension the whole time so it doesn’t bounce into a tangled mass of thread.
Actually, I usually grip the halfway point in my teeth, but it’s really hard to take a photo when you’re doing that…

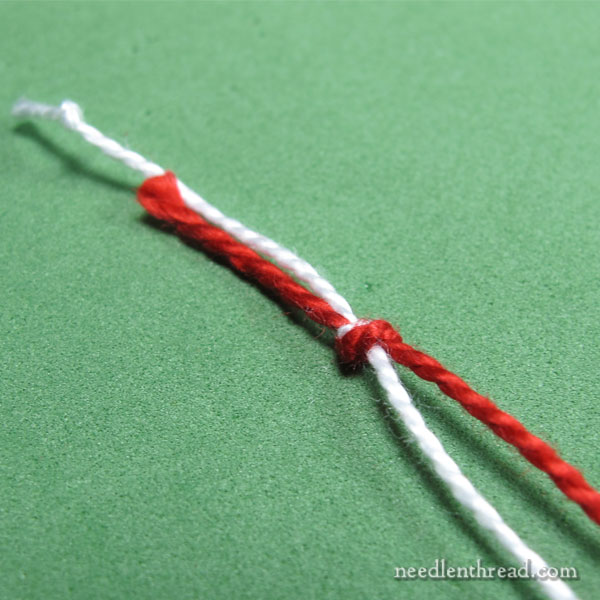
Once you pull the two ends together (don’t let go of them) and you release the middle, your thread will twist up into a nice little rope.
Smooth it a bit to get it even…
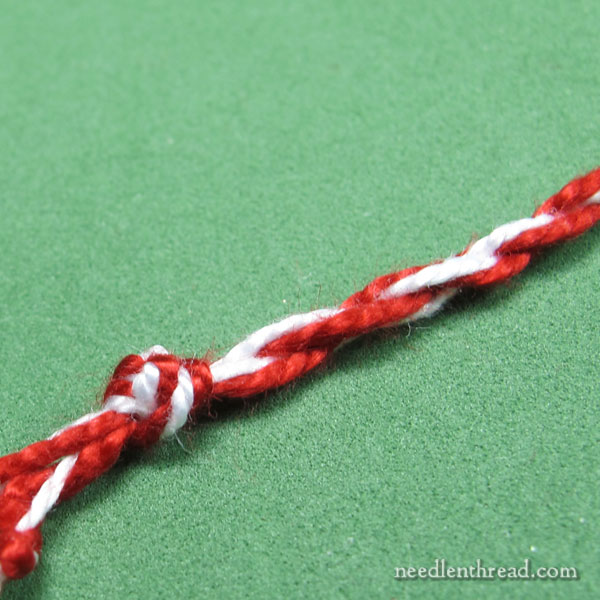
…and then tie a nice big fat knot where the two ends came together, to keep it from untwisting.
You can cut the knot off later, but for now, the hanging cord is finished, so we can move on!

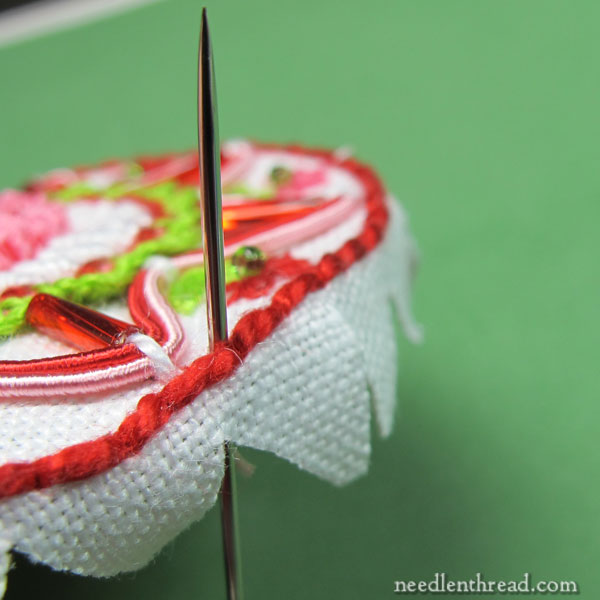
After you’ve cut your ornament out around the circle, you’ll need to cut notches all around the perimeter. The notches will help the seam allowance fold in without puckering up the ornament.
The notches are just V-shaped notches towards the backstitch outline, but not right up next to it. You’ll want to leave several threads of fabric between the tip of the notch and the backstitch outline.
It’s pretty important to take this part slowly, especially if you aren’t confident in cutting, and to use nice, sharp little scissors.
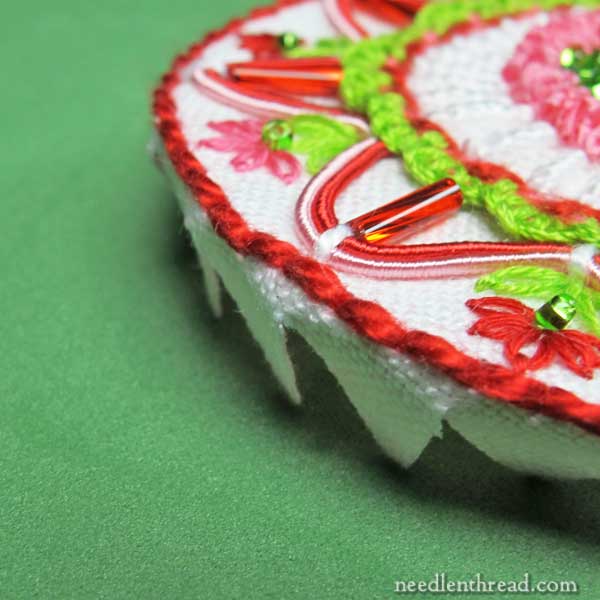
Once all your notches are cut out all the way around each side of the ornament, finger press the notched edge under.
Go all the way around each side of the ornament, pinching the heck out of the fabric so that you end up with a nice crease right at the backstitch outline.
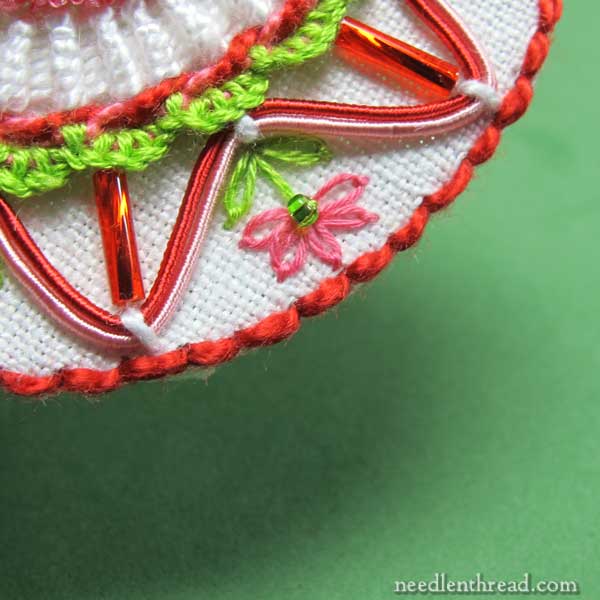
When you’ve finished finger pressing, the edge should look like this.
It’ll really feel like you’re over-handling the ornament and the embroidery, but unless you have something super delicate near the edge, don’t worry about it. Just pinch hard, moving all the way around the edge.
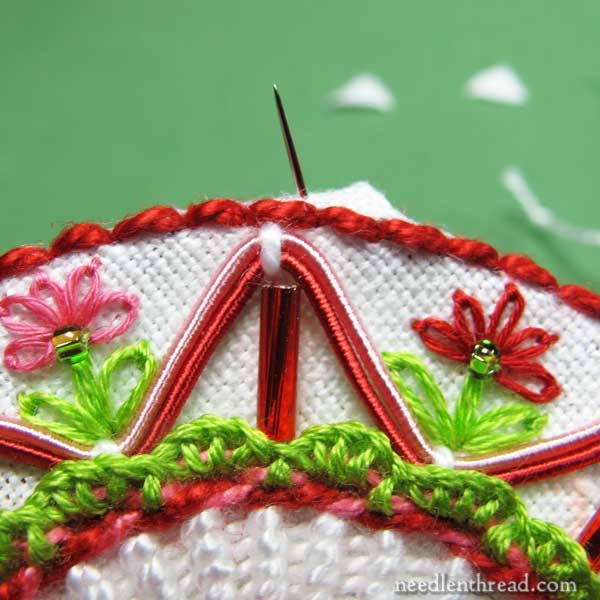
Now we’re going to tack the hanging cord in place.
Thread up a regular sewing needle with some regular sewing thread. I used white because, if any of it showed for any reason, it would blend in.
Decide where you want your hanging cord (I chose the tip of one of the waves of Memory Thread), and bring your sewing needle up in the little linen “tab” (between the notches) in the seam allowance, behind the backstitch outline.
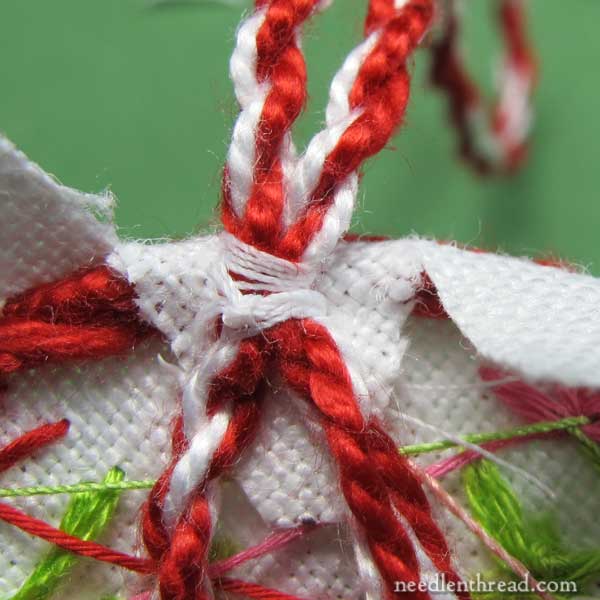
Fold your hanging cord in half so that you have a loop and decide how long you want your hanger. Adjust the cord accordingly, and place both sides of it on that same tab where you brought your needle up, and then whip tightly around the two sides of the cord, picking up a little bit of the linen, to hold the cord in place.
I’m not too concerned about the look of this area, because it’s not going to show. This is all part of the inside of the ornament. If you want to be more precise and neat about it, you may, but you can see that my tacking area here is rather haphazard.
Finally, trim the ends of the cord inside the ornament, cutting off especially that big fat knot that we tied earlier. Might as well not have something particularly lumpy in there.
Now it’s time to put both sides together. Make sure you align the front and the back so that the design is situated the way you want it.
Using white perle cotton #3, I’m going to whip the backstitch outlines together, keeping the notched tabs tucked to the inside.
Using a crewel needle at first, bring your needle and perle cotton up in front of the backstitch line, wherever you want to begin your whip stitching.
At this point, I thought I was going to stuff the ornament, so I didn’t start up around the cord area. In fact, if you’re not going to stuff your ornament, then starting at the cord at the top makes the most sense.
Still, this worked.
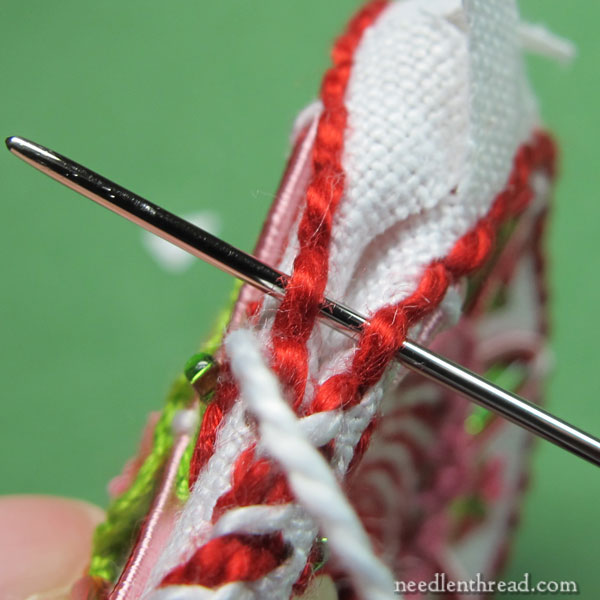
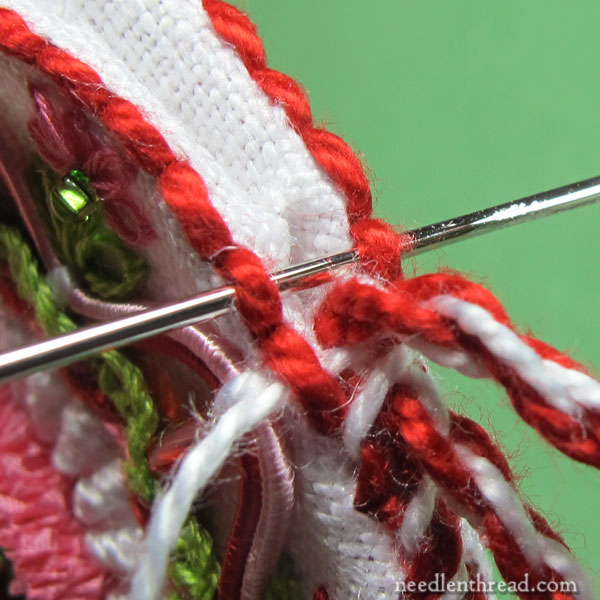
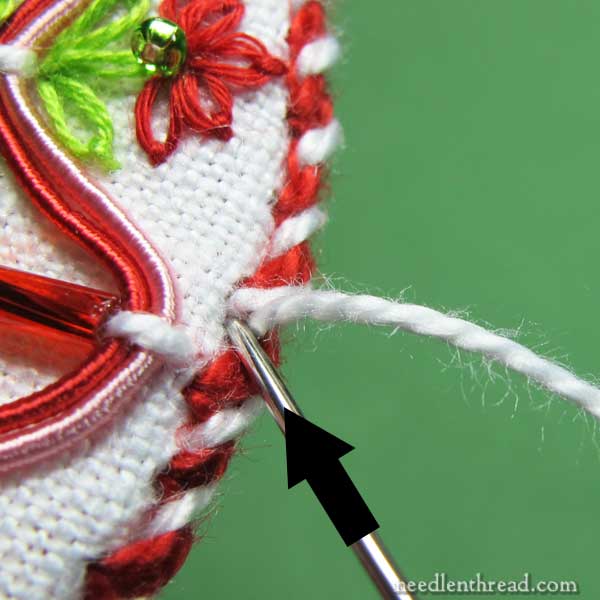
Once you have your thread brought to the front with the crewel needle, switch to a blunt tapestry needle, and begin whipping around both backstitch lines.
Make sure you’re always passing underneath the two lines of backstitch from the same direction.
Pull nice and snuggly on each stitch – not so much to warp the line, but enough to really pull the two sides firmly together.
When you get to the cord area, just go between the two sides of the cord and keep whipping those backstitches together!
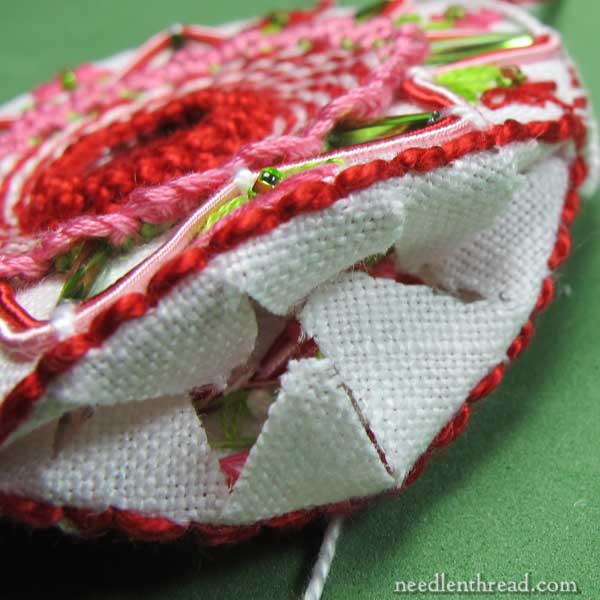
If you’re going to stuff your ornament, you’ll need to leave about an inch-wide mouth open, so that you can fill the center with polyfill or whatever you want to use to stuff your ornament.
I opted for not stuffing, because I like the flat look. Remember, I used a strong medium-weight linen for the ground fabric, and with all that embroidery, both sides of the ornament were nice and stiff. When sewn together, they were flat and firm. I didn’t need to put anything in between them.
But if you do stuff yours, stuff it! And I mean, stuff it really full! Don’t just put a little stuffing in there – make sure you pack it in so it’s nice and tightly filled. That’s the key to any good-looking stuffed anything – it’s stuffed full and tight.
The ornament will end up looking like a plump little disk, like this Fiesta Scissor Fob that I wrote about on Craftsy.
When you arrive back around at where you began whipping the backstitches together, switch back to a crewel needle and take your needle down inside the ornament, and bring it out again right under the whipped outline some space distant (about an inch or so along the ornament’s edge).
You might have to fiddle the backstitches out of the way to get the needle up under them without splitting the whipped edging. Pull the needle and thread through, then take it back down into the inside of the ornament again and out on an edge in the same way, pull the thread firmly, and snip it as close to the surface as you can. The end should sink into the ornament and disappear.
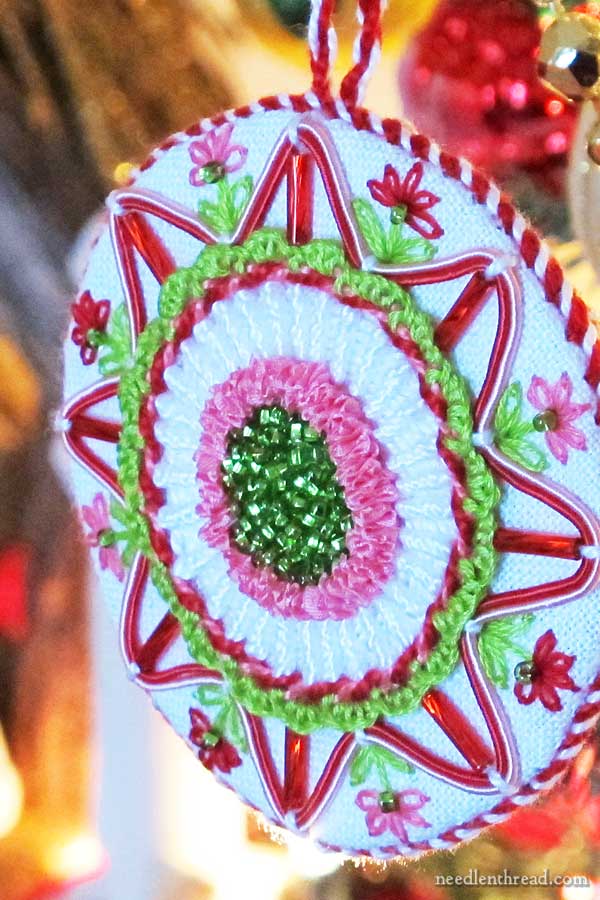
And that, my friends, is the finish on the ornament!
The only thing I didn’t do that I probably should have done was somehow incorporate the date into the stitching. Next time…
Now, it probably took you longer to read this than it actually will take you to assemble your ornament using this method.
Once you’re finished, go hang it on your tree and pat yourself on the back. You managed all the normal demands of life leading up to Christmas, plus a handmade ornament! Good for you!
If you have any questions, you’re most welcome to use the comment form below and I’ll do my best to answer them!
Wishing you a cheery eve of Christmas Eve, wherever you are!
Needle ‘n Thread, Daily!
Did you know there are seven terrific reasons to sign up for the Needle ‘n Thread daily newsletter? Check them out and sign up today!
Just thank you for this and everything else this year, you are an inspiration x
Mary, I just wanted to say that I love this ornament. The finishing technique is superb. Very easy and neat. Thanks for sharing your thoughts. 🙂
Totally fantastic and so wonderful using just what you had in the cupboard too xx
This is so BEAUTIFUL I can hardly wait for the holidays to be over so I can get started on some for next year. I think I will give them for Birthday gifts this year. I know my family will love them.
What a lovely little ornament, Mary. I learned so many tips and techniques from this little ornament alone. You are such a gem! The finishing tips were invaluable. I have never tried to use a row of the humble backstich and whipstich to get such a lovely finished edge. What a revelation!
I can’t wait to try my hands at this. I can see it in so many colors! Or what about one color- all white or all green? What about a 12 days of Christmas-inspired series?
Thank you for all that you do! Merry Christmas Eve Eve to you, too!
Hi Mary,
Happy Holidays, hope you have a wonderful Christmas and again thanks for sharing.
I use to finish for a shop many years ago and still finish all of my own ornaments. Just wanted to share this find with you, it’s called Peltex. It is the most amazing stabilizer, comes
with a fusible adhesive on both sides or without. Joann fabric carries it. I just use it inside of the ornament (cut smaller)
before stitching it close with several layers of flannel or quilt batting, it stabilizes the ornament beautifully rather than stuffing. You can sew through it very easily, as well.
Teri
Hi, Teri – Thanks! I use Peltex quite a bit, too – in fact, I used it extensively in the “Little Things” ornaments and such in my Lavender Honey e-book. It’s great for the insides of needle book covers, small ornaments, and the like. Stuffing will produce a rounded, plump disk (like the one I linked to in the article above), while Peltex produces a flat disk. Just depends on the look you want. The nice thing about this particular ornament is that I didn’t have to put anything inside it – it finished up beautifully without any stuffing or interfacing. Stiff, but not hard, and no wrinkles or anything. I attribute that to two things: very good linen (Alba Maxima by Legacy) and the relatively heavy embroidery in a small space.
Dear Mary
The finished Christmas ornament is just beautiful I wish I had followed you on it but so many other things to do like baking etc. I’m just in process of making mince pies so this is a quick view of your finished ornament which I was dying to see. Thanks for your efforts in showing us how to create Christmas ornaments and for all your instructions It’s given me ideas for a new project for next year celebrations after I’ve finished my little sisters pillow for her 60th Birthday in January.
Regards Anita Simmance
Please can I take this opportunity to wish you, Mary, and everyone everywhere, a lovely, peaceful Christmas.
I can imagine the ornament made bigger and hanging in a window perhaps. It’s beautiful.
Marie,
Je vous souhaite un chaleureux Noël ainsi qu’à votre famille. Merci de cette talentueuse, instructive et passionnante année que vous nous avez donné.
Mille mercis.
What a beautiful ornament!!! Mary you have an incredible ability to combine different stitches and come up with something absolutely stunning. Thank you for sharing so much of your beautiful work with us.Happy Christmas to all.
Wonderful! This ornament is beautiful and I enjoyed the journey and watching you work.
love the ornament and plan on making some for next year’s tree.Way to much more to do at this point in time now, BUT…..To you and your family…..
”Have a cool Yule and a swingin’ first”!
Yours and His, Deonia
I really do love this ornament! The colours and the stitching, and the fact that it’s reversible – all so pretty!
Mary, what a delightful ornament this turned out! Thank you so much for your careful instructions. Your generosity is much appreciated.
Best wishes for a wonderful Christmas and a peaceful, fulfilling and happy New Year.
….from “down-under”
Mary,
I want to thank you for what you are showing all of us, including your wonderful photos and very clear descriptions. I found you about a year ago and can’t wait to catch the new mail each time.
Have a safe and peaceful Christmas and a very successful 2015.
Hella
Mary–the way you write is so much like my sister when she explains to me how to do something that it makes me laugh. Thank God for sisters.
Merry Christmas.
JoanB
Charming! Merry Christmas and Joy to You, Mary!
Beautifully made, Mary. I’ve tried a high contrast whipped stitch like your edging, and I found that the smallest variation in stitch length was horribly magnified by the contrast.
But, your care is worth it, because the peppermint theme is sooo nice. Wonderful project, and I bet it looks great on the tree! Happy Christmas!
This is just beautiful! Love your narrative, thoroughness, and clarity!
Mary, Merry Christmas and a wonderful, fulfilling New Year filled with lots of stitching. Cheers Jude
Merry Christmas to you, Ms. Mary Corbett! And blessings for another fabulous year!
Beautiful ornament and love the finishing. Easy to follow. Merry Christmas.
Thank you for this Mary, it is quite lovely although I haven’t made one. This Christmas has not been a particularly good one – two days before I had to have a lump removed from the cartilage part of my ear, which then became infected. I spent all of Christmas mostly in bed feeling very ill while trying to entertain daughter, husband and 2 young children. Eventually we found a doctor, got some antibiotics and things are improving. I certainly hope your Christmas was a whole heap better and more fun than mine, lol. And I would like to wish you and all the gang here a happy new year and a great 2015 with heaps of lovely embroidery.
Oh, sorry to hear that, Christina! I hope you are much improved by now and able to enjoy some Christmas cheer before the new year!
I saw that you mentioned an ebook for hand embroidery finishing of ornaments. How do I go about purchasing this?
Hi, Vicki – This will be a section in the e-book on the snowflakes designs that will be available on the website in about two weeks. Thanks for asking!
Hi Mary,
Do you have a favorite way to attach pearl beads around the outside edge of the round snowflake ornaments?
Thanks Mary ❄️
Nadine
In todays post, 11-21-2023, first picture, the red perle you are using around it…how are you doing it to make the neat knitted look that it has on the part done? Love that look and tried to find it in your tips section but failed. Thanks for any help!
Hi, Evelyn – that’s one of the techniques we cover in the Twelve Wreaths project… It’s done with regular floss, not perle.