


Yesterday, I reviewed Salley Mavor’s new book, Felt Wee Folk: New Adventures, and you met my new stitching companion, who still doesn’t have a name.
For those of you who receive the Needle ‘n Thread daily newsletter in your inbox, you might have missed the give-away. I’m also giving away a copy of the book, courtesy of C & T Publishing. If you did miss that, you’ll find the details on yesterday’s book review, and you still have plenty of time to join in!
Sorry about that – I added the give-away later in the morning, after the newsletter had already flown the coop!
Throughout the day yesterday, I received a slew of email about the curls on the doll, many from folks working on stumpwork figures: how did I work them, are there instructions in the book, are they attached to the head first, is there a pattern for that bonnet, and so forth.
So today, before we get too far away from the subject, I’ll explain how I added curls to my doll’s head, so that those of you immersed in creating stumpwork figures can play with the techniques.
Just so you know, these instructions are not in Salley’s book. It was one of those “try it out and see what happens” experiments. You know the kind!
I cut out a bonnet shaped hat from felt. You can use any kind of hat, of course, by I was kind of going for the Jane Austen bonnet look.
The shape is something like a mushroom, like this:
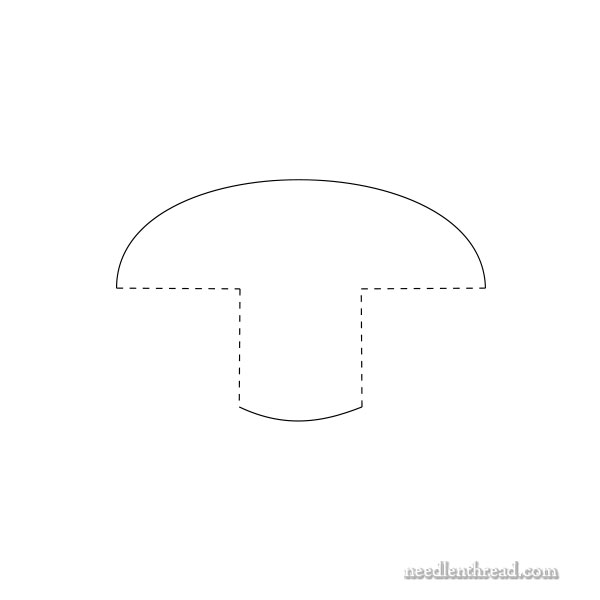
Of course, you have to adjust it to whatever size you need to cover your figure’s head.
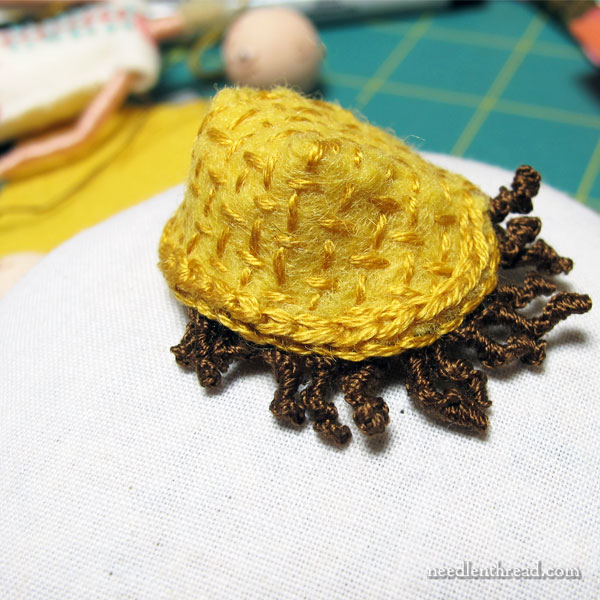
With the shape cut out of yellow felt, I took some darker straw colored floss (two strands) and stitched rows of running stitch horizontally across across the cap of the mushroom shape and the stem, and then I stitched rows of running stitch vertically, between the gaps in the horizontal rows, to give the whole thing a kind of woven look. I worked the buttonhole stitch around the domed line of the mushroom cap and on top of that, I worked a chain stitch line, to enhance the straw bonnet look.
Then, I sewed it together using whip stitch. I brought the two dotted lines together on one side of the mushroom stem and lower cap and whip stitched along the seam, with the right side of the fabric together (so I was whip stitching the piece inside out). I did the same on the other side, and that made the bonnet.
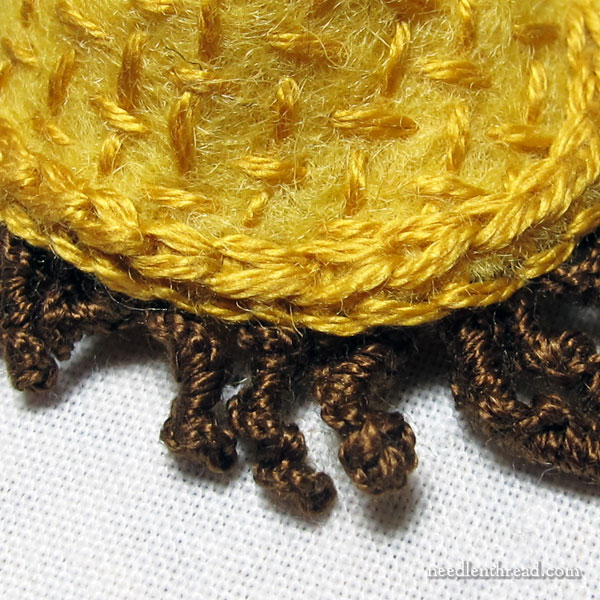
Then, leaving the bonnet inside-out, I worked the drizzle stitch along the edge of the whole bonnet, working with two strands of regular cotton floss in dark brown. (If I were doing it again, I’d probably use three strands of floss, two dark and one slightly lighter.)
Except for the forehead area (the middle of the mushroom dome in the pattern), I stitched drizzle stitches that were anywhere from 18 – 25 wraps on the needle. On the forehead area, I worked about 8 – 10 wraps on the needle.
To really get a curl going, I purposely swirled the cast-on stitches around the needle before re-threading the needle and pulling through.
If you don’t know how to work drizzle stitch, you’ll find a very handy how-to video for the drizzle stitch right here.
I’ve used this technique before for stumpwork figures – it’s a great way to add a curly mass of hair to a head!
The trickiest part is picking up only the inside of the felt, just inside the brim of the hat. You don’t want the dark thread to show through. With good wool felt, this is pretty easy, because the felt is thick enough to take the needle only part way into it to take a stitch.
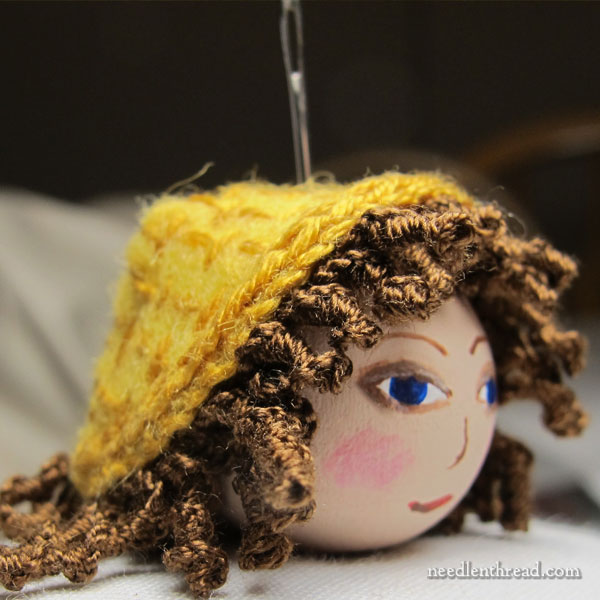
Once all the curls were finished, I slathered the top of my little gal’s head with glue (except for the area right around the hole in the wooden bead), stuck a needle through the top of the hat and into the hole in her head (heh heh – kind of gruesome…) and into a pincushion, where I let her sit and dry.
When her head was dry, I attached it to her body. And that’s it!
I’ve discovered something about my new stitching companion.
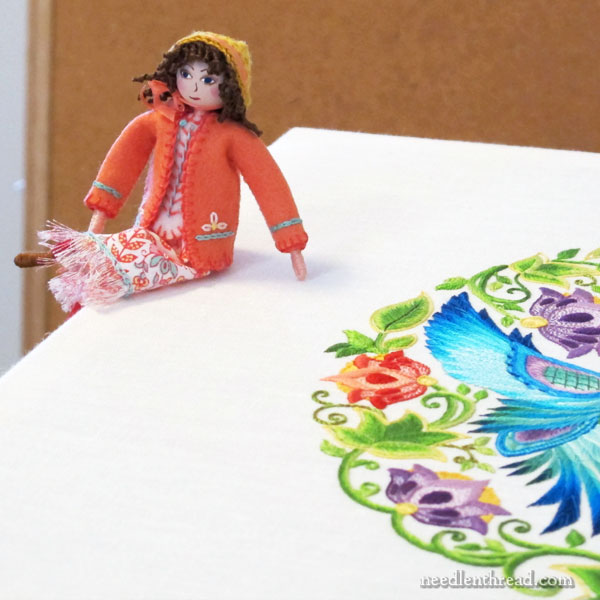
She’s a bit of a nag.
Twice, I found her perched on my embroidery frame yesterday afternoon.
I think she was trying to tell me something.
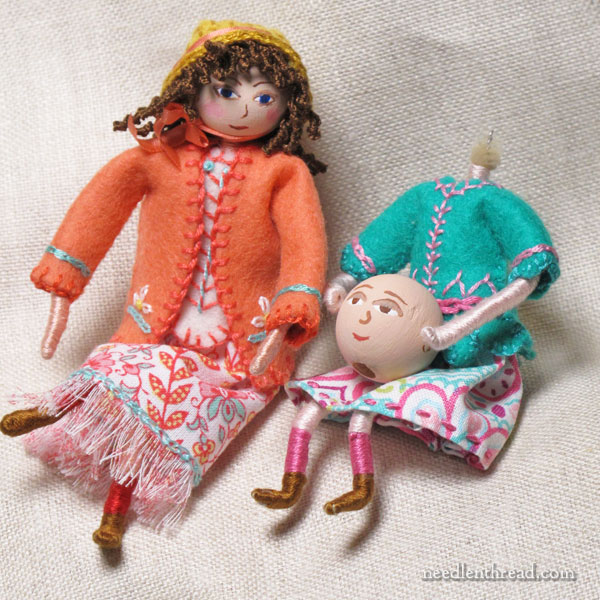
So I gave her a companion to chat with, hoping she’ll leave me alone.
I think she got the point.
If you want to join the give-away for Salley Mavor’s Felt Wee Folk: New Adventures, feel free to head over to my review from yesterday and follow the simple guidelines!
And now, I’m off doll-making for a while. Back to concentrating on three big projects. You probably know what they are, right?
I’ll be sharing updates soon!
We are so lucky to have you explain and share your talents. Thank you. I must have this delightful book…so I am off to find it.
Thank you so much. I do dollhouse dolls sometimes and I think this technique might come in very handy for them as well as for these felt wee folk dolls.
G’day Mary,
Your story is delightful. Excuse the use of the word ‘story’, I know it’s real! With 2 of them you now have Needle ‘n’ Thread, only Needle has lost hers.
I left my comment without realising it was a giveaway as went straight in from the email. I did notice later though, and went back in to distinguish myself!
Cheers, Kath
Well Kath, I reckon that’s a winning entry!!
Thank you for all of your teaching Mary. I look forward to receiving your email daily, knowing there are always treasures inside. You are a delight! Blessings to you!
Thank you for the tutorial, I would not have thought to do a drizzle stitch. Love her new companion and I do hope she is not one of those that loses her head at a moments notice!
Dolly and Emmy
Your posts are always a treat! Thanks.
Thank you for a great laugh. This is probably not a technique I will ever do but I decided to read about it anyway. I’m glad I did. I had a good chuckle when she appeared on your frame, but an outright laugh when you gave her a companion!
Let’s hope she hasn’t been possessed by the spirit of that malignant Advent manipulator, ‘Elf on a Shelf’ and morphs into the ‘DAME ON THE FRAME’.
Ha ha ha ha ha!! This comment made my day!
Dear Mary
Late today I’ve been out playing in an afternoon quiz game and shepherd’s pie delicious. Anyway back to the post I love the doll and what a great way to create the hat and hair I love what you have created for the curls I wouldn’t have thought of the Drizzle stitch I would have probably used the Bullion stitch but I can see that the Drizzle stitch gives it more of a curl effect. I really like her friend hopefully you will be attaching her head to her body so she can interact on the same level with Maud thats what I’m calling her. Thanks so much for sharing how you created the dolls body and hair I shall use this for reference when I get around to making these dolls they are lovely.
Regards Anita Simmance
Your two ladies, I would humbly suggest, are from a time period slightly earlier than Jane Austen. And too, perhaps from across the channel. Henriette and Agnes, as I found myself thinking of them, look like they may have been caught up in the Revolution, with Agnes having not quite making it out in time. Henriette, however, seems to have escaped unscathed. It is very kind of you to give them a place to rest and recuperate. .
My mother uses scraps of sheepskin, especially the kind with the long hairs.
You can get white through brown to black varieties and the advantage is that they are curly and not so curly depending on which one she uses.
Since she does not really work with blogs, my wife has a few pictures of them here http://enbogormsstrikkerier.blogspot.dk/2010_10_01_archive.html
Sweet little’s, dolls are so much fun, to make and play with. Great ideas, Mary, thanks for sharing.
Janie @ crazyvictoria.blogspot.com
Having made several of these little dolls, I would like to offer a bit of advice for anyone who is making any of them for boys (I made an entire army of knights, for example)…
…because sometimes boys get rough with their toys, and ANYTHING has the potential, in their minds, to become a projectile or a “thonk your cousin on the head” type of weapon…
Those little wooden balls used for the dolls’ heads are not so cute when a four-year-old knocks a three-year-old in the eye with one. However, you can use felted balls or even temari-style thread balls for the doll heads…which is what I ended up doing on the second go. You attach them just as you would the wooden balls.
Just a little FYI.
Wow! this is absolutely amazing, i instantly want to make a doll 🙂 above you mentioned…:” then i attached her head to the body..” how exactly do you attach it? just hot glue? i’m planning on giving the dolls to my kids, would that be strong enough? thanks for your help on that question
kind regards
Dani
The hole in the base of the head goes onto the pipe cleaner extension of the neck that’s been wrapped in thread. I use glue (a PVA glue) to secure it – gluing inside the whole before inserting the pipe cleaner into the hole, and then wiping any excess off with a q-tip.