


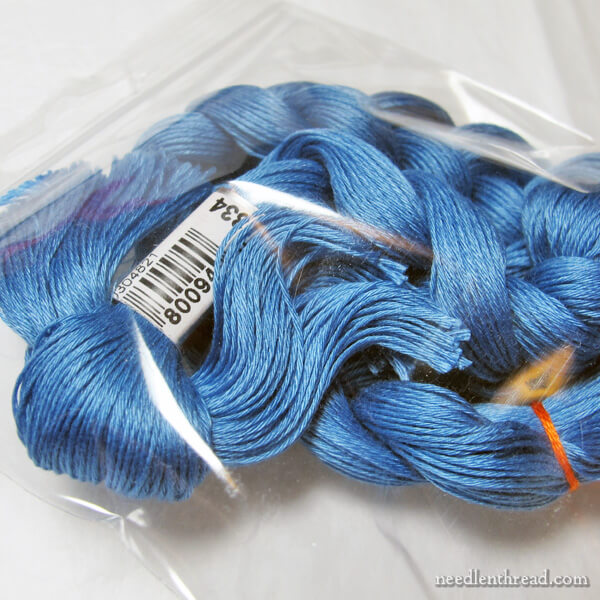
Oooooh, you’re excited! You just bought a new skein of embroidery thread!
You can’t wait to try it for the first time!
You take it home.
You cut into it.
You pull a strand, you cut a piece, you stitch a bit, and you reach for the skein again.
Where is that dagblasted end?!
You find it. You pull. And then it happens.
A Nightmare Mass of interlocking, intertwining, interconnected, angry thread mushrooms forth with every inch you pull from the skein.
Excitement turns quickly to consternation, and consternation to downright frustration.
Before you know it, you’ve got a huge, convoluted jumble of thread rupturing from your lap.
I’m guessing this has probably happened to you before. I know it’s happened to me more times than I can count. And it’s always frustrating!
You might think my scenario is exaggerated. But it’s not! And it’s especially likely when you handle a large skein (or hank) of floche embroidery thread for the first time.
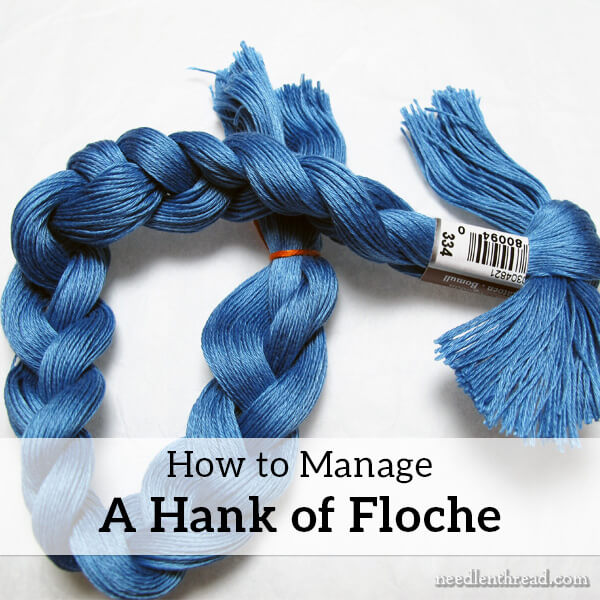
I’ve written about cotton floche before – you can read my most recent accolades of this thread here – but I’ve never actually discussed using the larger hanks of floche before now. Since some of you asked how to handle the large hanks, I thought I’d show you how I do it.
Normally, I buy floche in the smaller put-ups available from Hedgehog Handworks, but I also have a collection of frequently used colors in large skeins, too.
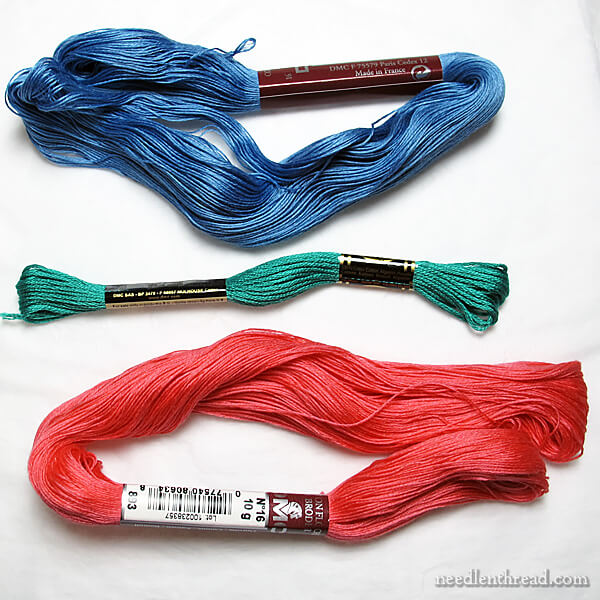
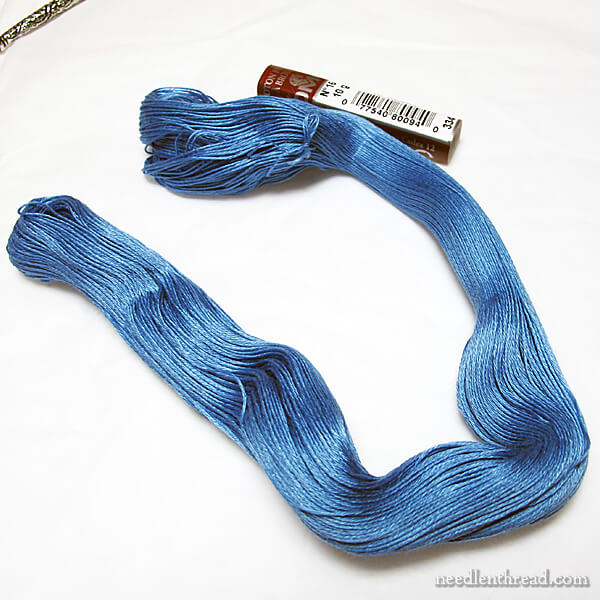
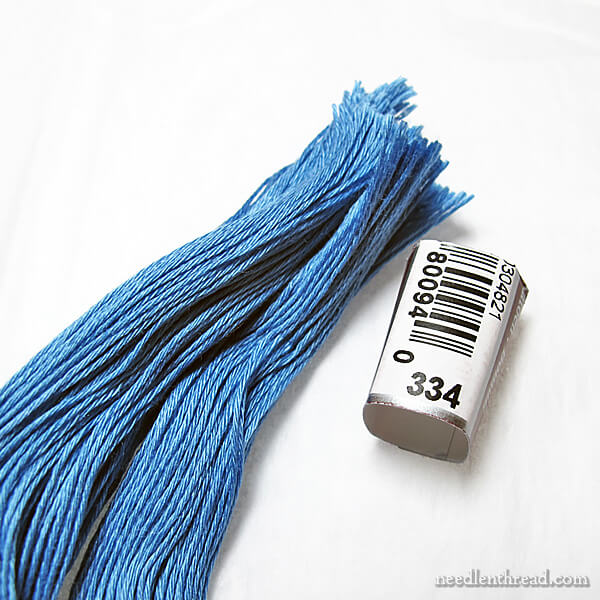
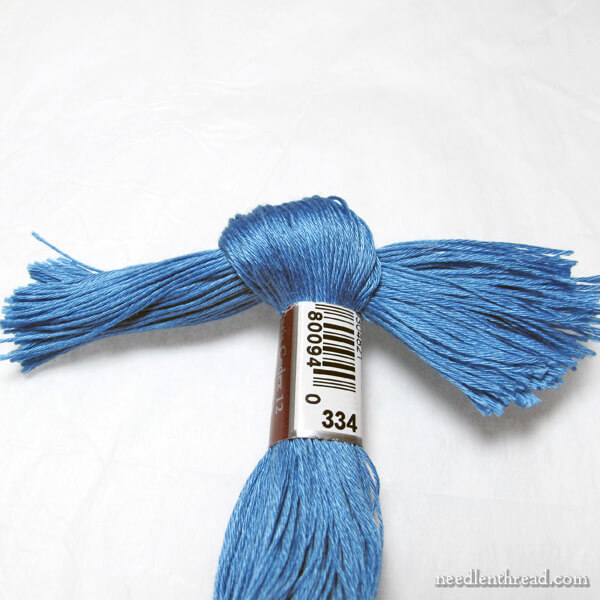
The hanks are pretty beefy, as you can see in the photo above. The center skein up there is a regular skein of DMC stranded cotton. Above and below are large hanks of floche.
It’s Not a Pull Skein
The one thing to realize when facing a hank of floche is this:
Floche is not put up in a pull skein.
It’s important to resist the temptation just to cut and pull on a thread end. If you do, you’ll end up with a jolly mess.
So when it’s time for me to cut into a large hank of floche, I go about it a special way. I prepare the skein ahead of time, so I can use it with ease and with as little mess and frustration as possible!
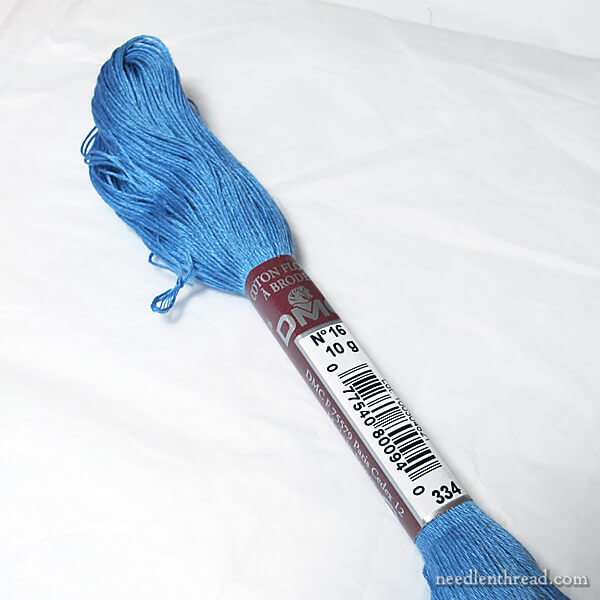
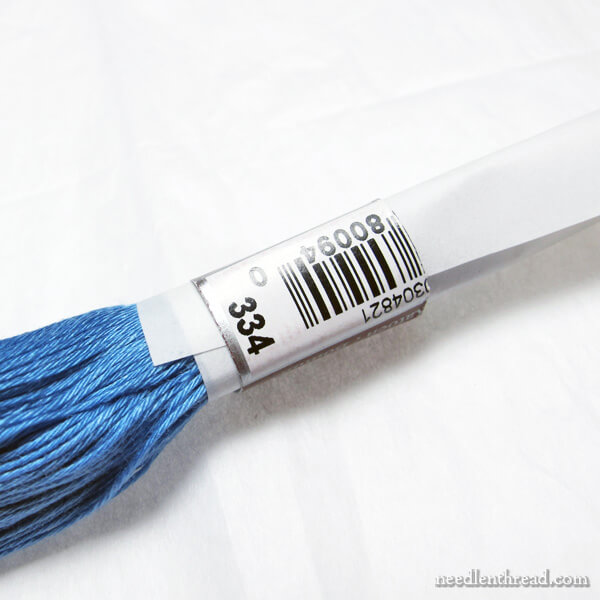
I start by examining the end of the hank nearer to the paper sleeve.
Find the Connection
Generally, thread manufacturers are consistent in the way a thread is put up and packaged. So, while there may be exceptions to individual skeins now and then, in general, the paper sleeve on a large hank of floche will be situated towards one end of the hank.
If you examine the short end of the hank extending beyond the sleeve, this is normally where you’ll find the spot where the two ends of thread for the whole skein meet.
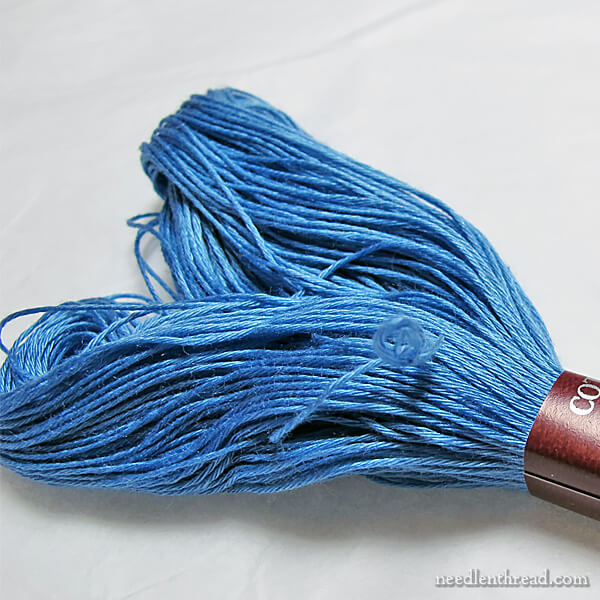
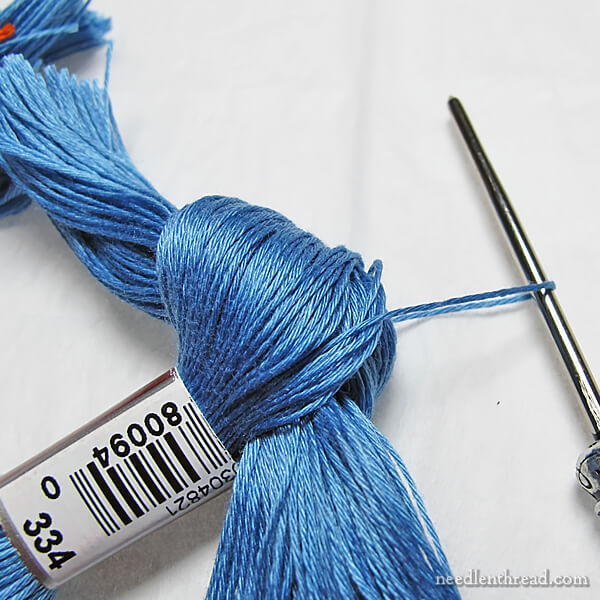
What you’re looking for is a little slip knot.
If you can’t see it right away, gently part the sections of the skein and look inside. Don’t pull or anything – just look for the slip knot. It’ll be a tiny loop of thread, tied up on itself.
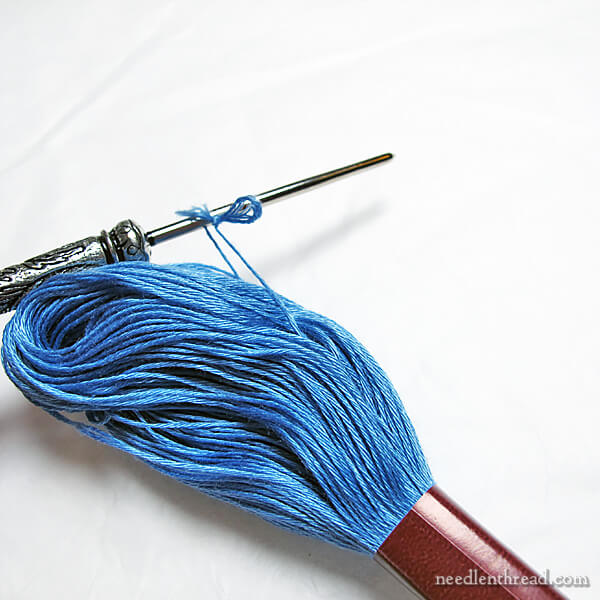
On this particular skein, the slip knot was easy to spot on the outside of the skein. You can see it there, held out by my laying tool.
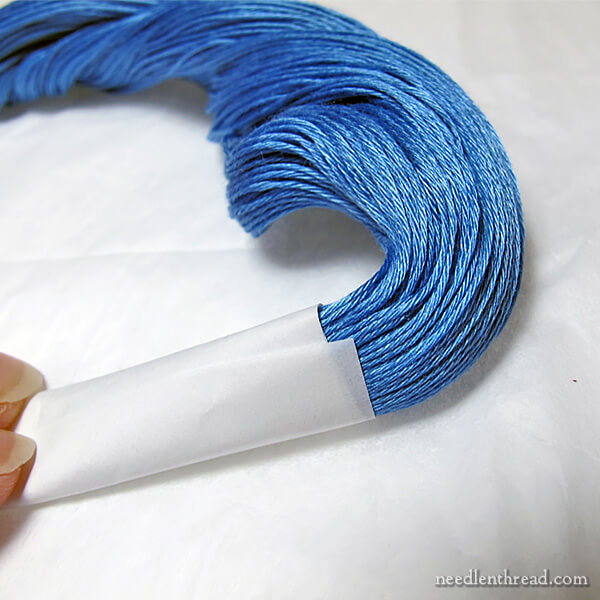
Open the Skein
Once you’re certain of where that slip-knot loop is, slide the paper sleeve off the skein, so that you’re working with a naked skein of floche.
Don’t throw the paper sleeve away!
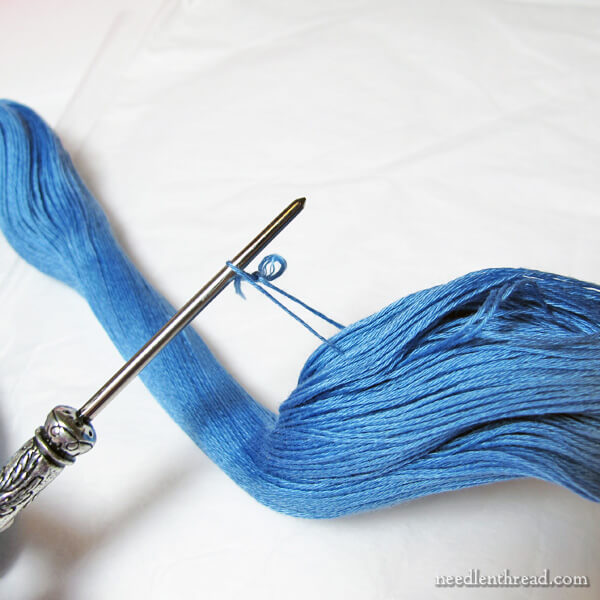
I usually use my laying tool to do this part, because I can slip it easily underneath the piece of thread involving the slip knot. But you can use your fingers, too!
Just grab that looped piece of thread, and gently…
…gently…
…pull on it.
It will separate out a “clump” of threads about a quarter the thickness of the skein.
When you’re sure that you have all the threads in that clump smoothly situated together, pick up just that clump of threads enwrapped with the slip-knotted piece of thread that loops around it. Just pinch the separated clump and hold it all together.
Lift the skein up and gently shake it.
The skein will fall out into one huge loop.

The loop will look like this.
Cut & Divide & Cut
With a large skein of floche, pre-cutting your thread lengths is essential to managing the hank.
Floche is a soft thread, so shorter lengths are ideal. The longer the thread, the more likely it will lose its luster and weaken while you’re stitching with it.
Dividing the hank up as directed below results in practically perfect lengths of floche for most stitching needs.
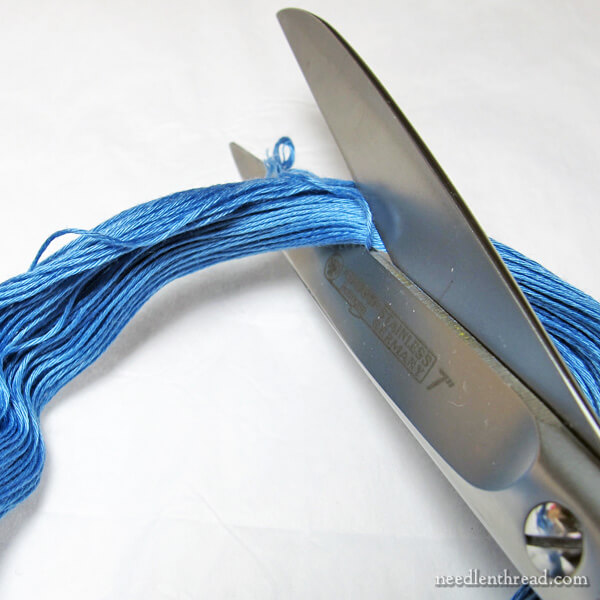
Cut the big loop right up next to the slip-knot thread, so that you’re opening the whole loop into one very long collection of thread.
Then, fold the whole length into thirds. Cut the thread at each fold.
You’ll end up up with three groups of floche, each about 18″ in length.
(Instead of folding into thirds, you can also measure 18″ and cut the thread, but you’ll end up with one section slightly longer – by about an inch – than the other two.)
Tame It!
All those pre-cut lengths of thread need to be kept together somehow, or they’re just going to end up in a mess, too.
So let’s tame them!
Remember the paper sleeve you kept?
Cut the paper sleeve so that it’s about 3/4″ long and has the color number on it, as shown above.
With the cut ends of all three groups of floche lined up neatly, wrap a small piece of scrap paper tightly around them.
Feed the folded scrap paper with all the cut ends inside it through the small paper sleeve.
Pull the floche through, so a couple inches are sticking out beyond the sleeve.
Very gently, divide just the small extending inches of floche into two, and tie them (gently) into a not-too-tight overhand knot. This is just a simple knot, tied right on the end, on the short side of the sleeve.
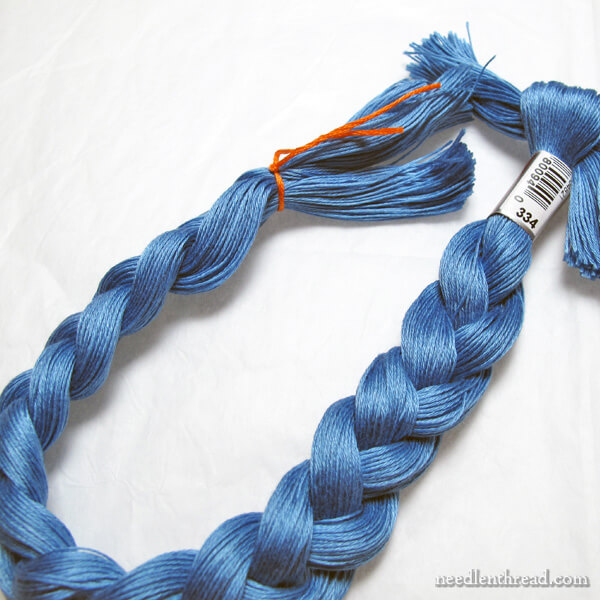
Then, take the three divisions of floche that are below the sleeve, and braid them into a not-too-tight braid.
To secure the end of the braid, use a contrasting color of thread or string tied in a slip knot, slipped around the end and pulled snugly.
To remove a thread from the braid, slip the eye of your needle (or, in this case, I’m using a laying tool) under just one thread in the knot at the top of the sleeve and gently pull the whole thread out.
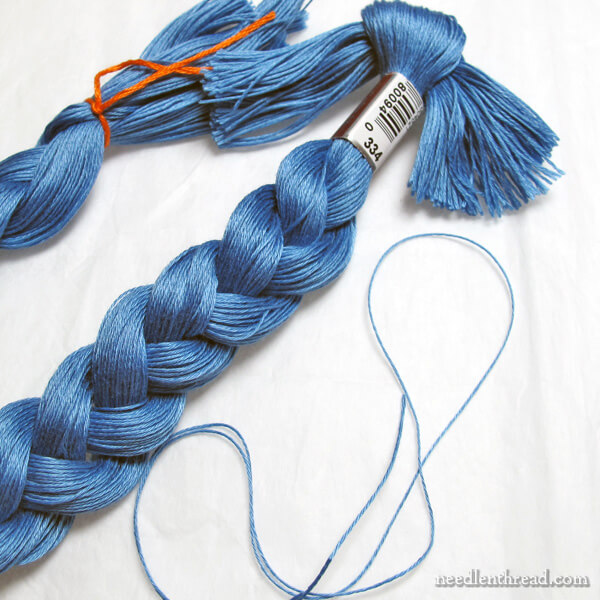
It comes right out and leaves the braid intact.
No knotty mess! No gnarled confusion of thread to tackle. Just a nice, neat braid!
As you use more and more floche from the braid, you might have to tighten the knot above the sleeve, re-braid the floche, and tighten the slip knot, but these are small considerations when it comes to keeping all the thread under control.
When I want to transport the floche with a project, I slip the whole braid into a small ziplock, to keep it clean and to keep the ends of the braid from getting fuzzy.
And that, my friends, is how to conquer a big skein of floche!
You can pretty much apply this concept to any put-up of embroidery thread that isn’t in a pull skein.
Of course, if you like to pre-cut your threads from a regular pull skein, you can braid the pre-cut threads the same way.
And finally, if you have troubles with a regular pull skein of floss – if it tends to knot on you as you pull thread from it – you might find this article on unraveling the secrets of the pull skein helpful.
Have a terrific Tuesday!
What an ingenious method to keep us sane!
This is a brilliant way of taming your threads whatever they are. I always used this method in the classroom when teaching 8year olds, and it worked every time. No one can tangle up a skein of thread quicker than an 8 year old!
I use a similar method for my hardanger threads. However, they don’t look nearly as neat and, well, beautiful as this. I have recently fallen heir to hanks of this thread — lucky, isn’t it? — and now I know how to tame them. Thank you!
Great tips! Thanks Mary.
Mary, Brilliant! Expect it would work on the large skeins of Appleton wool too.
Ann B.
Mary, you are brilliant!! I’m 70 years old and have been embroidering since I was about 9 years old and NOBODY ever told me this. I also read your link to using the pull skein and had to go try it out immediately so I could learn this. Wow! You’ve just make my life so much easier! Thank you!
Dear Mary
I always mess my skins up and have to unwrap the skin to get the right amount of thread needed for my projects and I constantly loose the number of the thread. What a great idea and handy for keeping skins of thread tidily together with the number of the colour thread intact and a great way of separating one strand at a time. I will definitely try this method next time I unwrap a skein of thread it’s a brilliant concept. Thanks for sharing with us the tips and technique on how to unwrap and tame thread, the photos are great you can really see the technique clearly.
Regards Anita Simmance
Great article. Just this week I battled with a skein of wool threads. BTW. The website looks so nice and uncluttered. Thanks.
Mary, I just don’t know what I’d do without your site. Although I’ve been embroidering for many years and teaching for the last few, I read your articles regularly and you never fail to teach me something new. Although I’ve been cutting my floche and segragating it into more managable chunks, I’ve never plaited it before because I had NO IDEA that the thread could actually be pulled out so easily. Thank you!
Thanks Mary! My Monogram book arrived, the floche is here, and I’ve traced my initial from “Favorite Monograms”. I’m hooped and well let the embroidery begin!
When are you going to do lower case letters? I have a friend with just one name. No middle or surname. I feel a little cheesy just putting one initial on. It looks so lonely, even in pencil.
Hi Mary,
thankyou so much for such a useful hint. Now a question I hope you can help me with please. What do you think is the best way to store the strandard cottons, please? My husband is about to start on a studio for me(when ever the engineers finally give us the plans etc) I have about half my strandard embroidery threads on those little bobbin thingies in the divided plastic cases. I still have a lot more just in boxes. I am trying to decide whether to continue with the bobbins or have a very shallow cupboard built with rows of L hooks and just hang the skeins on these. I really can’t make my mind up, what do you think please?
Cheers Judy
SE Queensland, Australia
Hi, Judy – well, I use drawers to store mine, in these Bisley collectors cabinets: https://needlenthread.wpengine.com/2013/02/embroidery-thread-organization-reminders.html The cabinets support a table top from IKEA. I organize the threads by type (for example, all DMC stranded cotton) and by color, but not by number. I suppose this could be problematic, but I usually look for colors based on their color, not their number. If I have to find a particular color, it does take a bit of digging! I’m not a huge fan of winding thread on the small cardboard bobbins, just because I don’t like the resulting kinks. But that’s just me.
Hi Mary,
Many thanks for that, I really like the Bisley cabinets, I have just contacted them to find out if they have distributors in Australia.
In the mean time I was winding on a very, very fine warp on my loom this morning and realized that I had wound it nearly 36″ short So to get past the loom waste at the beginning of the warp I have had to tie on 160 very fine threads (approx 80 threads per inch over 4″) So to tame my 160 36″ long threads I immediately thought of your taming of the floche and it is working brilliantly, so thankyou very much.
Cheers Judy
SE Queensland, Australia
Hi Mary!
I have fallen in love with floche! I purchased the set of 91 floche skeins from Hedgehog in July and started using it right away on my very first project (I am doing a letter from your alphabet sampler e-book) using Pussywillow grey linen as ground fabric. (beautiful linen)
I have found cutting the thread no longer than 11 or 12″ long; otherwise the soft twist seems loosen up a bit. Am I doing something wrong since it seems you cut 18 inches? For stranded thread I usually cut no more than 15 inches. I like using smaller lengths so I don’t end up with knots and other messes on the back of my project.
Your post is very timely as I have 2 lists going. The first is floche that I am going to restock with a hank and the second is for colors that I can just restock with the smaller skeins. One thing I love about floche, as a beginner, it’s helped with learning split stitch as it’s just a tiny bit bigger than a single strand of floss. Just using floche to learn the motions on certain stitches has helped me “graduate” to single strands of floss.
I now understand why you are always raving about floche! It’s a beautiful thread and a joy to work with. I only wish it came in more colors. I am now saving for the bundle of brodor cotton, but I might break down and purchase some skeins of the brodor cotton in the colors that I love in floche.
Your new website looks beautiful and it’s good to see you posting more. ;0-)
Best Regards,
Christi
This is amazing! I have a few hanks that I can tame. I usually pull out a little to one side and then the other side until I get the length I need. But, this is brilliant. Thanks for sharing your knowledge and talents. Melita
Hi Mary:
Just now looking at your great website….and learning so much. I was wondering if you knew of a pattern
similar to the historic pattern [for petit point, or embroidery] listed on page 6 of the July/August Piece Work Magazine. It is the bottom photo of a chair seat covering found in Muncaster Castle, Cumbria, England.
I would like to work on a chair seat covering similar in colors and Medieval in date. It could be English,
or French. The pattern will need to have a color chart with it so that I can make sure I have all the colors
of threat – wondering it the Floche [you mention on your site] would be the ideal thread?
I am a 17th Century historian and writer. I have done a little embroidery – monograms and other pieces but it has been many years now. So I am interested in working on a project or two to see how I like it
again but want only historic heirloom patterns that are of animals, people, castles, etc. I like the Medieval period and up to the 17th Century.
Special thanks for reading my email and look forward to hearing back from you!
Teresa
I look forward to hearing back from you.
For historic petit point / needlepoint and the like, I think the most accurate thread you could use would be wool or silk. Floche is cotton, which would be rather anachronistic. It’s also too fine for most needlepoint canvas. Hope that helps!
Just wanted to say I ordered my first skein of floche recently, remembered you had a post on how to manage it, found the post, followed your instructions, popped the tidy result into a snack-size zip bag, and voila! Lovely, soft, shiny floche to play with 🙂 Thanks, Mary!
Holly
What I love about you and your website is that I can find the solution to my problem- whatever it is. Today was opening up my first hank of DMC floche… which of course started to tangle… Hmmmm… I wonder what Mary says… and there was the answer.
Thank you,
Barb
That’s a great article! I have pulled the wrong end many times and threw away the whole mess 🙂
Thanks Mary.
I just purchased floche for the first time & used this info to tame the skein! Thank you so much! This will keep the floche perfectly as I use it. Your tips are always so helpful.
Wow! Thank you so much for this! For my birthday I got a THIRTEEN skeins of Floche and when I realized how huge they were, I knew I needed help. I also knew that, somewhere on this site, you’d have the answer. And so you did!
What a relief to have it all sorted out nicely and know that many tears of frustration have been avoided. Thank you, thank you thank you! The instructions were so clear and the photos so helpful. You are a gift!
Your site is sooo helpful! Thanks!
I do mine just a bit differently, and I find that they stay much neater if after you separate the thread into 18” portions, to first slide the label back on after cutting it down a bit, and then sliding it to the center of the bunch, then folding that in half and braiding it that way. This leaves the thread looped at one end and all the cut ends are on the other. Then I just pull the thread from the looped end and everything stays nice and neat and there is no having to untie anything.
Curious as to how you store your floche. I have been storing my skeins in a few draws of a repurposed lingere cabinet but as I collect more colors it is becoming much harder to stay organized and more difficult to find things.
I have metal cabinets that I store all my threads in. I keep the skeins laid out flat. Because there aren’t that many colors of floche available, I don’t have them arranged by color. They occupy about two drawers.
I just purchased 4 skeins of floche, it is heavenly! I really appreciate your information about it. I am excited to get your smaller portions so I can have more color variety of it. For now I will divide my skeins and share with my stitching club. I teach wool stitchery (Sue Spargo style) and your site is the go-to site for stitch how-to. After several classes the gals are so into wool stitchery that we’ve formed a small club that meets monthly just to sit and stitch. So fun! Thank you for all you offer us.