


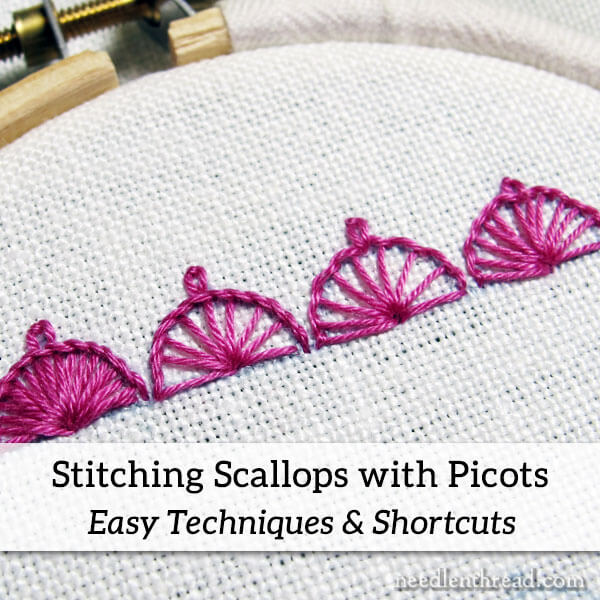
I’m working on a little hand embroidery design that features embroidered scalloped edges.
I like scallops! While there are a number of ways to embroider scallops on a design, I have a favorite method that’s a bit of a “cheater” approach – it makes for very evenly spaced spokes on the scallops (if your scallops have spokes), resulting in a nice, neat little design edge.
In working this particular embroidery design, I wanted some of the scallops to feature a little picot, or extra little bump, right at the top of the scallop.
So let’s look at some approaches to embroidering scallops (one of which is an utter failure). I’ll show you how to add a picot to the top of a scallop, no matter which approach you take. Then I’ll show you my cheater approach to buttonhole-like scallops, without the buttonhole stitch.
For this tutorial, I’m embroidering on linen using coton a broder #25, which is a softly twisted cotton embroidery thread. You can read about coton a broder #25 here, if you’re not familiar with the thread.
I’m using a #7 crewel needle and a little three-inch hoop.
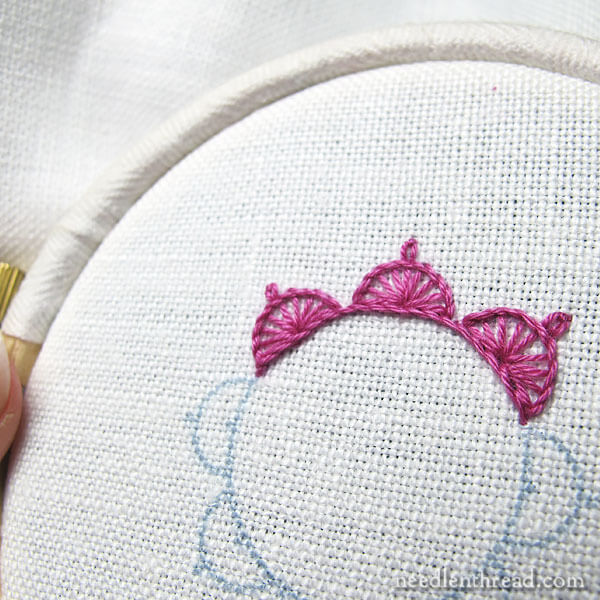
The scallops you see here are slightly spaced apart. I wanted the edges to remain distinct so that it’s easy to see what’s going on with each approach to scallops.
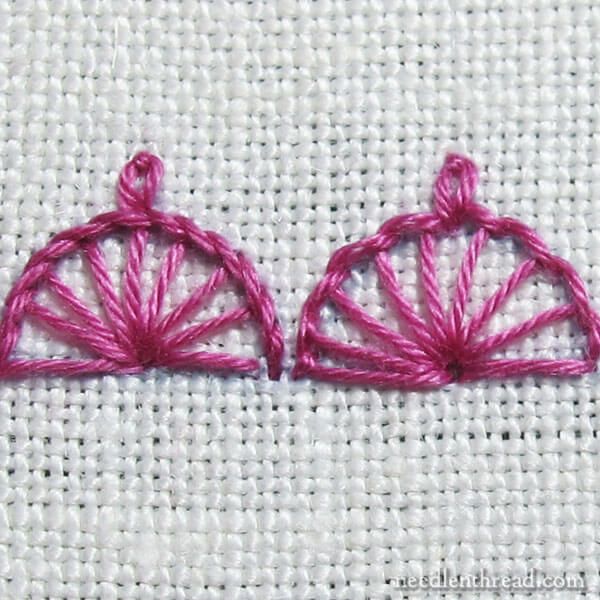
The two scallops above might look the same at first glance, but they’re not! Can you spot the differences?

This scallop is somewhat meh, for a filled scallop. Too many stitches are crammed in for this size scallop (about 3/8″ wide). The result is rather sloppy.
This particular scallop is pretty much an utter failure, for the look I’m after.
Sometimes, satin stitching scallops is a great way to go, if you want solidly filled, smooth scallops. The straight satin stitches perpendicular to the base line, though, isn’t really the look I’m after.
I padded underneath the satin stitches, split stitching along the round edge of the scallop and working long horizontal stitches inside it. Then I satin stitched over it.
It doesn’t quite do it – but it’s a nice way to make a smooth scalloped edge, if that’s what you’re looking for.
The look I’m after is more of the half buttonhole wheel look, and so that is what we will talk about first.
Buttonhole Wheel Scallop with a Picot
If you’re not familiar with buttonhole wheels, you’ll find a video for how to stitch buttonhole wheels here. The concept for the scallop is the same – only the scallop is generally about half a wheel.
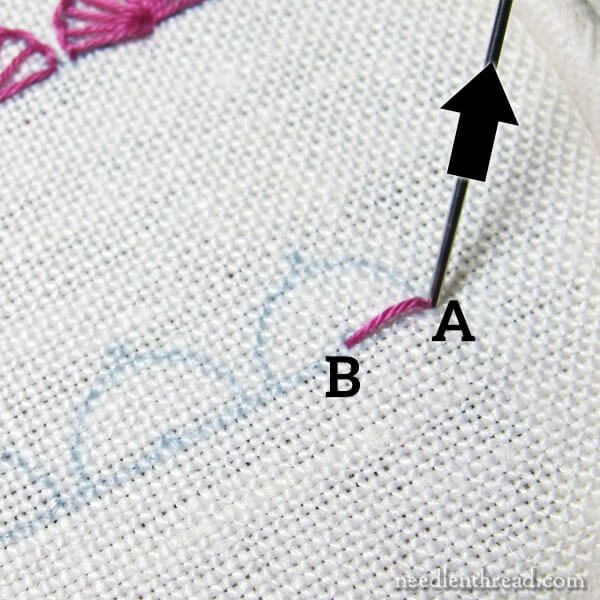
I like my spokes on my scallops to even out at the base line, especially if the base line is not embroidered over by another line stitch, so I started with a straight stitch from A to B – in the photo above – and then brought my needle back up at A to begin the buttonhole stitch.
I find that working the buttonhole stitch from the right side and around counter-clockwise produces a neater buttonhole stitch edge. It’s easier to keep the tension on the stitches, keeping the wheel open.
If you have trouble with buttonhole wheels – if they tend to close up on you because of stitch tension – try stitching them counter clockwise.
So, to make a buttonhole wheel scallop with a picot, proceed to the apex of the scallop with the buttonhole stitch.

When you get to the top center of the scallop and you’ve pulled your working thread through to the front, pause in the buttonholing.
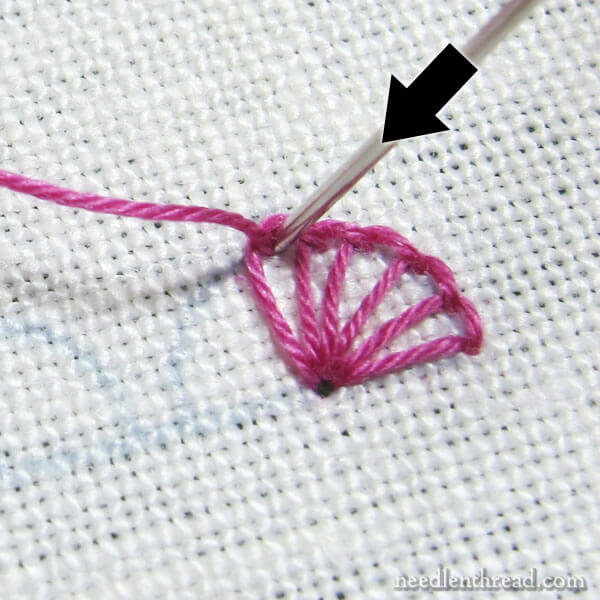
Take your needle to the back of the fabric in the same hole from which you just emerged, leaving a small loop of the working thread on top of the fabric (i.e. don’t pull the thread through all the way).
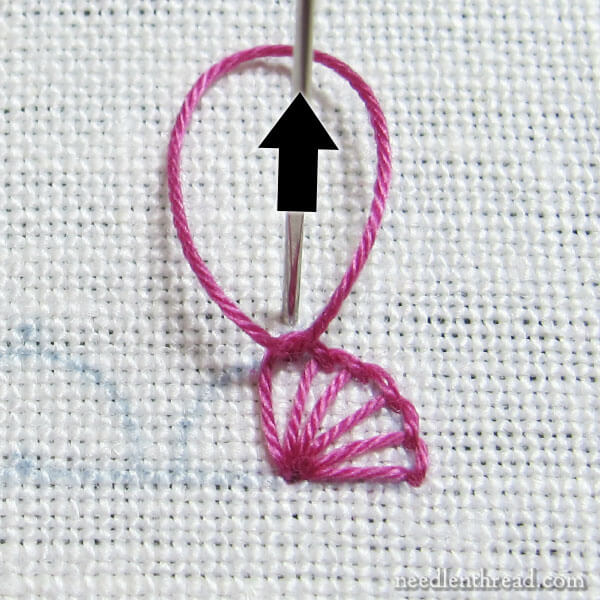
Bring the needle up into the fabric a little bit above the scallop – about 1/8 – 3/16″ above it, depending on how long you want your picot – and inside the loop of working thread, to make an isolated chain (or “lazy daisy”) stitch.
Anchor the loop just as you would a daisy stitch.
That’s the picot. It’s just a little isolated chain stitch sticking up out of the edge of the scallop. Easy!
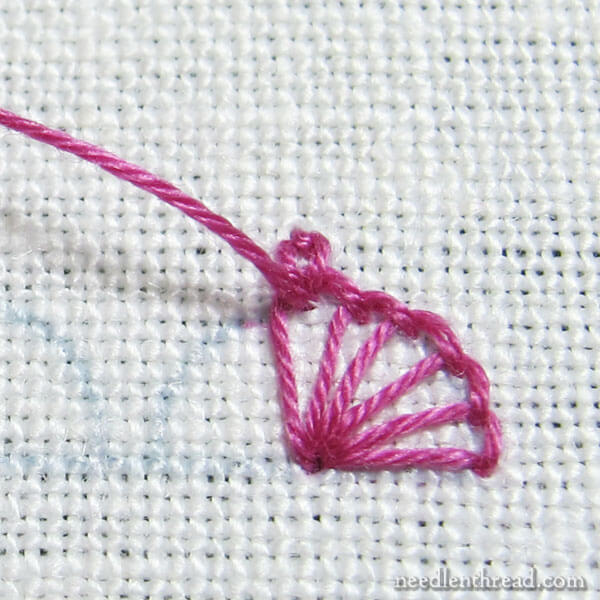
Bring the needle and thread to the front at the base of the chain stitch, right where you left off with the buttonholing…
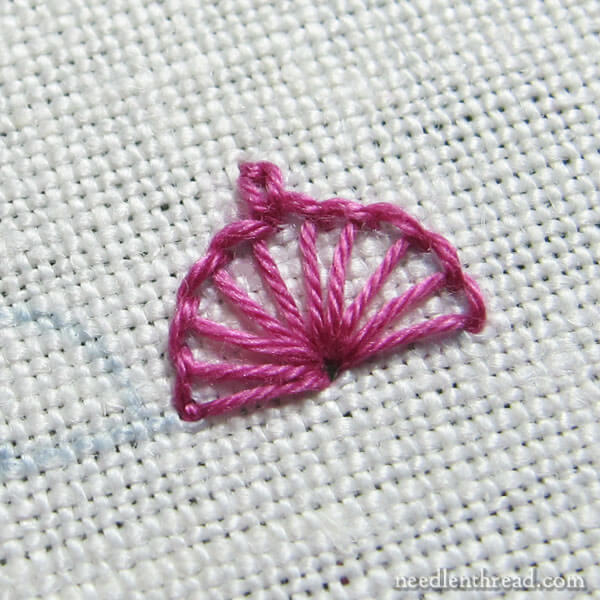
…and continue the buttonhole wheel down to the base of the scallop. Secure the last buttonhole stitch with a small stitch right over the edge of it.
If you like buttonhole stitch wheels and you have no problem with the spacing or the tension of them, this is an easy way to embroider a scallop with a little picot at the top.
But what if you’re not so great with buttonhole wheels?
What if you have a hard time getting the spacing on the spokes right?
What if you have difficulty tensioning the stitch so the wheel doesn’t collapse inwards.
And yet, you really want that look of a buttonhole wheel scallop. What to do? What to do?
Well, this is where the simple straight stitch combined with the stem stitch comes in quite handy.
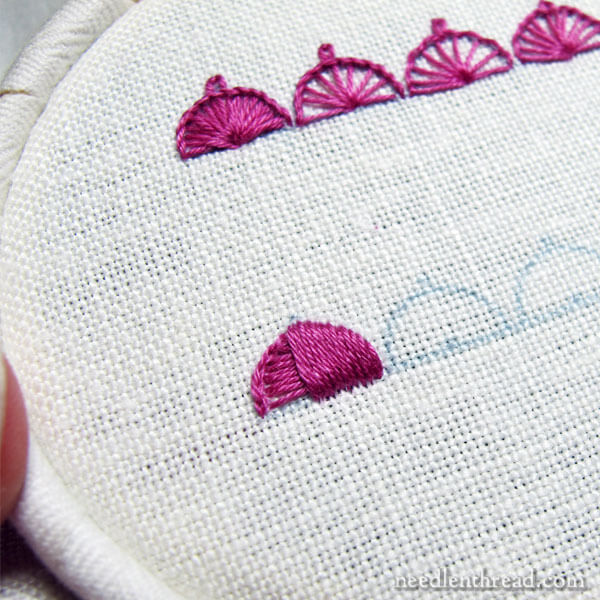
Straight Stitch + Stem Stitch = Easy Scallops
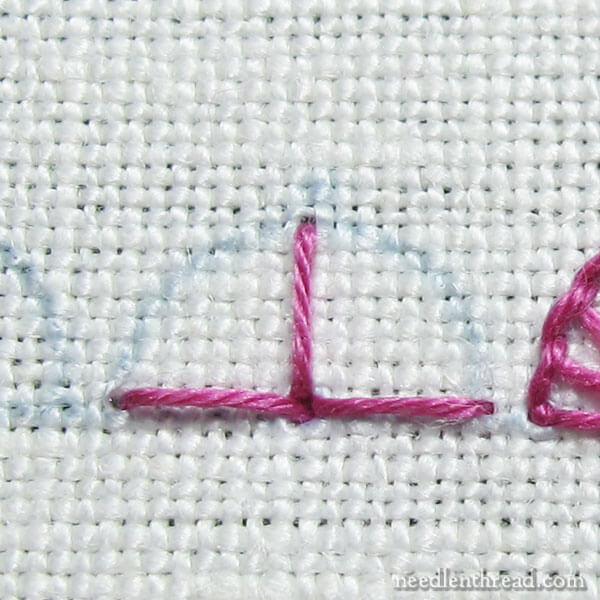
Start by making a straight stitch straight down the center of the scallop, from the center outside edge (at the apex) to the center base line, cutting the scallop in half.
Then work a straight stitch from the base outside edge on one side into the center, and then the base outside edge on the other side into the center.
Then just divide up the empty space between the straight stitches with more straight stitches, breaking the resulting quarter wheels in half with another straight stitch, and then break those spaces into half again.
Always make sure your straight stitches begin on the outside curved line of the scallop and end (going down into the fabric) at the center of the scallop on the base line.
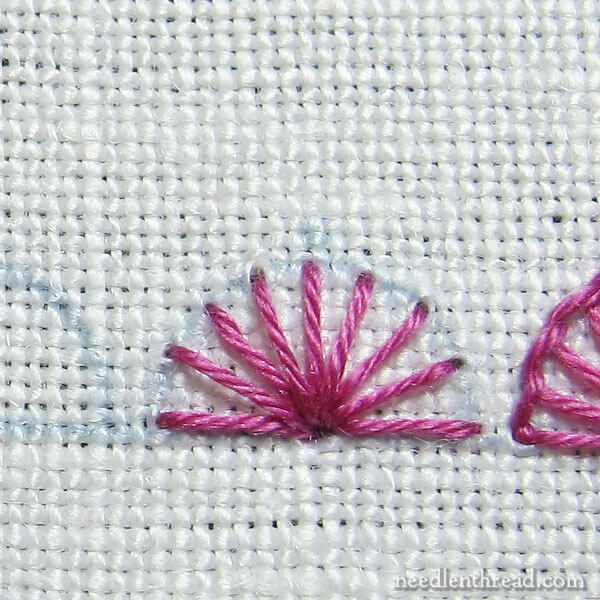
Once you’ve broken the scallop down into quarters and then eighths and then sixteenths (if you want that many stitches), you’ll end up with evenly spaced rays of straight stitches that look like those in the photo above.
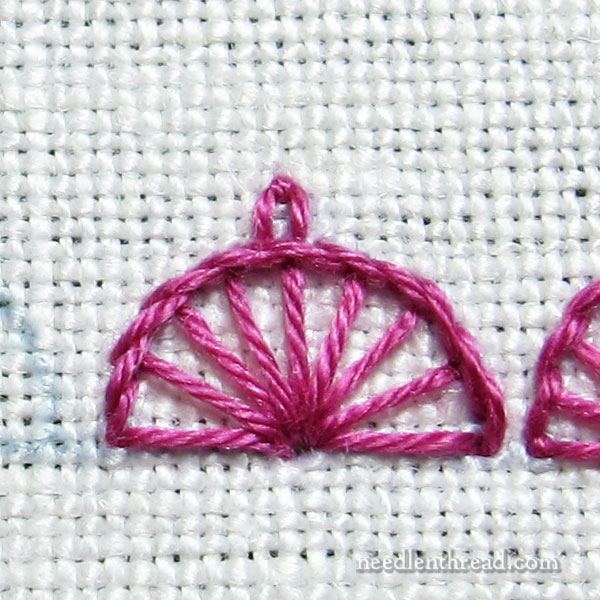
Then, starting from the left side of the scallop, stem stitch around the curved outline, breaking at the apex to stitch a little chain stitch again.
In this case, the chain stitch will start and end above the stem stitch line, so it won’t cross over the edge, like it does with the buttonhole stitch scallop.
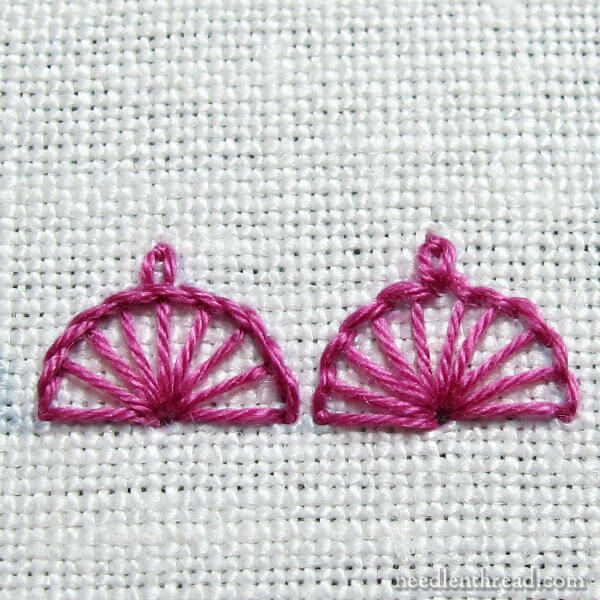
From the front, there’s not really a huge difference in the finished look, is there?
The chain stitch on the buttonhole version (right) begins inside the scallop, and in the stem stitch version, it begins behind the stem stitched edge of the scallop.
The straight stitch / stem stitch version is definitely more even, and the rope-like stem stitch outline is a bit tighter looking.
But overall, they look similar enough to mistake one for the other at a glance.
So, if you’re eager to try some scallops with picots on your stitching, that’s two easy ways to do it!
More Stitch Fun?
If you’d like to indulge in a little more Stitch Fun, you might enjoy this grand list of photo tutorials for embroidery stitches and combinations.
You can also find over 75 videos for embroidery stitches right here, if you want to go the video route.
And if you’re itching for something to stitch, but you don’t know what…perhaps you’ll find a pattern that beckons you on my free hand embroidery patterns page.
Finally, if you love the idea of fantastically fun stitch combinations, you might take a look at Stitch Sampler Alphabet – it’s a vast ebook featuring decorative initials with over 65 embroidery stitches and stitch combinations that will add a bit of stitching Zing to all of your hand embroidery projects!
Always such a pleasure stopping by to learn something new or refresh our minds. Thank you for sharing your talents.
Dear Mary
I do love the stitch fun series and the tips and techniques involved they are so helpful. The scollop edges look lovely and I really like the buttonhole stitch its one of my favourite stitches and so easy and versatile to use. Thanks for sharing with us another great tutorial in your fun stitch series and for the tips and techniques on how to accomplish perfect stitching and for the links to more stitch fun and patterns.
Regards Anita Simmance
Morning Mary,
Thank you so much for this tutorial. I also went back and looked at the two beaded buttonhole edgings and can now foresee some pretty Christmas ornament gifts (from my recently purchased “…Other Little Things”) in paper mache boxes that have an acrylic pour on them in matching colors. This is going to be so much fun!
Best regards,
Brenda
Thanks, Mary. Since I started embroidering again after a 30 year hiatus, I am grateful for your video, commentaries and general discussions. You rock!
BTW, I think your “cheater” scallop looks better than the buttonhole version.
LOL! Thanks, Anne – me, too, incidentally!