


Today, we’re exploring the very last step in embroidering Party in Provence, a hand embroidered kaleidoscope we’ve been working through together here on Needle ‘n Thread.
If you’re just joining in, you can find all the installments for this embroidery project in my embroidered kaleidoscope projects index, where you’ll also find step-by-step instructions listed for a few similar projects that are just as fun to stitch.
The last step on Provence is bling! It’s time to add the beads!

If you are substituting materials – for example, you’ve been using a different weight of thread or you’re using different sized beads – you’ll need to experiment with thread weights and needle sizes to see what will work best for you.
To sew the blue beads on around the petals, you’ll need a #10 crewel needle and DMC 797. I’m using Miyuki Delica beads, size 11/0, in transparent sapphire (DB707). I did not wax the thread or anything like that.
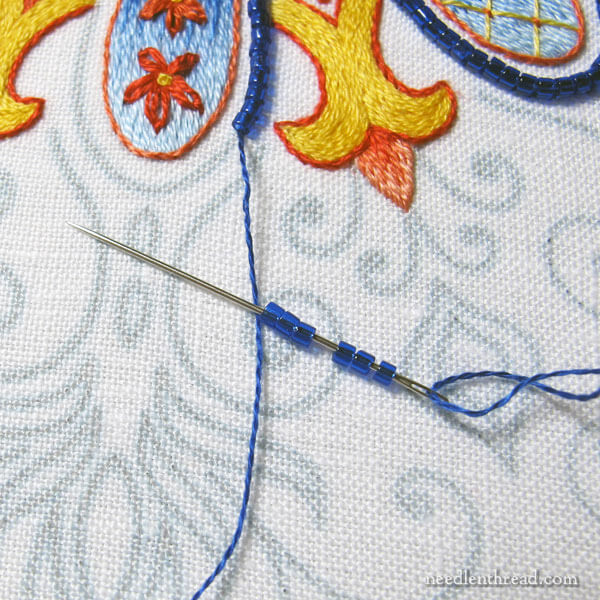
To initially sew the beads on, start with one long strand of 797 in the crewel needle. To cover the design line with beads, string up approximately 5 or 6 beads on the needle at one time.
Move forward along the design line enough space for those 5 or 6 beads to lie neatly on the line. Take the needle down into the fabric after the group of beads, right on the design line.
When you go down into the fabric here, you want to leave enough space for the beads to sit on the design line without being crowded. You’re going to couch between each of those beads, to secure the line of them onto the design line, so that they follow it precisely. You’ll need enough space there to couch between each bead, and you don’t want the line to buckle, so give yourself just a little room beyond that last bead.
This may take a little trial and error, until you get used to the distances and how much space the couching takes up!

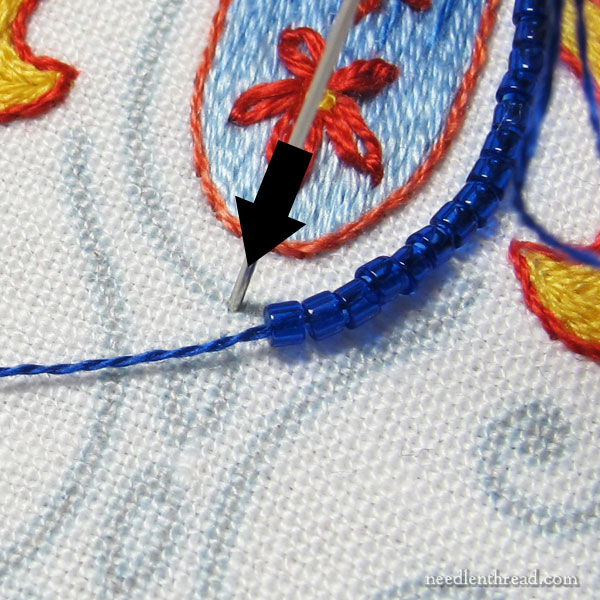
After you’ve entered the fabric after the group of 5 or 6 beads, bring your needle up into the fabric on the design line, right about a bead space away from where you originally emerged with your needle and thread, when starting the group of beads.
In the photo above, I’ve moved the bead line out of the way, to show you that I’m coming up right on the design line, close to the very beginning of this particular bead group.

Take the needle down into the design line on the other side of the beads, so that your thread will catch between the first and second bead in the grouping. Pull through, and couch the thread running through the beads to the design line.

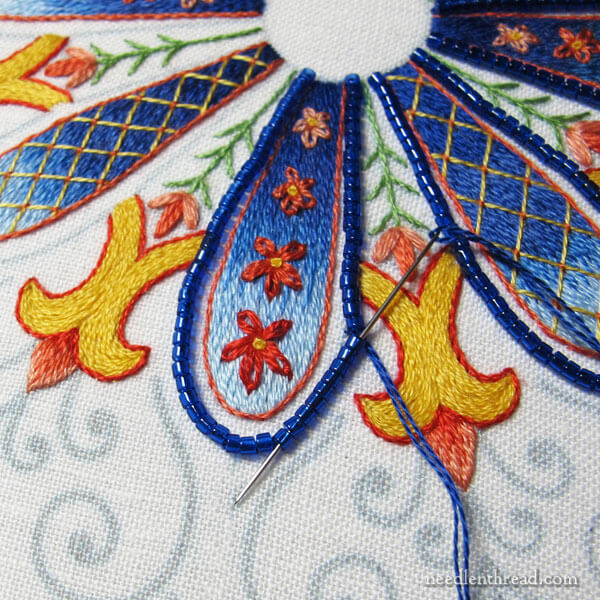
Do this between every bead in the group, as indicated by the lovely green lines in the photo above.
Make sure you’re following the design line carefully, so that your beads are situated nicely along the line.
Cover the whole design line around each petal working in groups of 5-6 beads. As you near the end of the line surrounding the petal, adjust the number of beads you need in each group, to cover the design line. It’s better to sew down 4 or even 7 beads, than to sew down, say, 1 or 2 beads, because you’ll maintain a smoother line.
When the bead line is completely couched around the petal, end your thread. Then, thread another long, single strand of 797 in the needle, and this time, double it, by bringing the two ends together so that your needle is situated in the middle of the length of thread.
Bring the doubled thread to the front of the fabric at the end of the petal line you just beaded, and pass the needle and doubled thread through all the beads around the petal.
To do this, you’ll have to work in groups, passing into and out of however many beads your needle will fit through. As you pass through one group, pull the thread through, and then insert into the next group of beads around the petal.
Essentially, you are simply passing a doubled thread through the middle of all the beads in one continuous thread.
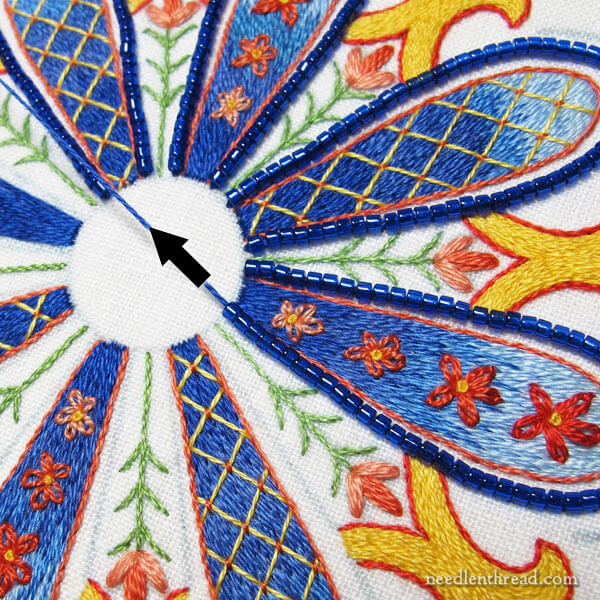
When you get to the other side of the petal and the end of the beads, pull the whole doubled thread firmly, to tighten up the line of beads and straighten them. They will fall into a much neater line this way!
Take your needle to the back of the fabric, ending the doubled strand of floss in the stitches on the back of the work.
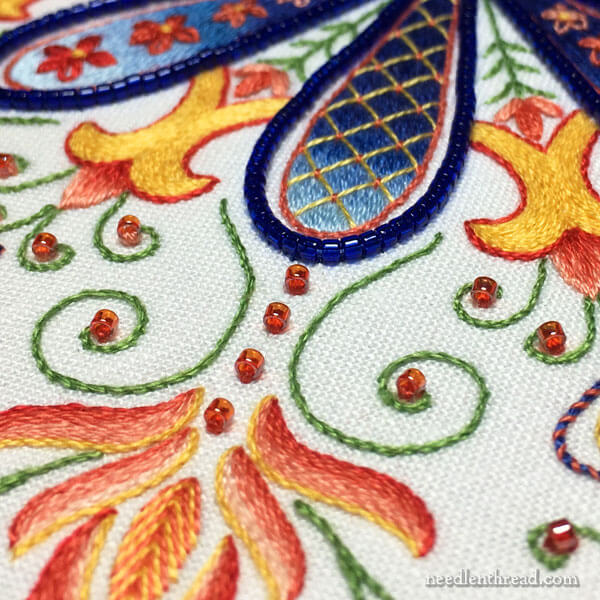
For the coral beads (these are Mill Hill Magnificas in 10060), use a medium coral (351 or 352) and a #9 or #10 crewel needle.
Double one strand of floss in the needle, centering the needle as before. Sew each individual coral bead by passing through the bead twice, to make sure it’s secure. It’s a lot of thread going through the bead, but it will hold it nice and snug and look fine.
Sew individual beads at the tips of swirls and up the center lines of the swirls, as indicated on the pattern. When you’re sewing the beads up the center area of each “leg” on the design, you’ll want to make sure the beads are aligned in the same orientation up that center path.
On the tips of swirls, try to align the beads in directions that mirror each other across the pattern, so that the beads look neat and aren’t skewed in all kinds of directions.
To sew the individual beads, you can carry the threads on the back, underneath nearby, already stitched lines on the design. Try to work it out so that you aren’t carrying long pieces of thread across the back of the fabric, to get to new beading areas. Better to end the thread and start it again, than to carry long threads across the back of your work.
The End!
When you’re finished with Party in Provence, rinse it in cool water if you need to. If you’ve taken precautions to keep your work clean and you don’t need to rinse it, then move straight on to damp stretching and blocking it. You’ll find instructions for damp stretching and blocking a finished embroidery project here.
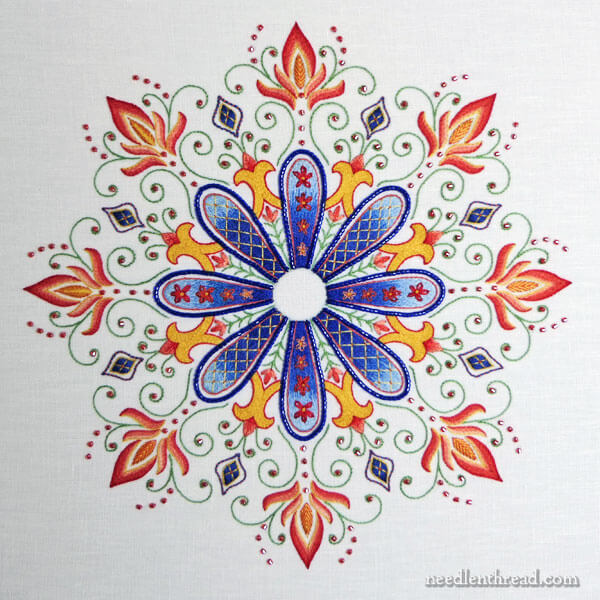
And that brings us to the end of Party in Provence! Congratulations on making your way through it – I hope you enjoyed stitching it as much as I did and that you learned a lot along the way!
If you’d like to share pictures of your finished kaleidoscope designs and you’re on Facebook, you can post photos in the Needle ‘n Thread Community over there. If you’re on Instagram, tag me! I’m @needlenthreadmc – you’ll find me here on Instagram.
And, as always, if you have any questions, feel free to leave them below!
You can find the rest of the articles for this project in the Kaleidoscope Projects Index here.
You can find the design for Party in Provence (and 30 other fun kaleidoscopes to stitch) available in my e-book, Favorite Kaleidoscopes, here.
Thank you for sharing how to add beads to a string of embroidery. I really appreciate all of your tips and tricks, and you explain everything so clearly as well as “demonstrate” with the attached photos!
Hi Mary,
I love watching you work through your projects!
Do you ever use nylon thread to attach beads?
Thanks for all your inspiration.
Warm regards,
Francine
Hi, Francine – When I’m doing regular embroidery with floss and the beads are just part of the accent, I use regular floss (though with tiny white beads on some pieces, I’ll use sewing thread). If I’m using bugle beads that tend to have sharper edges, then I might make use of nylon thread. But usually, for the type of accent beads I use, I either use regular floss or sewing thread.
So very vibrant and beautiful!
Yay, the beads, the beads, the beads are there! I’ve immediately put my cross stitch sampler aside and started beading.
Thank you, Mary, for all your efforts and enthusiasm in upholding the wonderful art of embroidery! 🙂
Angela from the Ore Mountains
Wow! It’s beautiful, Mary!
Thanks, Susan! 🙂
Aaand, I’m finished! I wan’t loving the beads on mine, so I replaced the red beads with French knots in DMC color #817 (the darkest of the coral-y shades) and the blue ones with whipped backstitch in the darkest of the blues we used, whipstitched with a sparkly royal blue thread. Honestly, the sparkle doesn’t really show up, but it does provide just a bit of “interest.”
Thank you so much for this Mary. I had a great time doing this stitch along and learned a lot-even if my project didn’t come out looking quite as perfect as yours.
Where can I find patterns of antique samplers! Thank you
Hands Across the Sea Samplers – google them and you’ll find some lovely ones!
Hi Mary! When attaching beads to my needlework, I match the thread to my fabric.
I find that the beading thread disappears better that way. It’s probably an optical illusion! Additionally, I can carry my thread all over my stitching this way. I always knot the thread before moving to a new area. If I’m embellishing an area with lots of beads, I also knot after every third bead. I have no desire for a thread to break and all the beads go flying. Since I use Nymo beading thread for this task, my knots are very small.
I am interested in your beading as you embroider. Can you tell me how you decide on which beads to use, and where do you get them? Do you use embroidery floss to secure them and if you do, how many floss strands are best? Also sizing beads for a project! Do you have tips and tricks that would be beneficial fo r someone trying to incorporate beads into embroidery?
I loved the beads you put into your snowflakes