Traveling and needlework can very easily go hand-in-hand, depending on the type of traveling you’re doing and the type of needlework you’re toting along.
The travel and grab-and-go project that I’m working on this year (and last) is not actually an embroidery project. It’s a hand-pieced quilting project, using 3/4″ hexies. I first mentioned it here (which is where you can find some of the details about supplies and methods and so forth), and then I wrote a follow-up here, when things had moved along a bit.
The only other time I’ve mentioned the project is in this article, where I talked about using pencil and make-up cases and the like for needlework.
I’ve changed a few organizational aspects of the project, and I’ve made some good progress on it.
And since I’m traveling right now as we speak, I thought I’d show you how the quilt is coming along and mention a few organizational approaches I’ve taken with it. You can apply the same principles to embroidery projects as well!
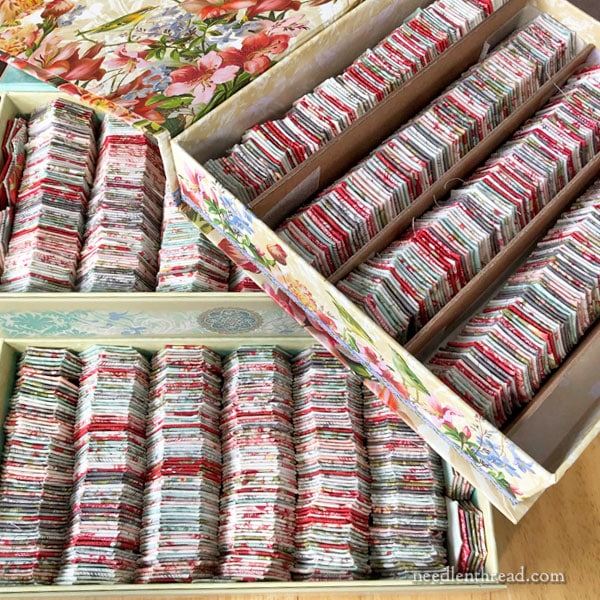
One thing that I’ve discovered with this particular project is that it’s very easy for me to get sucked into either basting of the hexies or the piecing of the hexies (sewing them together), but rarely am I into both at the same time.
If I’m on a basting kick, I starting preparing hexies until I’ve got a mad overflow of them.
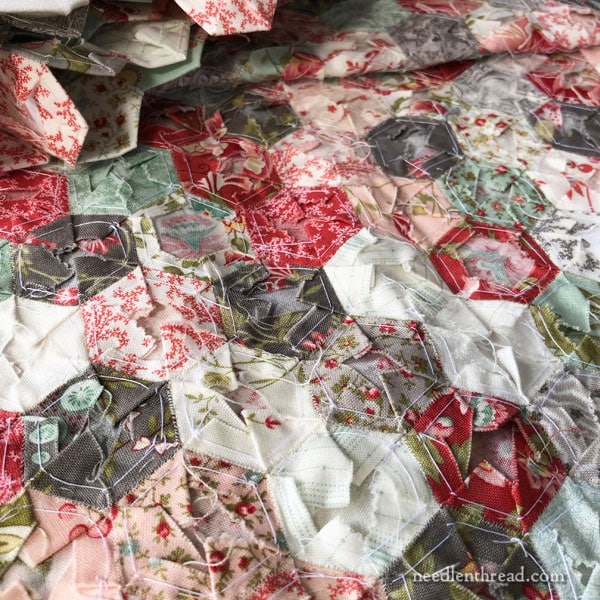
And then somewhere in there, suddenly, I just want to start piecing them together. And once I start piecing, that’s all I want to do. I don’t want to go back to basting.
So I don’t baste a few, then piece, then baste a few. I work in big chunks, either basting the fabric squares to the hexie paper shapes or piecing hexies together.
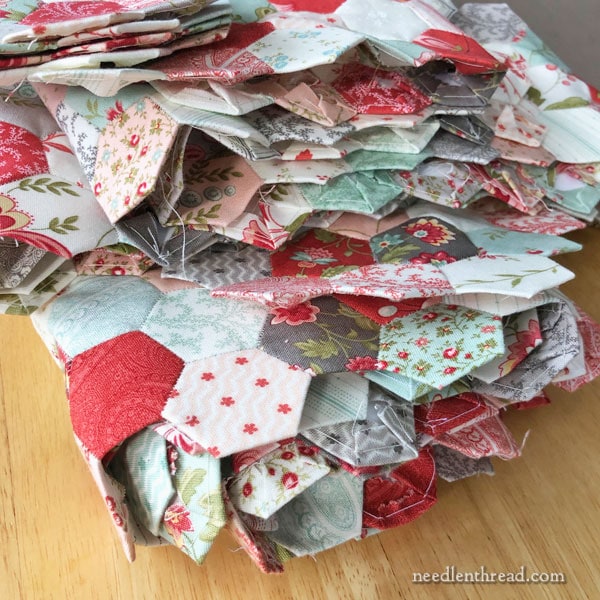
Once I start piecing, I don’t usually go back to basting until my options of prepared hexies are running thin, or until I’m suddenly tired of piecing.
Then I start basting and reveling in it, and I build up a massive collection of basted hexies all over again.
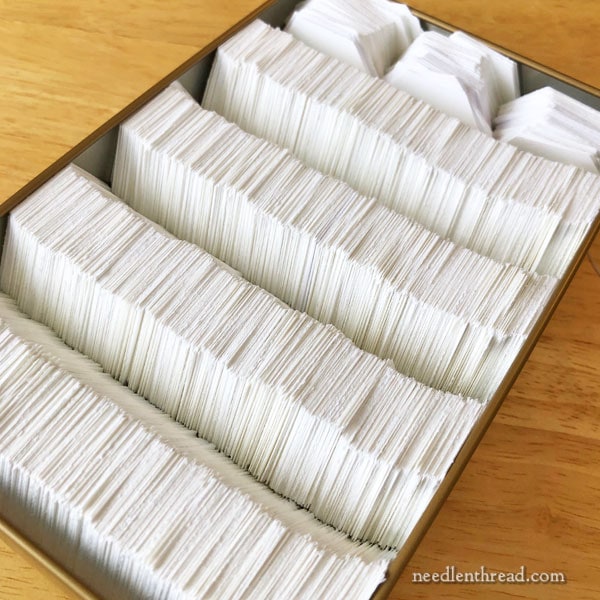
Somewhere in there, I’ll stop to salvage some paper hexies or make new ones. I usually use used card stock that still has space on it, or old card stock that has gone a little off-white from storage. I occasionally beg old card stock from friends and relatives who own businesses and have old office supplies. Why buy new if you don’t have to?
Once I have a good supply of paper hexies on hand, I know I can baste again to my heart’s content.
You would think that some day, the basting would end. Some day, I would have all the hexies I need for the quilt that I’m making (it’s a full-size or double bed size quilt).
Yes, you’d think that. But sometimes, I have a suspicion this could end up a lot like hexie hell. It could go on for eternity, with no end in sight and no quilt ever developing!
But no, seriously. The quilt top I’m making requires some 5,000+ hexies, so I have a feeling I’ll be doing this for a while.
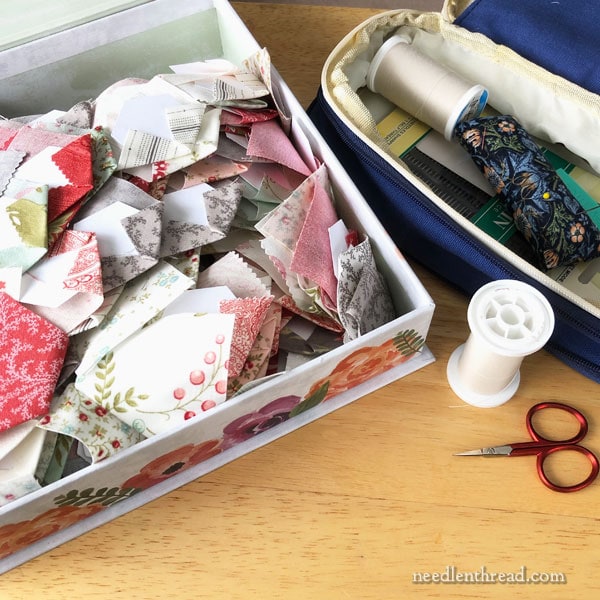
And that’s great! You know why? Because it is such a satisfying grab-and-go project!
At home, I keep my in-progress hexie supplies in boxes, tins, and the like. When my little travel pouch that I keep in my purse runs out of either hexies to baste or hexies to piece, I replenish the pouch from the boxes.
The boxes all fit in one tidy larger tote bag, too, so if I’m traveling for a longer span of time (as I am right now), I either grab the tote (if I’m driving) or I tuck an extra box of fabric and hexies into my carry-on (if I’m flying). That way, I can always replenish my little grab-and-go pouch.
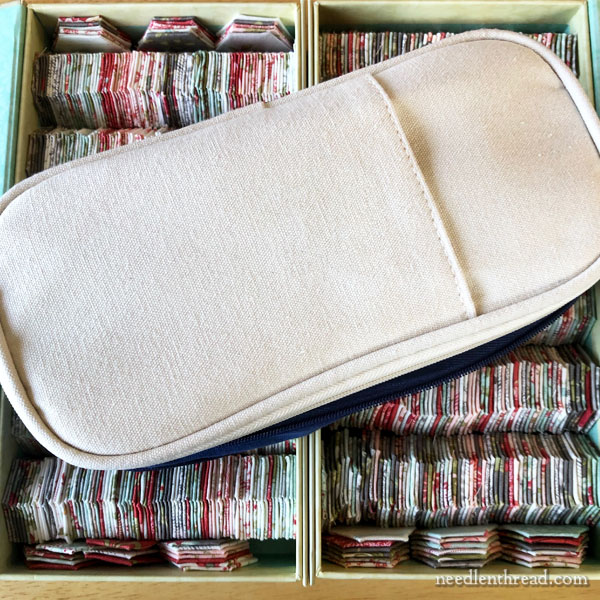
That’s the pouch I’m using now. I have several pencil pouches that I use for toting small projects around in. They’re great for making up little compact stitching kits.
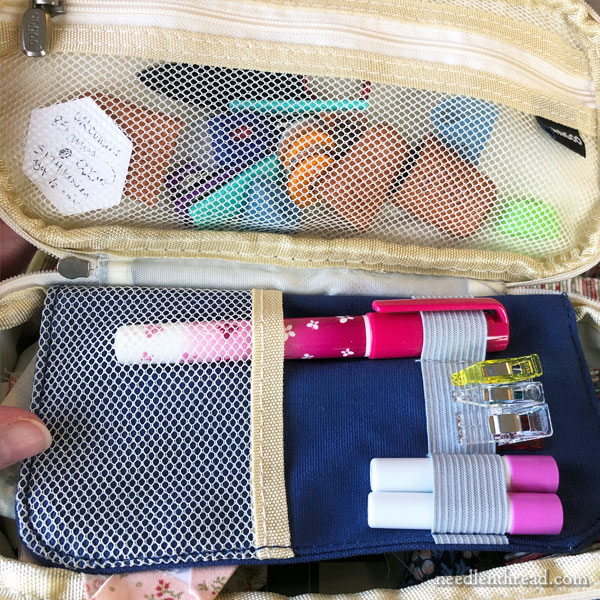
Out of all the pouches I use, lately I prefer the one above (I’ll provide a link below, if you’re looking for something similar).
It’s got a nice roomy zipper pocket where I keep thimbles, a few magnets, and my tiny scissors. It has a place for easy access to pens (I put my fabric glue pen there, with a couple refills)…
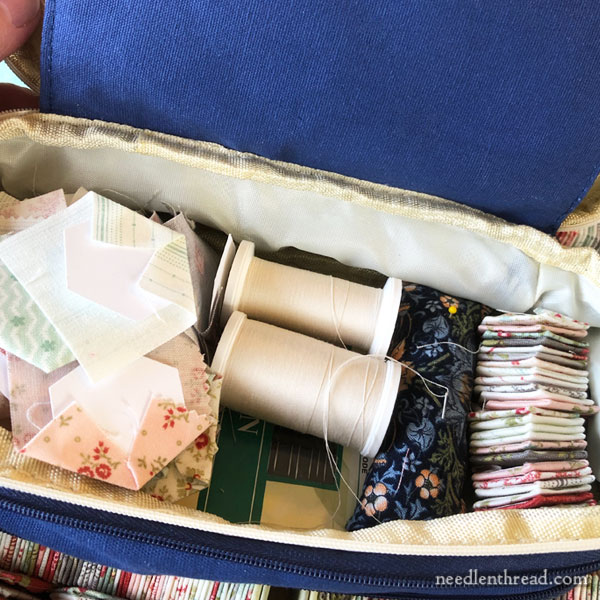
… and the base of it, which is expandable, is roomy enough for plenty of hexies or pieced portions, spools of thread, and my little pincushion, which also serves as a divider to keep things organized.
I can fit many hours’ worth of work into this one handy little pouch.
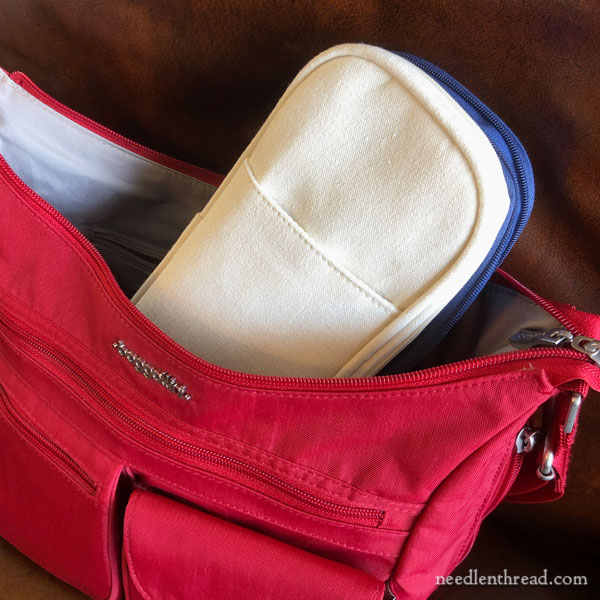
And when I want to grab it to go somewhere, the pouch fits easily in my purse.
My purse isn’t tiny, but it isn’t huge, either.
I tote that little pouch around all the time. If I’m going to be shopping or whatnot and I don’t want the extra baggage in my purse, I’ll leave it in the car. But for the most part, it’s always with me, and it has served me well!
Where to Get It
I bought this particular pouch through Amazon, and you can find it listed on my Amazon Recommendations page here, under Embroidery Tools & Accessories. There are several different types of pouches on that page, but this is the one I like best. Most of the others are nylon either inside or outside – this one is a sturdy canvas.
The Lack of Stitching Stats
If I were Super Duper Organized, I’d probably keep some serious stats on this thing – a count of how many squares of fabric are cut; how many paper hexies are ready to use; how many I’ve already used and discarded; how many spools of thread I’ve gone through (1.5); how many needles I’ve gone through (I’m on my second one, only because I lost my first one); how many hexies are prepared for basting; how many basted hexies are waiting to be pieced; how many hexies I’ve already pieced; and what size my pieced-so-far quilt top is.
But I’m not Super Duper Organized. I suppose if I get Really Bored some day, I might figure all those things out for you.
In the meantime, I just love this project. I find that it’s good for me to have a needlework project that isn’t embroidery, that I can easily tote so that there’s always something on hand to do.
I’m also enjoying being beyond the boarders of Kansas right now, for the first time in a couple years. It’s good to get out now and then!
Coming Up!
Just because I’m away from the studio doesn’t mean the fun stops! On Wednesday, we’re going to talk about choosing colors and I’m going to share a favorite resource with you that may make your color choices much easier to make.
See you then!
This article contains an affiliate link to my Amazon Recommendations page, which means that Needle ‘n Thread receives a small commission for purchases made through that link, at no extra cost to you.


I too, have a hexie stash going for the “Someday Quilt.” My problem is I’m impatient. I want to see this become something NOW, not awhile from now. So to appease my impatient self, I steal from my stash, and make a little hexie “flower” and applique it to a tote bag to give as a gift. I rest on the compliments from friends who think I’m just a genius because I can sew together a bunch of hexies and make a flower…..a few days later I’m beating myself up for robbing from my quilt and realizing that now it will be even longer till I have a whole quilt top! Never to learn from my impatience, I do this at least a few times a year, and I’m back to replenishing my quilt stash once again! When I die, the kids will say, “Why did Mom never finish that quilt? She was always making hexies.”
Seeing this reminds me of how much I would love to attempt this project…and then I give myself a very stern talking to and remind myself that my ‘stick-to-it-iveness’ is woefully lacking and I know it would end up being donated to the thrift store after only a little bit got done. A girl can dream, but a dream is all it must remain. In the meantime I will drool over yours!
Mary, I was just about to send you a post asking how you are putting all of your hexies together. Are you using a Ladder Stitch to sew them together? I am working on a similar project and your input would be such a grand help. Have a great day. Louisa
So many pieces, Mary! I admire your ambition.
I have a couple of questions about your project. I’ve never done a piecing project like this; do you take the paper out of the hexies before sewing them together? I’ve always wondered this but I’ve never found explicit directions to do so. From the pictures, it looks like indeed you do.
Second, can you reuse the paper pieces? If they’re made from card stock I would expect them to be pretty sturdy? Do you need a new one each time? Is that why you salvage the stock from others?
Looks like the quilt is going to be lovely when it’s finished. Will you be quilting it yourself as well?
Thanks!
The template is left in while sewing. After a bit of practice, you get the hang of sewing the fabric only and can reuse them until the edges get too battered.
Did I miss the pouch link? Can’t find it. Thanks.
Hello, Mary-
I noticed that you were using cardstock for the basting of your hexies. As I have always used the freezer paper method, I wondered if there was a reason or just personal preference. I find the freezer paper method particularly effective for micro hexies. Just curious. Thanks so much!
Wish you’d show us what you’ve already done on this quilt, Mary.
I made a small hexie and it took a while.
And I also made a super-large hexie quilt with Japanese fabric, which I use in the summer. But my grab-and-go project back in the day was my Cathedral Windows project…which I’ve got stashed in the closer the for “next time!”
Mary, ahh, you might want to count your card stock. I was supposed to make 3000 and ended up with closer to 4! Gadzooks, my husband howled with laughter!
I’m working on a similar project with 5/8″ hexies. My great grandmother cut the patches – probably in the 1940’s. To make the quilt large enough for a double bed, I’m doing distinct blocks with 2 rounds of prints surrounded by white, with setting diamonds and borders of green (both modern fabrics). Because I have a limited and non-replenishable collection of fabric, I sorted my patches into stacks for each block before I started stitching. Then, a stack for each block plus a setting diamond went into a 2 x 3″ resealable plastic bag. (I knew I couldn’t face doing a zillion setting diamonds all at once, so I do one with each block.)
I can fit a dozen bags plus thread, scissors, needles, etc. into a 1 x 6 x 8″ plastic box that goes into my purse when I’m traveling or know I’ll be waiting around somewhere. For long trips, I’ll put a bunch of the little bags in a gallon Zip-lock in my luggage.
It takes me about 2 hours to stitch a block (most have 32 patches for the block and most of its border). It was also taking about 1.5-2 hours to baste enough patches for a block, one block was close to 4 hours of work. I finally switched to fabric glue sticks and basted everything in a couple of marathon sessions. (About 14 glue stick refills!) It will be 121 blocks plus borders (also hexies) when finished – 4795 hexies.
I wax my thread when stitching patches together an inadvertently found a shortcut for that which I’m very happy with. For best results, you’re supposed to run thread over the wax, then iron it so that the wax sinks into the thread. Too much work! I did keep a round of wax in my portable box, though. I left it in the car one summer’s day – and when I next opened it, I found that my round of wax had melted all over the inside of the box. Since my patches were in little plastic bags, none of my fabric was affected, but my spool of thread had been soaked with melted wax. And I love it! Before starting a new spool of thread, I now soak the spool in a little pan of melted beeswax. Once I scrape the extra wax off the ends of the spools, I’ve got thread that’s lovely to work with. I sometimes have to run my fingernails down the thread to get rid of a little excess wax, but I’m left with thread that’s much better waxed than what I get by just running the tread over the wax, and it’s super easy to get through a needle. 1000 meter spools have to be waxed a second time partway through the spool, but the smaller spools only take one “dipping” for the wax to penetrate the whole spool.
Because of the wide variety of fabrics, I can’t put blocks together till I’m done with all the blocks and can lay them out, but I did pin some of them to a design wall to see what the finished quilt might look like.
Because of the wide variety of fabrics, I can’t put blocks together till I’m done with all the blocks and can lay them out to balance color distribution, but I did pin some of them to a design wall to see what the finished quilt might look like.
Great idea. I will be travelling soon & while I usually take some embroidery, this time I don’t think I will have access to great light. I have an EPP project on the go at home. so could take bits of it away with me. Do you do both basting & piecing when you’re on the road?…not literally on the road :-), but you know what I mean!
I inherited a similar hexie project from a great grandmother I’d never even met through her daughter, my grandmother, via my own mother, all of them now gone. But the hexies live on. I used a few of them to appliqué on a crazy quilted garment project and every once in a while I come across the rest lurking in my quilting supplies to trip me up with generational guilt. When you speak of hexie hell, I know of what you speak…
I’ve recently taken up tatting. Not quite needlework, but something creative I can slip into my pocket and pull out in odd moments. Very satisfying.
I was receiving your emails but some how they stop. Would love to receive them.
Quilts hugs. Maddy
Dear Mary
What a lovely idea and a great project to carry around with you while you are travelling. Where are you travelling to I hope it’s a holiday. I love the colour and design of the fabric you have chosen. It doesn’t matter how long it takes as long as you are happy with making your hexagon quilt pieces, it sounds very therapeutic project so enjoy making them. Thank you for your sharing with us your progress on the Hexies & Traveling Needlework Projects and great photos.
Regards Anita Simmance
Mary, inspired by your work, I just found something new for hexies…English paper piecing made modern by Becky Campbell. https://www.missouriquiltco.com/shop/detail/113190/sewforever-quilting/sewforever-quilting/english-paper-piecing-made-modern-34-hexagons
Hello, I am very interested in the travel pouch you show in this post. I especially like that the base of it is expandable. For the life of me I cannot find a link for it. Could you please provide one? Many thanks and safe travel for you!
Your detailed account of making a ‘Hexie’ quilt brings back many memories! I started one in 1976 when I was 15 years old using any type of fabric scraps I could cadge; school uniform fabrics, poly-cottons, curtain fabric and all sorts. It went everywhere with me, and eventually I disciplined myself to set targets for each week. After only 35 years it was completed with hand quilting, and now it is my proudest possession, as I feel it tells my life story.
So fun to see your progress, Mary! My pile of hexies are sitting in the bottom of my Japanese wedding basket (the other tiers house the fabric, template, and other notions). It’s a nice take-along project (even when just transporting them from room to room). I’ll be hand-piecing them eventually (I drew around a self-made plastic template on the back of each), but I think I may do a center pieced panel and sew the hexies around it. I’m staying within the Moda French General fabric line, so it will be fun to see what line of theirs is randomly joined to later lines as I go along. It’s very satisfying slow stitching. Glad to know you’re paving the way. P.S. I’m mixing some of the FG solids into the hexies too, so I can do tiny embroidered flowers on them. Are we crazy???
Beautiful paper piecing! unless I missed it, would you kindly link the little travel bag you showed. Thank you!
I love this entire project – alas I too have too many things going to dig in right away but would like to know how YOU baste hexies – there are various bastings I’ve seen – and not everyone uses glue – but your picture leads me to believe you do – is there someplace I haven’t spotted where you go through the ABC’s of your method?
Do you use the 2″ square as is? Do you trim corners? Do you sew through the paper (think not since you reuse them) Do you only thread-baste the ‘corners’ ???? do you use the glue stick just on the overlaps? It is so simple I know but you have it down to a
science and knows what works for you so would you share? THANKS!
Hi, Betty – I’ve gotten a lot of questions on how I do the hexes, so I’ll probably write a blog post on that a little later. You can also go to the previous articles on the project using the link in the first paragraph or so, and it will take you back to topics I’ve already covered about the quilt – that may help answer some questions, too. But I’ll write up something a little more specific in a future article. 🙂
You have a very nice travel kit, Mary. Your quilt will be gorgeous.
Help! I thought I only subscribed to a newsletter but I’m getting every comment! I tried to unsubscribe with no luck! How do I get out of this!
Jean, when you leave a comment, there’s an option to tick to receive follow up comments via email. At the end of each email, you will find a link to click to manage your subscription. If you click that link, you can turn that subscription to the comments off. If you have any difficulties, just email me. You could also forward me one of the emails that you are receiving and I can take care of it for you.
I am wondering how many layer cakes you had to buy to have enough fabric? Given how fast fabric disappears from stores, I’m curious how much I’d need to buy at once to make a quilt like this!
I bought six. I probably could have gotten away with five, but I wanted to make sure that I had extra fabric for any incidentals, edging, etc.
How thick of paper do you use? I am new to paper piecing and was looking at different papers I have like the thin cardboard from Valentines Day card packages. I don’t think cereal boxes would work. I purchased the Better homes and Gardens hand work happiness magazine. It has several paper piecing projects. Particularly one that is a small notebook holder that I want to make with a friend with cat emblems. Thank you
I use regular card stock – the lightweight stuff. I have a bunch of scrap card stock right now that I’m using up, and I’m not sure exactly what weight it is, but it is not heavy card. It’s heavier than paper. I know folks who recycle their greeting cards and similar things to make their hexies. I think the paper needs to have a bit of body to it – you want it to keep its shape as you shape the fabric around it.
Thank you so much for today’s email update with the hexagon pictorial tutorial! I have wondered for YEARS whether those hexagons still had the paper inside, what happened when they were washed, how would one get the paper out, etc.
And now I know. I can take on the world, today.
Thanks again!
Mary,
I use a paper punch to put a hole in middle of paper hexie. So easy to pop papers out. Love your posts Paula
Mary,
I just saw your hexies and realized that you used the same line of fabric that I did for my first hexie small quilt!!! Oh my gosh, how I love hexies! I am addicted. I can’t wait to start my next project. Thank you for sharing. 🙂
You are full of information. I read this on Pinterest. This is the best article I have read about English paper piecing with hexies. I’m getting older and out of my sewing room more and more. I did hexies for awhile but put it away. You have sparked my interest, today I’m going to use your information. Thank you.
Why don’t you remove the papers from your basted hexies and re-use them ??? Requires a lot less bulk and card stock !!!
I do remove them, once they’re sewn together into larger pieces. I remove all but the edge of the area that’s sewn together, so that the edge can be sewn to the next edge that still has the paper in it. They’re not usually in great shape by the time I pry them out, though. If they are, I re-use them. If they’re not, I pitch them.
can you buy pre-cut hexie fabric?
Not that I know of – but I don’t do a lot of quilting. There may be shops that offer them. Have you checked Etsy?
Hello Mary! I’m a few years late to the party on this post, but just in case….
In a few of the photos, you have a bunch of hexie papers with the fabric only partially attached. It looks like only 2 sides are glued, but I can’t figure out why you would do 2 sides on so many then move on. What am I missing?
(As an aside: I too will do a stretch of hexie-basting then a stretch of hexie flower-making — I just can’t baste 6 or 12 hexies then stop to sew them together (and repeat, and repeat……). I wonder if one method is any faster than the other. )
Well, I glue two sides (into one corner) to hold the fabric on temporarily, and then I baste the fabric all the way on, because I don’t know how long it will be before I get to sewing them up, and the glue may not hold. They need to be basted. But I found that I can baste more accurately and quickly if I glue the one corner first. I don’t have to arrange each piece of fabric with each piece of paper as I reach for it to baste it, because it’s already arranged and it is held into place for that first stitch. It works for me – it’s an extra step, but it helps the whole basting process go a lot faster.
Well well. I am a beginner in this art.
I love your pin about english paper picing. I to like taking this project in my travels, but I’m looking for a container that it’s more inclusive, thank for you ideas!